Good Afternoon!
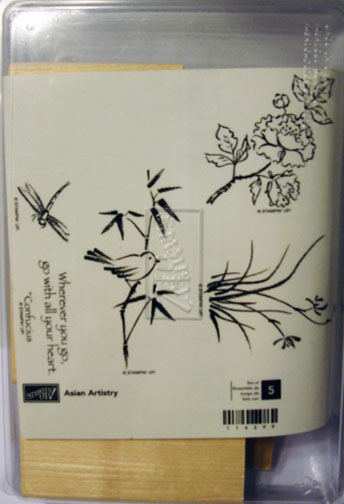
How about a farewell tutorial for the Stampin’ Up! Level 2 hostess set, Asian Artistry. I have loved using this set and will be sad to see it retire, but happy to see new and exciting hostess sets in the brand new Idea Book and Catalog that starts July 1, 2010. So Farewell to all of the 2009-2010 Hostess sets. I will miss you just like old friends. Contact me at mzindorf@aim.com if you wish to purchase a new 2010-2011 Idea Book & Catalog for $9.95.
I have a couple things to report before starting today’s tutorial.
I’m so very happy to announce that I have added Orlando (Davenport), Florida to my Brayer Workshop calendar. Click HERE for more details.
Now it is Blog Candy Winner Time!!!! Yeah!!! I have a winner and it is . . . . . . . . . . .. . . . . . . .
linda zaworski who wrote “Unbelievably gorgeous!!! I can not wait for you to come to Baltimore next year. I need to learn from you Obi-wan with-the-brayer! You are amazing!”
Linda you crack me up, lol. Congratulations! Please e-mail your address to mzindorf@aim.com within 30 days and I will get this set of Asian Artistry right out to you.
Thank you to all who played along. Keep trying it may be you that wins next week. 🙂
Now it is tutorial time. . . . . .
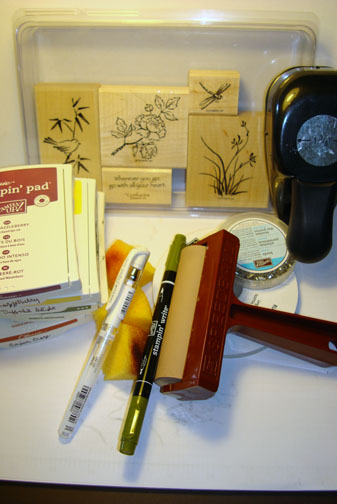
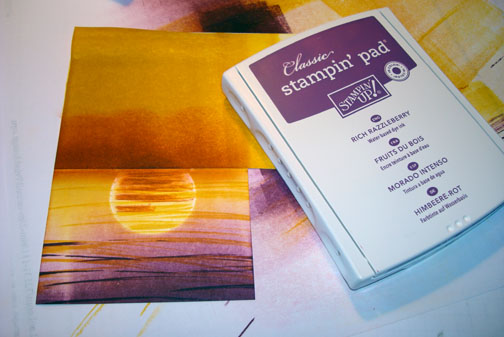
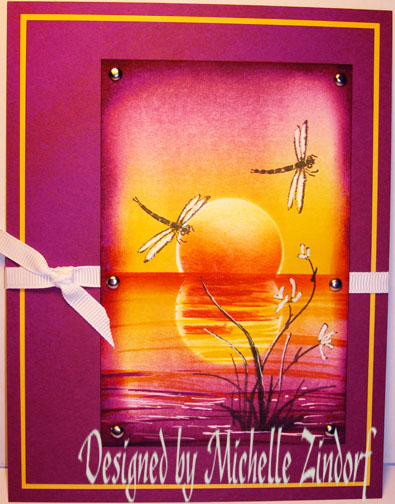
Supplies:
| Stamps: Stampin’ Up Asian Artistry |
| Paper: Stampin’ Up Whisper White, Rich Razzleberry and Daffodil Delight |
| Ink: Stampin’ Up Always Artichoke, Daffodil Delight and Cajun Craze |
| Accessories: Stampin’ Up White Gel Pen, Brayer, Always Artichoke Marker, Silver Brads, Sponges, Whisper White Ribbon |
Live in the USA and need a copy of the Summer Mini Catalog? E-mail your mailing address to mzindorf@aim.com and I will get one in the mail to you. ![]() Are you getting inspiration from this blog? One way you can help support it is to order your Stampin’ Up products through me. Click HERE to place an order. Click HERE to check out the Stampin’ Up! catalogs. Want to become a Stampin’ Up Demonstrator , receive a 20% discount on product and earn instant income on orders? Consider being part of my Stampin’ Up Team and start your own business. Click HERE for more information.
Are you getting inspiration from this blog? One way you can help support it is to order your Stampin’ Up products through me. Click HERE to place an order. Click HERE to check out the Stampin’ Up! catalogs. Want to become a Stampin’ Up Demonstrator , receive a 20% discount on product and earn instant income on orders? Consider being part of my Stampin’ Up Team and start your own business. Click HERE for more information.
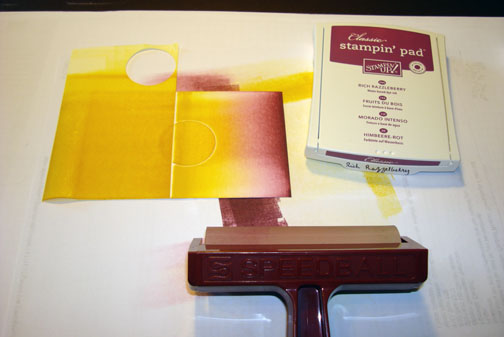
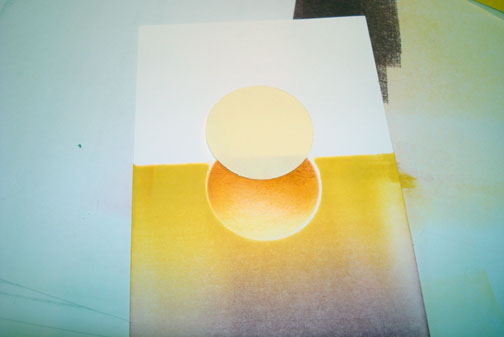
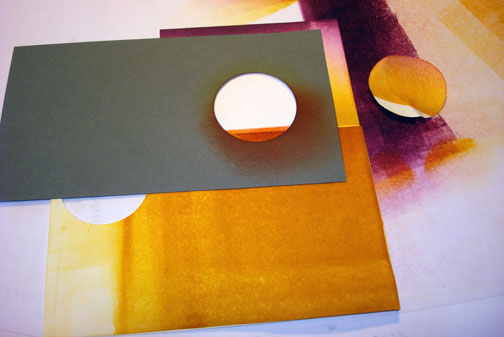
Punched a 1 3/8″ circle from a double layer of post it notes.
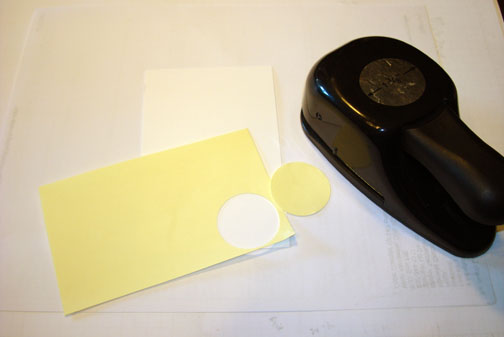
Put 1 layer of the circle punch on a 3.25″ x 5″ piece of Whisper White card stock. Used the post it notes that I punched the circles from to mask the bottom of the card stock, covering a bit of the circle.
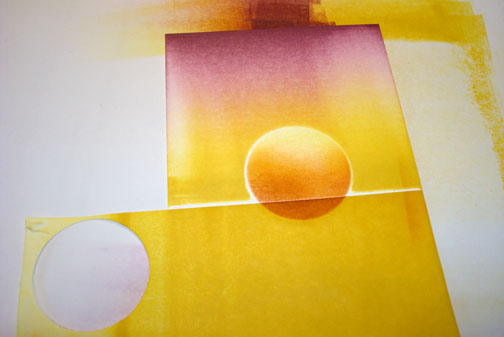
Brayered Daffodil Delight ink on the card stock, starting at the post it note and working upward.

Brayered Rich Razzleberry ink at the top of the card stock.
Punched the 1 3/8″ circle punch out of a scrap piece of card stock.
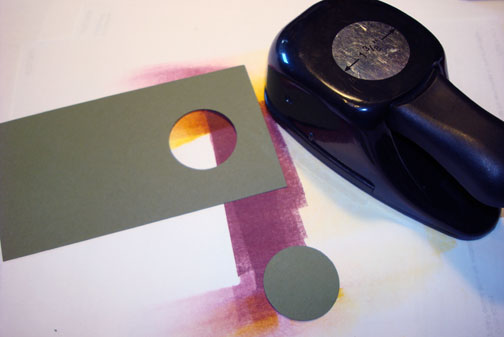
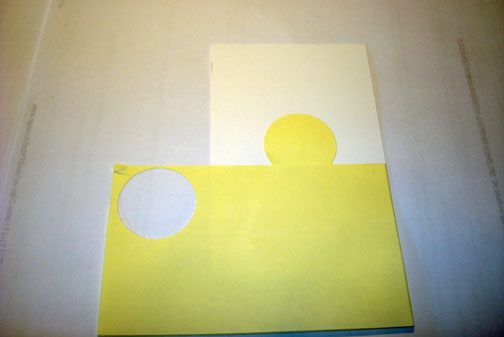
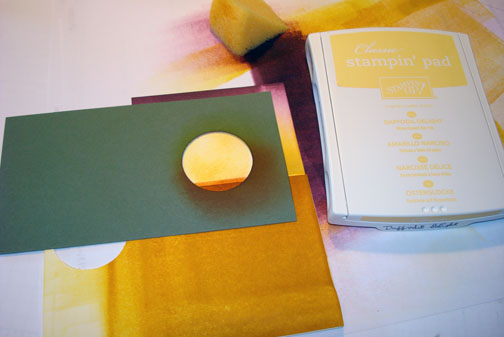
Removed the circle mask and left the post it notes in place. Placed the card stock with the circle punched out over my main image panel, lining the circle up with the circle on the card stock.
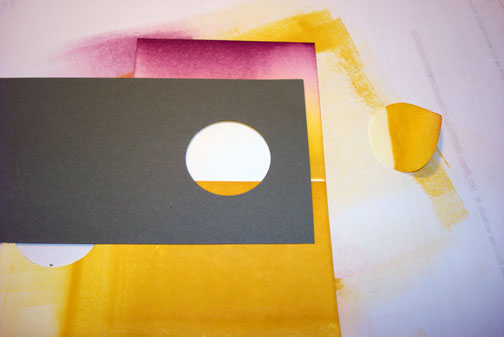
Sponged Daffodil Delight ink in the circle.
Sponged Cajun Craze ink at the bottom of the circle.

Removed the scrap card stock with the circle punched out. This is what the sun looks like after sponging.
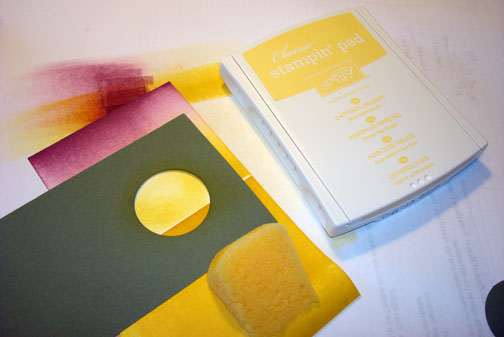
Removed all the masks.
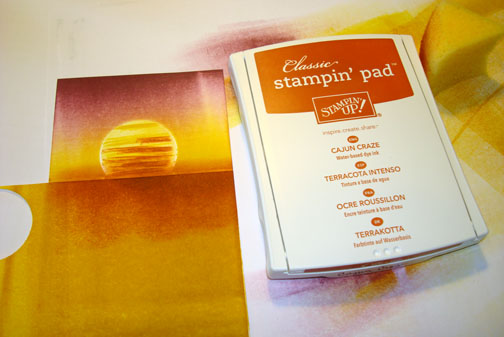
Put the remaining post it note circle on the card stock to create the reflection of the sun.
Masked the sky area of the card stock with the post it notes. Brayered Daffodil Delight at the top of the water area.
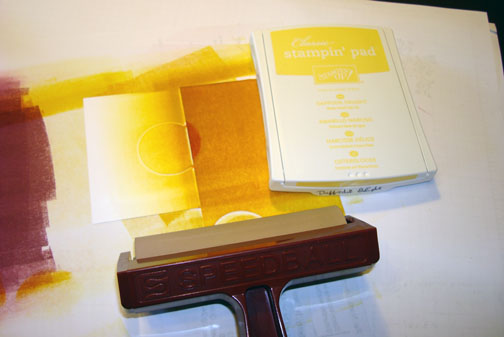
Brayered Rich Razzleberry ink at the bottom of the water area.
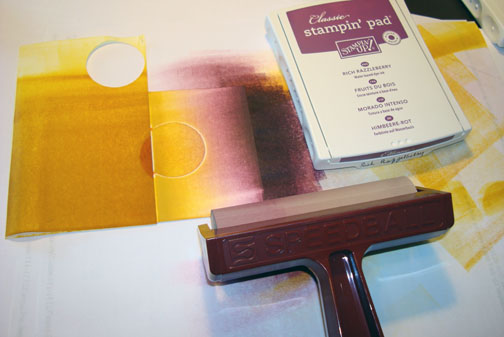
Removed just the sun mask and put the scrap card stock mask back on. This time over the reflection of the sun.
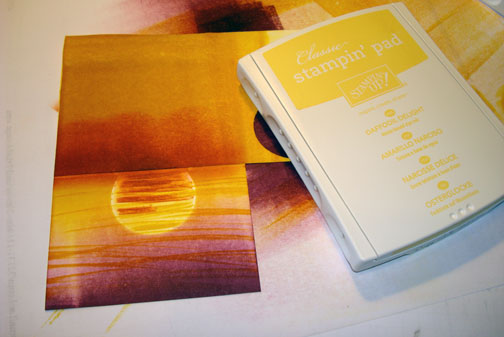
Sponged Daffodil Delight ink in the circle.
Using the edge of the Daffodil Delight ink pad, swiped it over the circle.

Using the edge of the Cajan Craze ink pad, swiped the ink over the circle.

Removed the scrap card stock and sponged Cajun Craze at the post it note edge to darken the horizon line.
Using the edge of the Daffodil Delight and Rich Razzleberry ink pads, swiped in water lines.
Stamped the plant and Dragonfly images using Always Artichoke ink.
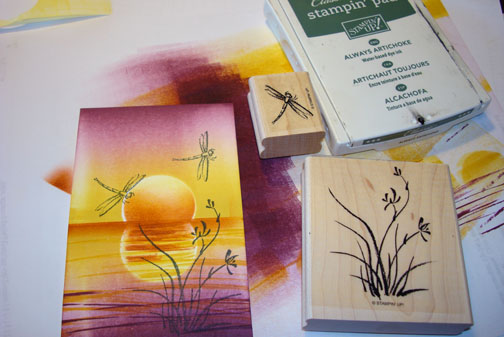
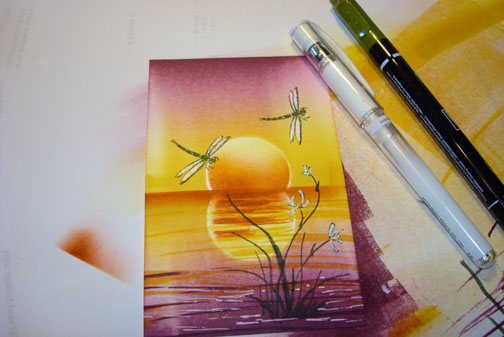
Colored in the dragonfly bodies with an Always Artichoke marker and colored the Dragonfly’s wings, the blossoms on the plant in with a White Gel Pen. Also added a few water lines using the white gel pen.
Sponge Rich Razzleberry ink around the edges of the card-stock.

Added Rich Razzleberry and Daffodil Delight card stock panels, Silver Brads and Whisper White Ribbon.
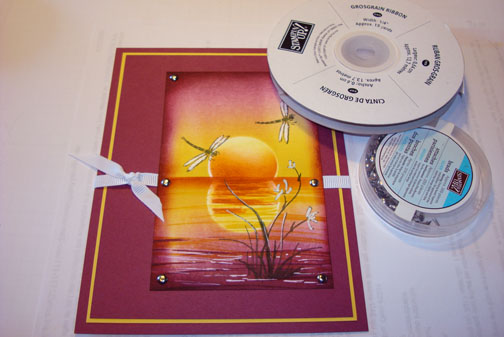
Here is the finished card measuring 5″ x 6.5″.
I hope you have found inspiration in this tutorial.
May your day be delightful in every way.
Until my next post. . . . . . .
Hugs,
Michelle
 Get ready for Brayer Workshops! I am coming to the following locations, click the location name for more information.
Kenova (Huntington), West Virginia
Piedmont, Alabama (Near GA border close to Cedartown)
Auburn, Washington (near Seattle)
Here is a link to my workshop calendar where you can see all of my travel schedule and to get info on beginner and advanced Brayer workshops: http://zindorf.blogs.splitcoaststampers.com/workshop-calendar
Link to my Stampin’ Up website where you can order all of your must have Stampin’ Up products from me 24-7: http://michellezindorf.stampinup.net
Frequently asked questions answers: http://zindorf.blogs.splitcoaststampers.com/frequently-asked-questions/


