
Hi There,
I spent the entire day yesterday in the kitchen to fill my freezer back up to capacity with freezer meals. I put away 5 meals each of the following, beef stew, Salisbury steak, teriyaki Roast. I had found yellow, red and orange bell peppers on sale too, so I purchased a bunch to have on hand in the freezer for fajitas. Also, when I am gone teaching for the weekend, Russ runs out of fresh bread so the first thing he ask for me to do is make bread. So, I also made french bread and Apple Wheat bread. Oh, and lets not forget the no bake cookies I made. Yes indeed, it was a busy Monday and the crockpots, oven and bread machine were working over time! I guess you now know what I do when I am not blogging or traveling. 🙂


Also, this arrived while I was in Tennessee this past weekend. It’s my chicken coop!!! Woohoo!
My oldest son, Jesse took mercy on me and came over and assembled it. It’s all ready now for the chickens, but they will not be arriving until the end of May. They will be 1 day old chicks when they arrive at my post office and will live in the house with us for weeks before they get to be moved to their permanent coop and run. I’ll keep you updated on my chicken saga for sure.

It reminds me of a doll house, lol. I will be building on to this, no doubt.
My dog, Lucas who is 100 lbs keeps looking at. I can just see his canine brain working and wondering if it is some type of dog house. See the worried look on his face. He’s an indoor dog.

Also, I have an announcement. . . . . I have added Scottsdale, Arizona Brayer and Direct to Paper Workshops to my workshop calendar for October 6-7, 2012. Be sure to register early so you don’t miss out. CLICK HERE TO GET THE DETAILS.
Now a little about today’s tutorial. . . . . .
I broke out my forgotten Prisma Color pencils and paint thinner for this project. When you dip the end of the pencil in the paint thinner is melts like butter on your card stock. Lovely technique. Join me, won’t you.
Reminders before I start on the tutorial:
Last month to pick up those free Sale-a-bration sets. Stampin’ Up! Sale-a-bration sales period runs from January 24 – March 31, 2012. During this sales period you will receive your choice of a free stamp set from the Sale-a-bration catalog for every $50 in product you order. CLICK HERE TO CHECK OUT THIS YEAR’S SALE-A-BRATION CATALOG! You won’t want to miss out on the sale-a-bration sets, paper and embellishments.
Don’t miss out on my Customer free stamp set program. Check it out! Along with a thank you card from me for your order you will receive a token for each $50 in product you order using me as your demonstrator. After you have collected 10 tokens you will receive a free current stamp set of your choosing, a value of $39 or less. Here is a link to my online shopping page that you can shop at 24/7 (from the comfort of your home, even in your pj’s) and the products will be shipped directly to your door step from Stampin’ Up: CLICK HERE TO SHOP. My free stamp set program will be an on going program. 
Don’t forget the Stampin’ Up! new Occasions Mini Catalog CLICK HERE TO TAKE A LOOK AT IT. I know you will fall in love with the new stamp sets, dies and accessories. They are to die for. . .
Now on with today’s tutorial. . . . . . .
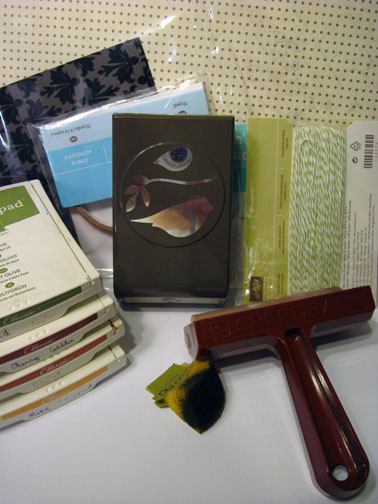
Supplies:
Stamps: Stampin’ Up! Everybunny (item number 122707)
Card Stock: Stampin’ Up! Whisper White, Pretty in Pink and Old Olive
Ink: Stampin’ Up! Basic Black, Old Olive, Pacific Point, Tempting Turquoise and Stazon Jet Black
Accessories: Stampin’ Up! sponge, White Gel Pen, Prismacolor pencils, Odorless Paint Thinner, Brayer, Scallop punch, Blushing Bride Ribbon (item number 125570).
Want a free copy of the current Stampin’ Up! Occasions Mini Catalog? Just e-mail your address to mzindorf@aim.com and I will get one right out to you. Get your copy of the 2011-2012 Stampin’ Up! Idea Book & Catalog by sending $9.95 to me at P.O. box 116, West Alexandria, Ohio 45381 or via paypal to mzindorf@aim.com, shipping is free. Are you getting inspiration from this blog? One way you can help support it is to order your Stampin’ Up products through me. Click HEREto place an order and have your order delivered directly to your door step from Stampin’ Up! Want to become a Stampin’ Up Demonstrator , receive a 20% discount on product and earn instant income on orders, get to purchase products before they are released to the public? Consider being part of my Stampin’ Up Team and start your own business or become a Hobby Demo just for the discount. Click HERE for more information.

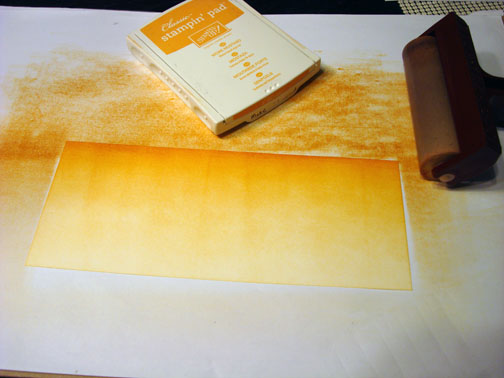
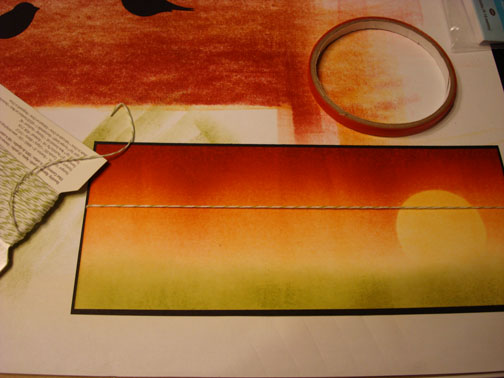
Brayered Tempting Turquoise ink on a 3″ x 4″ piece of Whisper White card stock.

Brayered Pacific Point ink at the top of the card stock.

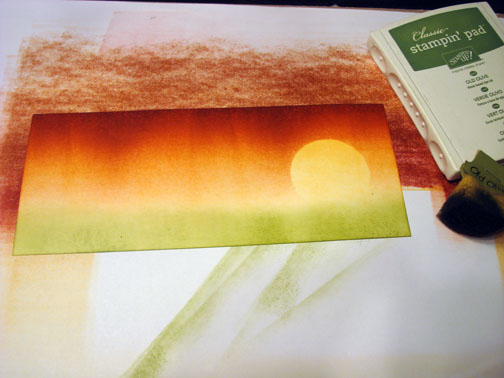
Sponged Old Olive ink at the bottom of the card stock.

Brayered Basic Black ink at the very bottom of the card stock.

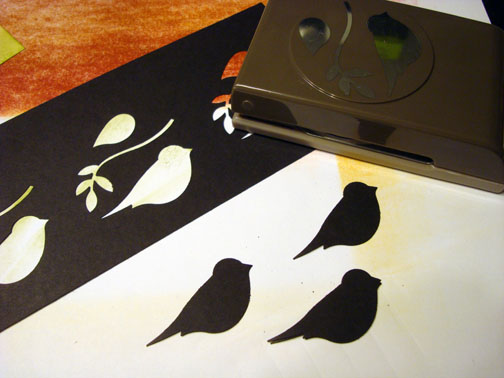
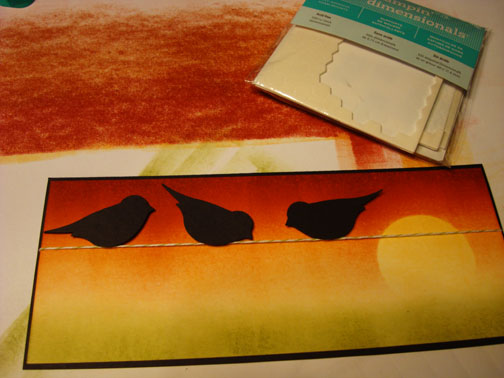
Stamp the image using Stazon Jet Black ink.

Got out my Prismacolor pencils and Odorless Paint Thinner. When using these pencils I like to dip the tip of the pencil in the paint thinner and then color with it. The color melts onto the card stock like butter and it’s really smooth.

I pour just a little bit of the paint thinner in the cap from the bottle to use with my pencils. Colored the bunny in with Peach Beige.

Added a shadow on the bunny using Prismacolor Light Umber.

Colored in the balloon using Prismacolor Hot Pink.

Added Prismacolor Process Red to the sides and bottom of the balloon to add depth.

Colored in the stripes and basket using Prismacolor Canary Yellow.

Colored in the dots, flowers and added highlights to the stripes on the balloon, basket Ribbon and the bunny using a White Gel Pen.

Added some Prismacolor Scarlet Lake to the sides and bottom of the balloon to create a bit more roundness.

Added Light Umber to the bottom and top of the basket.

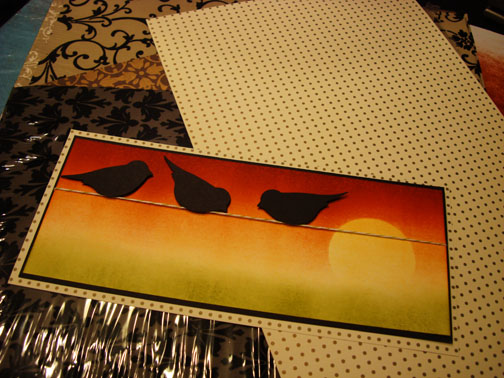
Added 2 Pretty in Pink Panels, One Whisper White panel and an Old Olive Strip of card stock that has been punched with the Scallop Boarder punch. Also added Blushing Bride ribbon.

Here is the finished project. Please realize that the pencil colors will change on the project since they are layered over blue ink. For instance the pinks will turn purple, yellow will turn green and the tan will turn gray. 🙂
Happy Stamping!
Until my next post. . . . . . . .
Hugs,


 Get ready for Brayer and Direct to Paper Workshops! I am coming to the following locations, click the location name for more information.
Greeneville, Tennessee
Indianapolis, Indiana (Sold Out)
Indiana, Pennsylvania
Sparta, New Jersey (Sold Out)
Piedmont, Alabama
Post Falls, Idaho (outside of Coeurd’Alene)
Sand Lake, Michigan (just North of Grand Rapids)
Lawrence, Kansas
Elizabethtown, Kentucky
West Bend, Wisconsin
Longmont (Gunbarrel), Colorado
Orange, Massachusetts
Scottsdale, Arizona
Sacramento, California
Staley, North Carolina
Here is a link to my workshop calendar where you can see all of my travel schedule and to get info on beginner and advanced Brayer workshops, along with the newly added Direct to Paper Workshop: http://zindorf.blogs.splitcoaststampers.com/workshop-calendar
Don’t see a workshop in your State? Interested in hosting the workshops in your area Click HERE to get hostess information.
Link to my Stampin’ Up website where you can order all of your must have Stampin’ Up products from me 24-7: http://michellezindorf.stampinup.net


 Get ready for Brayer and Direct to Paper Workshops! I am coming to the following locations, click the location name for more information.
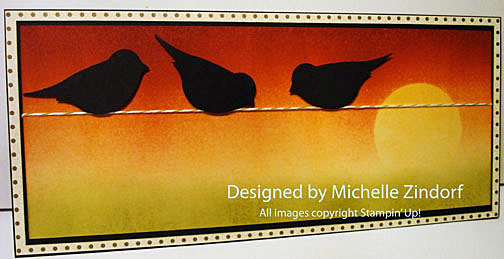


