
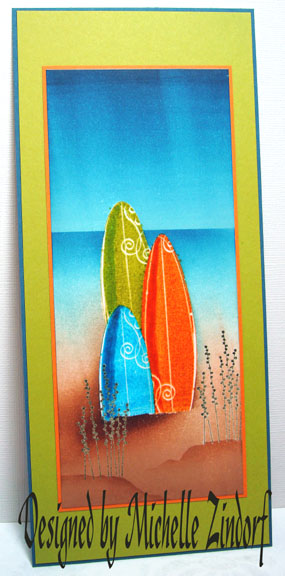
I have a little pond scene for you using this great flower image from the Stamp Sheet “Summer Elements III” by Innovative Stamp Creations. If you wish to check out all the great stamps from Innovative Stamp Creations here is the link: http://www.innovativestampcreations.com/ischomepage.html
My tutorial today shows how to put a moon in the scene using a simple masking technique and White Pigment ink.
Hang out a moment or two and check it out. 🙂
Let’s get started. . . .
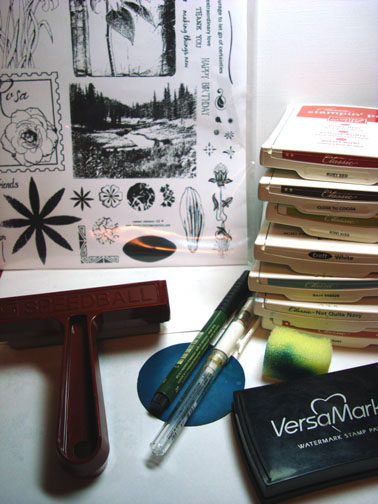
Supplies:
| Stamps: Innovative Stamp Creations “Summer Elements III” |
| Paper: Stampin’ Up Whisper White, Kiwi Kiss & Not Quite Navy |
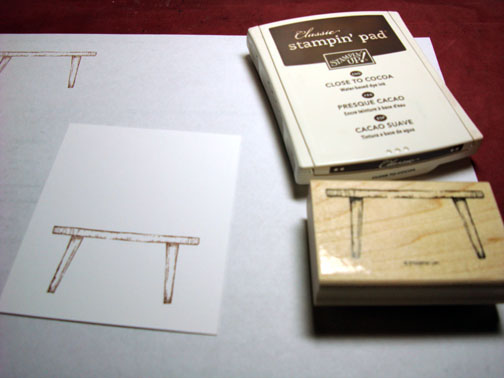
| Ink: Stampin’ Up Ruby Red, Close to Cocoa, Kiwi Kiss, Craft White, Baja Breeze, Not Quite Navy, Really Rust |
| Accessories: Sponge, Brayer, White Gel Pen, Versamark Pad, Clear embossing powder, Heat Gun, Faber Castell 174 Green Marker |
Are you inspired by this Blog? One way you can help support this blog is by ordering your Stampin’ Up products through me. You can order from me 24-7 from this link: http://michellezindorf.stampinup.net or e-mail me at mzindorf@aim.com if you are within the United States. Want a copy of the current mini catalog, just e-mail me your address and I will pop one in the mail to you. Want to become a Stampin’ Up Demonstrator and earn instant income? Consider being part of my Stampin’ Up Team.
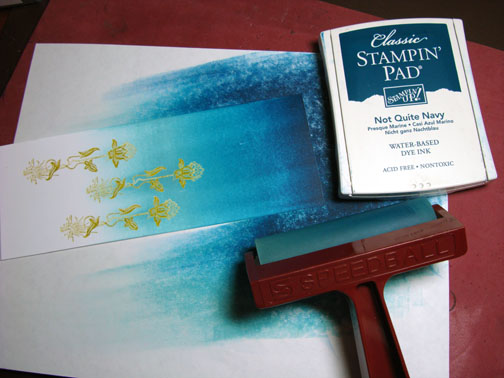
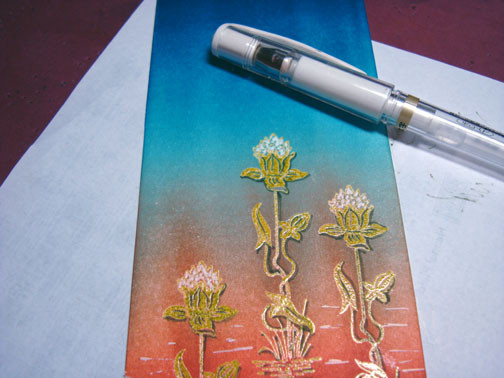
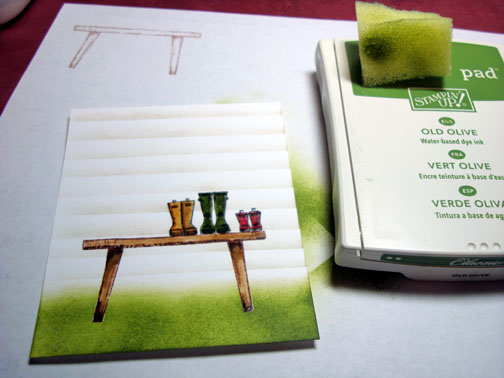
On a 3″ x 8″ piece of Whisper White card stock, stamped the flower image three times by loading my stamp first with Versamark and then with Kiwi Kiss ink before stamping each image.
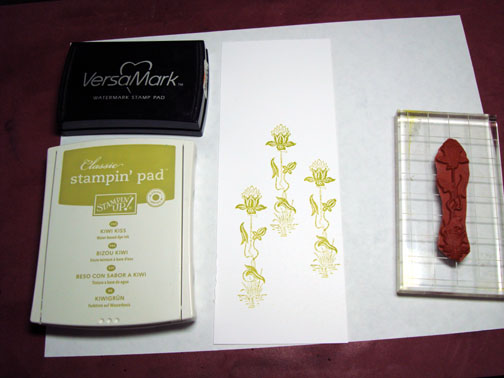
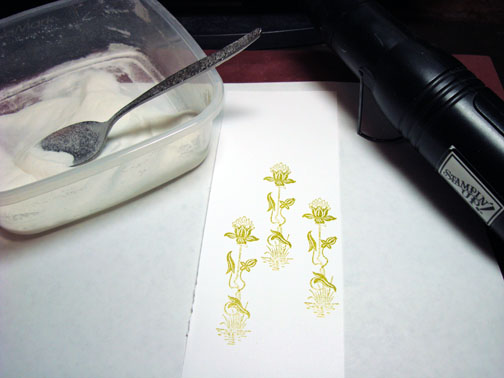
Heat embossed the images using clear embossing powder and a heat gun.
Brayered Baja Breeze ink at the top of the card stock.
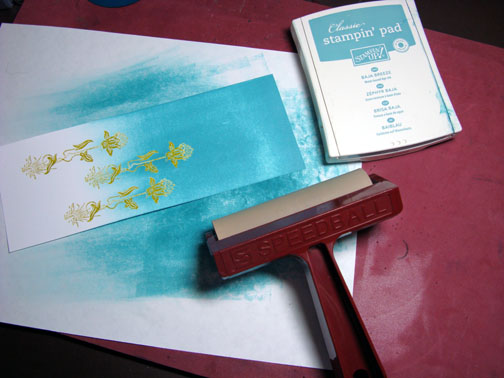
Brayered Not Quite Navy ink at the top of the card stock, not covering the Baja Breeze ink entirely.
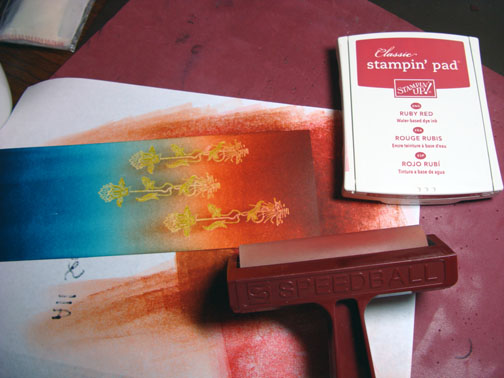
Brayered Really Rust ink at the bottom of the card stock.
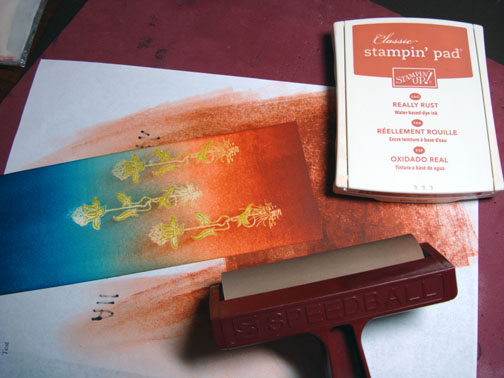
Brayered Ruby Red ink at the bottom of the card stock, not covering the Really Rust ink entirely.
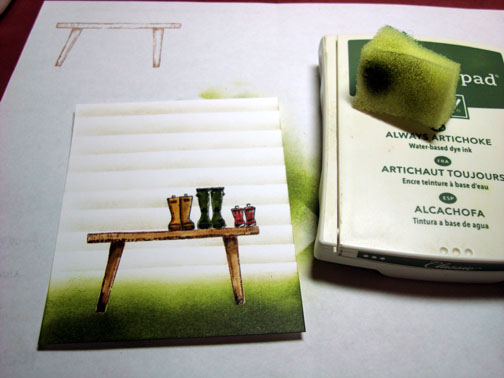
Added a dark Green marker shadow to the right sides of the plants.
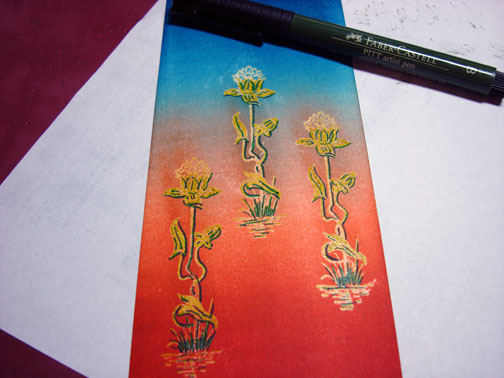
Added some White gel pen lines at the bottom of the card stock.
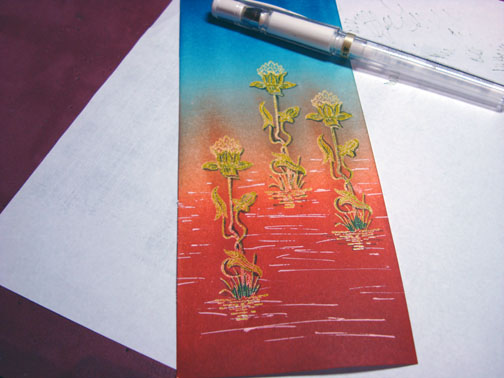
Colored in the flower heads with the White Gel Pen.
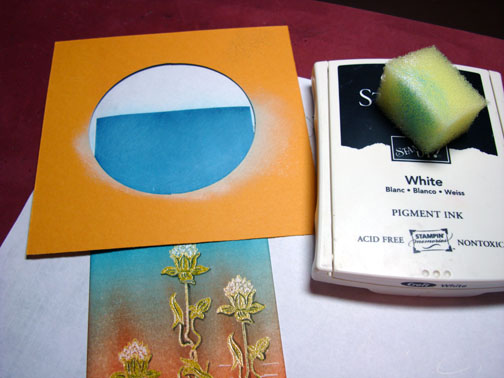
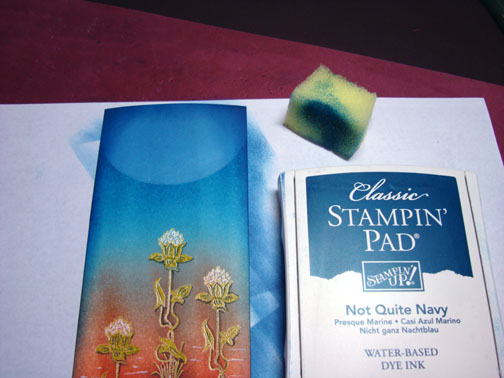
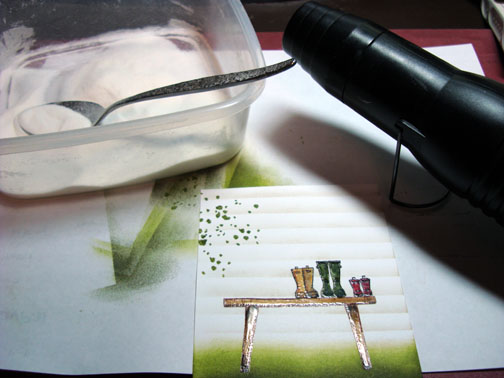
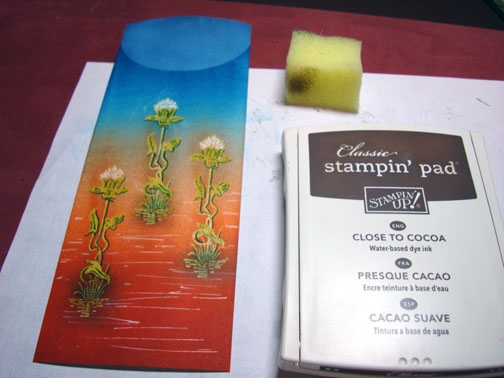
Use the negative piece of card stock that I cut a 3″ circle out of with a Circle Cutter for a Mask to create my Moon. Sponged White Craft ink (Pigment ink) in the open area of the mask.
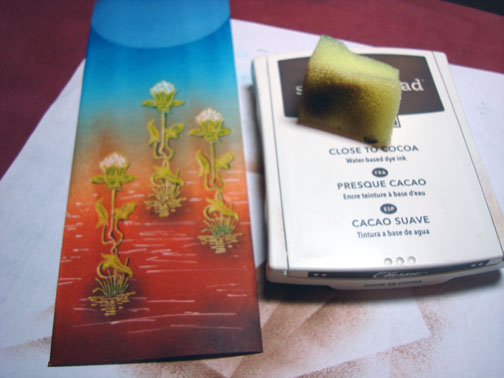
Removed the mask and sponged Close to Cocoa at the base of each plant and at the very bottom of the card stock.
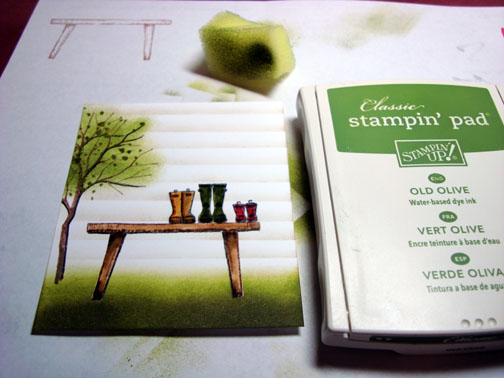
Sponged Not Quite Navy ink at the top sides and top edge of the card stock.
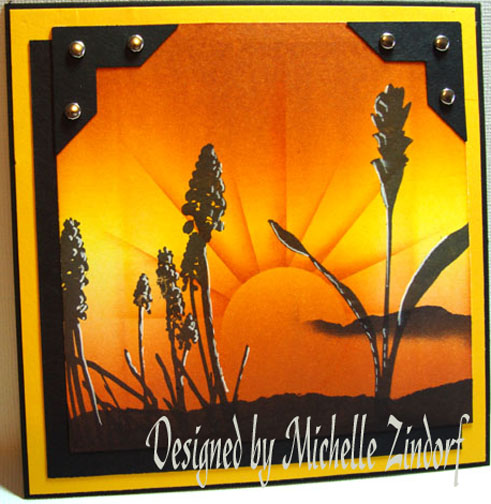
Assembled a few simple layers and here is the finished card measuring 4″ x 9″.
May your day be filled with great summer images as well. 🙂
Until my next post. . . . . . . . . . . . . . . . .
Huge Hugs,
Michelle
 Get ready for Brayer Workshops! I am coming to:
New Johnsonville, Tennessee
Stoughton, Wisconsin
Dayton, Ohio
Columbia, Missouri
Lynchburg, Virginia
Greenwood, Indiana
Castro Valley, California
Yardley, Pennsylvania (near Philadelphia)
Knox, Maine
Broomfield, Colorado
Moore, Oklahoma
Nashville, Indiana
Portland, Michigan
2010
Phoenix, Arizona
Monroe, Louisiana
Jacksonville, Florida
Mechanicsville, Virginia
Raleigh, North Carolina
Colleyville, Texas
Colorado Springs, Colorado
Salem, Oregon
Here is a link to my workshop calendar where you can see all of my travel schedule and to get info on beginner and advanced Brayer workshops: http://zindorf.blogs.splitcoaststampers.com/workshop-calendar
Link to my Stampin’ Up website were you can order all of your must have Stampin’ Up products from me 24-7: http://michellezindorf.stampinup.net
Frequently asked questions answers: http://zindorf.blogs.splitcoaststampers.com/frequently-asked-questions/


