Prismacolor Sun on Dark

dsc03458.jpg

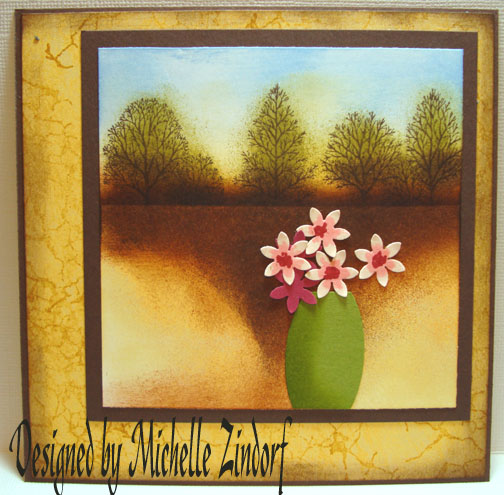
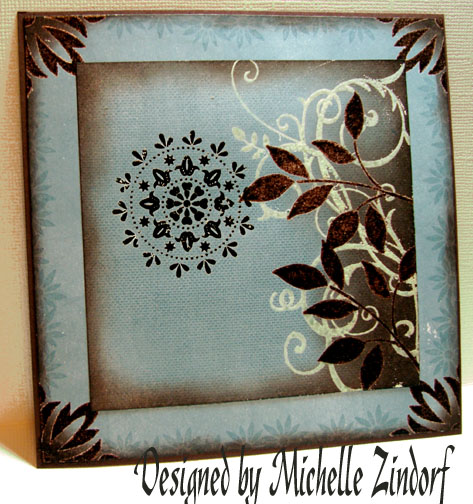
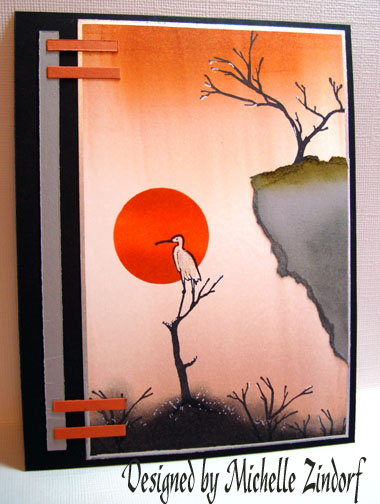
I created this card this morning to show you the effect you can get using Prismacolor Pencils & Odorless Paint Thinner on dark colored card stock.  I love this look and it is very easy to achieve. 
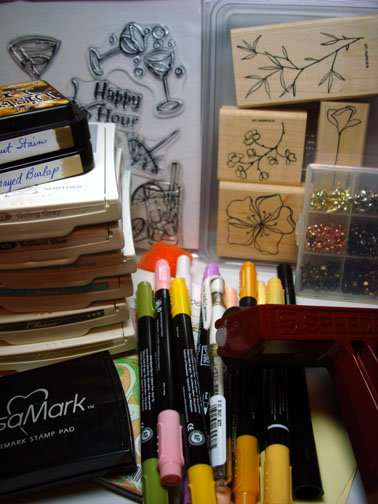
Supplies:

Stamps: Stampin’ Up Stardust
Paper: Stampin’ Up Not Quite Navy, Soft Sky & Night of Navy
Ink: Palette Noir Black, Stampin’ Up Night of Navy & Not Quite Navy
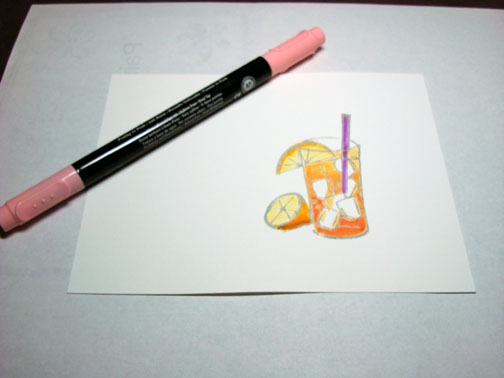
Accessories: Prismacolor Pencils, Mona Lisa Odorless Paint Thinner, White Gel Pen, Sponges

dsc03460.JPG

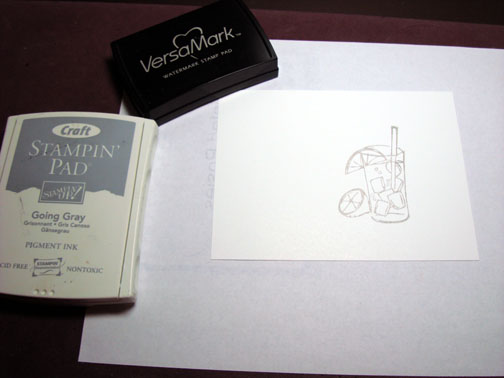
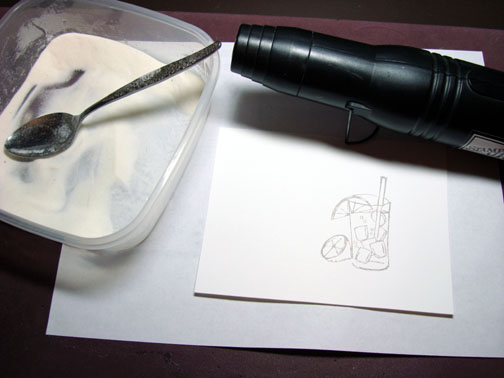
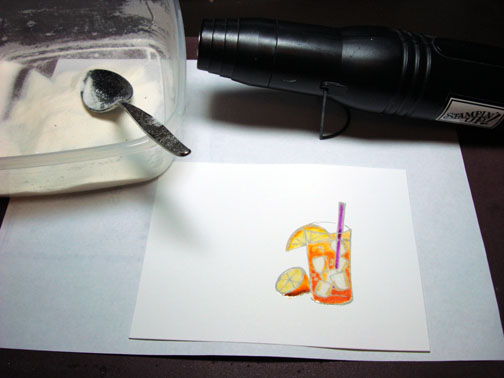
Stamped sun with Palette Noir Black ink on Stampin’ Up Not Quite Navy card stock and then heat set it with my heat gun.  Heating it helps keep the ink from smearing.

dsc03438.JPG

dsc03439.JPG

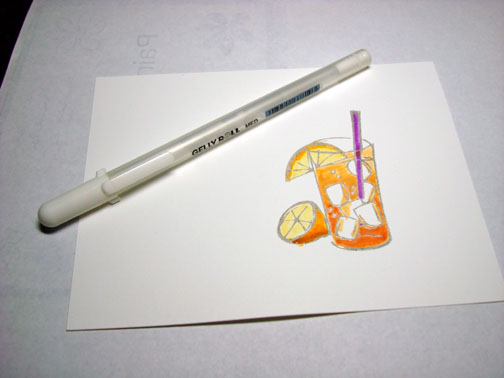
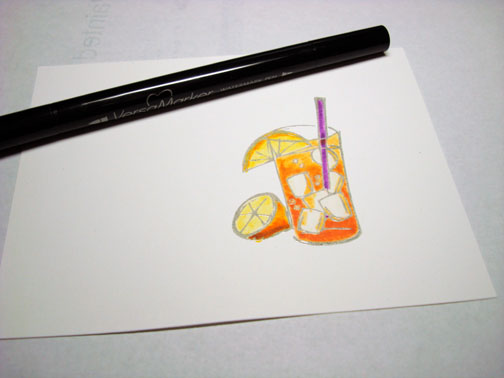
I use Prismacolor Pencils and Mona Lisa Odorless Paint Thinner and a little plastic cup to put my thinner in.

dsc03440.JPG

I dip my pencil directly into the thinner and then color with it.  The Prismacolor pencil melts like butter on the paper.  It’s wonderful!  Some folks color and then use blending stumps dipped in thinner to blend with.  I just blend with my pencils as I go.  🙂

dsc03441.JPG

Started with a Jasmine pencil.

dsc03442.JPG

Put the Whites of the sun’s eyes in with a white gel pen.

dsc03443.JPG

Added the True Blue pencil to his eyes.

dsc03444.JPG

Colored around the sun with True Blue pencil.

dsc03445.JPG

Add Pale Vermillion pencil.

dsc03446.JPG

Added Jasmine pencil to his face.

dsc03447.JPG

Colored more of his face in with Pale Vermillion pencil.

dsc03448.JPG

Added Poppy Red pencil to the flames, cheeks and outline of circle.

dsc03449.JPG

 Added Deco Yellow Pencil to the outside of the sky area and his eyelids.

dsc03450.JPG

dsc03451.JPG

Added white dots to the sky area with a white gel pen.

dsc03452.JPG

Sponge Not Quite Navy ink to right, top & bottom of card stock.

dsc03453.JPG

Sponged Night of Navy ink over Not Quite Navy ink not covering it completely toward the center.

dsc03454.JPG

Sponged Noir Black ink over Night of Navy ink not covering it completely.

dsc03455.JPG

Sponged Not Quite Navy ink around edge of background panel.

dsc03456.JPG

Assembled card and here it is completed.

dsc03458.jpg

Hope you enjoyed seeing one of the effects you can get using Prismacolor pencils on dark card stock.   Give it a try.

Have a sunshine filled day.

Until tomorrow. . . . . . .


Landscape floral – Tutorial

dsc03434.jpg

Hello fellow stampers!   We have had such beautiful weather here in Ohio, but I’ve not had a chance to be outside this week, so this card represents that feeling.  Let’s start with the tutorial.

Supplies:

Stamps: Stampin’ Up Lovely as a Tree, Marble Texture Cube
Paper: Whisper White, Chocolate Chip, Blush Blossom, Purely Pomagranate & So Saffron
Ink: Stampin’ Up So Saffron, Old Olive, Bashful Blue, More Mustard, Adirondack Espresso, Ginger & Oregano
Accessories: Stampin’ Up Markers, Sponges, Large Oval Punch, Flower Punch

dsc03437.JPG

I’ve put away my brayer for today and decided to do this scene all in sponging. 🙂

Sponged So Saffron ink on 2/3 rd’s of a piece of Whisper White card stock.

dsc03410.JPG

Sponged Bashful Blue ink at top of card stock.

dsc03411.JPG

Used Post it notes as a mask to cover part of the card stock.

dsc03412.JPG

Stamped trees with Espresso ink.

dsc03413.JPG

Sponged Oregano ink on the trees to represent leaves.

dsc03414.JPG

Sponged Ginger ink under the trees.

dsc03415.JPG

Sponged Espresso ink at the horizon line (top of post it notes) and at the bottom of the leaves on the tree.

dsc03416.JPG

Removed post it notes.

dsc03417.JPG

Sponged on Ginger ink over some of the field.

dsc03418.JPG

Sponged Espresso ink over some of the ginger ink.

dsc03419.JPG

Punched an oval out of Old Olive card stock using the large oval punch.   Cut the top and bottom off of the oval.

dsc03420.JPG

dsc03421.JPG

Sponged Old Olive ink on left side of vase to create a shadow.

dsc03422.JPG

Punched flowers out of Blush Blossom and Purely Pomegranate card stock.

dsc03423.JPG

dsc03424.JPG

Colored the centers of the Blush Blossom Flowers with a Pretty in Pink marker.

dsc03425.JPG

Made dots in the very center of the flowers with a Rose Red marker.

dsc03426.JPG

Glued the vase and flowers to the scene.  I put the vase just off center in the scene.  This is more please to the eye.

dsc03427.JPG

Stamped side “A” of the marbling cube on So Saffron card stock using So Saffron ink.

dsc03428.JPG

Stamped side “C” of marbling cube with More Mustard ink.

dsc03429.JPG

Sponged Espresso ink lightly around edge of card stock.

dsc03430.JPG

Assembled card and here it is completed.

dsc03434.jpg

Hope you are able to go outside and enjoy some wonderful weather today.

Until tomorrow. . . . . . . . . .


Tool Time – Sponges

dsc03408.JPG

My post today is not very exciting, but I have received so many questions as to what kind of sponges I use in my tutorials that I thought it warranted a posting.

I use to be caught up in using Stampin’ Up sponges, but after much frustration and money, I threw them all away, YIKES!  Stampin’ Up sponges are wonderful, but trying to keep track of one more thing in my life, and sponges at that, was just not worth it to me.

My solution was the Dollar Tree, Dollar Store.  Here is a link to see if you have one near you:  http://www.dollartree.com/index.cfm

Anyway, as you see in the picture, I spend $1 on 14 sponges that are 4.5″ by 3″.  They are called Scrub Buddies.  The sponges in the bag are both blue and red.

Because they are so economical, I cut a small chunk off of one and use it and throw it away upon project completion.  I’m sure any soft foam sponge will work in the same manner. 🙂

Well, there it is, I’m keeping it real, sharing my sponge secret with you, lol.

Please share with us your sponge finds and storage solutions by posting a comment here.  You may have just the solution someone else is looking for and sharing is good.  🙂

Until tomorrow. . . . . . . .


Tall Drink by the Sea – Tutorial

dsc03406.jpg

I think my mind is still at the beach in California, lol.  Why don’t you join me and follow along on this tropical tutorial?

Supplies:

Stamps: Clear Stamps Happy Hour, Stampin’ Up Embrace Life
Paper: Stampin’ Up Whisper White & Tempting Turquoise, Basic Grey Pheobe DP
Ink: Stampin’ Up Cool Caribbean, Tempting Turquoise, Brilliant Blue, Going Gray, Always Artichoke & River Rock, Distress inks Frayed Burlap & Walnut Stain
Accessories: Stampin’ Up Markers, White Gel Pen, Versamark pad & marker, Post it notes, Brayer, Sponges, Heat Gun, Embossing Powder, Brads

dsc03407.JPG

Stamped drink by first loading my stamp with Versamark and then Going Gray.  Note:  My craft pads are no longer craft.  I have been re-inking them with dye inks.  If they were still craft ink I would not have to use the Versamark.

Heat embossed image with clear embossing powder and a heat gun.

dsc03377.JPG

dsc03378.JPG

Colored flesh of lemon with Barely Banana Marker and outside of lemon with Summer Sun.

dsc03379.JPG

Used a More Mustard marker for the underside of lemon on table.

dsc03380.JPG

Colored straw with Orchid Opulence marker.

dsc03381.JPG

Colored drink with Apricot Appeal marker and then went over the lower 2/3rds of it with a Blush Blossom Marker.

dsc03382.JPG

Colored the bottom 1/4 of the drink with a Pretty in Pink marker.

dsc03385.JPG

Used a White Gel pen on the bubbles in the glass.

dsc03386.JPG

Went over the drink, straw and lemons with a Versamark marker and heat embossed using clear embossing powder and a heat gun.

Note:  I did not emboss over the top of the glass where it should be naturally see through.

dsc03387.JPG

dsc03388.JPG

Brayered Cool Caribbean ink over top 1/2 of card stock.

dsc03389.JPG

Put post it note masks on the card stock to create the horizon line.

dsc03390.JPG

Brayered on Tempting Turquoise ink, not covering the Cool Caribbean ink completely.

dsc03391.JPG

Sponged on Brilliant Blue at the top of the water.  Being heavy with the ink at the (top) post it note mask.  This gives you a good strong horizon line.

dsc03392.JPG

Removed post it notes and brayered on River Rock ink for the sand.

dsc03394.JPG

Cut a large circle from a piece of card stock and used it as a mask for the table shape.  I just held it in place.

dsc03395.JPG

Brayered on Frayed Burlap ink to create the table.

dsc03396.JPG

Swiped Walnut Stain ink under the glass and the lemon with a sponge to create a shadow.

dsc03397.JPG

Used a white gel pen to put in a foamy water line.

dsc03398.JPG

Sponge River Rock ink at the bottom of the sand.

dsc03399.JPG

Stamped leaves with Always Artichoke ink.

dsc03400.JPG

Partly colored in the leaves with an Old Olive marker, leaving some of the leaf uncolored to create a highlight.

dsc03401.JPG

Assembled the card and here it is completed. 

dsc03406.jpg

Thanks for following along on my tropical adventure.

May your day be filled with Ocean views, even if only in you head. 🙂

Until tomorrow. . . . . .


Blue Faded Flower – Tutorial

dsc03372.jpg

I was just itching to do some emboss resist this morning and this piece definitely is embossed.  Follow along if you want to see how it was created.

Supplies:

Stamps: Stampin’ Up Best Blossoms, Baroque Motifs, Wanted, Linen
Paper: Stampin’ Up Whisper White & Chocolate Chip
Ink: Stampin’ Up Basic Black, Soft Sky & Bordering Blue, Adirondack Espresso
Accessories: Versamark Pad, Clear Embossing Powder, Heat Gun, Brayer, Stamp-a-ma-jig, Sponge

dsc03376.JPG

Stamped leaves on Whisper White card stock by first loading stamp with Versamark and then loading it with Espresso ink.   I then heat embossed it with clear Embossing powder and a heat gun.

dsc03352.JPG

dsc03353.JPG

Note:  I’m asked a lot why I just don’t use Versamark alone with colored embossing powders?  Well I would rather not have to buy a bunch of different colors of embossing powder and this method allows me to emboss in any color of ink I have. 🙂

I also keep my clear embossing powder stored in a sandwich size plastic container instead of trying to use an embossing tray and then put it back in the tiny canister it came in.  My aim is not very good, lol.

Stamped Wanted motif by first loading the stamp with Versamark and then Basic Black ink.  Heat embossing image with clear embossing powder and a heat gun.

dsc03354.JPG

dsc03355.JPG

Stamped Baroque Motif by loading stamp first with Versamark and then Soft Sky ink.  Stamped image over embossed leaves and heat embossed with clear embossing powder and a heat gun.

Note:  when doing multiply layers of embossed images, work from the foreground to the background.

dsc03356.JPG

dsc03357.JPG

Heavily Brayer Bordering Blue ink over entire piece of card stock.

dsc03358.JPG

Sponge, using a circular motion, Espresso ink around edges of card stock and over leaf image area to create a shadow.

dsc03359.JPG

On a larger piece of Whisper White card stock, using my Stamp-a-ma-jig for placement, I stamped the background corner images by first loading my stamp with Versamark and then Espresso ink.  Heat embossed images with clear embossing powder and a heat gun.

dsc03360.JPG

dsc03361.JPG

dsc03362.JPG

Heavily brayered Bordering Blue ink over entire background piece.

dsc03364.JPG

Stamped small flower around edge of card stock with Bordering Blue ink.

dsc03365.JPG

Sponged Espresso ink around edge of card stock.

dsc03366.JPG

Stamped linen stamp on my main image panel by loading my Linen background stamp with Bordering blue ink.  To do this I put my stamp rubber side up on the table.  Rub my ink pad on the rubber, place my card stock face down on the rubber and put a piece of scrap paper over it and rub it with my hand to get the image.

dsc03367.JPG

dsc03368.JPG

dsc03369.JPG

dsc03370.JPG

Here we have another card assembled and completed!

dsc03372.jpg

Give it a try!

Well I hope your day is filled with blue skies.

Until tomorrow. . . . . . .


At the End of the Day – Tutorial

dsc03351.jpg

Feels very good to be back in my craft-room stamping again.  These stamp images are from http://www.mypapermoon.com

Ready for a tutorial?  If so, let’s get started.

Supplies:

Stamps: Stamps by My Paper Moon
Paper: Stampin’ Up Whisper White, Going Gray & Basic Black
Ink: Stampin’ Up Going Gray, Stazon Black, Adirondack Hazelnut, Salmon, Terra Cotta, Rust & Oregano
Accessories: Sponges, Post it note, 1 3/8″ circle punch, brayer, white Gel pen, Prismacolor Metallic Silver Paint Pen

dsc03349.JPG

On Whisper White card stock brayered Hazelnut ink on both ends, leaving a white space.

dsc03325.JPG

On both ends again, brayered on Salmon ink, not covering the Hazelnut completely.

dsc03326.JPG

Punched a 1 3/8″ circle in a post it note and used the negative image as a mask.

dsc03327.JPG

Sponged Terra Cotta ink in a circular motion over circle in post it note.

dsc03328.JPG

Sponged Rust ink in a circular motion over bottom and top of circle in post it note.

dsc03329.JPG

Tore a cliff shape from a piece of Going Gray card stock.

dsc03331.JPG

Sponged Going Gray ink along the front edge of the cliff shape and Oregano ink along the top edge.

dsc03332.JPG

dsc03333.JPG

Ignore the color at the bottom of the card stock.

Stamped bird in tree stamp with Stazon black ink.

dsc03335.JPG

Stamped Tree stamp with Stazon Black ink at top of card stock.

dsc03336.JPG

Adhered cliff shape to main card stock.

dsc03337.JPG

Stamped tree stamp along bottom of card stock with Stazon Black ink.

dsc03338.JPG

Sponged Going Gray ink at bottom of card stock using a bouncing motion.

dsc03339.JPG

Sponged  Stazon Black ink at bottom of card-stock not covering all of the Going Gray ink.

dsc03340.JPG

Decided I wanted the scene to be a lot darker at the top of the card stock so I brayered on Rust ink along the top.

dsc03341.JPG

Used a white gel pen to color in the bird.

dsc03342.JPG

Sponged Going Gray in at the backside of the cliff.

dsc03343.JPG

Used a Prismacolor Silver Paint Pen to go around the edge of the card stock.  Note:  just hold the pen so it is half on the card stock and half on your scrap paper and you will get a straight line without a ruler.

dsc03344.JPG

Used the white gel pen again to make highlights in the trees and to add a few specks on the ground area to simulate weeds and grasses.

dsc03345.JPG

Here is the assembled card.

dsc03351.jpg

Thanks for following along with me and I hope you will give it a try.

May your evening be filled with a sunset!

Until tomorrow. . . . .


I’m Back!

Hi Everyone, I’m back from vacation refreshed and ready to create.  My vacation was one of learning.  I attended the Art & Soul By the Sea Retreat at Asilomar State Park, Monterey, CA.  Where I took a two-day class on making Nature journals from a fabulous teacher, LK Ludwig.  LK has a book out on the subject, which I ordered first thing upon returning home.  Anyway, here is a shot of my nature journal I created.

dsc03319.jpg

I learned so many new techniques that I hope to incorporate in my card making.  One for instance is applying Patina to Metal Mesh, like you see on my journal cover.  Yep, that’s right, stamping on metal mesh!

I also took a one day class called Simpatico from the wonderful, Angela Cartwright who is also a published author.  I’ve got her book ordered too, lol.  Simpatico is taking Black and white photos and applying color to them.  Here is a horrible scan of one of mine that I did in her class, but you can get an idea of the technique.

scan00014.jpg

Although we were in the classroom during the day, we were able to enjoy the scenery at Asilomar early morning and during the evenings.  Here is an early morning shot.

asilomar-early-morning.jpg

My vacation was not entirely spent in the classroom.  Here is picture I took along the coast as we were on our way to spend the day shopping in Carmel.

seventeen-mile-drive-1.jpg

Ok, enough with my vacation photos.  I can hear you snoring, Zzzzzzz.

I hope this post finds all of you happy and healthy. 

I plan to post a tutorial later today.  Stay tuned because I’m back and ready to do some stamping!


Taking a needed break. . . . . . .

Hello everyone,

I’m going to take a break from blogging until I return from my vacation.  My next post will be April 20th.  In the mean time, please check out and try some of the past tutorials here on my blog.  There is a tutorial tab on the top of this page with quick links to all of them.  There are over thirty, so grab a cup of your favorite brew and stay a while.  Any questions/comments leave them in the comments section under the tutorial you are viewing and I will answer if I can before the 20th.  If I can’t, I’ll be sure to answer them upon my return. 

Thanks again to all of you that visit my blog.  Your wonderful comments have inspired and driven me to keep posting tutorials and in the process I have learned a great deal myself.

Hugs,

Michelle


Oriental Lotus Blossom – Tutorial

dsc03252.jpg

In this day and age of the Copic marker, I find I still like to get out my Stampin’ Up markers and color every once in a while.  Today is one of those days.  🙂

Supplies:

Stamps: Stampin’ Up Oriental Gardens
Paper: Stampin’ Up Very Vanilla, River Rock, Bravo Burgundy
Ink: Stampin’ Up Blush Blossom, True Thyme and River Rock
Accessories: Ribbon, Brads, Stampin’ Up Markers Old Olive, Certainly Celery, Creamy Caramel, Blush Blossom & Baroque Burgundy, White Gel Pen, Sponge, Versamark Marker

dsc03255.JPG

Stamped flower with Blush Blossom ink on Very Vanilla card stock.

dsc03227.JPG

Colored stem in first with a Certainly Celery marker and then used an Old Olive maker along the left side (shadowed side) of the stem.  Went over the entire stem again with Certainly Celery marker to blend the two colors together.

dsc03228.JPG

dsc03229.JPG

dsc03230.JPG

Colored the inked areas of the flower in with a Blush Blossom marker.

dsc03231.JPG

Colored over the darkest areas (shadow areas) with a Baroque Burgundy marker.

dsc03232.JPG

Went over the two colors where they meet each other with the Blush Blossom marker to get a better graduation in color.

dsc03233.JPG

Used a Creamy Caramel marker to make dots on the center of the large flower.

dsc03234.JPG

Used a White Gel pen to color in the lightest areas of the flower and bud.

dsc03235.JPG

Sponged on Blush Blossom ink around the outside edge of the card stock.  Leaving the middle area light.

dsc03236.JPG

Sponged River Rock ink under the flower with a circular motion.

dsc03237.JPG

Sponged on True Thyme ink under the flower to make it darker in the center and right under the flower.dsc03238.JPG

Used the gel pen again to clean up where my sponging darkened the white on the flowers.

dsc03239.JPG

Stamped flowers with River Rock ink on River Rock card stock.

Sponged around the outside edge of this panel with River Rock ink.

dsc03240.JPG

dsc03241.JPG

Used a Versamark Marker to define the undersides of the flowers.

dsc03242.JPG

Assembled card and decided it needed a hint of color on the background panel.  So I colored just a hint of Blush Blossom marker on the flowers undersides and then colored the stems with Certainly Celery marker.

dsc03244.JPG

dsc03245.JPG

And there were have it, another card done.

dsc03252.jpg

Glad you could visit my blog today.  I hope this inspires you to get out your markers and play a little. 

May your day be filled with sweet smelling flowers and sunshine!

Until tomorrow. . . . . . .


Back to the Beach – Tutorial

dsc03217.jpg

I wanted to give my brayer and embossing powder a little break today.   So this card was created using direct to paper for the background. 

Here we go.. . . . .

Supplies:

Stamps: Stampin’ Up Balmy Breezes
Paper: Stampin’ Up Whisper White, Real Red, Always Artichoke
Ink: Stampin’ Up Black, Tim Holtz Distress Ink Frayed Burlap, Shabby Shutters, Broken China
Accessories: White Gel Pen, Primsacolor pencils, Post it Note, Black marker

dsc03222.JPG

Drug Shabby Shutters ink pad edge across Whisper White card stock using a light touch.  You want to leave some white showing through.   Next, I drug a Broken China ink pad edge across the card stock being heavier toward the bottom of the card stock.

Note:  I used the entire edge of the ink pad, not just a corner and drug it from the left side of the card stock toward the right.  Trying to drag it all the way across the card stock before lifting the pad up.

dsc03203.JPG

Stamped small palm trees and large palm tree using black ink.

dsc03204.JPG

dsc03205.JPG

Colored the palm tree leaves with a Yellow Chartreuse Prismacolor Pencil.

dsc03206.JPG

Add some (red) Rouge Chamois pencil to the leaves randomly.  Colored the Coconut with Dark Brown Pencil and the trunk with Lilac pencil.

dsc03207.JPG

Traced a few of the black ink lines with a black marker to give a little more depth.

dsc03208.JPG

Used direct to paper technique again by applying Frayed Burlap ink to the bottom of the card stock.  Once again I used one entire edge of the ink pad and drug it in a downward motion.

dsc03209.JPG

Used a Post it note to created a horizon line and small beach where the small trees are.

dsc03210.JPG

Sponged Frayed Burlap ink at the edge of the post it note in a small circular motion.

dsc03211.JPG

Sponged Frayed Burlap in a small circular motion at bottom of the card stock, getting lighter in color towards the top.

dsc03212.JPG

Added White gel pen highlights to the leaves of the tree.  Drew in the waterline with the white gel pen using very small strokes.

dsc03214.JPG

Assembled card and here it is finished.

dsc03217.jpg

Hope you enjoyed this tutorial and will give the direct to paper technique a try.

I’m wishing you a day filled with Balmy Breezes.

Until tomorrow. . . . . . .