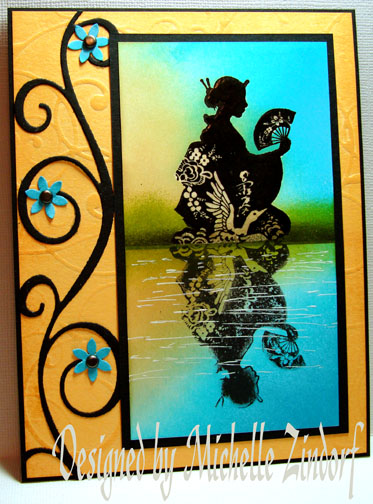
Before I finish packing for my trip to wonderful Lynchburg, Virginia tomorrow morning, I thought I would share with you this little Asian number. I used a fantastic tool, the opposite stamp from Innovative Stamp Creations to make quick work of making a reflection image in this project. If you want to pick up this opposite stamp, here is the link to Innovative Stamp Creations online store: http://www.innovativestampcreations.com/catalog/item/1516071/7057449.htm at $4 this is a terrific tool.
I paired up the opposite stamp with a great Stampin’ Up set “Dream Gardens”.
One thing before I start the tutorial, Stampin’ Up has a new Holiday Mini Catalog coming out and sales from this catalog start September 1st. If you would like a copy and you resided in the United States, please e-mail me your address at mzindorf@aim.com and I will pop one in the mail to you. If I am your Stampin’ Up Demonstrator you will receive this catalog automatically, no need to e-mail me. 🙂 Fantastic sets in this 39 page catalog!
Now, on with the tutorial.
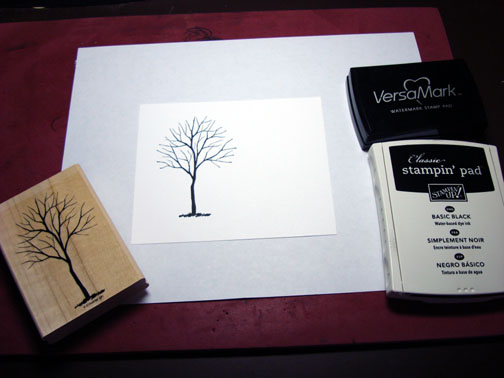
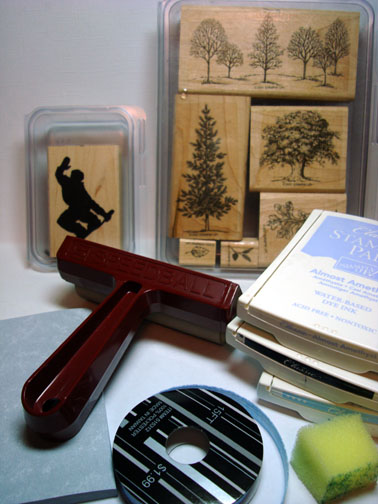
Supplies:
| Stamps: Stampin’ Up Dream Gardens and Innovative Stamp Creations Opposite Stamp |
| Paper: Stampin’ Up Whisper White, Basic Black, Apricot Appeal and Tempting Turquoise |
| Ink: Stampin’ Up Apricot Appeal, Tempting Turquoise, Old Olive and Basic Black |
| Accessories: Versamark marker and pad, EK Success Flower Punch, Big Shot Die Cut Machine, Swirley Die Cut, Flourish Texture Plate, Brayer, White Gel Pen, Sponge, Clear Embossing Powder, Heat Gun, Post it Note |
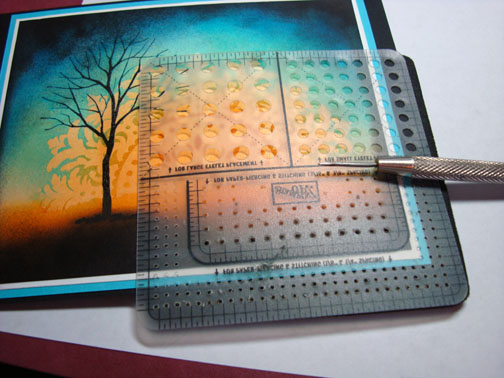
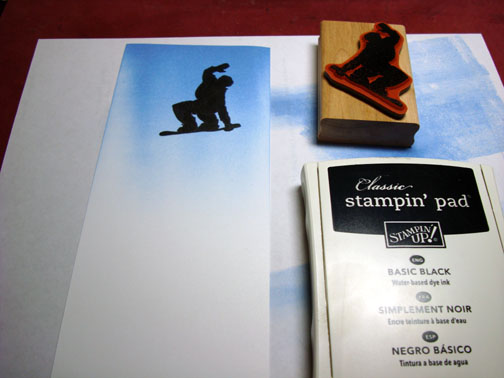
Are you inspired by this Blog? One way you can help support this blog is by ordering your Stampin’ Up products through me. You can order from me 24-7 from this link: http://michellezindorf.stampinup.net or e-mail me at mzindorf@aim.com If you are within the United States. Want a copy of the brand new 2009-2010 Stampin’ Up Catalog for $9.95, just e-mail me at mzindorf@aim.com and I will get one in the mail to you. Want to become a Stampin’ Up Demonstrator and earn instant income? Consider being part of my Stampin’ Up Team. Through August 31 you can become a Stampin’ Up Demonstrator for as little as $85 with the mini kit. Also check out the Stampin’ Up specials, click this link to check it out: http://www.stampinup.net/esuite/home/michellezindorf/promotions Stamped the image with Basic Black ink on the Opposite Stamp and then stamped the opposite stamp on a 3″ x 5.5″ piece of Whisper White card stock.
This creates a reverse image of the original stamp. 🙂
Note: I always start out stamping the reflection first. It is much, much easier lining the original stamp up with the reflection in stead of lining the reflection up with the original image. Clear as mud?

Stamped the original stamp by first loading it with Versamark and then Basic Black Dye Based ink before lining it up with the reflection image and stamping it.

Heat embossed the image using clear embossing powder and a heat gun.
Note: The reflection image is not heat embossed.

Colored over the main image with a Versamark marker and heat embossed it again with clear embossing powder and a heat gun. This was done in order to protect the open design in her robe.
Note: Did not do this step on the reflection.


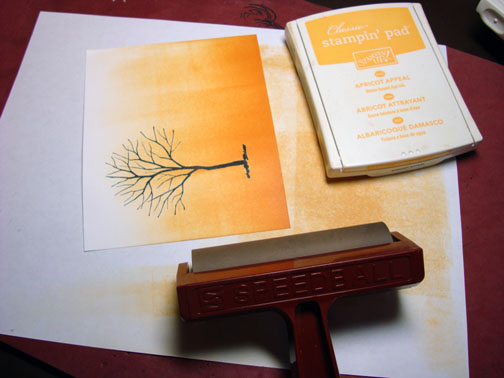
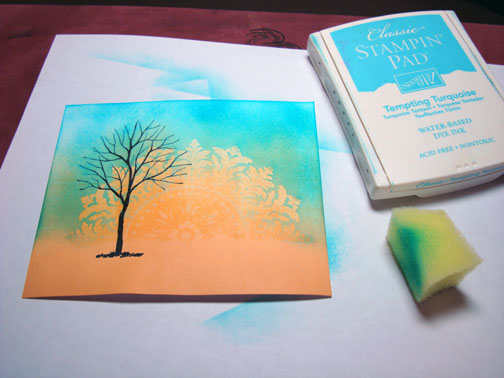
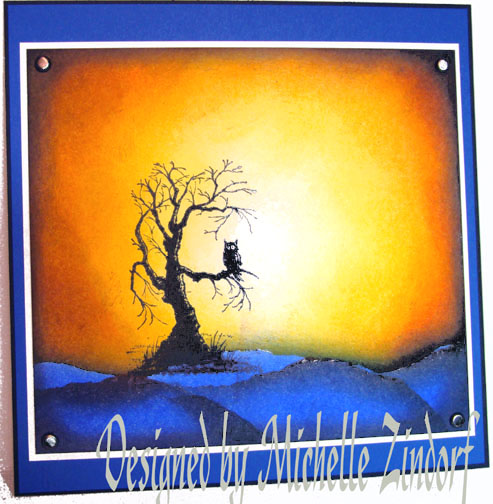
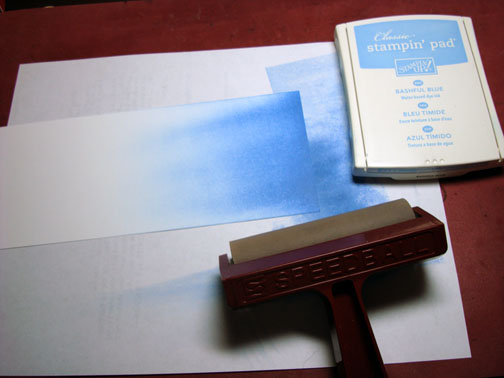
Brayered Tempting Turquoise at the top right corner of the card stock, at an angle.

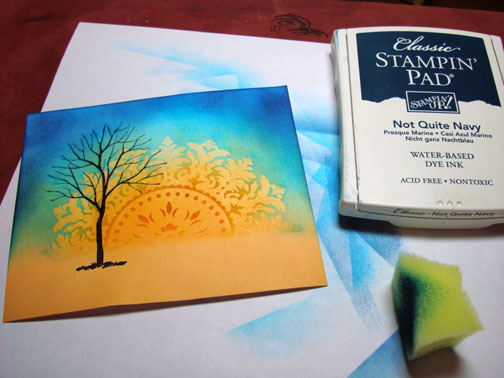
Brayered Tempting Turquoise ink at the bottom right corner, at an angle.

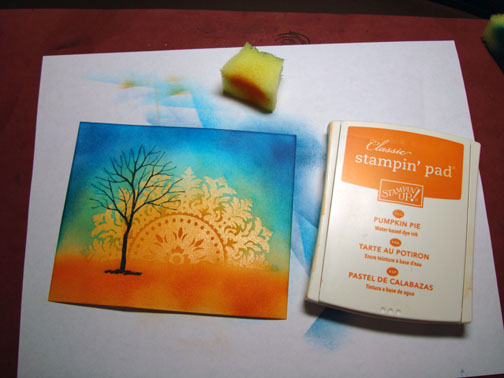
Sponged Apricot Appeal ink on the card stock, using a circular motion.

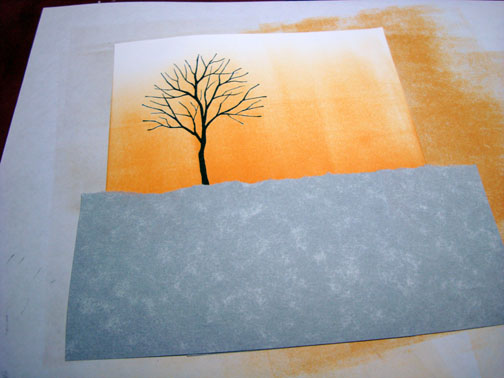
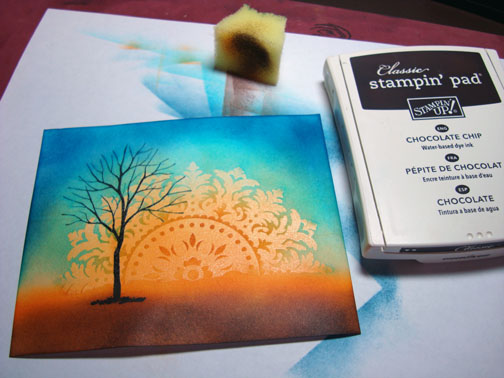
Masked the bottom of the card stock with a post it note and sponged Old Olive ink on using a circular motion.

Sponged Basic Black ink over the Old Olive ink, leave a bit of the Old Olive ink showing.

Un-masked the card stock and then put a new mask on the top of the card stock.
Sponged just a bit of Old Olive ink over the reflection image.

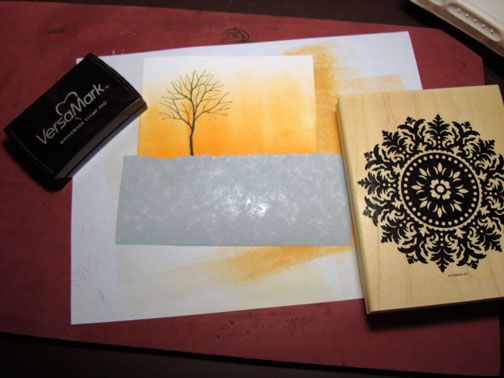
Unmasked the main image panel and added water lines with a white gel pen.

Used my Big Shot and the Swirly Die with Basic Black card stock to cut the Swirl die cut image.

Used the Big Shot and the Flourish texture plate on a panel of Apricot Appeal card stock. Brayered Apricot Appeal ink over the texturized panel to bring out the design more.

Assembled the card front and added Tempting Turquoise punched flowers to the flourish and Brads to the center of the flowers.

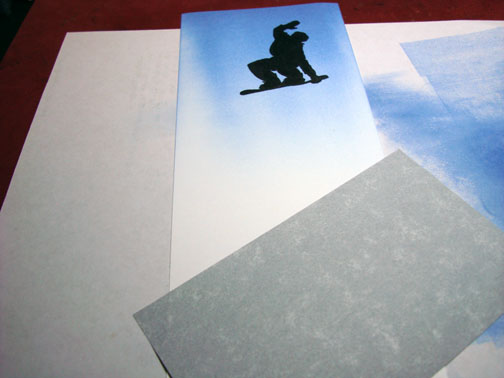
Here is the finished card measuring 5″ x 6.5″. 🙂
I hope this tutorial has inspired you to try a reflection scene.
May your day be filled with wonder. 🙂
Until my next post. . . . . . . . . . . . . . . . . . ..
Huge Hugs,
Michelle
 Get ready for Brayer Workshops! I am coming to:
Lynchburg, Virginia
Greenwood, Indiana
Castro Valley, California
Yardley, Pennsylvania (near Philadelphia)
Knox, Maine
Akron, Ohio
Broomfield, Colorado
Moore, Oklahoma
Nashville, Indiana
Portland, Michigan
2010
Phoenix, Arizona
Monroe, Louisiana
Jacksonville, Florida
St. Louis, Missouri
Mechanicsville, Virginia
Raleigh, North Carolina
Colleyville, Texas
Colorado Springs, Colorado
Boise area of Meridian, Idaho
Riverside, California (Southern California)
Salem, Oregon
Wheaton, Illinois
St. Cloud, Minnesota
Rockville, Maryland
North Chili, New York (near Rochester)
New Johnsonville, Tennessee
Helena, Montana
Middleburg Heights, Ohio
Venice, Florida
Here is a link to my workshop calendar where you can see all of my travel schedule and to get info on beginner and advanced Brayer workshops: http://zindorf.blogs.splitcoaststampers.com/workshop-calendar
Link to my Stampin’ Up website were you can order all of your must have Stampin’ Up products from me 24-7: http://michellezindorf.stampinup.net
Frequently asked questions answers: http://zindorf.blogs.splitcoaststampers.com/frequently-asked-questions/


