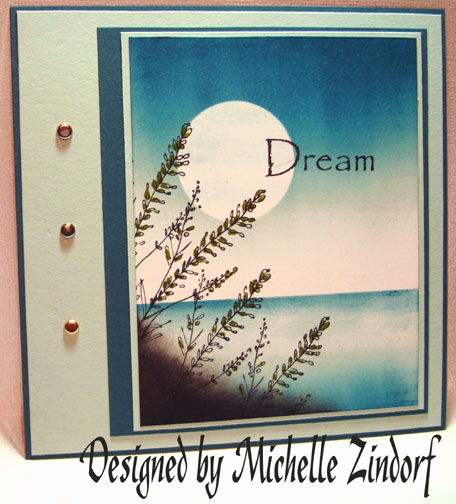
Ok, after an over whelming response I recreated this card so you can see how it was done. 🙂 But, this also leaves me with two of the same card, so I’ll give one away here as blog candy. If you would like a chance at getting it, please leave a comment on this post. If you are getting this blog update by e-mail and you wish to comment, please click this link that will take you to my blog so you can comment for a chance to win this card http://zindorf.blogs.splitcoaststampers.com/2008/06/25/isc-leaf-in-pond-tutorial/
I’ll use a random number generator to pick a number on Friday morning.
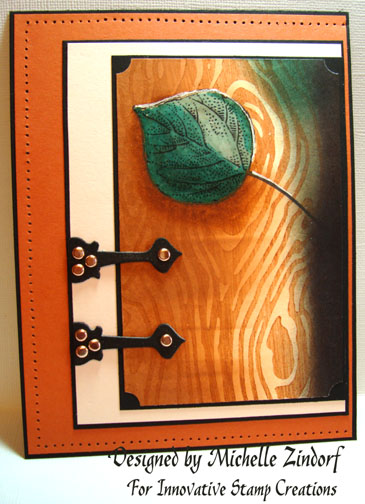
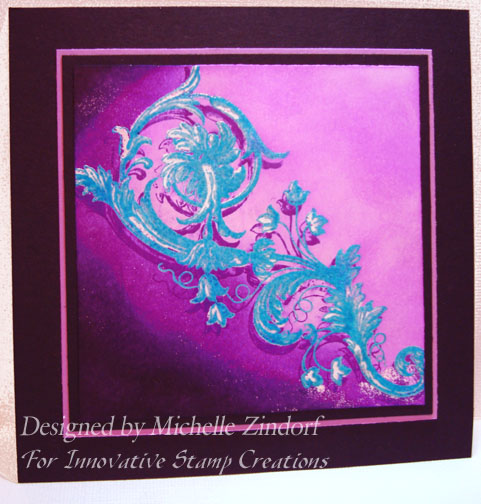
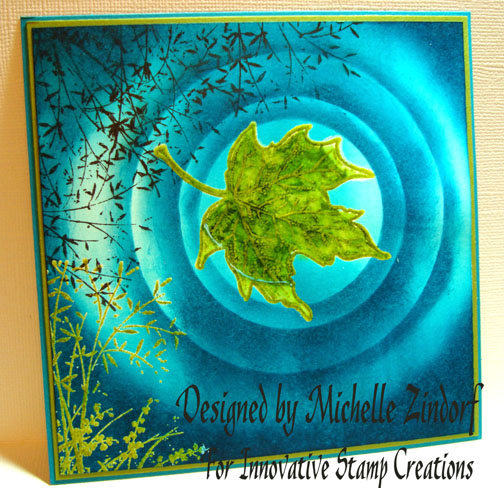
The images used on this card are by Innovative Stamp Creations, Stamp Sheets “Summer Flair” and “Fall Leaves”. Here is a link to their online store:
http://www.innovativestampcreations.com/ischomepage.html
Let’s get started on the tutorial. 🙂
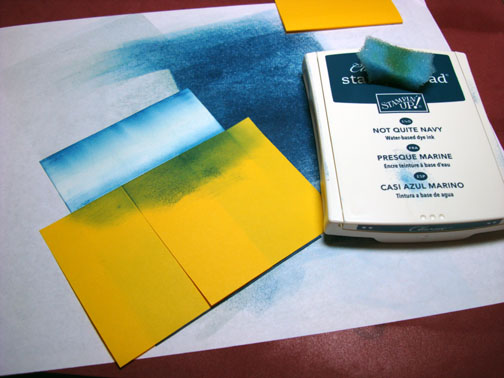
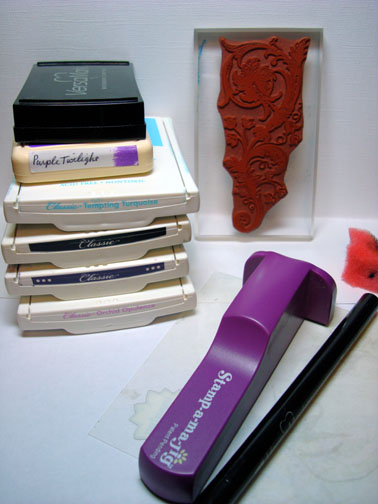
Supplies:
| Stamps: Innovative Stamp Creations “Flair of Summer” & “Fall Leaves” |
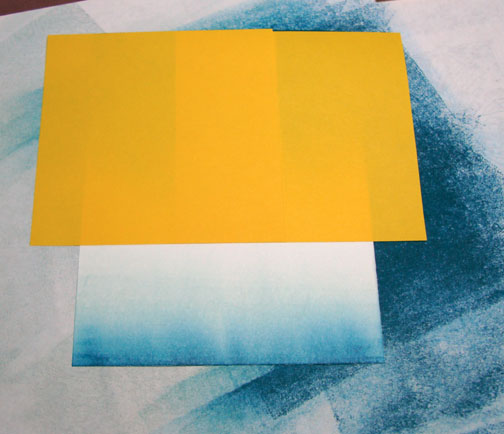
| Paper:SU Whisper White, Old Olive & Taken with Teal |
| Ink: Adirondack Lettuce, Stream & Pool |
| Accessories:Prismacolor Markers, Versamark Marker and pad, Clear embossing powder, heat gun, Coluzzle Circle Template, Sponges, brayer |

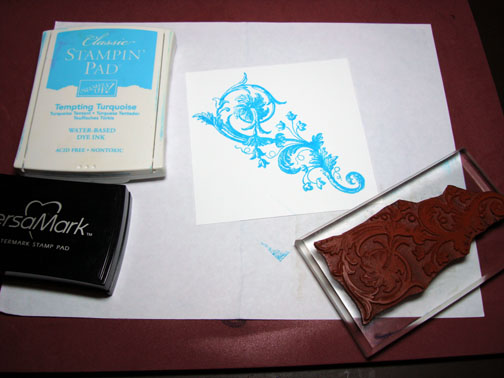
Stamped Leaf image on Whisper White card stock by first loading the stamp with Versamark and then Lettuce ink before stamping.

Heat embossed image using clear embossing powder and a heat gun.

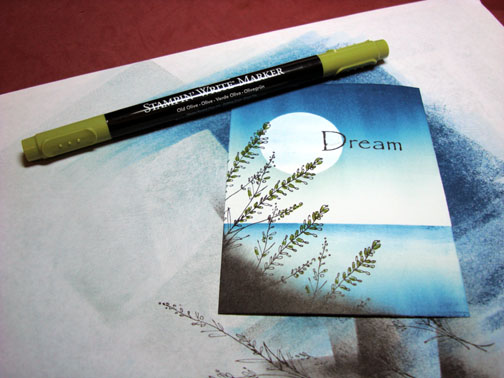
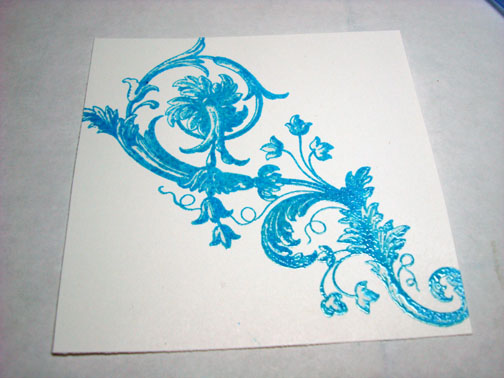
Colored in the open area of the leaf with a Prismacolor Chartreuse marker.

Colored the leaf with a Prismacolor Light Olive Green marker leaving some of the leaf points light green.

Colored over the entire image with a Versamark Marker and heat embossed using clear embossing powder and a heat gun.


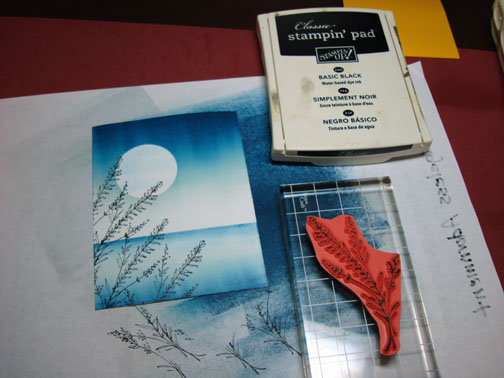
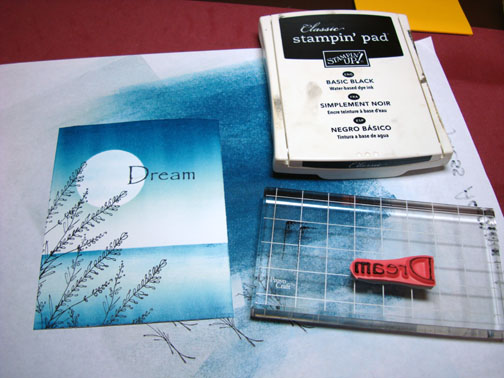
Stamped half of the grasses image by loading only part of the stamp with Versamark and then lettuce ink before stamping.

Heat embossed grasses using clear embossing powder and a heat gun.

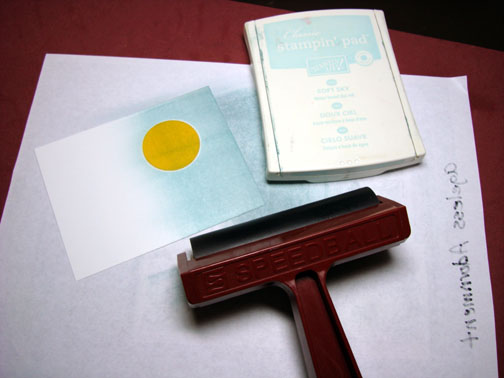
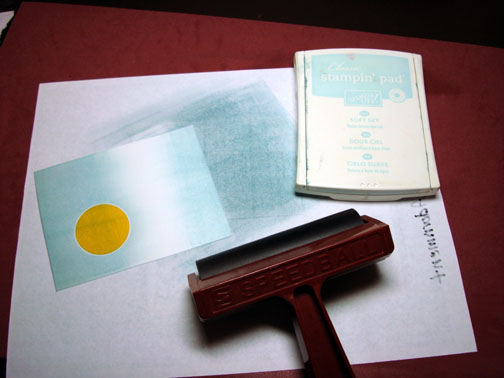
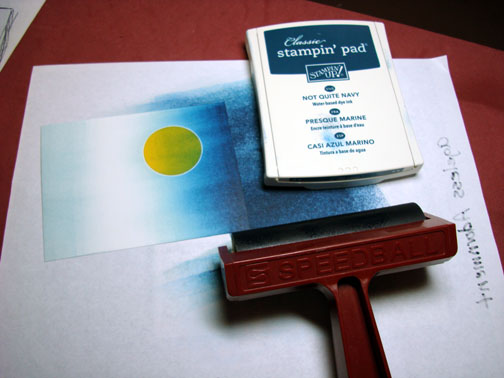
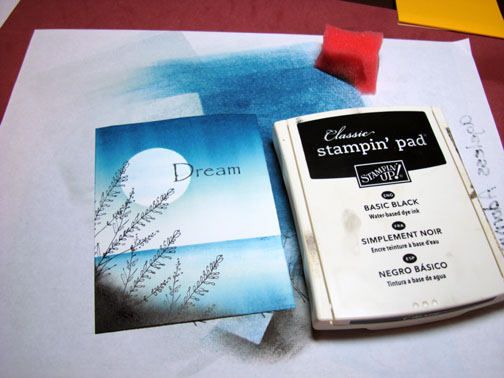
Brayered over the card stock with Pool ink.

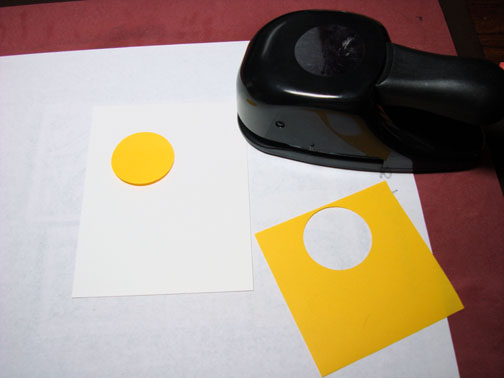
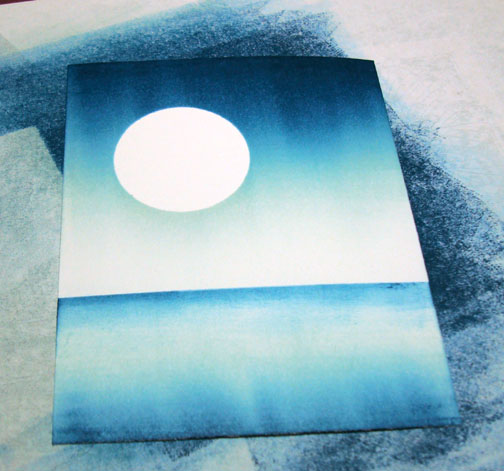
Cut various sizes of circle with a Coluzzle out of card stock to use as mask.

Using the largest circle (3 5/8″) I held it in place as I sponged Stream ink around it. I tried to have the darkest ink area right at the mask edge.


Using a smaller circle (2.5″), I put it in the middle and sponged Stream ink around the outside edge of it.


Using the smallest circle (2″), I put it in the middle and sponged Stream ink around the outside edge of it.


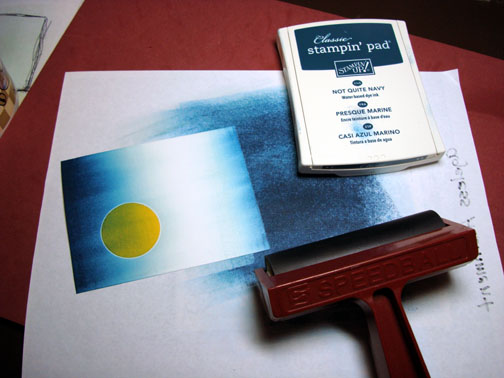
I created a larger circle on the outside of the others by sponging Stream ink in the corners of the card stock. You could use a larger circle mask for this step.

Stamped the black grasses in the upper left corner by loading Basic Black ink on half of the stamp.

To give the illusion of part of the leaf being under water I made a line between the dark green and the light green areas on the image with a White Gel pen.

There you have it! The finished cards all assembled, measuring 5.25″ x 5.25″.

Hope your day is filled with peace and cool pond breezes. 🙂
Until my next post . . . . . . . . .
Michelle