Owl in Flight – Tutorial

dsc03052.jpg

Did you miss me yesterday?  I took the day off and did absolutely nothing but lay on the coach and watch a Godfather marathon on TV.  Sometimes you just have to have a complete down day. 🙂

But I did make it to the craft room this morning to work up a new tutorial for you all.  So let’s begin.

Supplies:

Stamps: Stampin’ Up Essence of Love, Owl (maker unknown)
Paper: Stampin’ Up Whisper White, Old Olive, Night of Navy
Ink: Stampin’ Up Not Quite Navy, Night of Navy & Old Olive, Palette Noir Black
Accessories: Versamark Marker, Brads, Ribbon, Black marker, Brayer, Clear Embossing Powder, Heat Gun, Paper Towel, Sponge, Summer Sun Marker

 dsc03056.JPG

 Stamped Owl with Palette Noir Black ink on Whisper White Card stock.

This owl stamp was purchased from E-bay and I have no idea who the maker is. 

dsc03037.JPG

Colored the eyes with a Summer Sun Marker.

dsc03038.JPG

Heat set the black ink with a heat gun.

dsc03039.JPG

Went over the entire owl with a Versamark marker.  Be careful to clean your marker by wiping it on scrap paper before going over the white part of the image.  Some times the black ink will smear or make the white gray.  

dsc03040.JPG

Heat emboss the image with clear embossing powder and a heat gun.

dsc03041.JPG

Brayer Not Quite Navy ink over 2/3rds of the card stock.

dsc03043.JPG

Brayer Night of Navy ink over top 1/4 of card stock and a little at the bottom of the card stock.

dsc03044.JPG

dsc03045.JPG

Wipe the ink off of the embossed owl with a paper towel and stamp weeds with Black ink.

dsc03046.JPG

Sponged Night of Navy ink around the edges of the card stock.

dsc03047.JPG

Decided the piece looked a little bleak so I over stamped the weeds with Old Olive ink.  Now that’s better, lol.  You know I make this stuff up as I go along, so please bare with me.

dsc03048.JPG

Adhered the image to Old Olive card stock and stamped the weeds again with black ink.  Since I stamped over two layers of card stock there was a gap in the images, which I filled in with a black marker.

dsc03050.JPG

Assembled card.  Another one finished.

dsc03052.jpg

This creation is a bit masculine, but we need a few of those cards too.

I’m so glad you could join me today for this tutorial.  Give it a try!

Have a super day!

Until tomorrow. .. .. . . .


Putting it on the Table – Tutorial

dsc03033.jpg

Thought I would demonstrate in today’s tutorial how to put an object on a table/counter top using the emboss resist technique.  Your object could be a cup, vase of flowers, seashell, etc.   Use your imagination.

Let’s get started.

Supplies:

Stamps: Stampin’ Up What’s Brewin’ (retired)
Paper: Stampin’ Up Whisper White, Cranberry Crisp, Creamy Caramel, Basic Grey Design Paper
Ink: Stampin’ Up Certainly Celery, River Rock and Cranberry Crisp, Distress Ink Brushed Corduroy
Accessories: Brayer, Post it Notes, Brads, Ribbon, Sponges, Markers, Versamark Marker, Clear Embossing Powder, Heat Gun

dsc03036.JPG

Stamp cup with Certainly Celery Ink.

dsc03008.JPG

Color it in with a Certainly Celery marker.

dsc03009.JPG

Color Right side of the cup with Old Olive marker and then color over part of the Old Olive with an Always Artichoke marker to create a shadow and some dimension to the cup.  You will also want to put a little Old Olive just under the cup on the saucer.

dsc03010.JPG

Go Over the Old Olive, Always Artichoke and part of the Certainly Celery, making it heavier on the right side.  This helps give a smoother graduation in color.  I am having my light source come from the left side 🙂

dsc03012.JPG

Colored in the top of the cup with Close to Cocoa marker.

dsc03013.JPG

Went over the entire cup and saucer with a Versamark marker.

Heat embossed it with Clear embossing powder and a heat gun.

dsc03014.JPG

dsc03015.JPG

 Masked top 2/3rds of card stock with post it notes.

dsc03016.JPG

Brayered Cranberry Crisp ink over unmasked area.  Let dry for a moment and then wiped the ink off of the embossed image.  I then removed the mask.  Note:  if you take the mask off of the card stock before wiping the ink off of the embossed image you run the risk of smearing the ink wear you don’t want it.

dsc03017.JPG

dsc03018.JPG

Flip the post it notes around so they are masking the Cranberry Crisp and brayer on River Rock ink.  (Note: this is what happens when you don’t clean your brayer well in between colors, lol, oh well.)

dsc03020.JPG

Removed post it note mask. 

dsc03021.JPG

Used a Post it Note to mask the center of the card stock, so I can make a border.

dsc03022.JPG

Sponged Brushed Corduroy ink on unmasked edges.

dsc03023.JPG

Removed Post it note and stamped Steam with River Rock ink.

dsc03025.JPG

Sponged Brushed Corduroy ink around edge of Basic Grey Design Paper Layer.

dsc03026.JPG

Assembled card, but decided the image looked a little flat, so I went to working putting in a shadow.

dsc03027.JPG

Sponged Cranberry Crisp ink under and to the right side of cup.

dsc03028.JPG

Sponged River Rock ink to the top right of the cup.

dsc03029.JPG

Finished card!

dsc03033.jpg

Thanks for following along with this tutorial.  Now you give it a try!

Have a warm and wonderful day!

Until tomorrow. .. . . . . .


Warm Wishes Wanted – Tutorial

dsc03003.jpg

 Ahhhhhh warmth!  My projects have been a little cold of late.  It’s time for some warmth and a little dabbled light.

Let’s get going. . . . . . .

Supplies:

Stamps: Stampin’ Up Trees Three, Wanted, Hugs & Wishes, Simply Circles
Paper: Stampin’ Up Whisper White, Basic Black and Groovy Guava
Ink: Stampin’ Up Groovy Guava, Soft Sky, Basic Black, Pretty In Pink and Regal Rose
Accessories: Brayer, Black Marker, Stamp-a-ma-jig, 1 3/8 circle punch and post it notes

dsc03004.JPG

Started out by punching a 1 3/8″ circle from the sticky part of a Post It Note and put it on my Whisper White card stock to use as a mask for the sun.

dsc02984.JPG

Brayered on Pretty in Pink ink over top 2/3rds of the card stock.

dsc02985.JPG

Brayered on Groovy Guava ink, but did not cover the Pretty in Pink ink all the way.  Working towards a graduation in color here.

dsc02986.JPG

Brayered on Regal Rose ink at the top of the card stock, but did not cover the Groovy Guava ink completely.  We now have a nice graduation in color.

dsc02987.JPG

Covered the sky area with Post it notes to mask it.  Be sure the post it notes are straight.  You don’t want your horizon to go up hill, lol.

dsc02988.JPG

Brayer on Soft Sky ink at the bottom of the card stock.

dsc02989.JPG

Sponge on Groovy Gauva ink right at the edge of the post it notes.  I use a rubbing motion for this so I don’t get speckles.

I also swiped a little Groovy Gauva ink across the Soft Sky ink, very lightly with my sponge.

dsc02990.JPG

Removed all of the masks and swiped some Groovy Guava ink over the Sun to tone it down a little.

dsc02991.JPG

Stamped Trees with Basic Black ink.  Sorry, this Stampin’ Up Trees Three set is retired, but I love it and will never give it up until someone comes out with something comparable.

dsc02992.JPG

Stamped leaves on trees with Basic Black ink.

dsc02993.JPG

Sponged Basic Black ink on for ground.  I did use a pouncing motion with the sponge for the very top of the ground to simulate grasses in the light.

dsc02994.JPG

Stamped horse with Basic Black ink.

dsc02995.JPG

Colored Horse in with a black marker.

dsc02996.JPG

I had some stray leaves stamped, so I drew in a couple of branches with a black marker so the leaves would make more sense in the scene.

I also drew in a couple of grasses at the base of the trees with the black marker.

dsc02998.JPG

Here I took a chance and stamped some small circles with Groovy Gauva and Pretty in Pink inks on and around the trees to simulate dabbled light.  I kinda like it.  It gives a little more life to the scene.

dsc02999.JPG

Stamped sentiment with Basic Black ink, using my Stamp-a-ma-jig for placement on the Groovy Guava layer.

dsc03000.JPG

Assembled card and here it is finished!

dsc03003.jpg

Hoped you enjoyed this tutorial and give it a try.

May your day be filled with warmth and sunshine.

Until tomorrow. . . . . . . . . . .. .


Touch the Moon – Tutorial

dsc02975.jpg

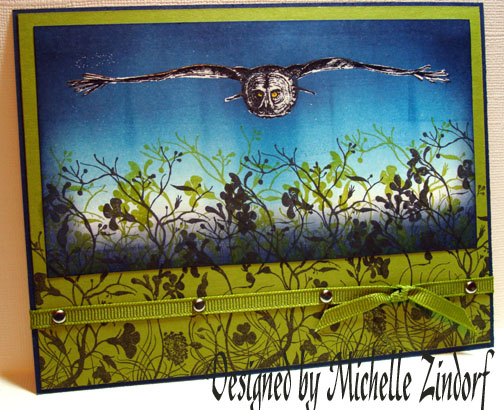
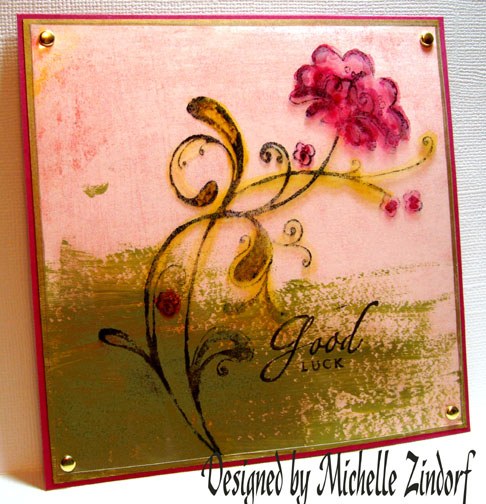
I love this Drama Queen image from Cornish Heritage Farms.  The Drama queen and the flourishes can be found here:  http://www.cornishheritagefarms.com/intro.php?osCsid=dtmnia8l444rr6anm95hm03995

You all know that stamping is my therapy, so after a rather long day at work I needed lots of therapy.  If you are looking for a fast project, this isn’t it!   But if you still want to follow along, grab a cup of your favorite brew and join be on my therapy session, lol.

And away we go. . . . . .
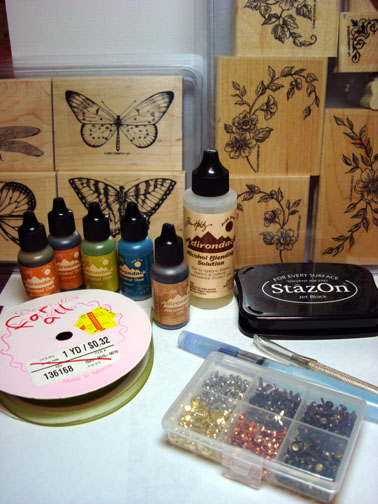
Supplies:

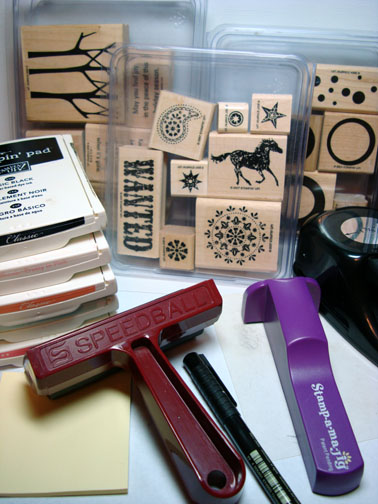
Stamps: Cornish Heritage Farms Drama Queen and Beautiful set by the Rummage Bin, Stampin’ Up Stardust
Paper: Whisper White, Really Rust, Basic Black
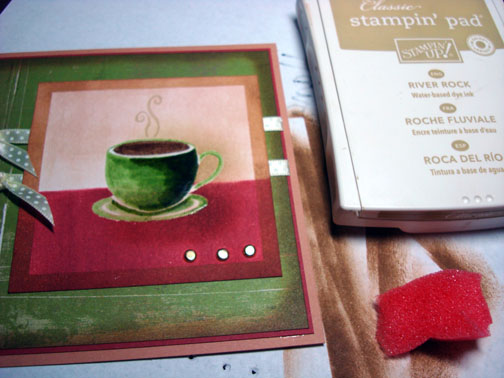
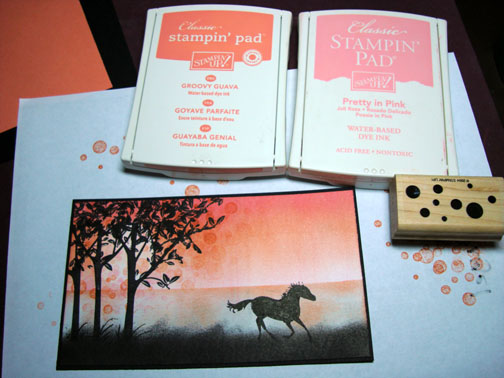
Ink: Stampin’ Up Soft Sky, Not Quite Navy, Night of Navy and Basic Black, Palette Noir Black
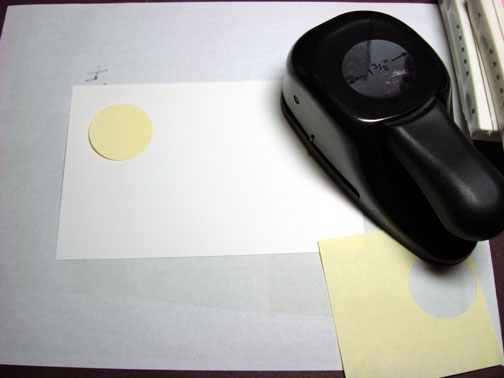
Accessories: 1 3/8″ circle punch, Brayer, Exacto Knife, Glass mat, Sponge, Prismacolor Pencils, Odorless Paint Thinner, Post It Notes, Heat Gun, Black Marke

dsc02977.JPG

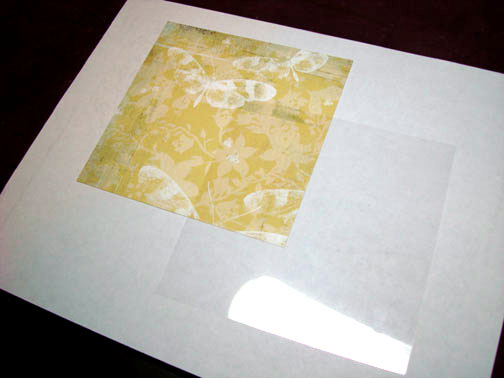
Punched a moon mask from the sticky part of a post it note and stuck it to Whisper White card stock.

dsc02937.JPG

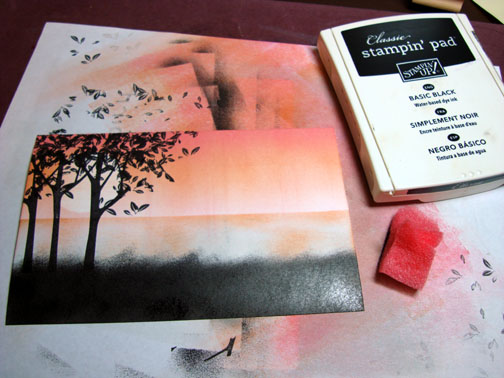
Brayered Soft Sky ink at the top and bottom of the card stock.

dsc02938.JPG

dsc02939.JPG

Brayered Not Quite Navy ink at the top of the card stock and at the bottom.  I did not cover the Soft Sky ink completely, so I have a graduation in color.

dsc02940.JPG

dsc02941.JPG

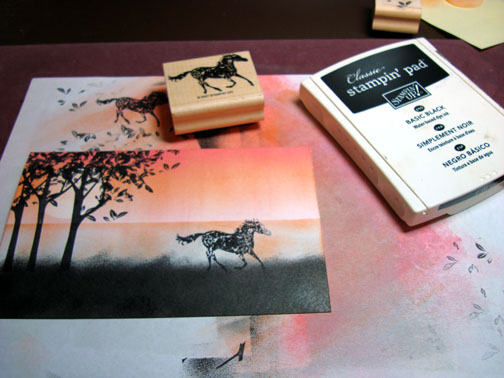
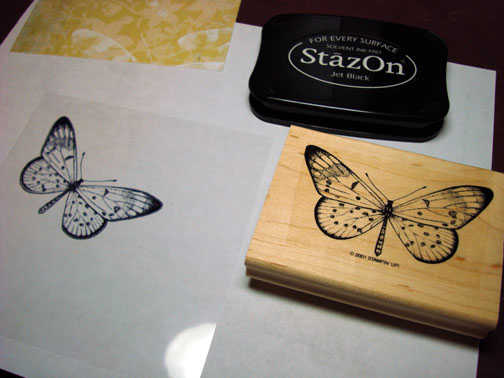
Stamped the image from Stampin’ Ups Stardust set in both Soft Sky ink and Not Quite Navy ink.

dsc02943.JPG

dsc02944.JPG

Tore Post It Notes through the sticky part and used them to mask the ground area.  Sponged on Note Quite Navy ink and than a little Night of Navy ink at the torn edge of the Post It Notes to define the horizon line.

dsc02945.JPG

dsc02946.JPG

dsc02947.JPG

Removed Post it Notes and sponged Night of Navy ink around the edges of the card stock.

dsc02948.JPG

Really wanted the middle of the card stock to glow with light, so I decided to get really dark at the edges.  Sponged on Basic Black around the edges and a little into the Stardust images.

dsc02949.JPG

On to the Drama Queen!  On a separate piece of Whisper White card stock I stamped the Drama Queen with Palette Noir Black ink.  Heat set the image with my heat gun.  This helps keep the ink from smearing in the next steps.

dsc02950.JPG

dsc02951.JPG

Time to have some coloring fun using Prismacolor Pencils and Odorless Paint Thinner.   I don’t use blending stumps.  I just dip my pencil in the paint thinner and color with it in very small circular motions.  The paint thinner makes the soft leads melt like butter onto your card stock.  I start with my lightest colors first and graduate to my darker colors, blending as I go with the pencils. 

Sorry, some of the pictures are a little washed out.  My poor old tired eyes need lots of light to color and that tends to make for bad photography.  Bare with me, I’m not a professional, just flying by the seat of my pants every day on this planet!

Enough rambling, let’s color!

I keep a very small container that I poor about 1/4 inch of Paint Thinner in at a time.  I have a tight fitting lid for the container so I never have to pore it out.  I just keep adding to it when it gets low.

This is what I dip my pencil into as I color.  When coloring, you can tell when you need to re-dip your pencil in the paint thinner.  Your coloring won’t look as smooth.

dsc02954.JPG

Colored queen’s hands and face with Light Peach.

dsc02953.JPG

Colored her robes with Poppy Red.

dsc02955.JPG

Colored her robe in the spotted areas with Scarlet Lake.

dsc02956.JPG

Colored the heavily spotted areas of her robe with Rouge Cramoisi (spelling?)  Hard to see the color name on the pencil.

Each time I add a new color I blend it into the previous one to get a graduation in color.

dsc02957.JPG

Last pencil color, Tuscan Red was used right at the bottom of the previous color.  I also, picked my first color back up and darkened areas of her robe to create light and shadow.

dsc02958.JPG

dsc02960.JPG

Cut the image out using a very sharp Exacto Knife and glass mat.  When cutting with an Exacto Knife I don’t move the knife.  I move the card stock.  This gives you very nice smooth curves.  The only time I move my knife is when I am cutting straight lines.  Note:  if your knife starts to hang up on the card stock, you need to replace your blade.

dsc02962.JPG

dsc02963.JPG

I went over the black trim in her Robe with a Black marker to make it more dramatic.  It was looking a bit washed out.

dsc02965.JPG

Adhered the Queen to the scene using my favorite glue.

dsc02966.JPG

Stamped the flourishes using Basic Black ink.  Since I stamped over two layers of card stock (the queen and the background) it left little gaps in my flourish images, so I just cleaned them up with a black marker.

dsc02967.JPG

dsc02968.JPG

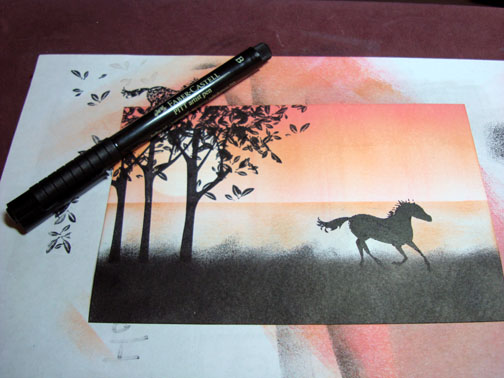
Finishing touches:  I didn’t like the Soft Sky Stardust images in the scene.  You just couldn’t see them well so I over stamped them with Not Quite Navy ink and then added a few more at the very top of the scene in Basic Black ink.

dsc02970.JPG

dsc02972.JPG

Are you still with me?  Well if so, we are finished.  I just added two layers and done.

dsc02975.jpg

I hope you enjoyed this therapy session, lol, I mean tutorial.  If you did give me a shout out in the comments section so I know.

Best wishes for a super day!

Until tomorrow. .. .. . . .


CC159 Simplify – Tutorial

dsc02931.jpg

I realize it is Spring, but I wanted to do the Color Challenge on Split Coast Stampers and these colors just remind me of Winter.  If you would like to play along, here is the link:  http://www.splitcoaststampers.com/forums/showthread.php?t=335287

Supplies:

Stamps: Cornish Heritage Farms Primitive Beginnings
Paper: Whisper White, Basic Black, Soft Sky
Ink: Stampin’ Up Basic Black, Going Gray & Soft Sky
Accessories: Versamark Pad and marker, Going Gray Marker, Post It Notes, Brads, Ribbon, Brayer, Sponges, Clear Embossing Powder, Heat Gun

dsc02936.JPG

Stamped House on Whisper White card stock by first loading my stamp with Versamark and then Basic Black ink.  Heat embossed image with clear embossing powder and heat gun.

dsc02913.JPG

Colored the windows in with a Going Gray maker.

dsc02914.JPG

Went over entire house with a Versamark Marker and then heat embossed it with clear embossing powder and a heat gun.

dsc02915.JPG

dsc02916.JPG

Brayered on Soft Sky ink for sky, keeping it darker at the top of the card stock.

dsc02917.JPG

Brayered on Going Gray for ground, keeping it darker at the bottom of the card stock.

dsc02918.JPG

Tore two Post It notes to use as a mask.  Note:  I tore through the sticky part so some of it is remaining so it will stick to the card stock.

dsc02919.JPG

Sponged on Soft Sky Ink right at the torn edge of the Post It Notes.

dsc02920.JPG

Moved the Post It Notes down a little on the card stock and sponged on Going Gray at the torn edge.  I’m just putting a hint of color on at a time.

dsc02922.JPG

dsc02923.JPG

I continue to move the Post it note mask down a little at a time and sponge more Going Gray ink at the torn edge each time I move it.

dsc02924.JPG

Decided I wanted it darker up around the house so I moved my Post it note again to the horizon line and sponge on Going Gray ink at the torn edge.

dsc02925.JPG

Stamped Trees with Going Gray ink.

dsc02926.JPG

Stamped Sentiment with Basic Black ink.

dsc02927.JPG

Added a shadow on the trees with a Going Gray Marker.

dsc02928.JPG

Created a bit of shadow under the sentiment by sponging Going Gray ink under it.

dsc02929.JPG

Assembled Card.  Here it is finished.

dsc02931.jpg

I hope you enjoyed this tutorial and feel inspired to try out the color challenge.

Wishing you a day that is much warmer than this card appears.  I think I will save this creation for next winter.

Until tomorrow. . . . . . .


Sunset Wheat – Tutorial

dsc02896.jpg

I have so many stamps that have not seen ink yet.  This wheat stamp from Cornish Heritage Farms is one of them.  Here is their wonderful website:  http://www.cornishheritagefarms.com/intro.php?osCsid=dtmnia8l444rr6anm95hm03995  check it out.

dsc02875.JPG

Let’s get started.

Supplies:

Stamps: Cornish Heritage Farms Wheat
Paper: Stampin’ Up Whisper White, More Mustard, Really Rust, River Rock, Basic Black
Ink: Stampin’ Up River Rock, More Mustard, Pumpkin Pie, Really Rust, Cranberry Crisp, Apricot Appeal and Basic Black
Accessories: Versamark pad and marker, Brayer, Clear Embossing Powder, Heat Gun, Post It Note, Circle Punch, Brads

dsc02903.JPG

On Whisper White card stock, stamped first row of wheat, loading my stamp first with Versamark and then with River Rock ink.  Heat embossed the images with Clear embossing powder and a heat gun.

dsc02876.JPG

I wanted the wheat to stay light in color so I went over just the heads of the wheat with a Versamark Marker and then heat embossed them again with clear embossing powder and a heat gun.

dsc02878.JPG

dsc02879.JPG

Stamped second row of wheat the same as the first, by loading my stamp with Versamark then with River Rock ink and heat embossing with clear embossing powder.  Then going over the wheat with a Versamark marker and heat embossing again with clear embossing powder.

dsc02880.JPG

dsc02883.JPG

dsc02884.JPG

Punched a circle out of the sticky part of a Post It Note and used it as a mask for the sun.

dsc02885.JPG

Brayered More Mustard ink over the entire piece of card stock.

dsc02886.JPG

Brayered Pumpkin ink over top 1/3 of card stock.  Then brayered Really Rust ink over top 1/2 of card stock.

dsc02887.JPG

Brayered Cranberry Crisp ink over top 1/4 of card stock and a little at the bottom.  We now have a graduation of color going on.

dsc02888.JPG

Removed Post It Note mask and brayered on Apricot Appeal to tone down the starkness of the sun.

dsc02890.JPG

Stamped more wheat with Basic Black ink.

dsc02891.JPG

Sponged Basic Black ink at the bottom and top of the card stock.  Used a clean part of the sponge to wipe the black ink off of the embossed images.

dsc02893.JPG

Assembled card.

dsc02893.JPG

Assembled card.

dsc02896.jpg

Glad you were able to join me for this tutorial.

Have a beautiful day!


At the Lake – Tutorial

 dsc028732.jpg

Well we have already been to the beach in a tutorial, so let’s go to the lake. 🙂

Supplies:

Stamps: Stampin’ Up Embrace Life and Holidays & Wishes (sentiment), Water stamp by A Stamp in the Hand
Paper: Stampin’ Up Whisper White, Going Gray and Blush Blossom
Ink: Adirondack Aqua, Stonewashed, Lake Mist & Pesto, Stampin’ Up Basic Black, Going Gray & Bordering Blue
Accessories: Stampin’ Up markers Blush Blossom, Mellow Moss, Bordering Blue & Always Artichoke, Versamark Pad & Marker, White Gel Pen, Brads, Brayer, Clear Embossing Powder, Heat Gun, Sponges

dsc02870.JPG

On a piece of Whisper White card stock I stamped the flower stems using my Stamp-a-ma-jig for placement by first loading the stamp with Versamark and then loading it with Black ink.  You can use Versamark and black embossing powder for this step too if you wish.

dsc02843.JPG

dsc02844.JPG

dsc02845.JPG

I heat embossed each image as I stamped it using clear embossing powder and a heat gun. 

Note:  I keep my clear embossing powder in a sandwich sized plastic container so I don’t have to try to put it back into the small container it came in.  I only own clear embossing powder.  That is why I load my stamp first with Versamark and then the colored ink in projects.  This method allows me to embossing in any color!

dsc02846.JPG

Colored bottom of the flowers with a Blush Blossom marker.  I left a lot of White showing on the flowers.

dsc02847.JPG

Colored over the flowers with a Versamark marker and then heat embossed the flowers with clear embossing powder and a heat gun.

dsc02848.JPG

Brayered on Aqua ink over 2/3rds of the card stock.

dsc02849.JPG

Brayered on Stonewashed ink over 1/2 of the card stock and not completely covering the Aqua ink brayered on in the last step.  Working on a gradution in color here.

dsc028502.jpg

Brayered Lake Mist ink on top 1/4 of card stock.

dsc02851.JPG

Wiped ink from embossed flowers using a paper towel.  Stamped water lines stamp with Lake Mist ink on top 1/3rd of card stock. 

Note:  This water lines stamp was purchased at a garage sale a long time ago for $1.  All it says on the stamp is “A Stamp in the Hand, 1982-1995.  I’m not sure if it is still obtainable or not.  There is not item number and I don’t know what the real name of the stamp is.

dsc02852.JPG

Stamped Waterlines stamp in the middle area of card stock with Aqua ink.

dsc02853.JPG

 Stamped water lines stamp on bottom 1/3 of card stock with Stonewashed ink.

dsc02854.JPG

Stamped weeds at bottom of card stock using Pesto ink.

dsc02855.JPG

Colored weed leaves with a Mellow Moss marker.

dsc02856.JPG

Colored bottom of the weed leaves with an Always Artichoke marker.

dsc02857.JPG

Stamped weeds again with Lake Mist ink, but stamped them just to the right of the previously stamped weeds.  I’m trying to create a shadow of the leaves on the water here.

dsc02858.JPG

Colored the shadow weeds with a Bordering Blue marker.

dsc02859.JPG

Put White Gel Pen on just the tips of green weed leaves for highlights.

dsc02860.JPG

Sponged on Going Gray at the top of card stock.

dsc02861.JPG

Sponged on Bordering Blue ink at the bottom of card stock.

dsc02862.JPG

Stamped more water lines, at the top with Going Gray and at the bottom with Bordering blue.

dsc02863.JPG

Assembled card front and added brads and stamped the sentiment using my Stamp-a-ma-jig for placement and black ink.

dsc02864.JPG

Finished card!  This card measures 9.25″ x 4″.  It will fit in a #10 sized envelope.

dsc028732.jpg

Thanks for following along with this tutorial.  I hope it has inspired you in some way.

Have a safe and happy Easter. 

Until tomorrow. . . . . .


Emboss Resist Nightingale – Tutorial

dsc028362.jpg

I came home from work last night to find a wonderful package filled with new stamps sets waiting for me at the door.  Thought I would try one out.  This set is from See D’s at www.InqueBoutique.com  named “Nightingale.”  I love those flourishes!

These are my first sets from See D’s and they are probably named that due to the fact they are unmounted and have the picture of the stamp on the back side so when you put it on your clear mount so you can see the image and exactly were you are going to stamp it on your paper.  Nice huh?

dsc02814.JPG

Let’s get started with the tutorial.

Supplies:

Stamps: See D’s Nightingale, Stampin’ Up Antique Background
Paper: Whisper White, Cool Carribean, Chocolate Chip, Basic Black
Ink: Stampin’ Up Basic Black, Cool Carribean, Chocolate Chip, Adirondack Ginger and Stream
Accessories: Versamark Pad and Marker, Photo Corner Punch, Copper Brads, Piercing Tools, Brayer, Clear Embossing Powder, Heat Gun, White Gel Pen, Chocolate Chip Marker, Aqua Painter, Paper Towel

dsc02841.JPG

I started out with Whisper White card stock.  Loaded the stamp with Versamark and then Black ink and stamped the bird.

dsc02815.JPG

Heat embossed the bird with clear embossing powder and heat gun.

dsc02816.JPG

Stamped the flourish by loading the stamp first with Versamark and then loading it with Ginger ink.

Heat embossed the flourish with clear embossing powder and heat gun.

dsc02817.JPG

dsc02818.JPG

Watercolored the bird using Cool Carribean ink and an Aqua brush.  With my ink pad closed I squeezed it so the pad would press against the lid and create a pudding of ink.  I used the puddle to paint with.

dsc02819.JPG

Shadowed the belly and wings with Aqua Brush and Stream ink.

dsc02820.JPG

dsc02820.JPG

Colored over the entire bird with Versamark marker and heat embossed using clear embossing powder and a heat gun.  Notice the black embossing did smear some when I used the Versamark marker.  That is the yellow/brownish color you see.

dsc02821.JPG

dsc02822.JPG

Now for the scary part.  Heavily Brayered Chocolate chip ink over entire piece of card stock.  The embossed images will resist the brayered ink.

dsc02823.JPG

dsc02824.JPG

Let the ink dry for a few moments and then wipe the ink off of the embossed images with a paper towel.

dsc02825.JPG

Stamped Antique Background stamp over the entire piece of card stock with Chocolate Chip ink.  Note I lay my background stamp wood side down and press my ink pad on top of it to ink it.  I then lay the card stock face down on the background stamp and put a piece of scrap paper over it and lightly rub over it to transfer image.

dsc02826.JPG

Wait a few moments to let the ink dry and then use a paper towel to wipe the ink off of the embossed images.

dsc02827.JPG

Put a shadow on the undersides of the flourish using a Chocolate Chip Marker.  (Note:  this would look more dramatic if I would have used a black marker).

dsc02828.JPG

Used a white gel pen to put in highlights on the top sides of the flourish, bird’s tail and the top of the bird.  This step really adds dimension.

dsc02831.JPG

Put a shadow under the birds belly with a Chocolate Chip marker.

dsc02832.JPG

Started assembling the card layers and used a photo corner punch with black card stock for photo corners.

dsc02833.JPG

Added copper brads to the photo corners and used my piercing tools along top and left sides of card front.

dsc02834.JPG

Here we have another finished creation.

dsc028362.jpg

Thanks for coming along on my trial run of these new stamps.

Hope your day is filled with the soothing sounds of birds singing.  It is Spring after all!


Alcoholic Butterfly :) – Tutorial

dsc02786.jpg

I used this technique in yesterday’s tutorial and I found it to be fairly quick and easy, but still has a great wow factor.  Here is another tutorial on alcohol inks and transparency film.

Supplies:

Stamps: Stampin’ Up Wonderful Wings and Toile Blossoms
Paper: Old Olive, Basic Grey Design Paper
Ink: Adirondack Alcohol Inks Butterscotch, Caramel, Latte, Lettuce and Stream, Stazon Black
Accessories: Alcohol Blending Solution, Aqua Brush, Brads, Transparency Film, Ribbon, Styrofoam Plate, Piercing Tool

dsc02798.JPG

Started out with a 5″x 5″ piece of transparency film and Basic Gray Designer paper.

dsc02774.JPG

Stamped Butterfly and flowers using Stazon Black ink.   Keep in mind that your finished image will be reversed in this technique.

dsc02775.JPG

dsc02776.JPG

Let the ink dry and then I flipped the transparency over, ink side down onto the Design paper.

dsc02777.JPG

Put about an inch of Alcohol Blending Solution in an Aqua brush.

dsc02778.JPG

Put a few drops of Lettuce Alcohol Ink on a Styrofoam plate and picked the color up with the Aqua brush and painted the leaves very loosely.  I’m painting on the side that does not have the Black Stazon on it.

dsc02779.JPG

Painted the inside of the flower petals loosely with Caramel Alcohol ink.

dsc02780.JPG

Painted the outside of the flower petals and buds loosely with Latte Alcohol ink. 

dsc02781.JPG

Painted the inside of the butterfly wings with Butterscotch Alcohol ink.

dsc02782.JPG

Painted the outsides of the butterfly wings with Stream Alcohol ink. 

Note:  if you get a bit of ink some where that you don’t want it.   Clean your brush and just use the alcohol filled aqua brush to whisk it away. 🙂

dsc02783.JPG

The butterfly was too bright for my liking so I tone it down with Caramel Alcohol ink.

dsc02784.JPG

Assembled card using brads to hold the transparency film in place on the card front.

Finished card!

dsc02786.jpg

Hey, if you like this tutorial and I haven’t bored you half to death, give me a shout out in the comments section below.  🙂  I love to hear from you.

Hope your day is filled with butterflies and flowers!


Alcoholic Flower – Tutorial

dsc02770b.jpg

This card is an experiment with Alcohol inks and transparency Film.  I found this great on line tutorial (here is the link:  http://ironorchiddesigns.typepad.com/iod/2008/03/clear-paintable.html)  and decided to play around with the technique.

Supplies: 

Stamps: Basic Grey Two Scoops/Flower Swash, Stampin’ Up Sincere Salutations
Paper: Purely Pomegranate, Basic Grey Two Scoops
Ink: Adorpmdacl Alcohol Inks – Cranberry, Currant, Lettuce and Gold Mixative, Stazon Black, Distress ink Walnut Stain
Accessories: Alcohol Blending Solution, Aqua Brush, Piercing Tool, Brads, Sharpie Gold Paint Pen, Sponge, Distress Crackle Paint – Peeled Paint, Transparency Film, Styrofoam plate

dsc02773.JPG

On a 5″x5″ piece of Basic Grey Two Scoops Design Paper, painted Distress Crackle Paint – Peeled Paint color on lower left hand corner.  This is my first time using this Crackle paint.  It has a handy little built in brush.  The thicker you apply it the more cracks that appear in the paint.    Let dry throughly.

dsc02751.JPG

I’m using the Basic Grey Two Scoops Flower Swash Set.  I don’t have a clear mount big enough for the large flower in this set so I improvised by sticking it on the wood of one of my background stamps.  I’m so cheap, no wait, thrifty someone once told me, lol.

dsc02752.JPG

I stamped the stamp on a Transparency Film with Stazon Black Ink.  Beware this will stain your stamp.  I was not able to get all of the ink off of it.  I’m not one to freak out about stains on my stamps, but some of you don’t like it, I know.

dsc02753.JPG

When the paint dried on the design paper I flipped the transparency film over so the ink side is facing down and put it over the design paper. 

dsc02755.JPG

I put some of the Alcohol Blending Solution in an Aqua Brush.

dsc02756.JPG

I put a couple of drops of Lettuce Alcohol Ink on a Styrofoam plate.  Picked up some of the color on the Aqua brush and loosely painted over the leaves and stem of the image on the transparency.  This ink drys super fast and flows like butter with the Alcohol filled aqua brush.

dsc02757.JPG

I started painting in my flower with Cranberry.  You will want to clean your brush in between the Lettuce and Cranberry ink by wiping it on your scrap paper a few times.

dsc02758.JPG

Outlined the flower loosely with Currant Alcohol ink.

dsc02759.JPG

Although you can’t see it in the pictures, I put a little Gold Mixative on the larger leaves. 

dsc02760.JPG

Removed Transparency film from Design Paper and outlined the paper with a Sharpie Gold Paint Pen.  This creates a layered look without the bulk, plus gives it a little bling. 🙂

It’s simple to do, just rest your marker on the side of the cardstock and run it along the edge.  One swipe usually does it.  It will put half of the color on the card stock and half on your scrap paper with an even line.

dsc02762.JPG

Put a little Walnut Stain ink on the crackle paint to highlight cracks.

dsc02763.JPG

Stamped sentiment with Stazon Black ink.

dsc02764.JPG

Glued card stock layers together and a fixed the transparency to the top with brads.  I use my piercing tool to make the holes for the brads.

dsc02765.JPG

Finished card!

dsc02770b.jpg

I really like painting with these Alcohol inks on the transparency.   It goes on very smooth and dries quickly.  I’ll have to play some more with this technique. 

Give it a try!

Have a bloom’n wonderful day!