Just Swinging – Tutorial #574

Hi There,

The ground is covered with snow here in West Alexandria, Ohio and I have gotten the itch to dig in the dirt.   Spring cannot get here fast enough for me.  It’s the gardener in me that just wants to get her hands dirty.   But, since I cannot dig in the frozen ground I lassoed my husband in to helping me with my seed starting project.

I usually start my vegetable seeds for my garden by window light but my plants sometimes get leggy so we put this adjustable light stand together last night from scratch.  It’s made out of PVC pipe and it was so simple to assemble.   Here is a link to the blog that I got the instructions from:  http://nogginsandnonsense.blogspot.com/2011/03/ready-set-go-garden-go.html

I just thought I would pass this info along to my gardening friends.  This stand is economical and rocks!

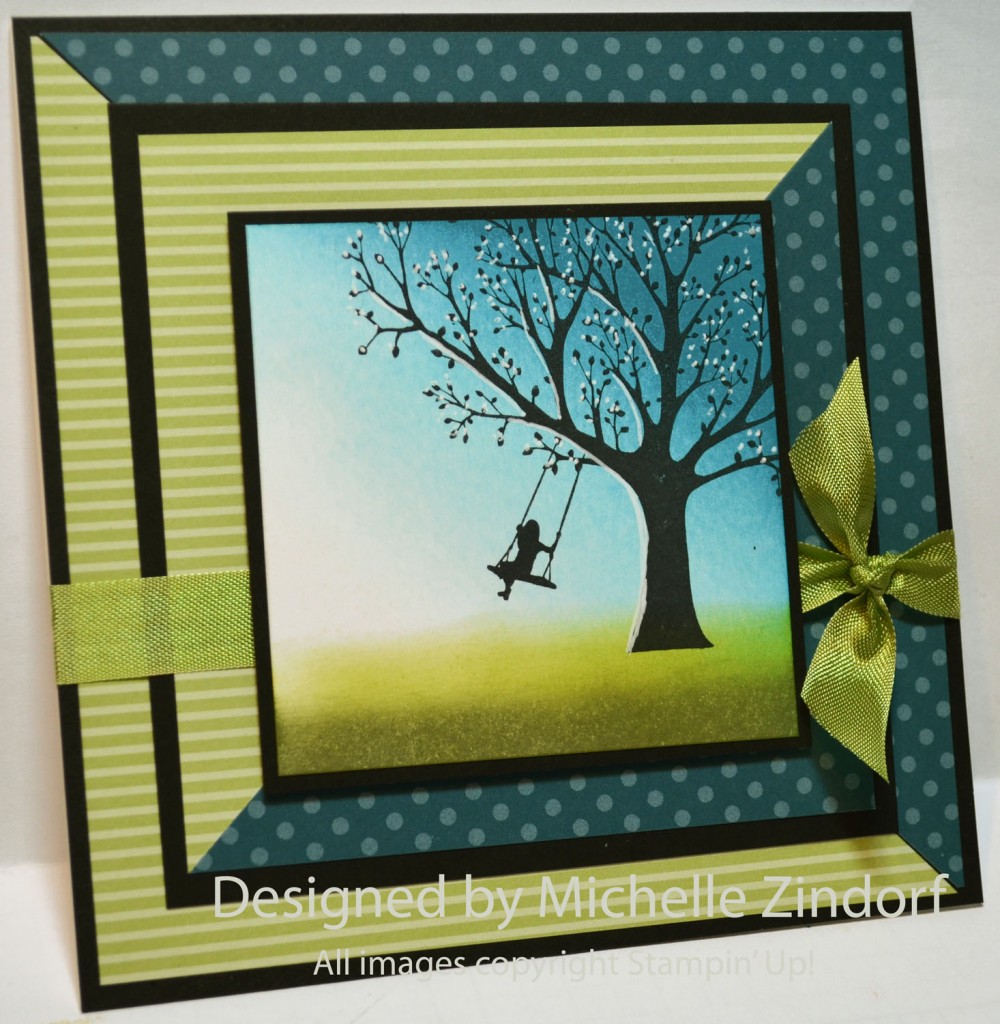
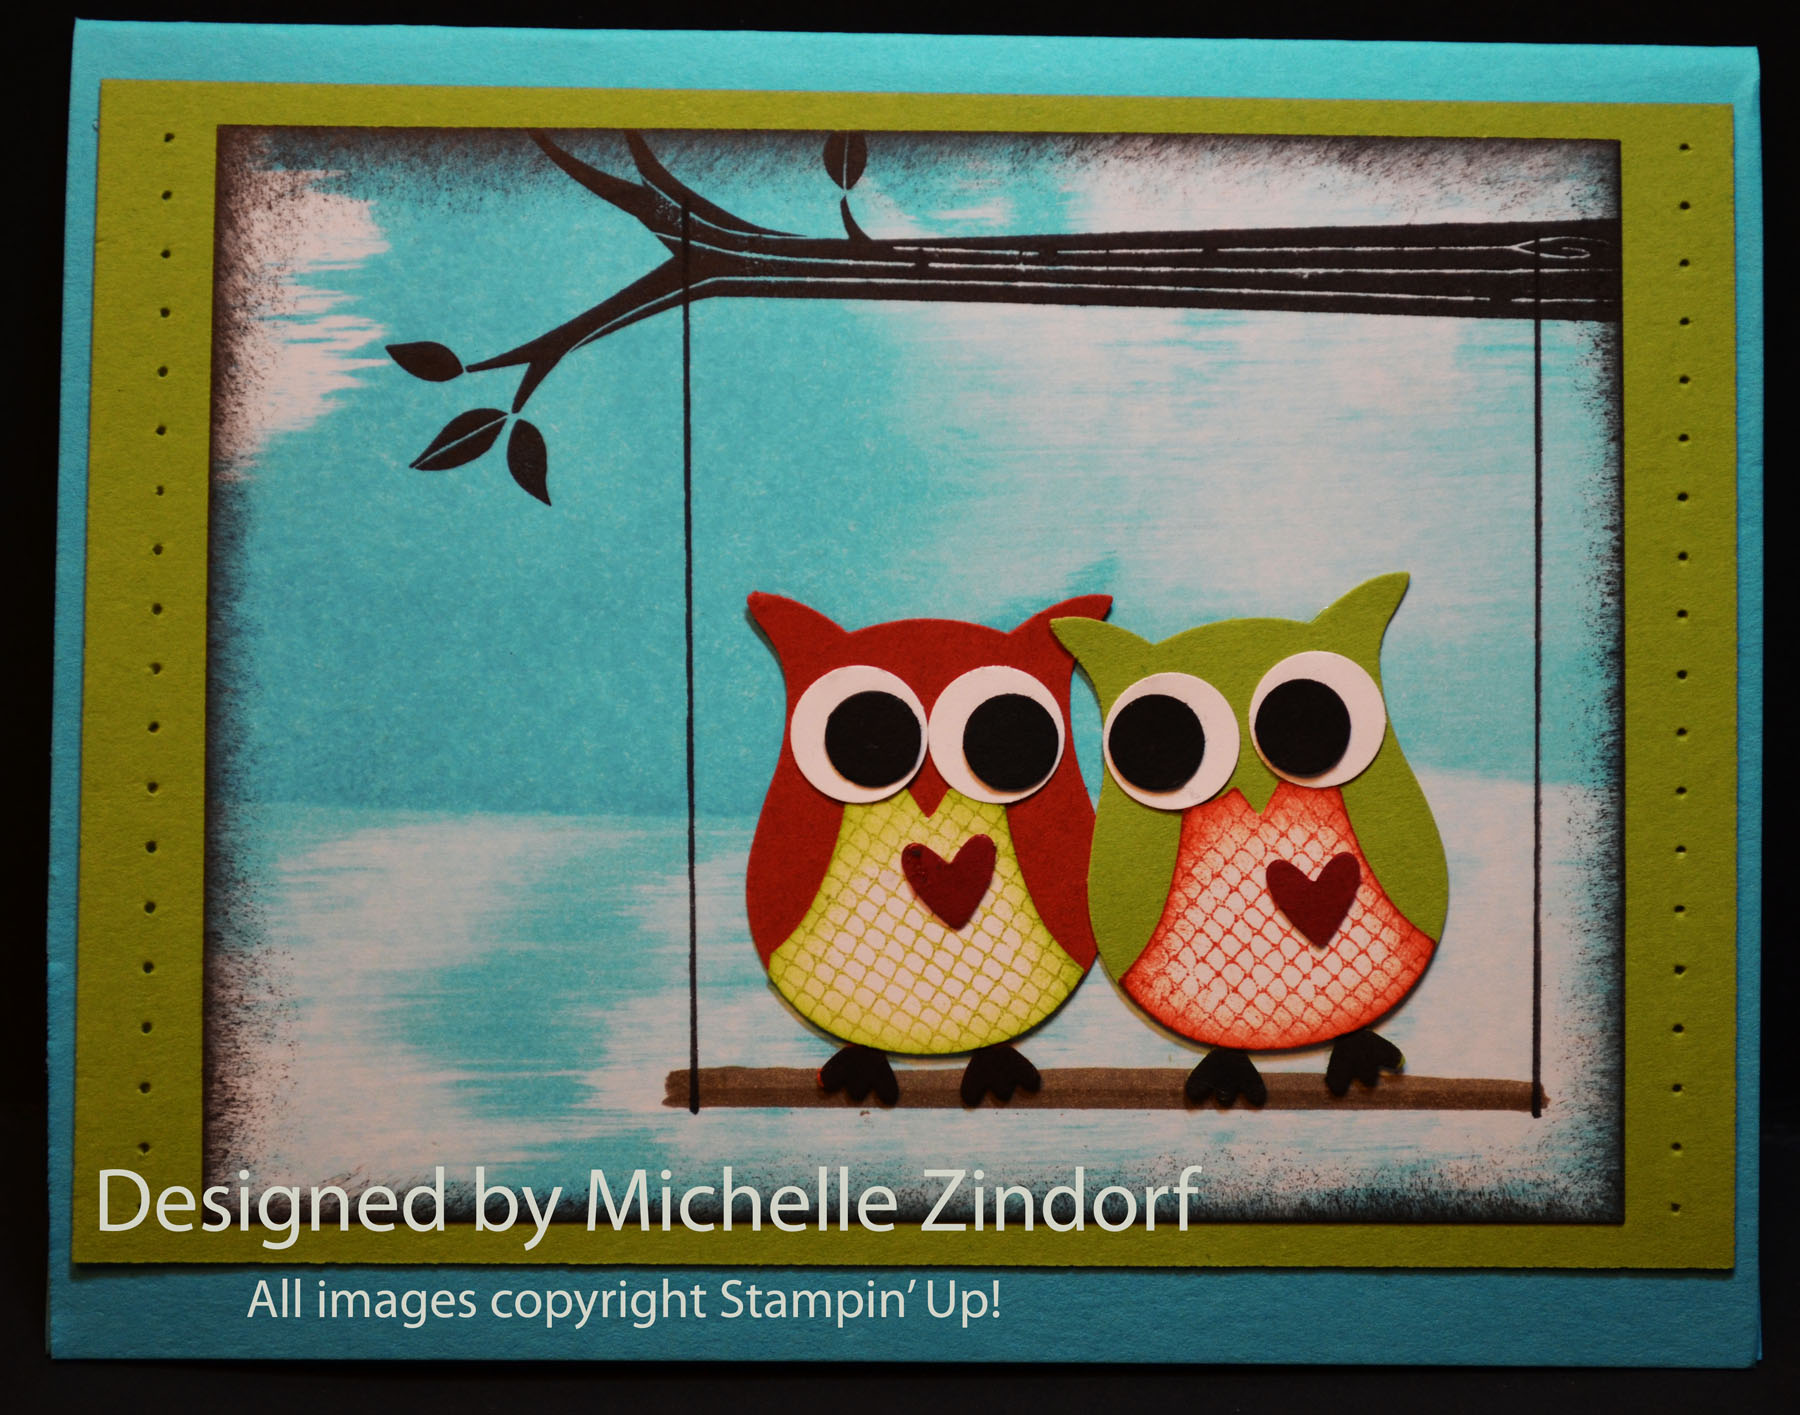
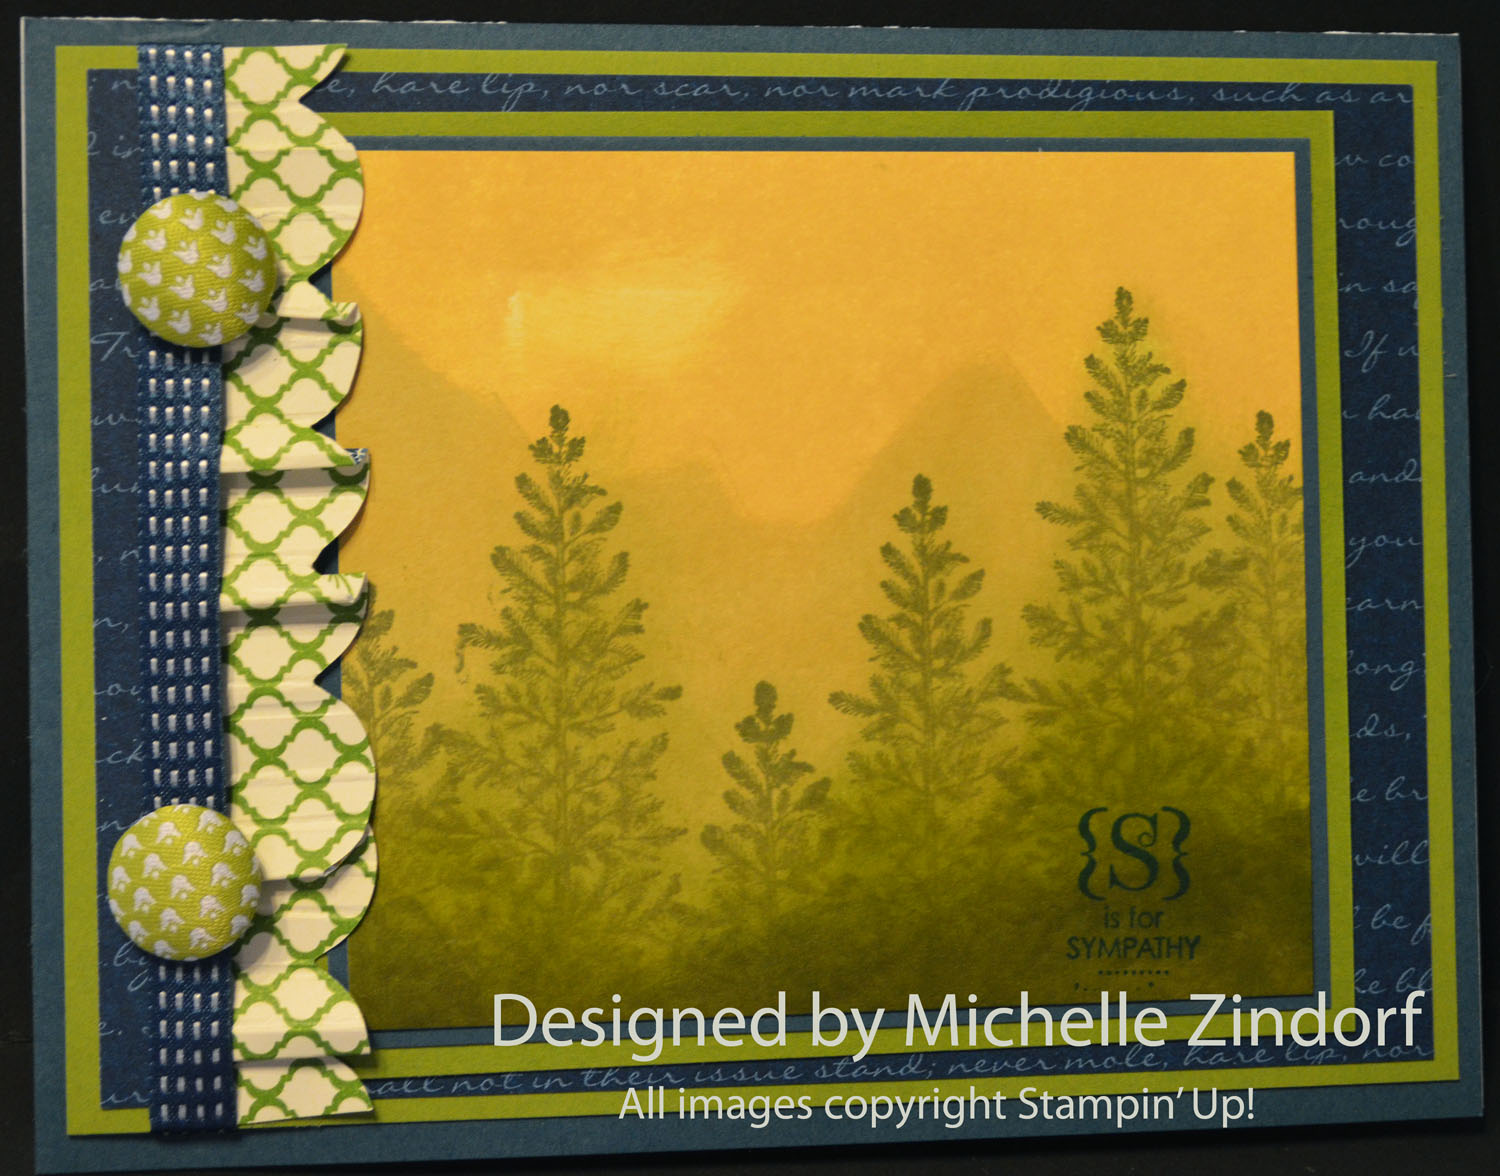
About what you really come to my blog for. . . . .I created a tutorial for you today using the Stampin’ Up! set Forever Young.  Oh, to be young and just hang out on a swing.   Don’t you miss those days?   Why did we ever want to grow up?

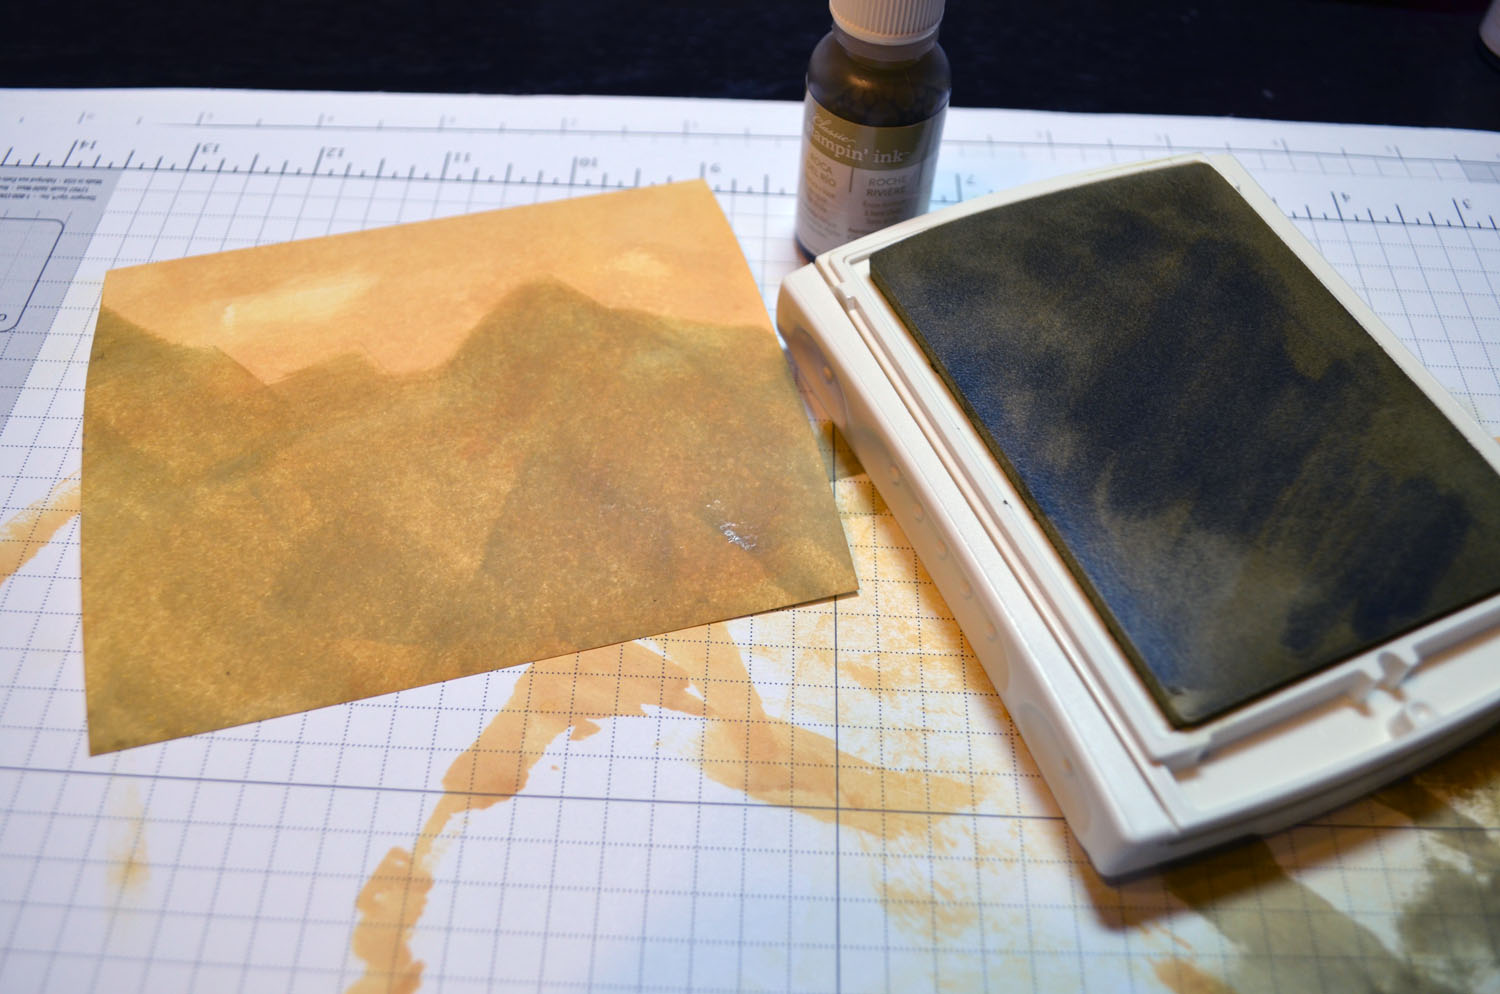
I brayered my sky in at an angle on this scene to create this lovely light effect.   Check out my tutorial for this project below.

********************************************

I’ve added this card to my sales page.  CLICK HERE TO CHECK IT OUT

********************************************

A few reminders of things you will want to check out. . . . . . . .here are some links:

Stampin’ Up’s fabulous Spring Catalog Get your supplies to rock those Spring projects.

Sale-a-bration brochure showing the totally terrific stamps and things you can get for free with a $50 order.

Paper Pumpkin Monthly Kits, hello, they are wonderful.

Stampin’ Up! Clearance Rack Hurry, you don’t want to miss out on these deals.

***********************************************************

Michelle’s Free Stamp Program

Don’t miss out on my Customer’s free stamp set program. Check it out!  Along with a handmade thank you card from me for your $50 order you will receive a token for each $50 in product you ordered using me as your demonstrator.  After you have collected 10 tokens you will receive a free current stamp set of your choosing, a value of $39 or less.   Here is a link to my online shopping page that you can shop at 24/7 (from the comfort of your home, even in your pj’s) and the products will be shipped directly to your door step from Stampin’ Up.   CLICK HERE TO SHOP.   My free stamp set program will be an on going program.  :)

*************************************************

Now on with today’s tutorial. . . . .  . .

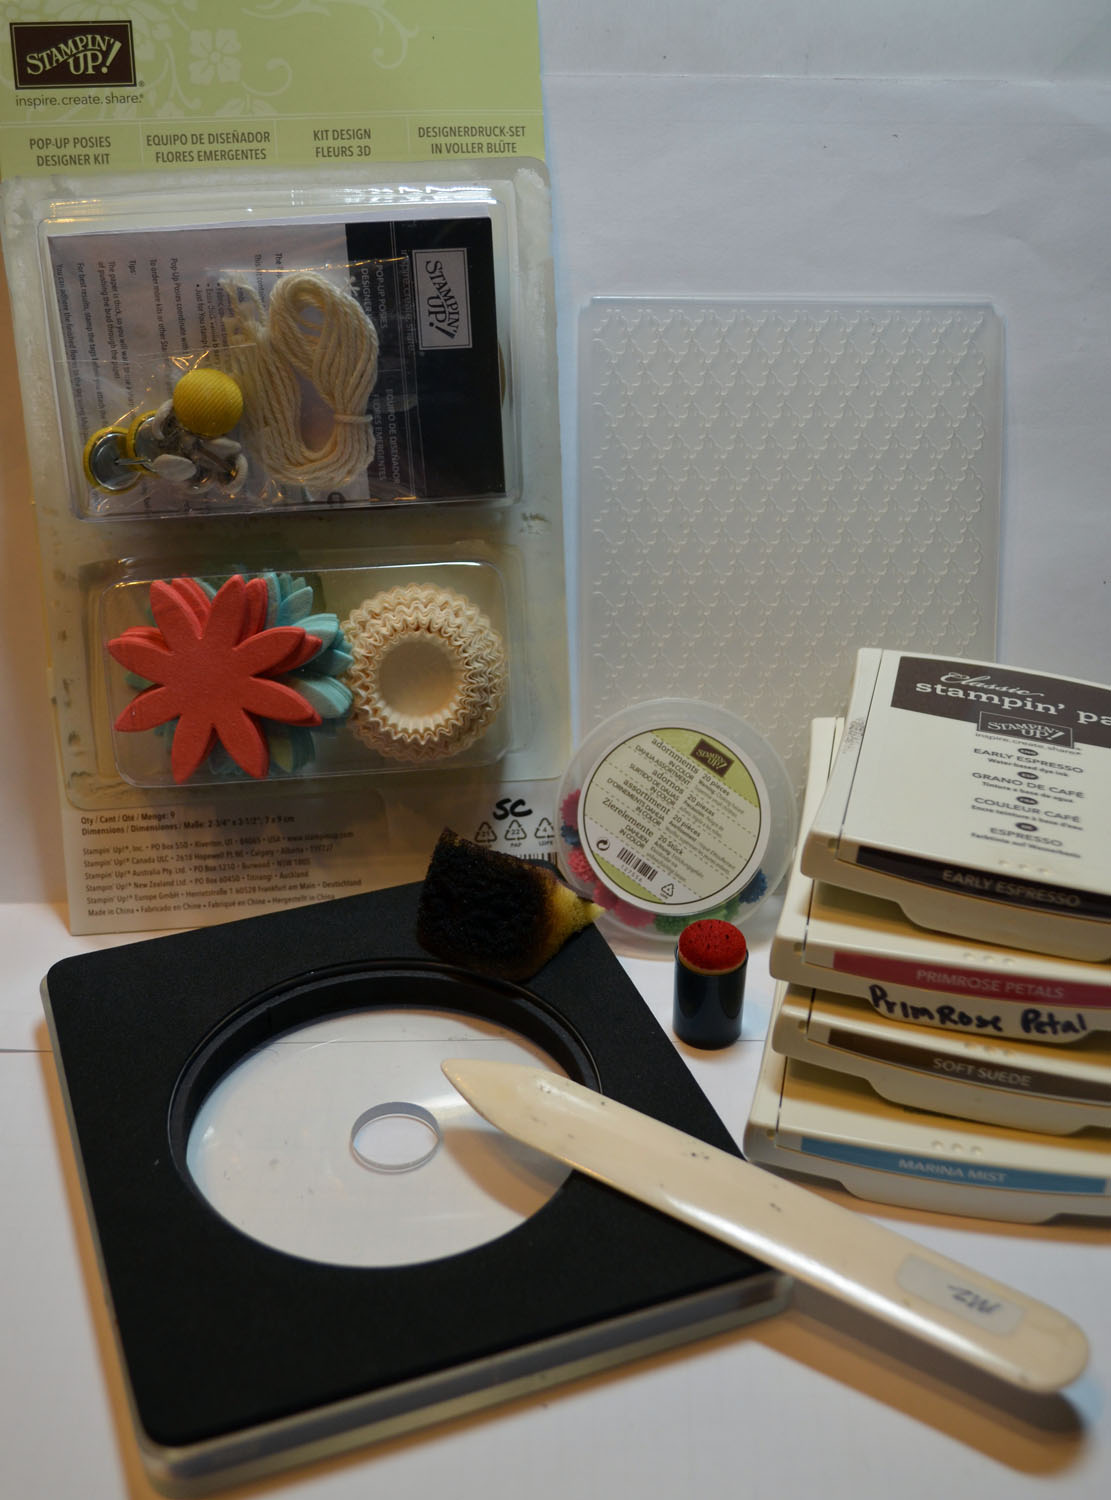
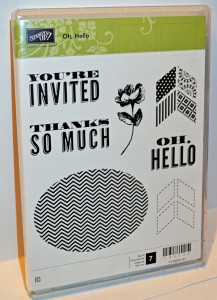
Project Supplies: Stampin’ Up! Forever Young (item# 122572)

Stamps:  Card Stock: Stampin’ Up! Whisper White, Basic Black and Designer Series Paper

Ink: Stampin’ Up! Lucky Limeade, Always Artichoke, Not Quite Navy, Tempting Turquoise and Stazon Jet Black

Accessories: Stampin’ Up! sponges, White Gel Pen, Old Olive seam binding and Brayer


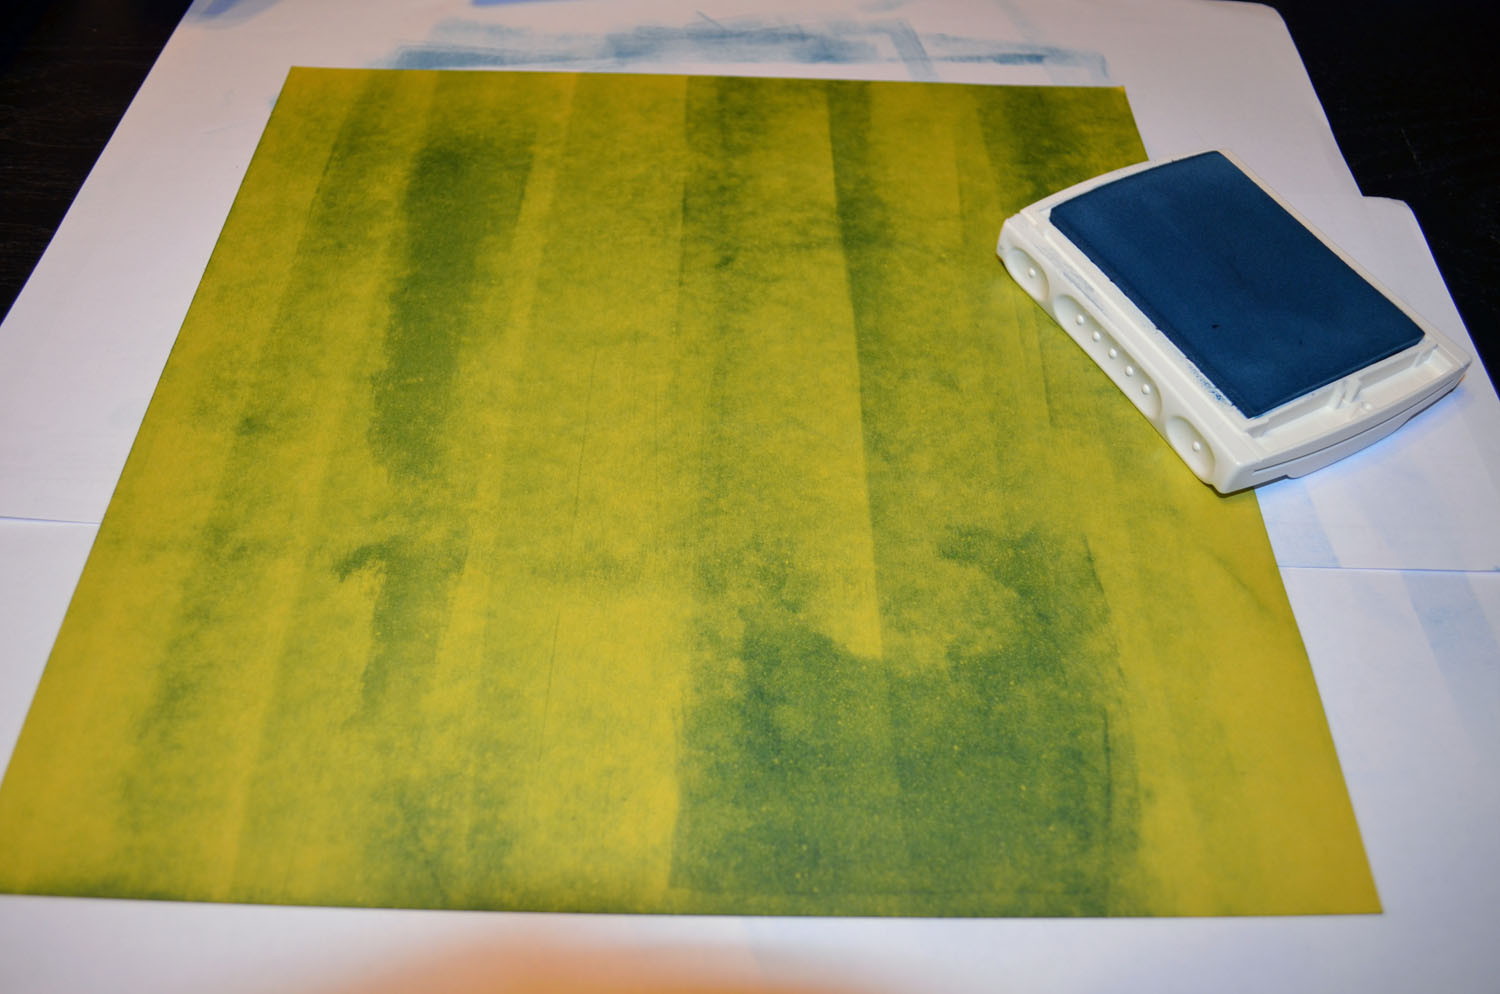
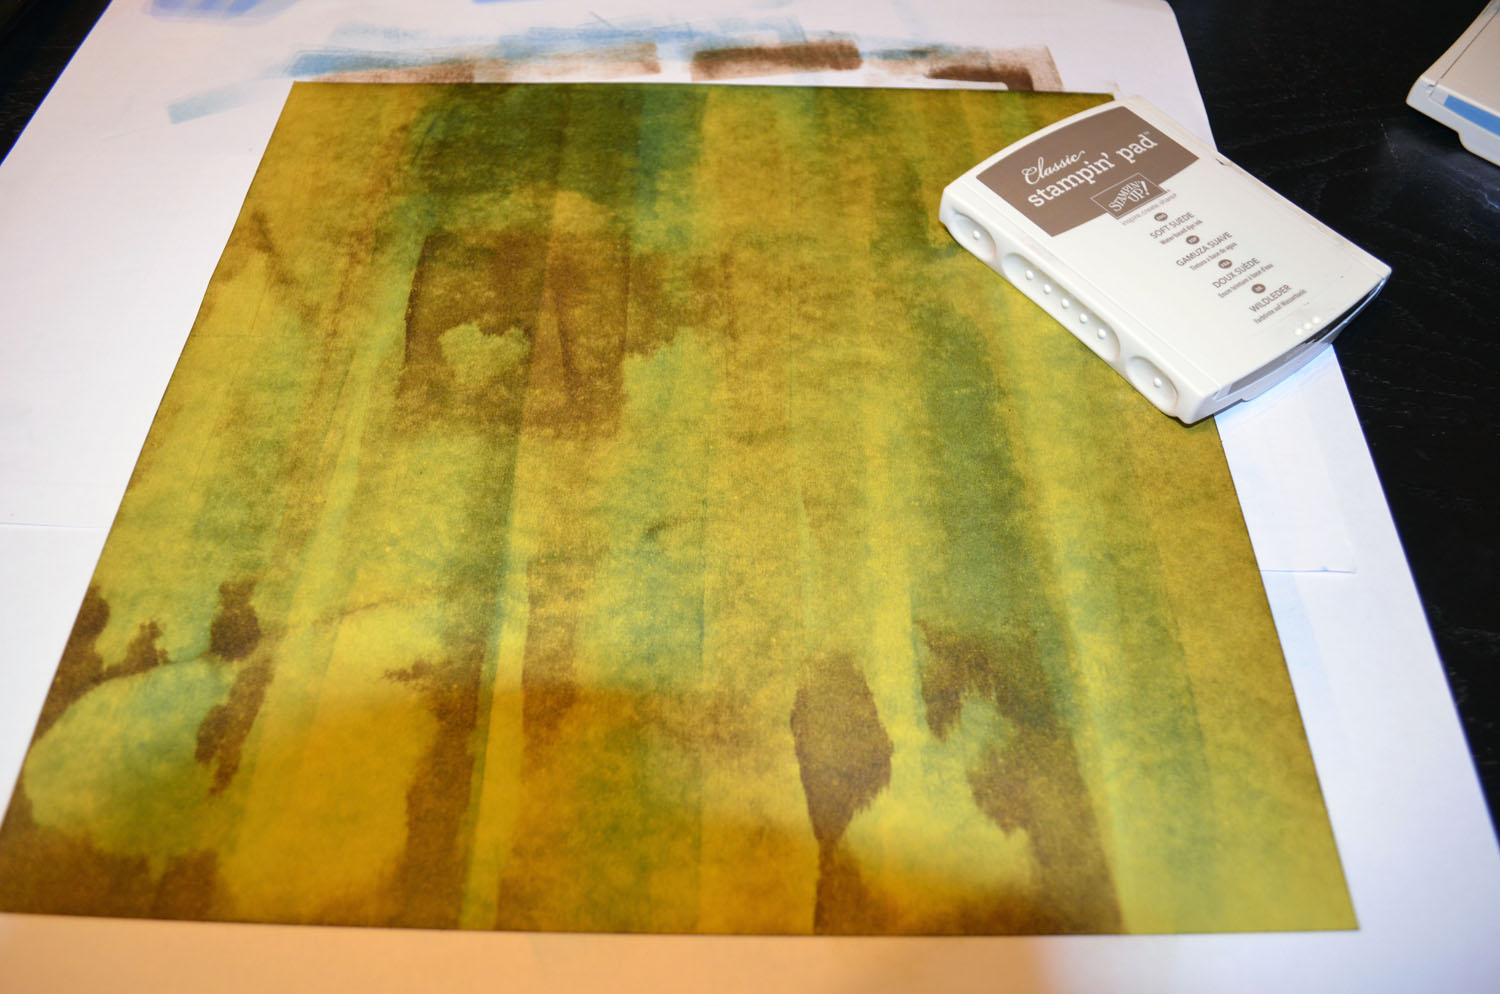
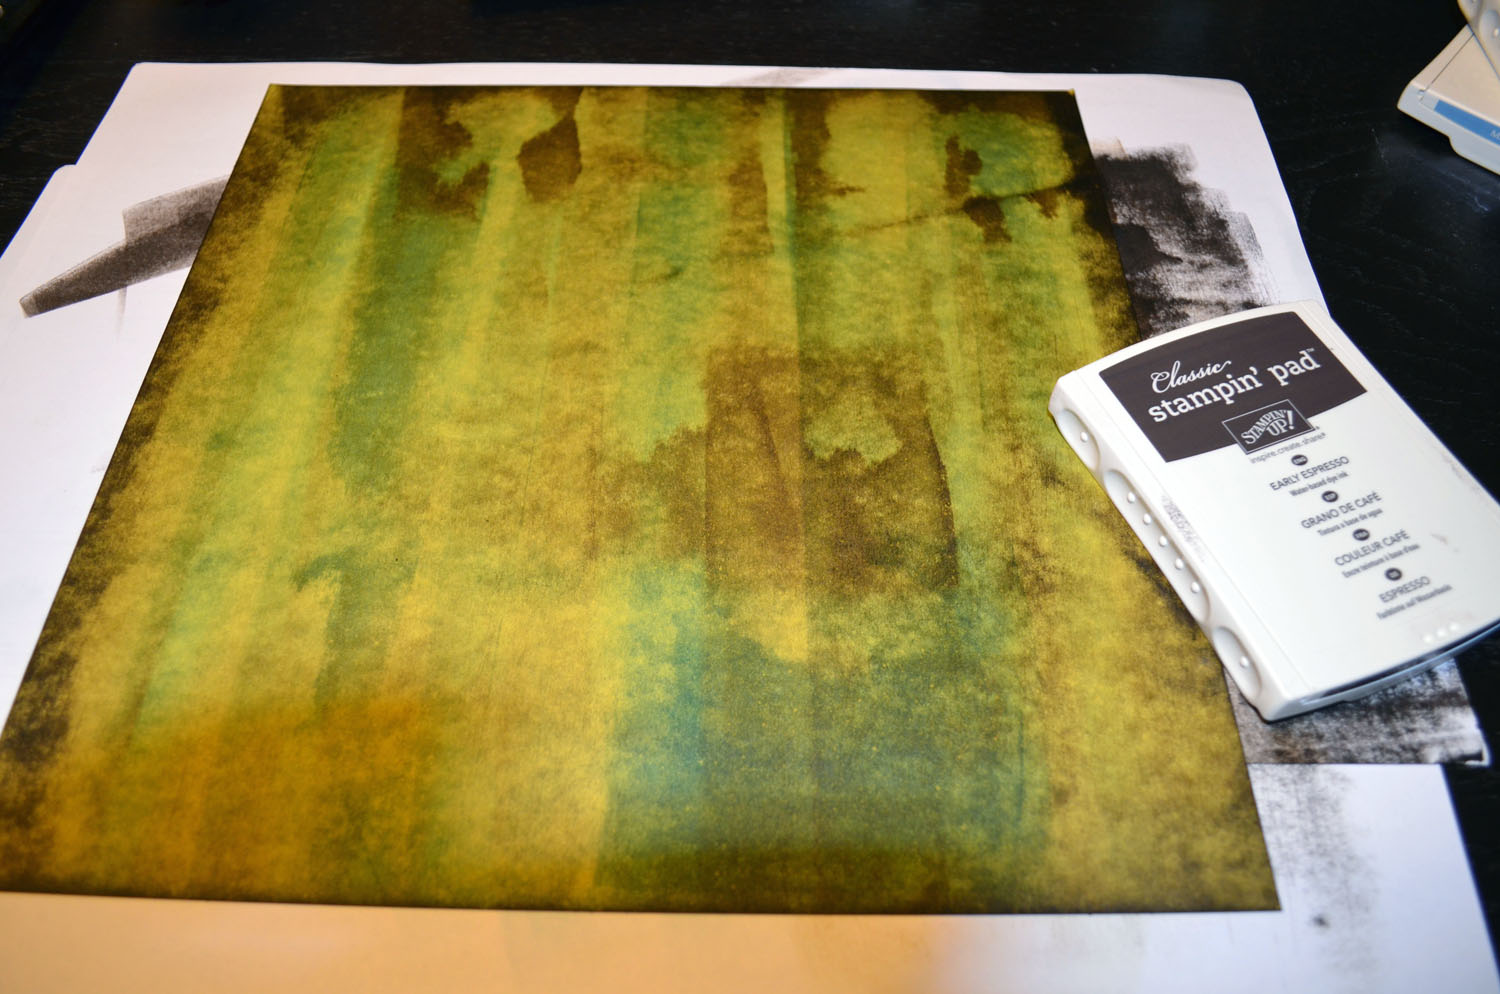
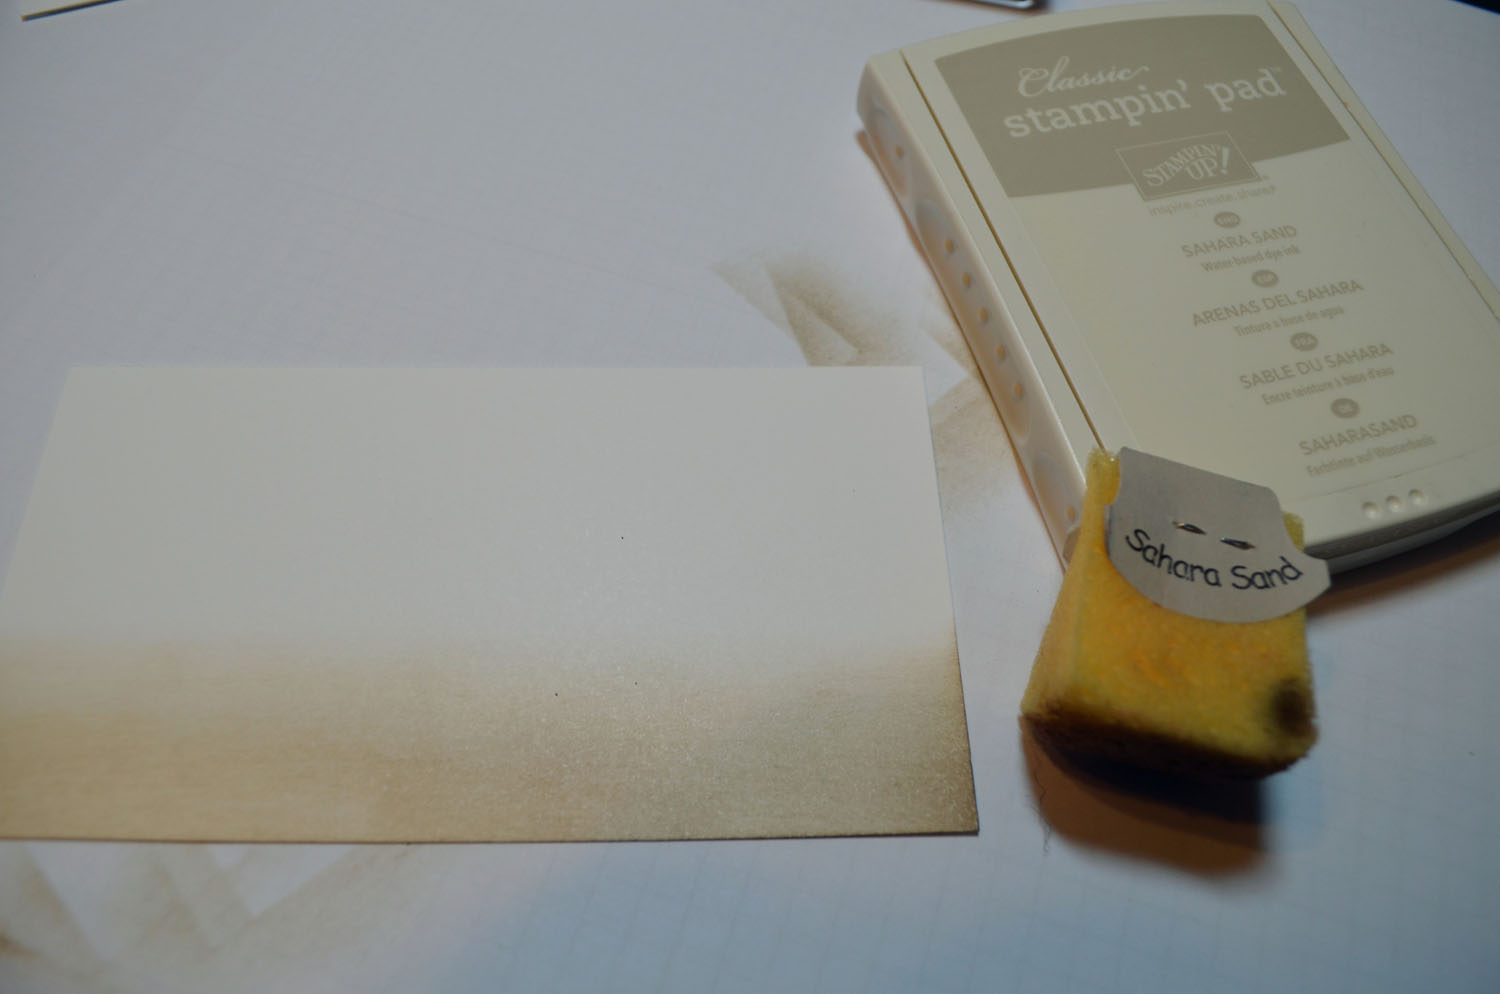
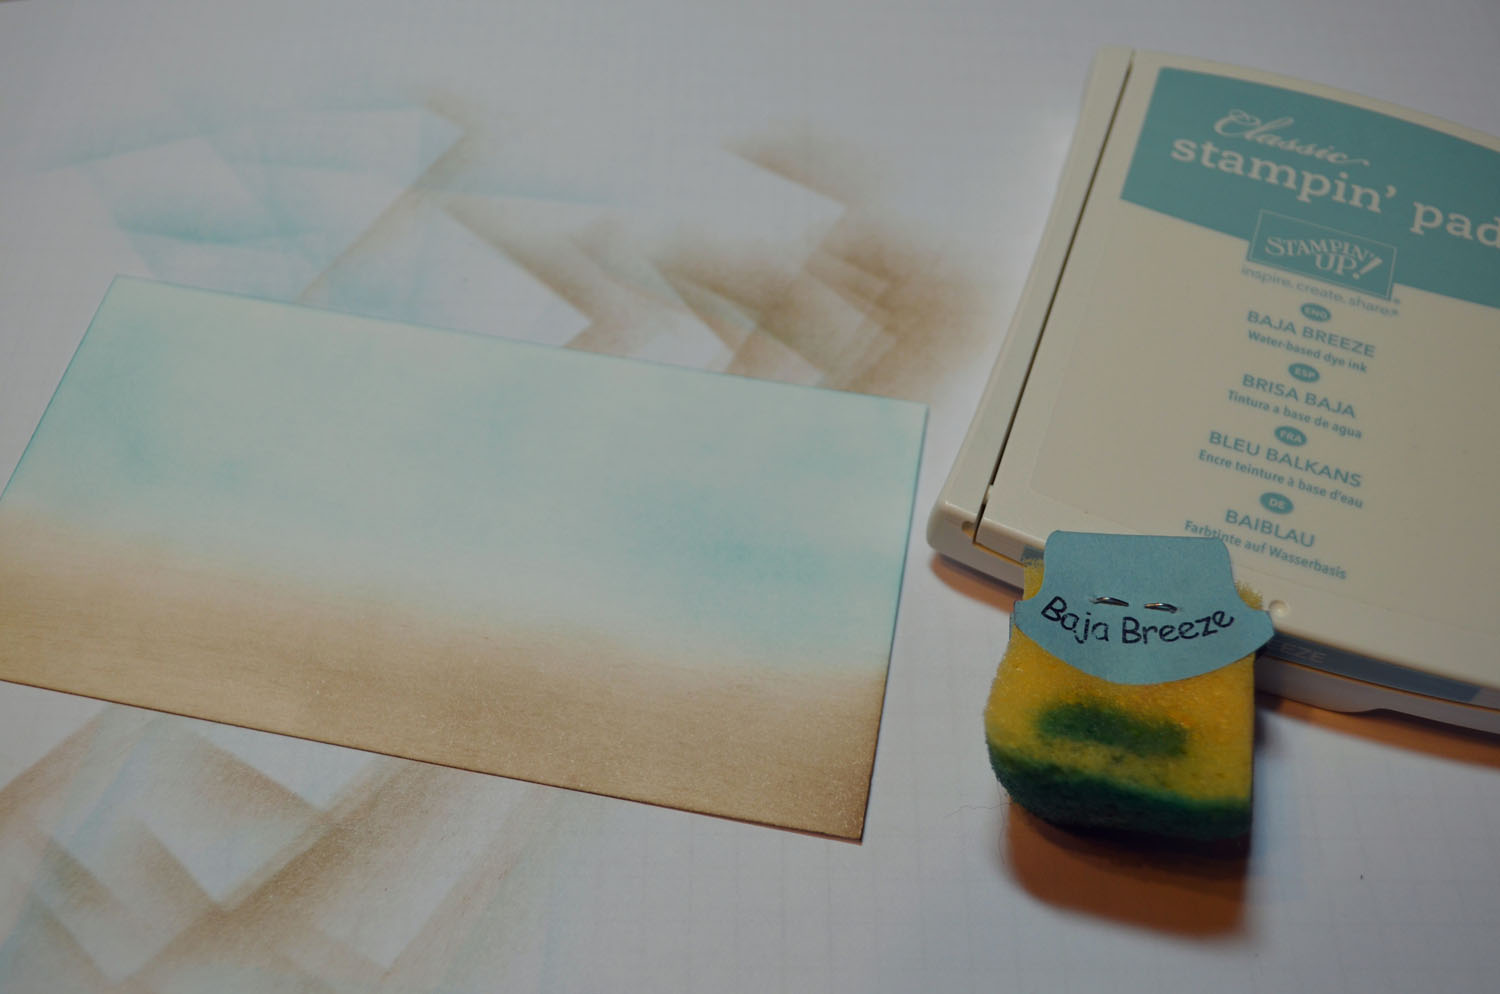
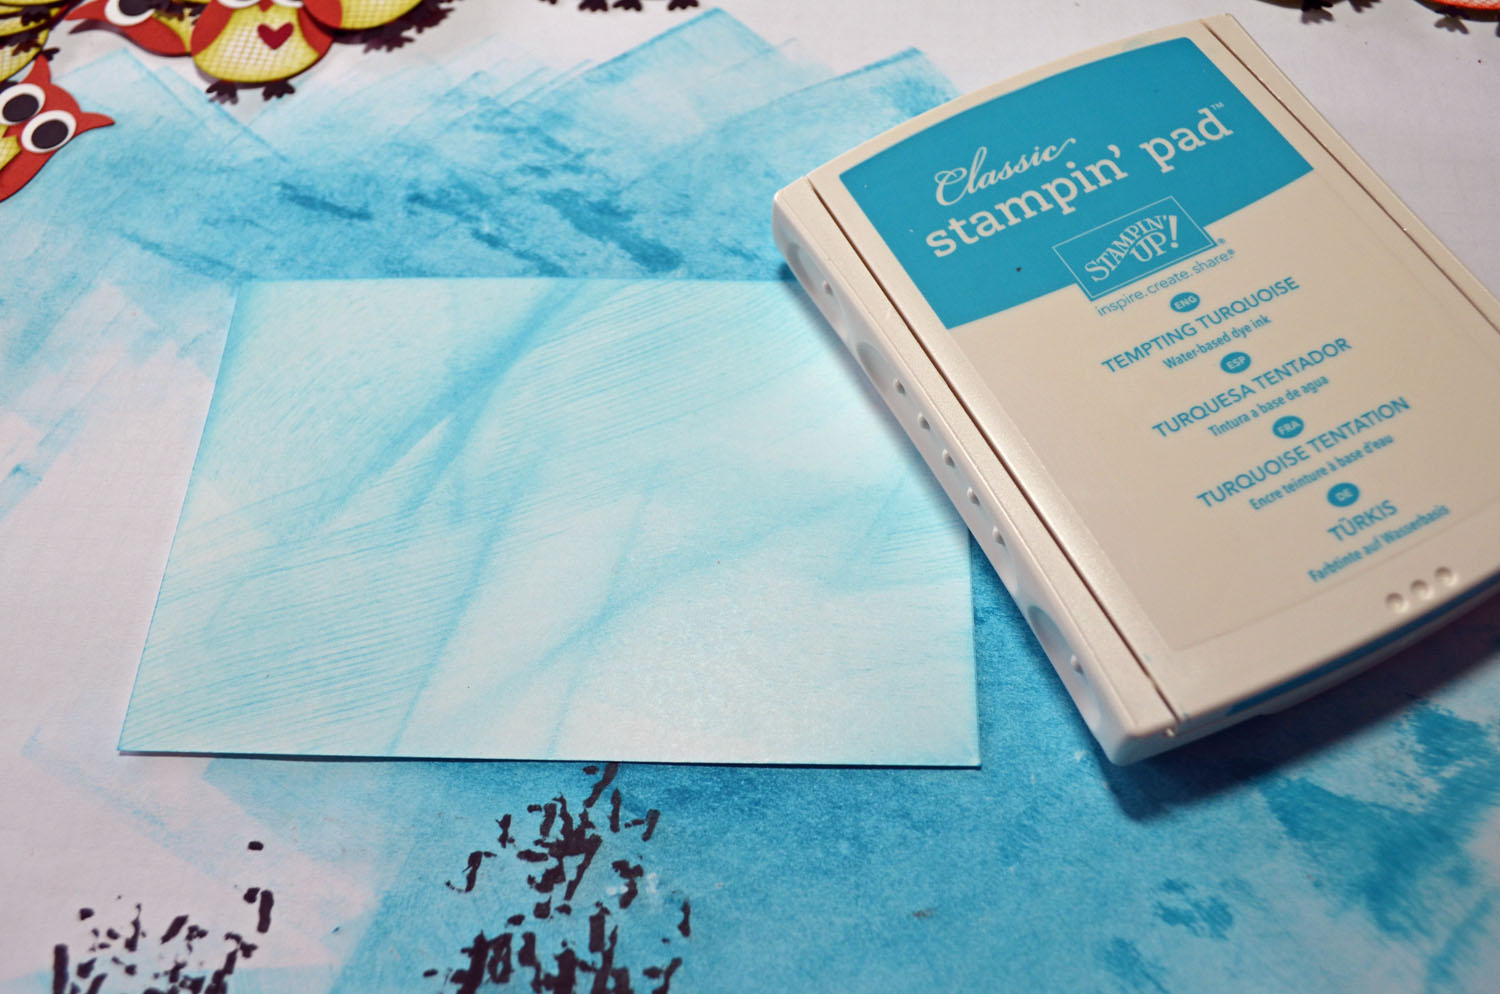
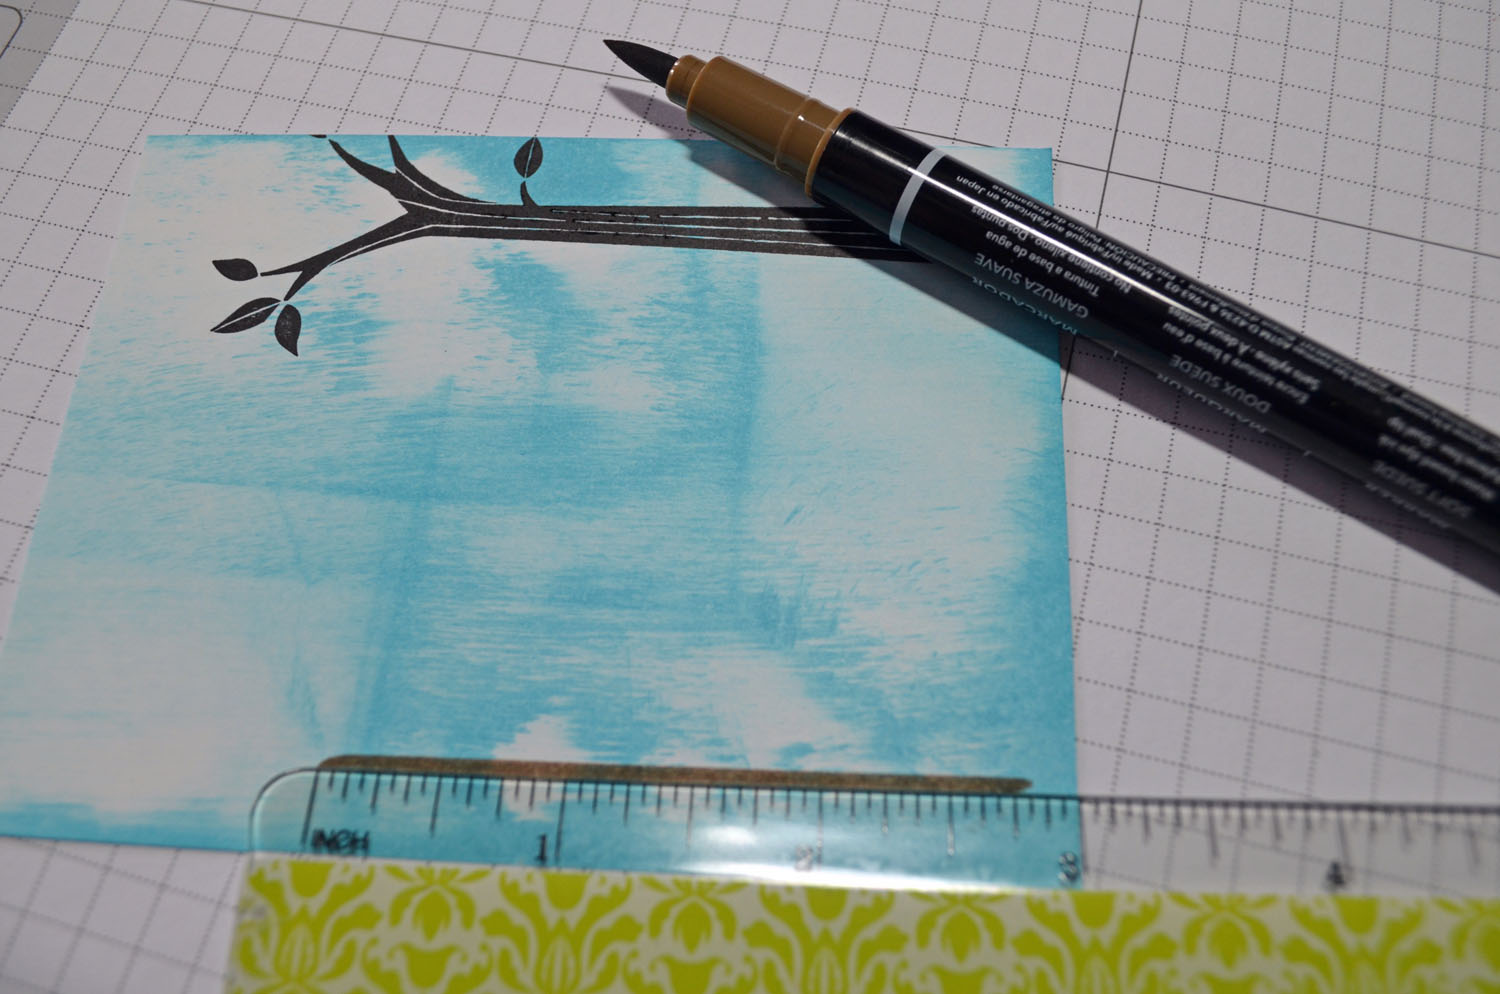
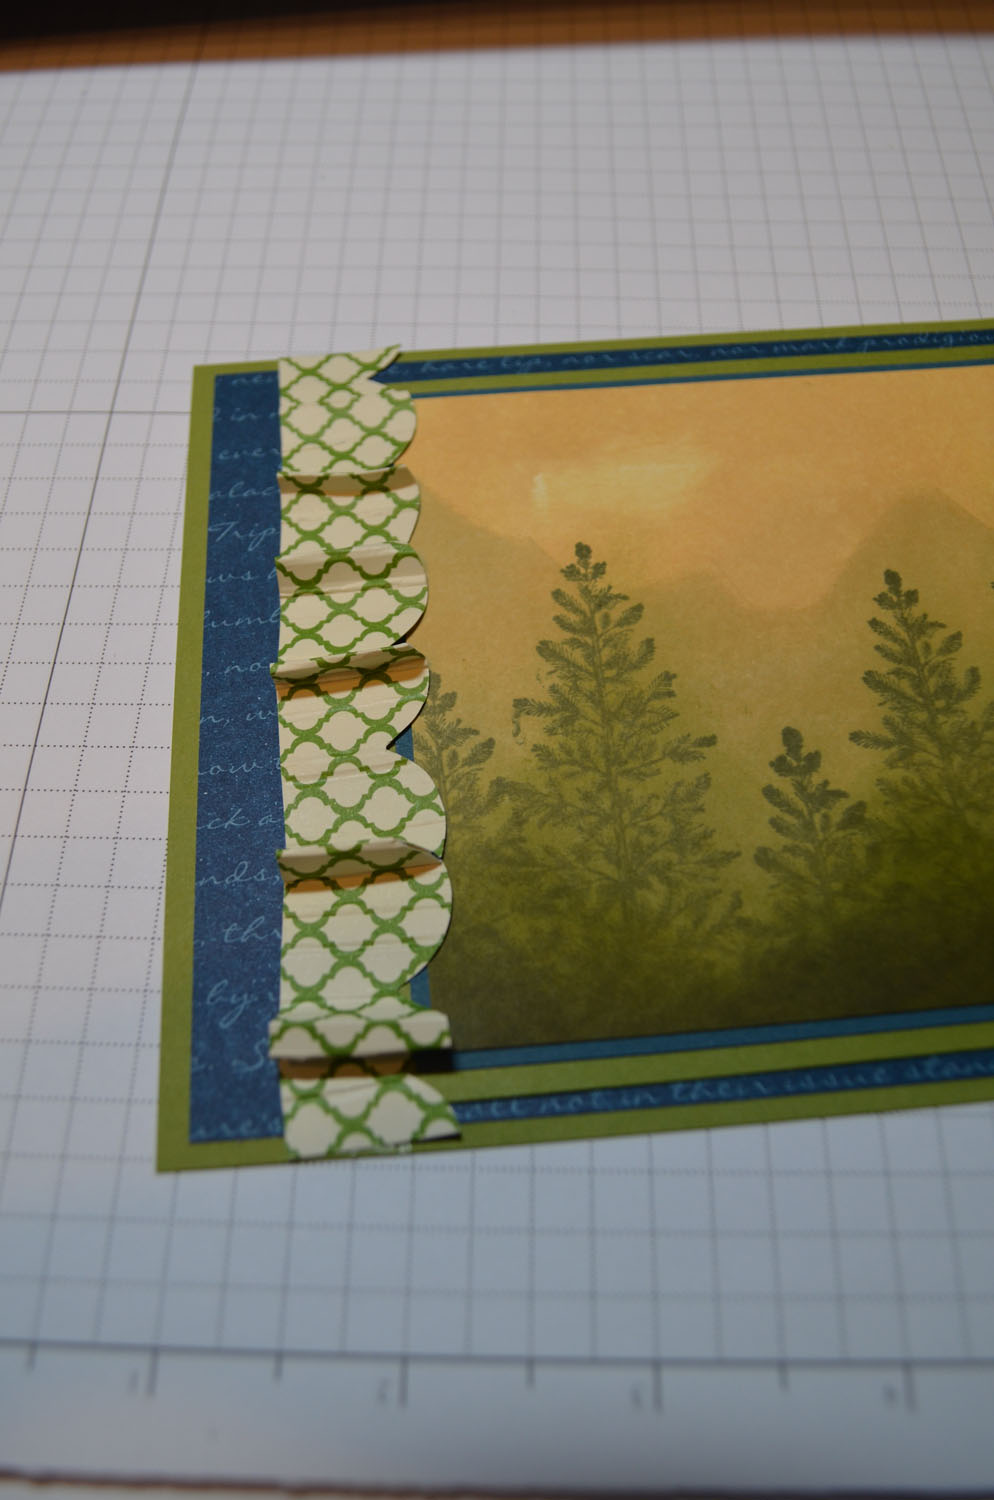
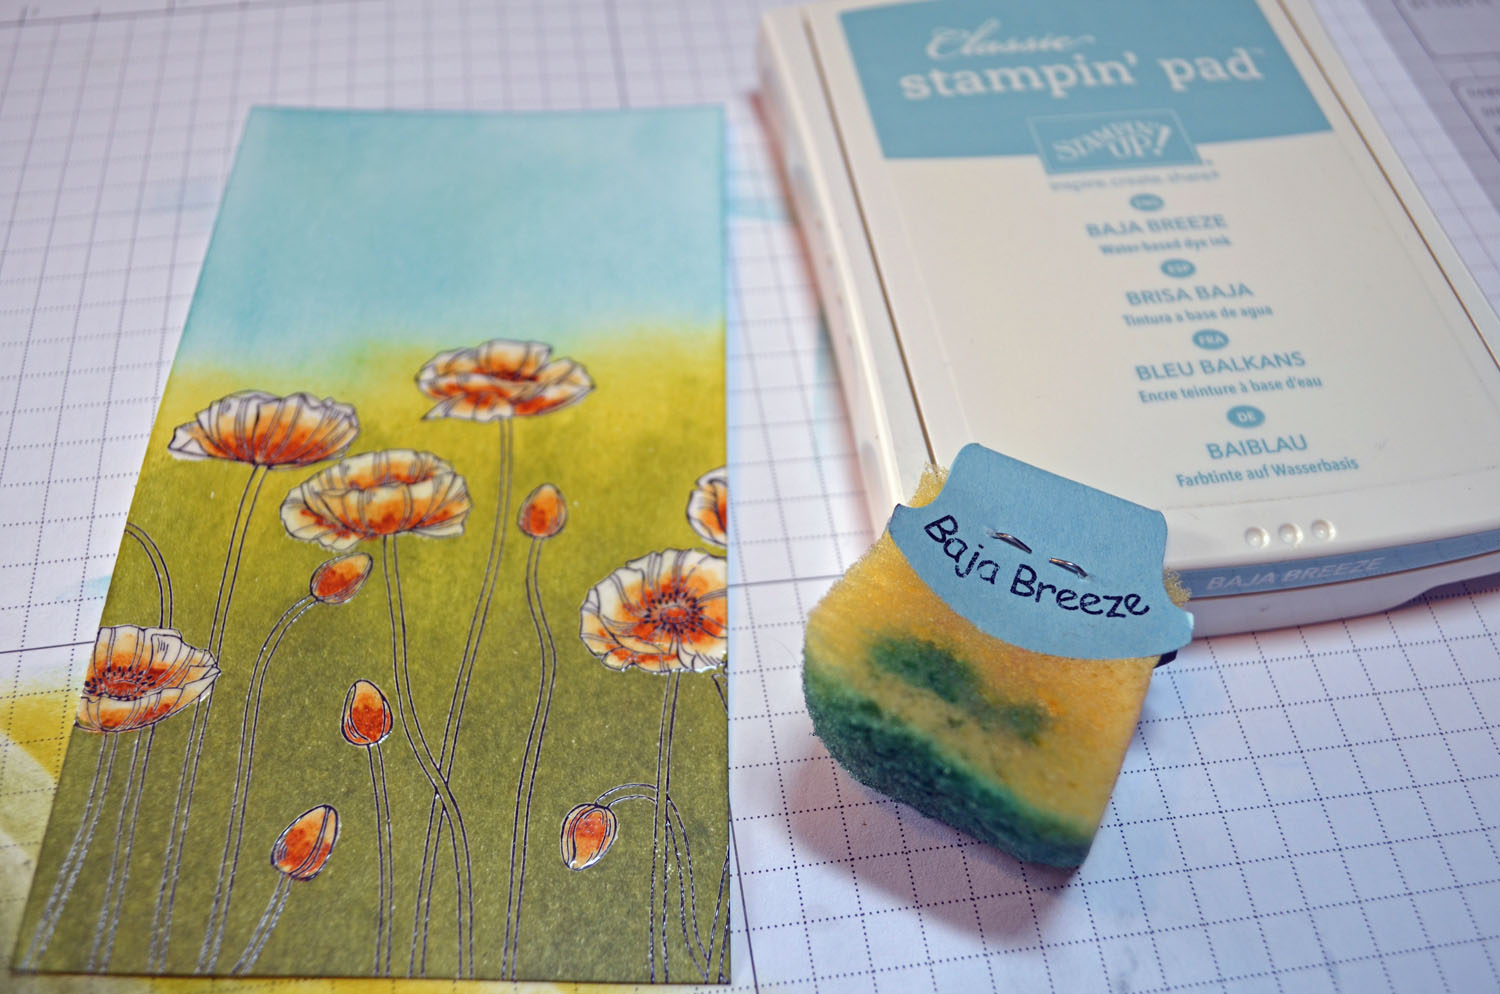
Brayered Tempting Turquoise ink at an angle on a 3″ square piece of Whisper White card stock.

Brayered Not Quite Navy ink at an angle not covering the Tempting Turquoise ink entirely.

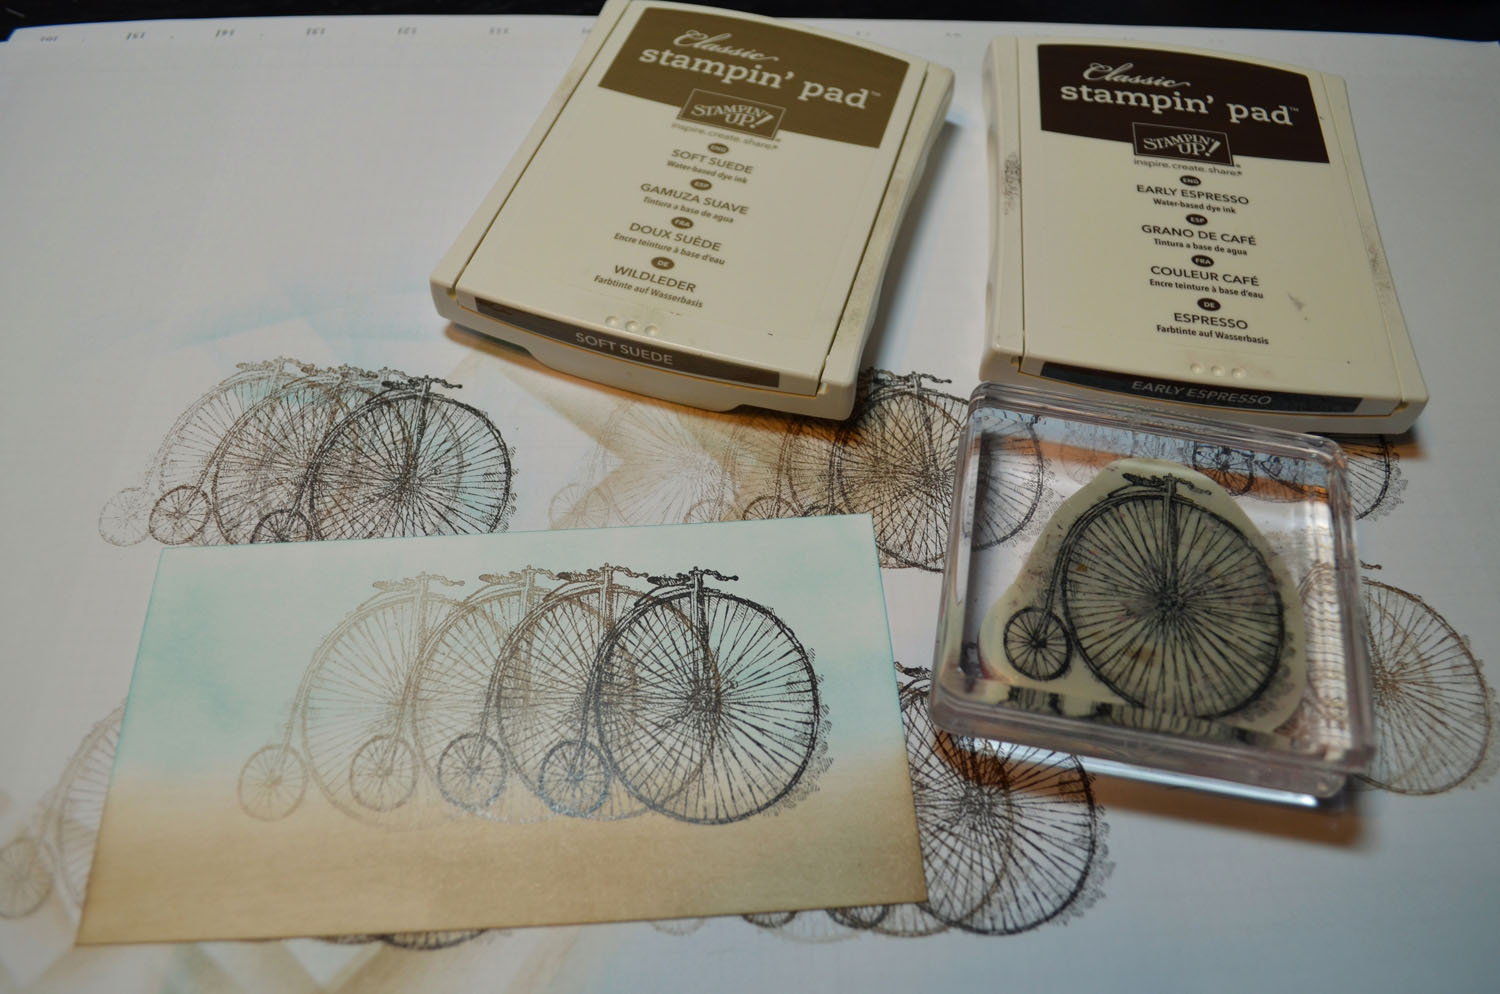
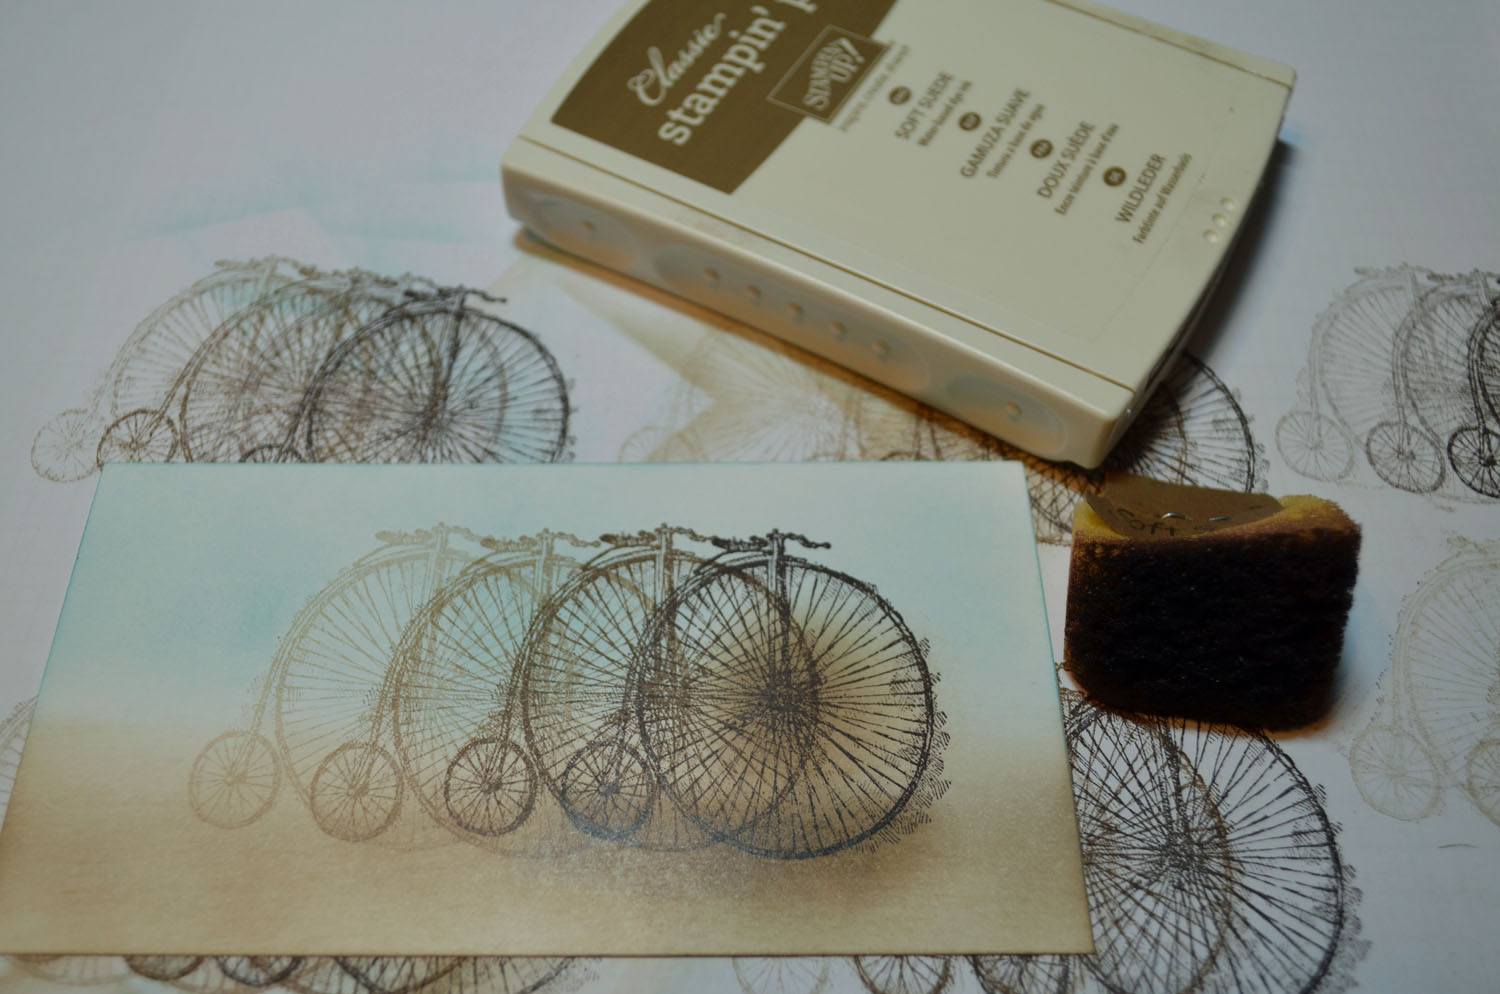
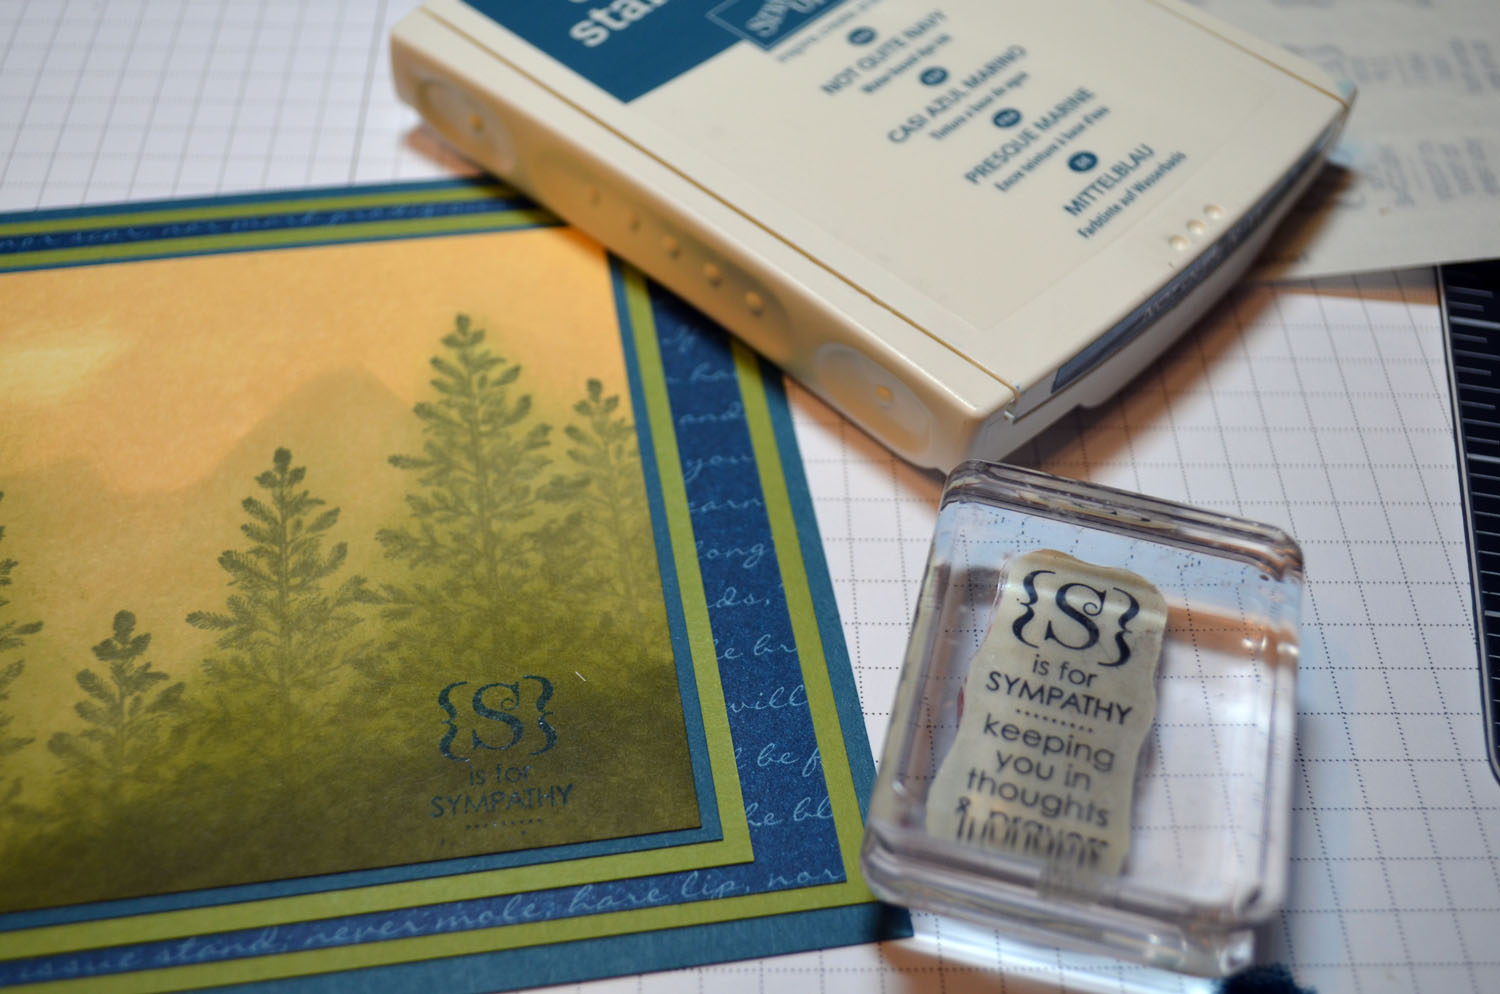
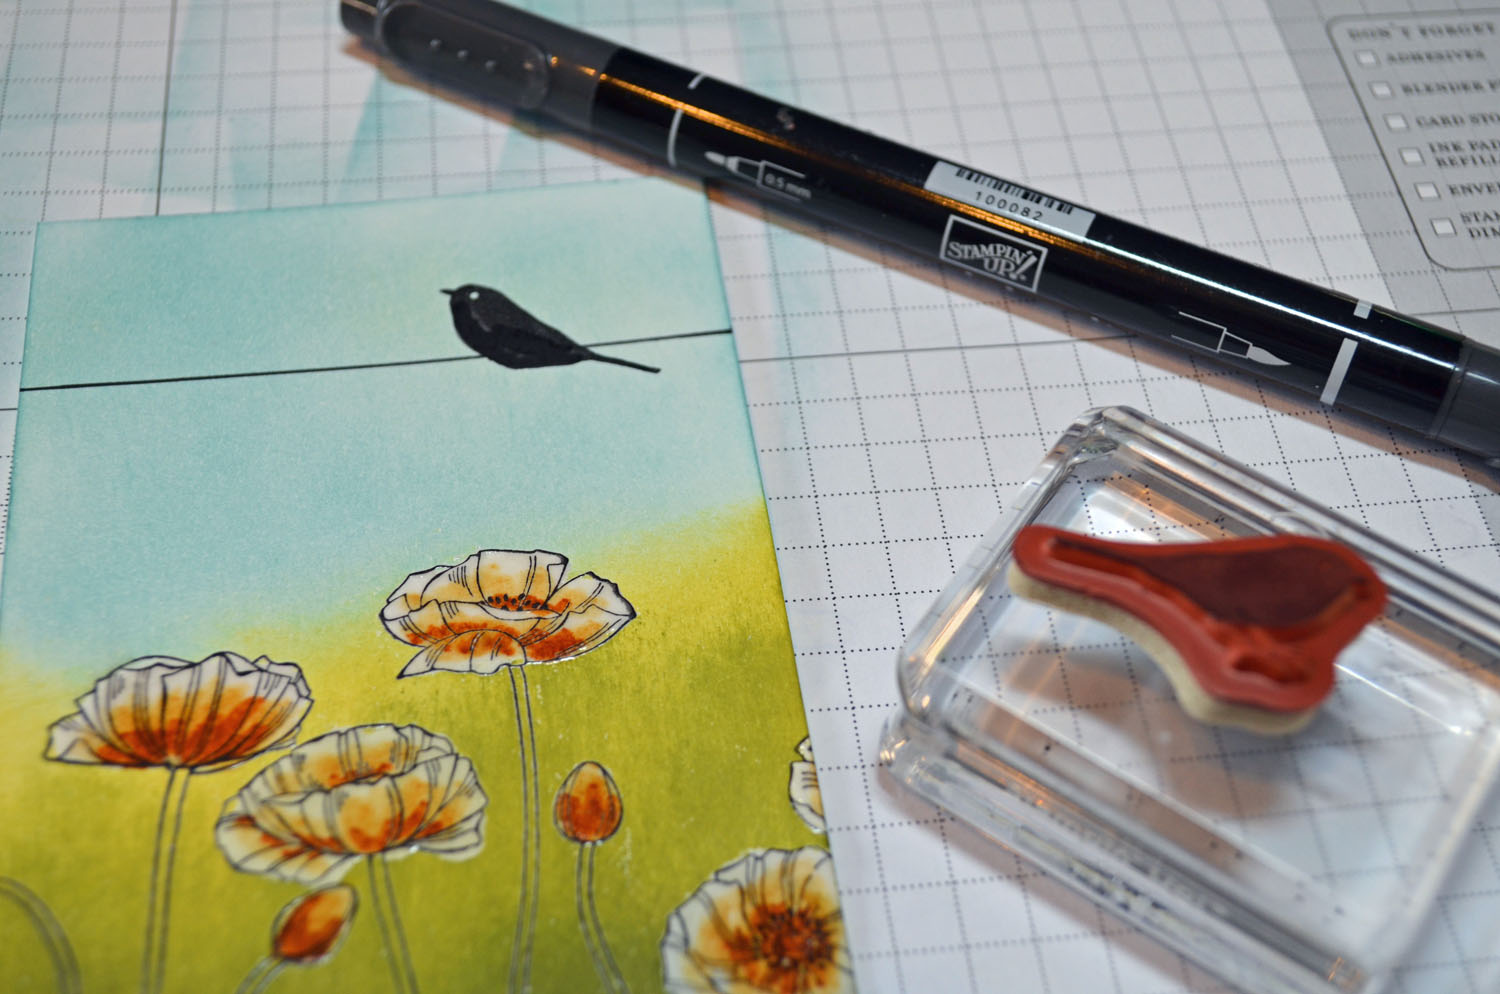
Stamped the Forever Young Tree using Stazon Jet Black ink.

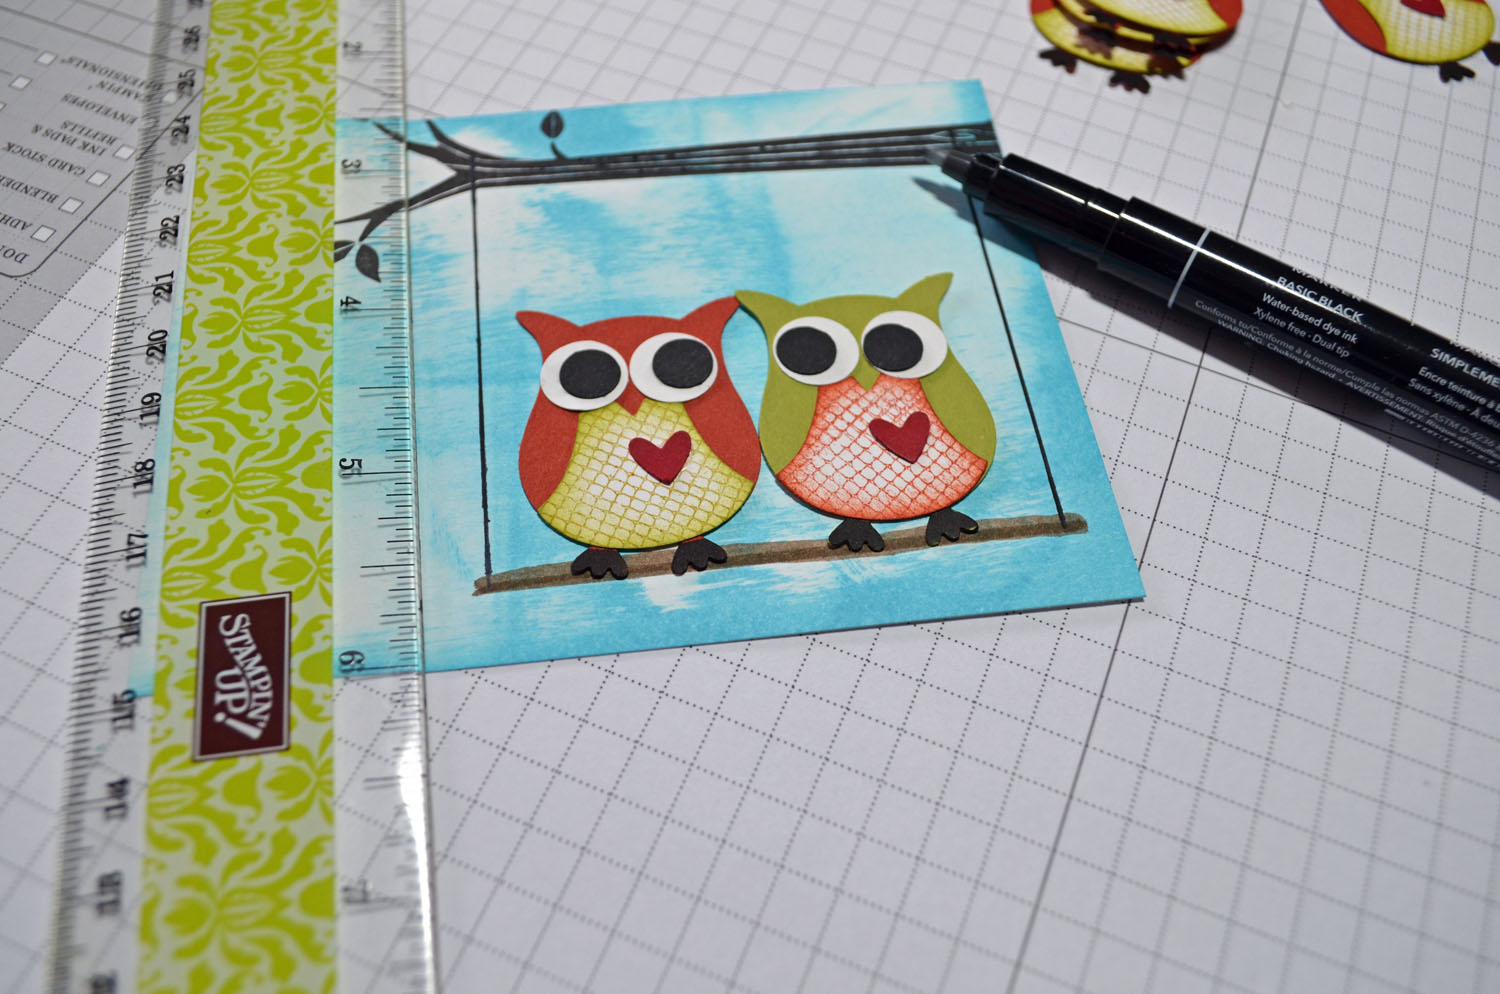
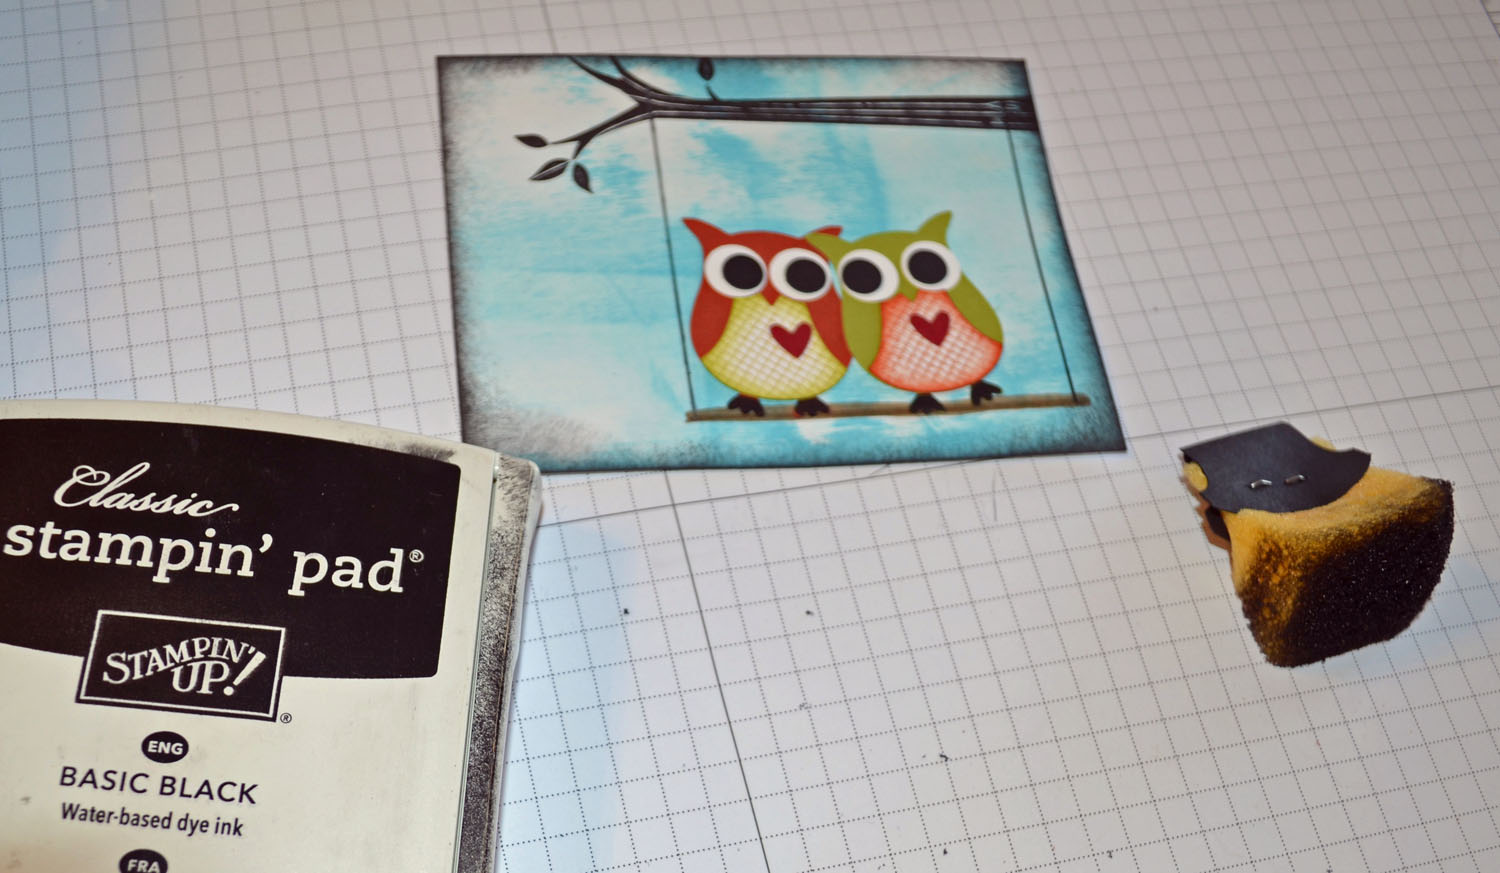
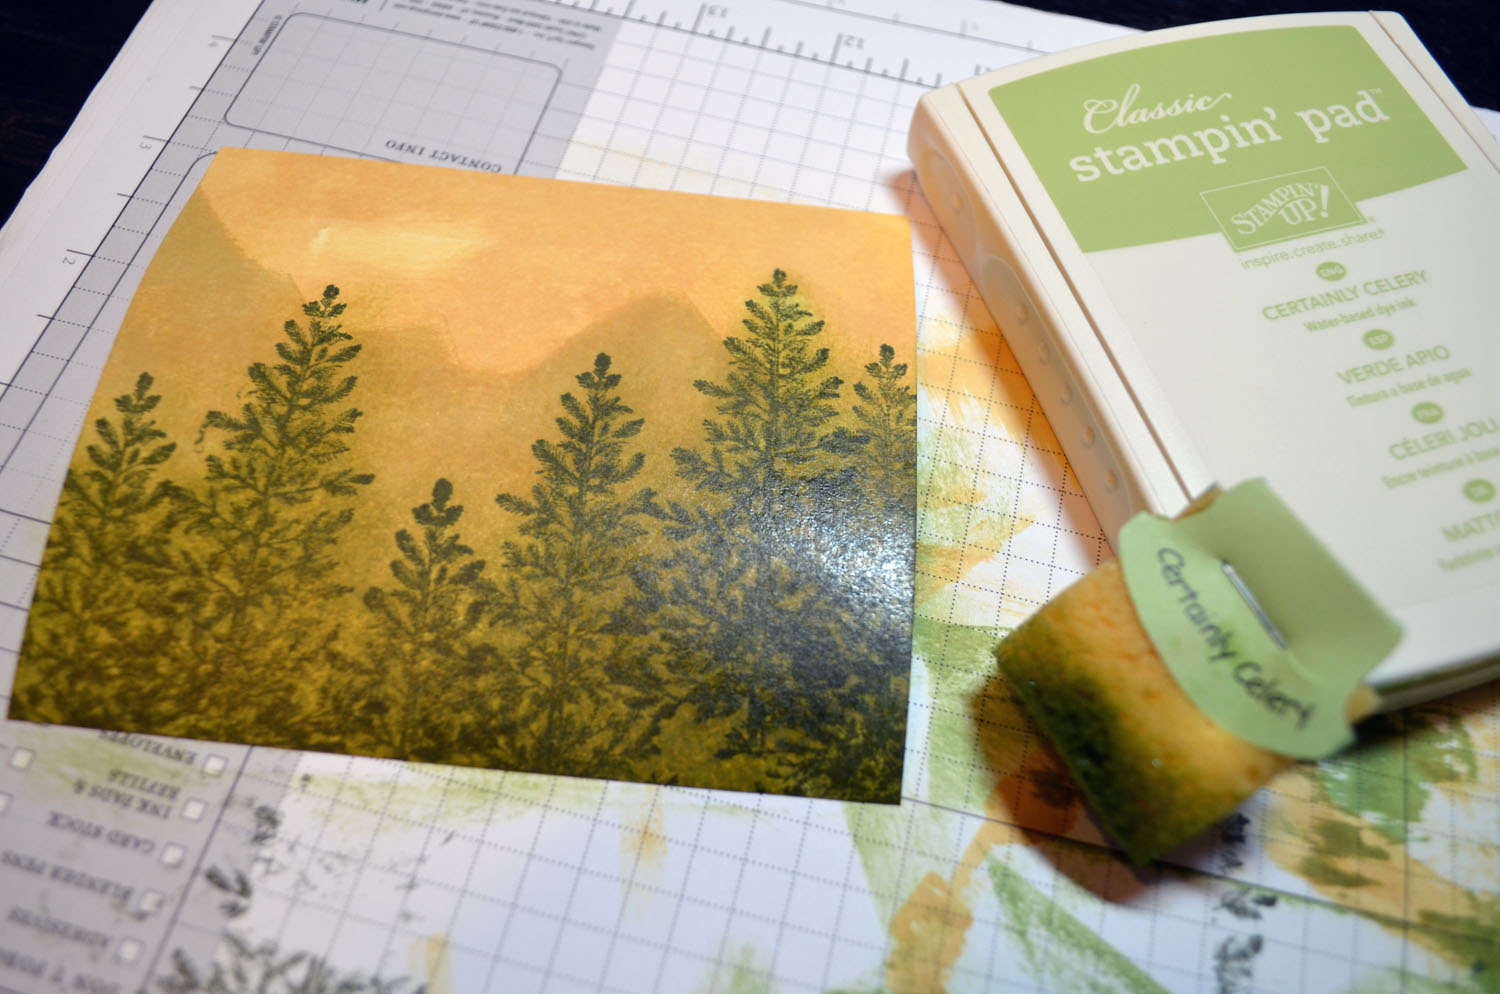
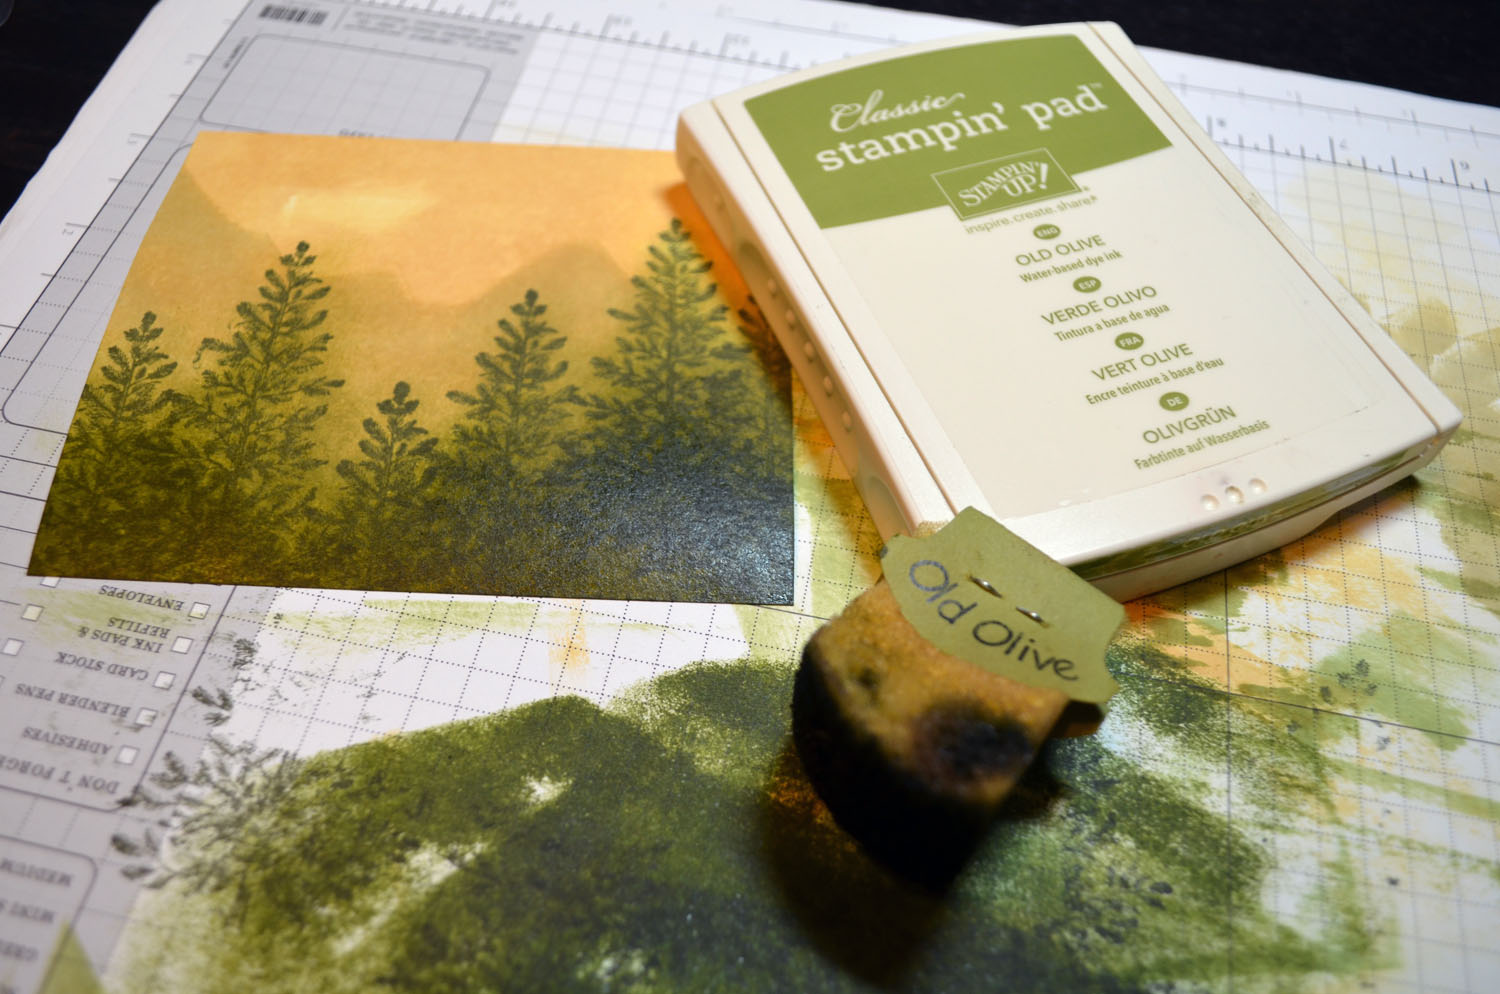
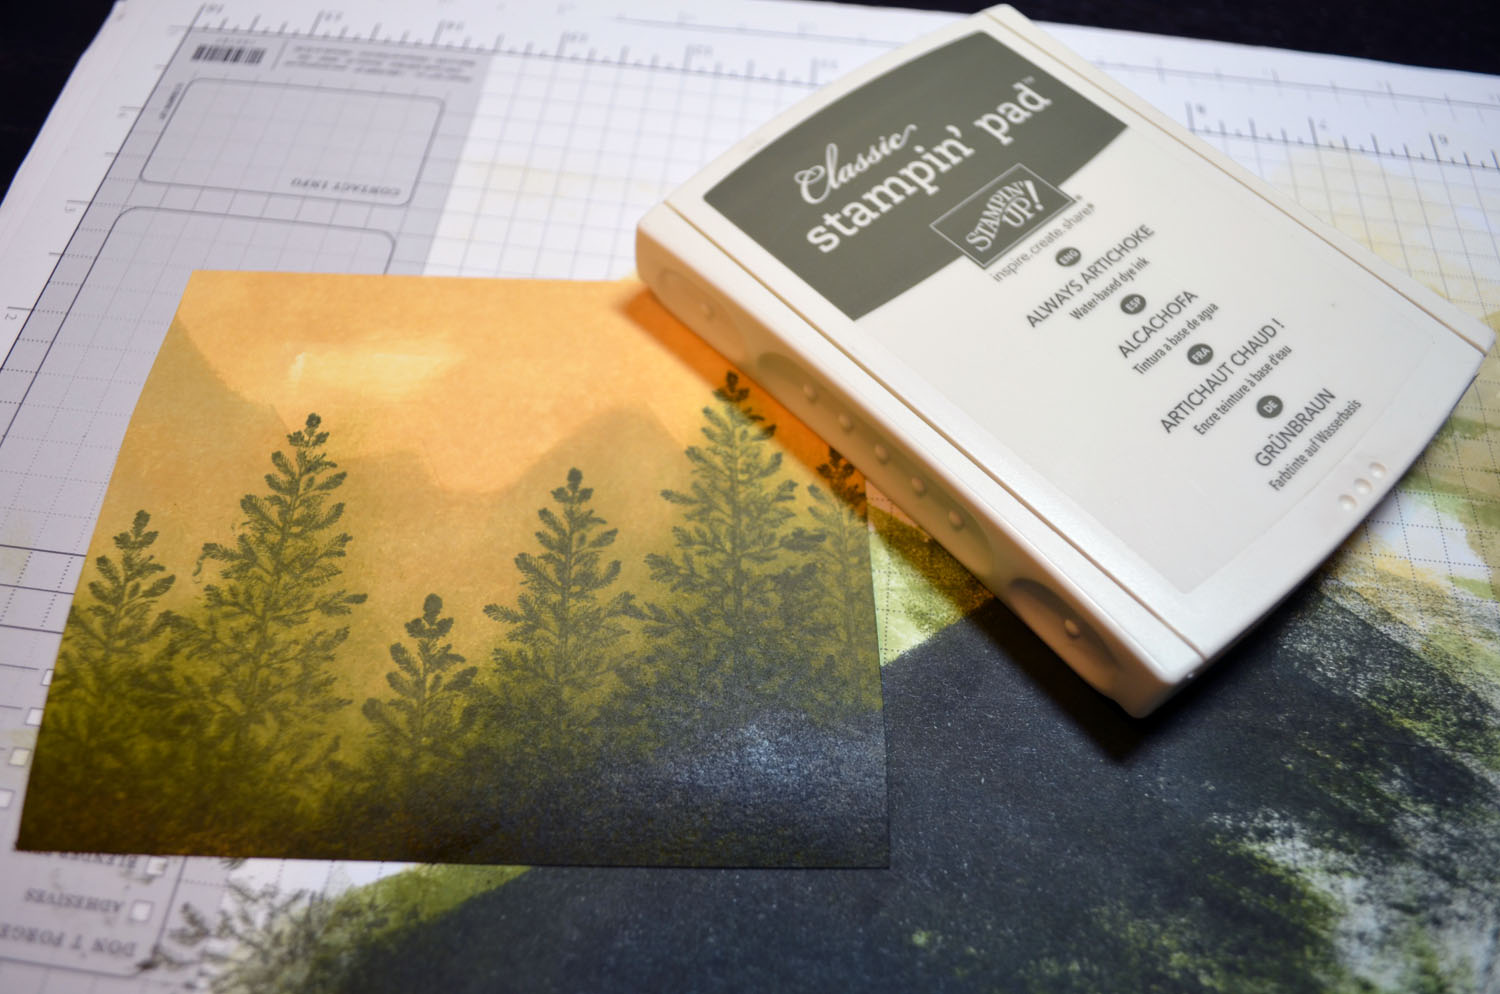
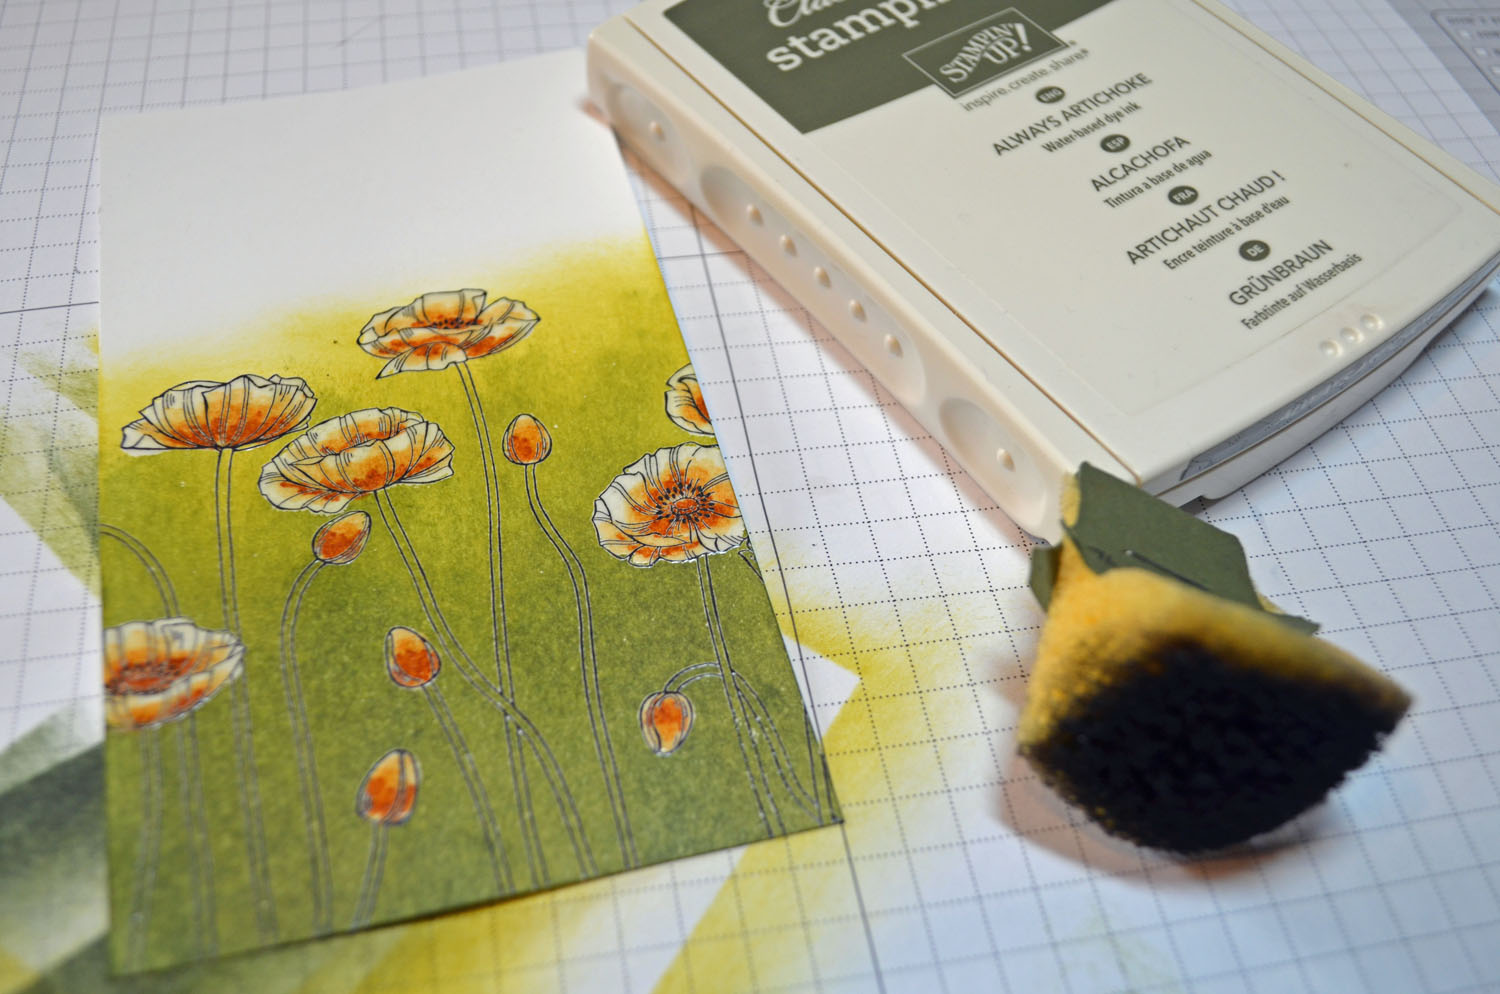
Sponged Lucky Limeade ink at the bottom of the card stock.

Sponged Always Artichoke ink at the very bottom of the card stock.

Added White Gel pen dots in the leaves of the tree and added highlights to the branches on the left side.

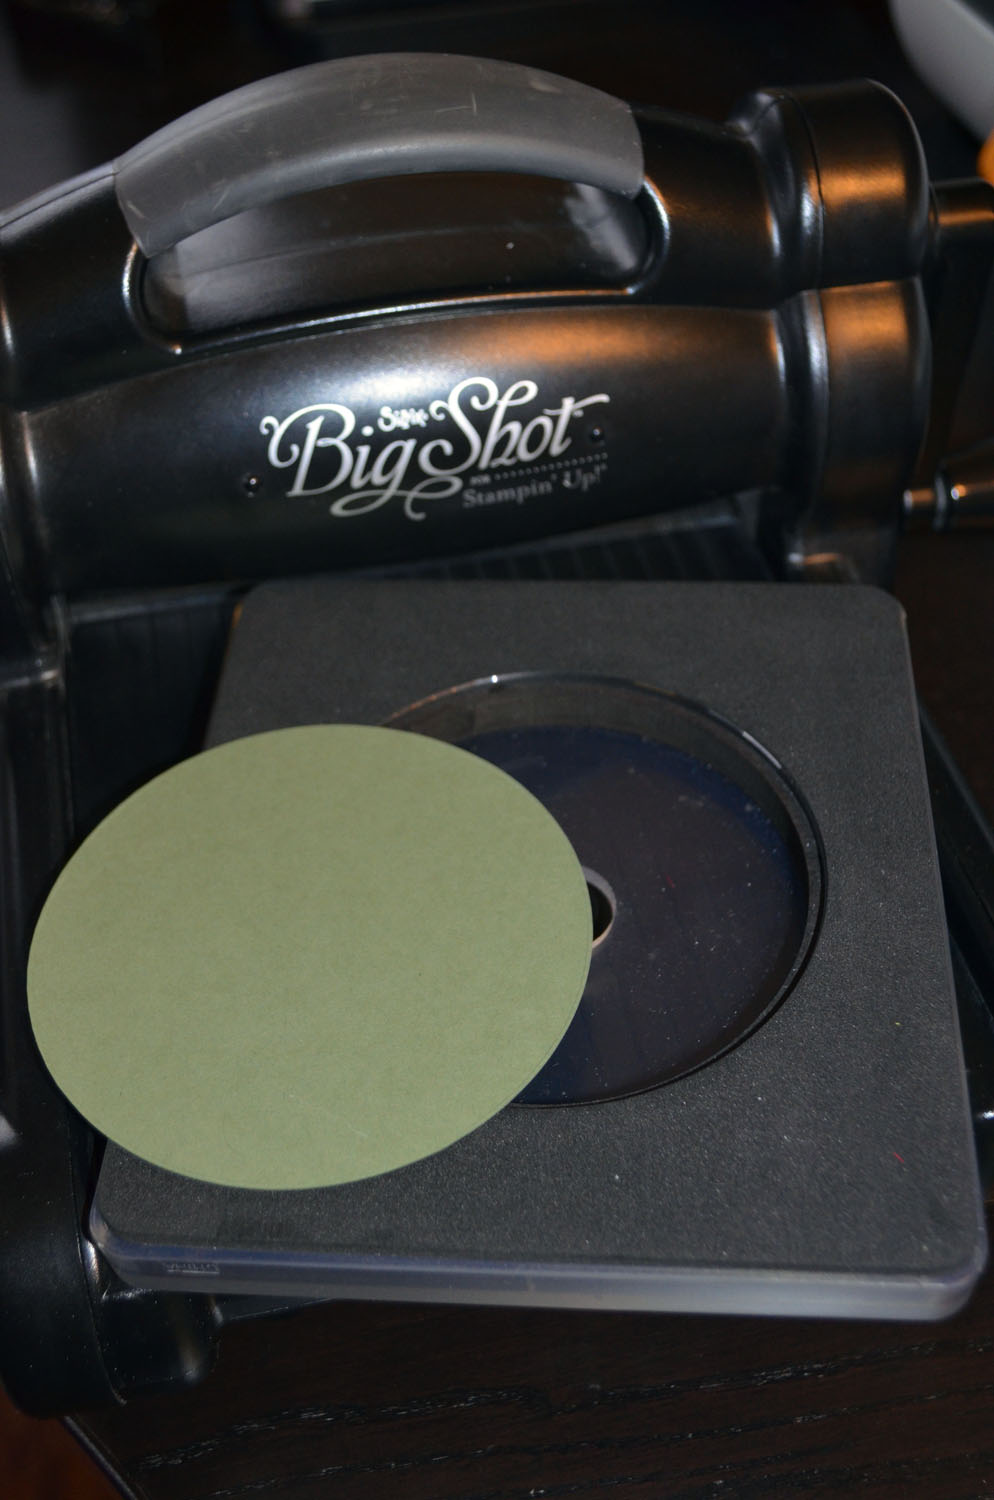
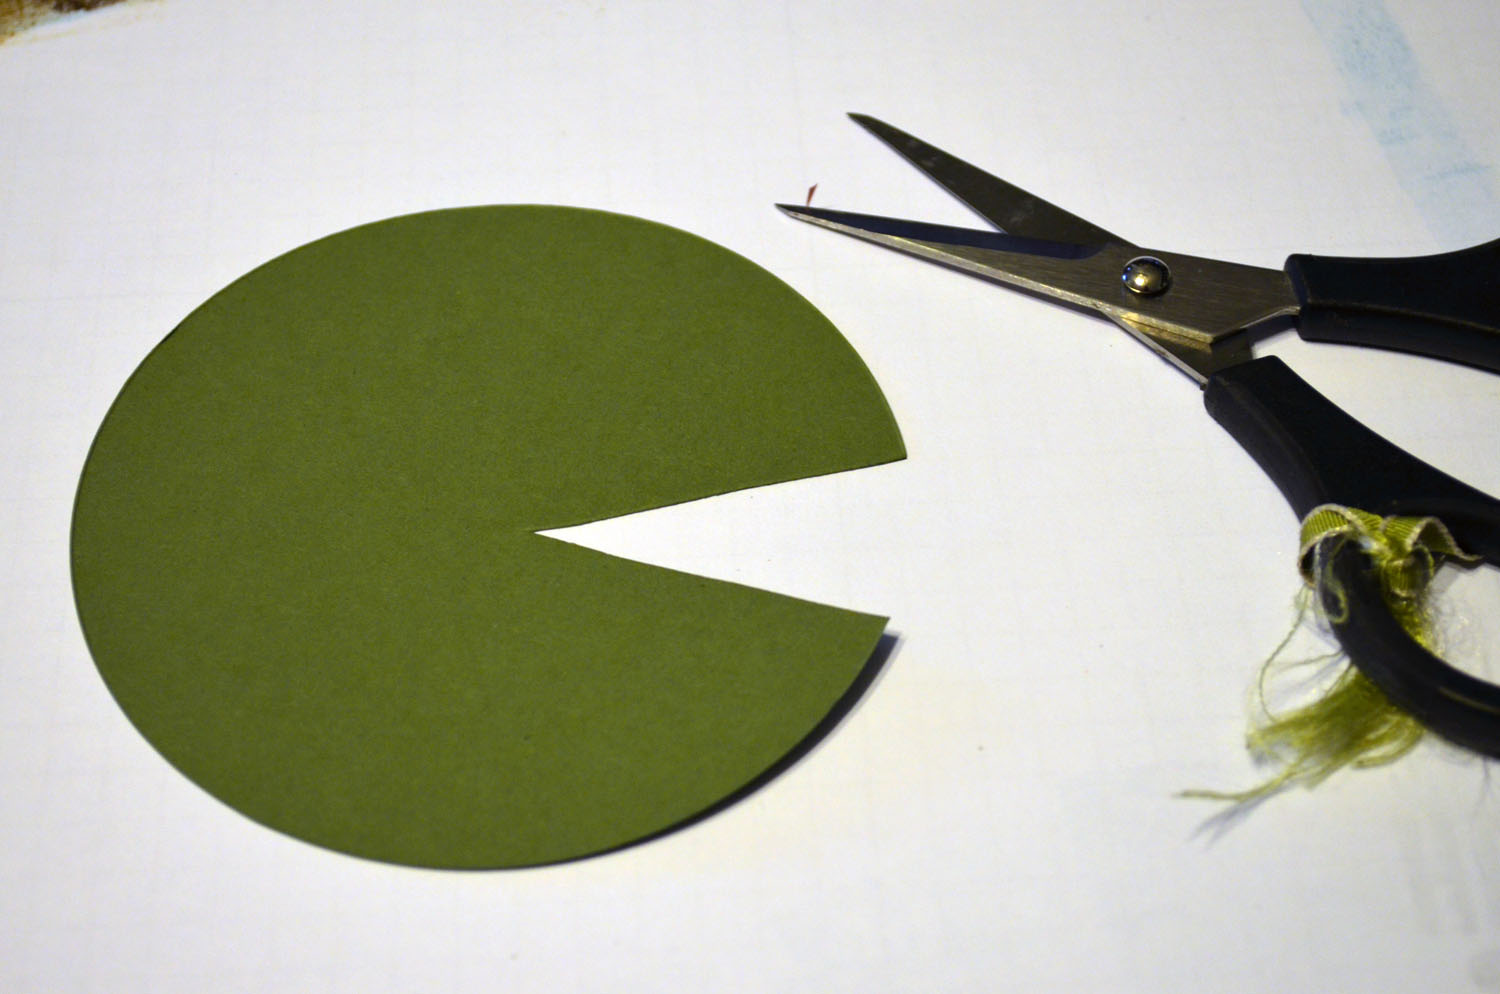
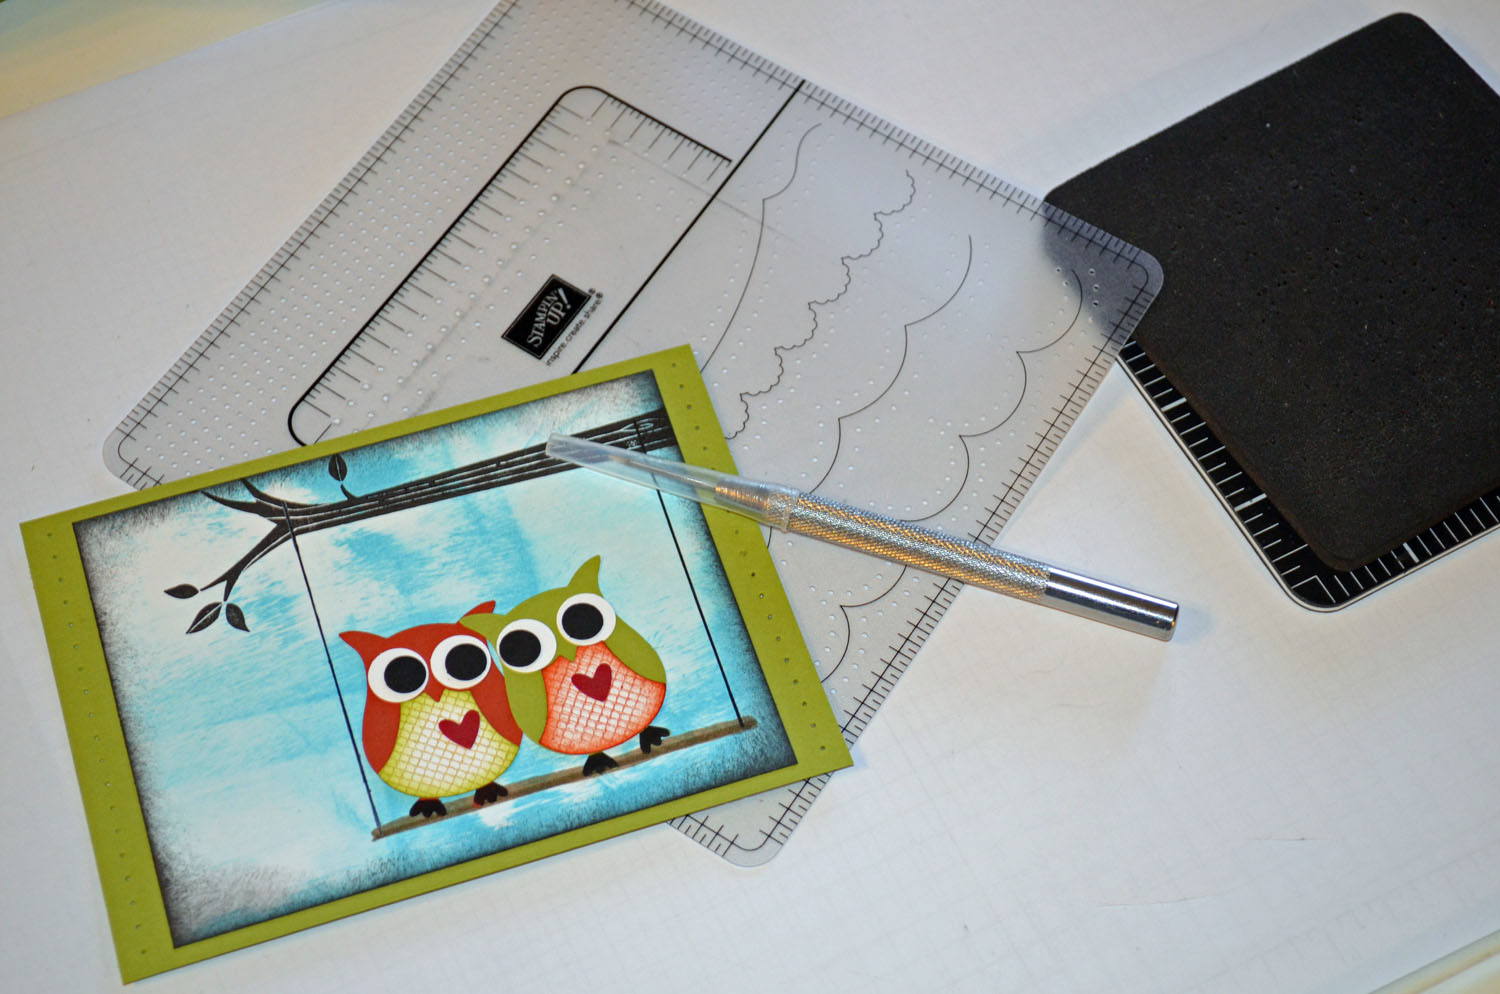
Added 3 Basic Black panels (5.25″, 4.25″ and 3.25″ square) 1/2 a 5″ square piece of Old Olive and Not Quite Navy DSP and 1/2 a 4″ square of Old Olive and Not Quite Navy DSP.  Also added Old Olive seam binding and a 5.25″ Whisper White card stock card base.

Here is the finished card measuring 5.25″ square.

May you have the freedom of your youth today.

Until my next post. . . . . .

Check out the awesome things happening at Stampin’ Up! below.

Hugs,

*******************************************

Weight loss in 2013:  9.5 lbs

*************************************************

Digital Content Discs for One Dollar

From now until February 12 (or while supplies last) you can get your hands on any of these content discs for just $1. That’s not a typo–they’re just one buck. So indulge–it won’t break the bank.

Since the discs are on the Clearance Rack, they must be purchased via demonstrator or online order. Go get yours today.

********************************************************************

It’s the time of year us Stampin’ Up! Fans look forward to, it’s Sale-a-bration time!!!!  The best time of year to get your Stampin’ Up! products.  Why you ask?

Shop and receive a free Sale-a-bration product for every $50 you spend.  CLICK HERE TO CHECK OUT THE SALE-A-BRATION PRODUCTS! This is a long brocure so be sure to scan right when viewing. . . . .

CLICK HERE TO SHOP NOW

***********************************************************************

Join Stampin’ Up! during Sale-a-bration and chose $156.50 in product in your kit for just $99.  That’s 25% more product!   Start a business or just enjoy being a demonstrator to receive the 20% discount.

CLICK HERE TO LEARN MORE!

*************************************************

It’s a Magical Paper Escape Every Month!

Check this out, you can now get a monthly kit called Paper Pumpkin from Stampin’ Up! that includes exclusive stamps and everything you will need for a great project.  You can get more info on this great product at www.mypaperpumpkin.com They even have a try me kit!  You won’t want to miss out on even one of these kits. . . . . . .  Please select me as your demonstrator when placing your order.

Also. . . . . . .

There is now a great stamp kit, Dude Your Welcome,  for the men in your life.  Check it out!

Guys don’t always have the easiest time expressing themselves, but with the Dude, You’re Welcome! kit, they’ll have

  • Four wood-mount stamps (double-mounted) with the perfect sentiment for every occasion
  • Twelve 4″ x 6″ postcards in four different (manly) colors
  • Twelve gray envelopes
  • A Basic Gray Classic Stampin’ Pad
  • An instructional guide (for the most novice stamper!)

Basically, the kit includes everything a dude needs to create the perfect manly card that any woman would adore, all packaged in an appropriately masculine box.

This set can be purchased now with item number 132807.  Great gift idea!

********************************************

Check out the brand new Spring Catalog and get all those supplies you need for your up coming projects.

CLICK HERE TO SHOP!

**********************************************************

Have you checked out the great clearance rack at Stampin’ Up!  CLICK HERE

New items added!


Pop Up Posies Pond Scrapbook Page – Tutorial #571


Hello There,

I’m still on my mission to get all my pictures out of frames that are sitting around and get them into Scrapbook frames to hang on the wall.  Today I am focusing on a photo of my Mom.   She passed over 2 years ago and I still found myself teary eyed though the process of this page.   I hope she is looking down smiling at me and what I did with her picture.  I also hope you enjoy the project and give it a try using the tutorial I created below.

The background is created using the direct to paper technique.  I created the lily pads using a circle die cut and the flowers are from the Stampin’ Up! Pop Up Posies Designer kit that can be found in the Stampin’ Up! Spring Catalog.

Now on with today’s tutorial. . . . .  . .

Project Supplies:

Card Stock: Stampin’ Up! Summer Starfruit, Early Espresso, Soft Suede, Calypso Coral, Always Artichoke

Ink: Stampin’ Up! Early Espresso, Primrose Petal, Soft Suede and Marina Mist

Accessories: Stampin’ Up! sponge, Sponge Dauber, Bone folder, Big Shot, Stampin’ Dimensionals, Clear Circle Die, Fancy Fan Embossing Folder, In Color Dahlias (127556), Pop Up Posies Designer Kit (131395), Timeless Type Alpha Dies (retired)


Started with a 11.75″ x 11.75″ piece of Summer Starfruit card stock.  Dragged the Marina Mist ink pad from the top of the card stock down to the bottom over and over until the color was all the way across.

In the same manner added Soft Suede ink.

Added Early Espresso ink in the same manner only just around the edges.

Die cut the Clear Circle die using the Big Shot Machine and Always Artichoke card stock.  Cut 4.

Cut a wedge out of the side of the circles.

Sponged Early Espresso ink in the center and on the edges of the circles.

Embossed the circles using the Fancy Fan embossing folder.

Added the lily pads to the page along with a 6 x 8 piece of Soft Suede card stock.

For each flower you will need 3 of the Calypso Coral flowers from the Pop Up Posies Designer set.   Sponged Primrose Petal ink in the center of one of the flowers.  Took a bone folder and curled the petals of all three of the flowers.

Assembled the flowers by turning the bottom flower so the tips point down and the add the other 2 flowers with the sponged flower on top.  Added a Summer Starfruit Dahlia to the center of the flower.   Adhered the flowers to the page using Stampin’ Dimensionals so they are popped up.  Made 5.


Added a Calypso Coral tag that has been embossed with the Fancy Fan embossing folder and Big Shot Machine.   Clipped a V shape in the bottom of the card stock and sponged Early Espresso ink around the edges.   Added Die Cut letters spelling “Mom” in Early Espresso card stock.

Added The picture with a Calypso Coral and Early Espresso card stock panels behind it to the layout using Stampin’ Dimensionals so it would be popped up.  Also added a Summer Starfruit 12 x 12 panel to the back of the layout.

Here is the finished project.  🙂

May you be surrounded by those you love today.

Until my next post. . . . . .

Check out the awesome things happening at Stampin’ Up! below.

Hugs,

*******************************************

Weight loss in 2013:  9.5 lbs

*************************************************

It’s the time of year us Stampin’ Up! Fans look forward to, it’s Sale-a-bration time!!!!  The best time of year to get your Stampin’ Up! products.  Why you ask?

Shop and receive a free Sale-a-bration product for every $50 you spend.  CLICK HERE TO CHECK OUT THE SALE-A-BRATION PRODUCTS! This is a long brocure so be sure to scan right when viewing. . . . .

CLICK HERE TO SHOP NOW

***********************************************************************

Join Stampin’ Up! during Sale-a-bration and chose $156.50 in product in your kit for just $99.  That’s 25% more product!   Start a business or just enjoy being a demonstrator to receive the 20% discount.

CLICK HERE TO LEARN MORE!

*************************************************

It’s a Magical Paper Escape Every Month!

Check this out, you can now get a monthly kit called Paper Pumpkin from Stampin’ Up! that includes exclusive stamps and everything you will need for a great project.  You can get more info on this great product at www.mypaperpumpkin.com They even have a try me kit!  You won’t want to miss out on even one of these kits. . . . . . .  Please select me as your demonstrator when placing your order.

Also. . . . . . .

There is now a great stamp kit, Dude Your Welcome,  for the men in your life.  Check it out!

Guys don’t always have the easiest time expressing themselves, but with the Dude, You’re Welcome! kit, they’ll have

  • Four wood-mount stamps (double-mounted) with the perfect sentiment for every occasion
  • Twelve 4″ x 6″ postcards in four different (manly) colors
  • Twelve gray envelopes
  • A Basic Gray Classic Stampin’ Pad
  • An instructional guide (for the most novice stamper!)

Basically, the kit includes everything a dude needs to create the perfect manly card that any woman would adore, all packaged in an appropriately masculine box.

This set can be purchased now with item number 132807.  Great gift idea!

********************************************

Check out the brand new Spring Catalog and get all those supplies you need for your up coming projects.

CLICK HERE TO SHOP!

**********************************************************

Have you checked out the great clearance rack at Stampin’ Up!  CLICK HERE

New items added!

CHECK OUT MY STAMPING EVENTS Click here to see my event calendar


Phone Booth Card – Tutorial #570

Hello There,

I’m having fun with this free Stampin’ Up! Sale-a-bration set, Feeling Sentimental.   Today I decided to light the phone booth up with a street light.  What do you think?

Check out my tutorial below for this card.

Before I start the tutorial though, I have a blog candy winner to announce!  The winner is. . . . . . . .

Jodi Mosher who wrote “Blog candy!, can’t get much better than that. Except maybe your weight lose! Congratulations and best of luck to you on how ever far you plan to go.”

Congratulations Jodi Mosher!!!  Please e-mail your shipping address to me at mzindorf@aim.com within 30 days and I will get this great set out to you.

As always, thanks to everyone for playing along.

********************************************

I’ve added this card to my sales page.  CLICK HERE TO CHECK IT OUT

********************************************

Now on with today’s tutorial. . . . .  . .

Project Supplies:

Stampin’ Up! Stamps: Feeling Sentimental (Free Sale-a-bration set, item number 129630)   CLICK HERE TO CHECK OUT THE SALE-A-BRATION PRODUCTS!

OH, Hello (Sentiment)

Card Stock: Stampin’ Up! Whisper White, Basic Black, Basic Gray, Cherry Cobbler and Going Gray Striped DSP

Ink: Stampin’ Up! Sahara Sand, Daffodil Delight, Marina Mist, Not Quite Navy, Night of Navy, Soft Suede, Basic Black

Accessories: Stampin’ Up! sponges, Basic Black Ribbon, Silver Brads, Real Red, Daffodil Delight markers, circle punches, piercing tools, Versamarker, Clear Embossing powder, heat gun and corner rounder punch.

Stamped phone booth with Craft Basic Black ink on a 4.75″ x 3.5″ piece of Whisper White card stock and then heat embossed the image using clear embossing powder and a heat gun.


Colored the phone booth using Real Red and Daffodil Delight markers.

Dried the image using a heat gun.  This is so the markers will set a bit and not smear around as much in the next step.

Colored over the phone booth using a Versamarker and then heat embossed the image using clear embossing powder and a heat gun.

Sponged Daffodil Delight ink on the card stock.

Sponged Marina Mist ink on the card stock.


Sponged Not Quite Navy on the card stock.

Sponged Night of Navy ink on the card stock.

Punched to small circles, one from Basic Black and one from Daffodil Delight.  Layered the smaller circle inside of the other one.  Added a Basic Black card stock strip for a light post.

Added a hook shape to attach the light to the post with a Basic Black marker.

Sponged Sahara Sand ink at the bottom of the card stock.

Sponged Soft Suede ink at the bottom of the phone booth for a shadow.

Cut a Basic Black card stock panel 3.75″ x 5″.   Used the corner rounder on the top left and bottom right corners of the black panel and the main image panel.

Sponged Basic Black ink around the edges of the main image panel.

Stamped OH, Hello with Basic Black ink.


Added a 4.75″ x 6.25″ Basic Gray panel, 2″ x 6″ piece of Basic Gray striped DSP, Cherry Cobbler strip of card stock and Basic Black Ribbon.

Added Silver Brads and a 5″ x 6.5″ piece of Basic Black card stock.

Added a Whisper White card base.  Here is the finished card measuring 5″ x 6.5″.

May your day be filled with sunshine.

Until my next post. . . . . .

Check out the awesome things happening at Stampin’ Up! below.

Hugs,

*******************************************

Weight loss in 2013:  9.5 lbs

*************************************************

It’s the time of year us Stampin’ Up! Fans look forward to, it’s Sale-a-bration time!!!!  The best time of year to get your Stampin’ Up! products.  Why you ask?

Shop and receive a free Sale-a-bration product for every $50 you spend.  CLICK HERE TO CHECK OUT THE SALE-A-BRATION PRODUCTS! This is a long brocure so be sure to scan right when viewing. . . . .

CLICK HERE TO SHOP NOW

***********************************************************************

Join Stampin’ Up! during Sale-a-bration and chose $156.50 in product in your kit for just $99.  That’s 25% more product!   Start a business or just enjoy being a demonstrator to receive the 20% discount.

CLICK HERE TO LEARN MORE!

*************************************************

It’s a Magical Paper Escape Every Month!

Check this out, you can now get a monthly kit called Paper Pumpkin from Stampin’ Up! that includes exclusive stamps and everything you will need for a great project.  You can get more info on this great product at www.mypaperpumpkin.com They even have a try me kit!  You won’t want to miss out on even one of these kits. . . . . . .  Please select me as your demonstrator when placing your order.

Also. . . . . . .

There is now a great stamp kit, Dude Your Welcome,  for the men in your life.  Check it out!

Guys don’t always have the easiest time expressing themselves, but with the Dude, You’re Welcome! kit, they’ll have

  • Four wood-mount stamps (double-mounted) with the perfect sentiment for every occasion
  • Twelve 4″ x 6″ postcards in four different (manly) colors
  • Twelve gray envelopes
  • A Basic Gray Classic Stampin’ Pad
  • An instructional guide (for the most novice stamper!)

Basically, the kit includes everything a dude needs to create the perfect manly card that any woman would adore, all packaged in an appropriately masculine box.

This set can be purchased now with item number 132807.  Great gift idea!

********************************************

Check out the brand new Spring Catalog and get all those supplies you need for your up coming projects.

CLICK HERE TO SHOP!

**********************************************************

Have you checked out the great clearance rack at Stampin’ Up!  CLICK HERE

New items added!

CHECK OUT MY STAMPING EVENTS Click here to see my event calendar


Feeling Sentimental – Tutorial #569

Hi There,

It’s totally freezing here in Ohio.  When the temps drop don’t you just want to stay in your Pj’s and stamp, stamp, stamp?  Well that’s what I have decided to do today.

I selected another free Sale-a-bration set to work with.  This one is called Feeling Sentimental.   I gave motion to the bike by stamping it multiple times.   Hang out a few moments and check out my tutorial below.

Stay tuned to the bottom of this post to check out what sale-a-bration is all about and how you can get this stamp set for free.

********************************************

I’ve added this card to my sales page.  CLICK HERE TO CHECK IT OUT

********************************************

Now on with today’s tutorial. . . . .  . .

Project Supplies:

Stampin’ Up! Stamps: Feeling Sentimental (Free Sale-a-bration set, item number 129630)CLICK HERE TO CHECK OUT THE SALE-A-BRATION PRODUCTS!

Teeny Tiny Wishes

Card Stock: Stampin’ Up! Whisper White, Baja Breeze, Soft Suede and Crumb Cake

Ink: Stampin’ Up! Early Espresso, Soft Suede, Sahara Sand and Baja Breeze

Accessories: Stampin’ Up! sponges, Word Window punch, Modern Label punch, Crumb Cake Seam Binding, Soft Suede Marker, Brass Brads, Fancy Fan Embossing Folder, Big Shot Machine and Stampin’ Dimensionals

Started With 3″ x 5.5″ piece of Whisper White card stock.  Sponged Sahara Sand ink at the bottom and Baja Breeze ink at the top.

Stamped the first bike with Early Espresso ink, Second with Soft Suede ink then stamped the 3rd and fourth bikes without loading any more ink on my stamp.

I practiced this a few times, lol.

Sponged Soft Suede ink in the center of the first bike’s large wheel and at the bottom of the first bike.

Colored the first bikes frame and bottom of the tires in with a Soft Suede marker.

Added Brass brads to the bike.

Cut a 6.25″ x 4.75″ piece of Baja Breeze card stock and embossed it with the Fancy Fan Embossing folder and Big Shot Machine.

Cut the top 2″ of the card stock off.   Added a 6.5″ x 5″ piece of Soft Suede card stock.

Added a Crumb Cake Seam Binding Ribbon.

Punched the Modern Label Punch out of Soft Suede card stock and then stamped my sentiment on Crumb Cake with Early Espresso ink and punched it out with the Word Window punch.

Put it all together and added brass brads to the Modern Label Punch.

Here is the finished card measuring 6.5″ x 5″.

May your day be filled with warmth and comfort.

Until my next post. . . . . .

Check out the awesome things happening at Stampin’ Up! below.

Hugs,

*******************************************

Weight loss in 2013:  7 lbs

*************************************************

It’s the time of year us Stampin’ Up! Fans look forward to, it’s Sale-a-bration time!!!!  The best time of year to get your Stampin’ Up! products.  Why you ask?

Shop and receive a free Sale-a-bration product for every $50 you spend.  CLICK HERE TO CHECK OUT THE SALE-A-BRATION PRODUCTS! This is a long brocure so be sure to scan right when viewing. . . . .

CLICK HERE TO SHOP NOW

***********************************************************************

Join Stampin’ Up! during Sale-a-bration and chose $156.50 in product in your kit for just $99.  That’s 25% more product!   Start a business or just enjoy being a demonstrator to receive the 20% discount.

CLICK HERE TO LEARN MORE!

*************************************************

It’s a Magical Paper Escape Every Month!

Check this out, you can now get a monthly kit called Paper Pumpkin from Stampin’ Up! that includes exclusive stamps and everything you will need for a great project.  You can get more info on this great product at www.mypaperpumpkin.com They even have a try me kit!  You won’t want to miss out on even one of these kits. . . . . . .  Please select me as your demonstrator when placing your order.

Also. . . . . . .

There is now a great stamp kit, Dude Your Welcome,  for the men in your life.  Check it out!

Guys don’t always have the easiest time expressing themselves, but with the Dude, You’re Welcome! kit, they’ll have

  • Four wood-mount stamps (double-mounted) with the perfect sentiment for every occasion
  • Twelve 4″ x 6″ postcards in four different (manly) colors
  • Twelve gray envelopes
  • A Basic Gray Classic Stampin’ Pad
  • An instructional guide (for the most novice stamper!)

Basically, the kit includes everything a dude needs to create the perfect manly card that any woman would adore, all packaged in an appropriately masculine box.

This set can be purchased now with item number 132807.  Great gift idea!

********************************************

Check out the brand new Spring Catalog and get all those supplies you need for your up coming projects.

CLICK HERE TO SHOP!

**********************************************************

Have you checked out the great clearance rack at Stampin’ Up!  CLICK HERE

New items added!

CHECK OUT MY STAMPING EVENTS Click here to see my event calendar


Bloomin’ Marvelous Hummingbird – Tutorial #568

Hey There,

I’m back with my tutorial for today.   I announced this morning that Stampin’ Up’s Sale-a-bration period started today and the stamp set I used in this card is one of the free sets you can get with a $50 purchase.  Check out the bottom of this post to learn more about the great savings and free stuff you can get during Sale-a-bration.

********************************************

I’ve added this card to my sales page.  CLICK HERE TO CHECK IT OUT

********************************************

Now on with today’s tutorial. . . . .  . .

Project Supplies:

Stampin’ Up! Stamps: Bloomin’ Marvelous (Free Sale-a-bration set, item number 129654)CLICK HERE TO CHECK OUT THE SALE-A-BRATION PRODUCTS!

Card Stock: Stampin’ Up! Whisper White, Cajun Craze, Tempting Turquoise and Soft Suede

Ink: Stampin’ Up! Tempting Turquoise, Not Quite Navy, Old Olive and Cajun Craze

Accessories: Stampin’ Up! sponges, brayer, Framelits-Apothecary Accents, Big Shot Machine, Clear embossing Powder, Heat Gun, Tempting Turquoise and More Mustard markers, Versamark pad, Designer Builder Brads, Stampin’ Dimensionals, Silver Brad, small hole punch, Soft Suede Ribbon

Using the Framelits – Apothecary Accents and the Big Shot Machine, I die cut my main image panel.

Loaded the flower stamp from the Bloomin’ Marvelous Stamp set with Versamark then added More Mustard marker to the middle of the stamp and Tempting Turquoise to the flower petals on the stamp.  Then stamped the image.  Repeated this twice loading the stamp each time.   Heat embossed the flowers using clear embossing powder and a heat gun.

Load the leaf stamp from the Bloomin’ Marvelous set with Versamark and the Old Olive ink and then stamped the image.  Repeated 3 more times loading the stamp each time.   Heat embossed the images using clear embossing powder and a heat gun.

Brayered Cajun Craze ink at an angle on the main image panel.

Wiped the embossed images off with a paper towel.

Stamped the Hummingbird using Old Olive ink.

Die cut the largest Framelits – Apothecary Accents die using Tempting Turquoise card stock.  Stamped the flower on the right side of the card stock using Tempting Turquoise ink.

Stamped the flower using Not Quite Navy ink and then sponged the Not Quite Navy ink on the edges.

Punched a small circle of Tempting Turquoise and then added it to the center of the Designer Builder Brad and added it to the main image panel.  Added a Silver brad to the left side.

Used the Fancy Fan embossing folder and the Big Shot Machine to emboss a Cajun Craze panel.

Added a Tempting Turquoise panel, Soft Suede panel and another Cajun Craze panel.  Also, added  Soft Suede ribbon and popped the main image panel up using Stampin’ Dimensionals.

Added a Whisper White card base.

Here is the finished card measuring 4.25″ x 5.5″.

May your day be very special.

Until my next post. . . . . .

Check out the awesome things happening at Stampin’ Up! below.

Hugs,

*******************************************

Weight loss in 2013:  6.6 lbs

*************************************************

It’s the time of year us Stampin’ Up! Fans look forward to, it’s Sale-a-bration time!!!!  The best time of year to get your Stampin’ Up! products.  Why you ask?

Shop and receive a free Sale-a-bration product for every $50 you spend.  CLICK HERE TO CHECK OUT THE SALE-A-BRATION PRODUCTS! This is a long brocure so be sure to scan right when viewing. . . . .

CLICK HERE TO SHOP NOW

***********************************************************************

Join Stampin’ Up! during Sale-a-bration and chose $156.50 in product in your kit for just $99.  That’s 25% more product!   Start a business or just enjoy being a demonstrator to receive the 20% discount.

CLICK HERE TO LEARN MORE!

*************************************************

It’s a Magical Paper Escape Every Month!

Check this out, you can now get a monthly kit called Paper Pumpkin from Stampin’ Up! that includes exclusive stamps and everything you will need for a great project.  You can get more info on this great product at www.mypaperpumpkin.com They even have a try me kit!  You won’t want to miss out on even one of these kits. . . . . . .  Please select me as your demonstrator when placing your order.

Also. . . . . . .

There is now a great stamp kit, Dude Your Welcome,  for the men in your life.  Check it out!

Guys don’t always have the easiest time expressing themselves, but with the Dude, You’re Welcome! kit, they’ll have

  • Four wood-mount stamps (double-mounted) with the perfect sentiment for every occasion
  • Twelve 4″ x 6″ postcards in four different (manly) colors
  • Twelve gray envelopes
  • A Basic Gray Classic Stampin’ Pad
  • An instructional guide (for the most novice stamper!)

Basically, the kit includes everything a dude needs to create the perfect manly card that any woman would adore, all packaged in an appropriately masculine box.

This set can be purchased now with item number 132807.  Great gift idea!

********************************************

Check out the brand new Spring Catalog and get all those supplies you need for your up coming projects.

CLICK HERE TO SHOP!

**********************************************************

Have you checked out the great clearance rack at Stampin’ Up!  CLICK HERE

New items added!

CHECK OUT MY STAMPING EVENTS Click here to see my event calendar


Stampin’ Up! Owl Card – Tutorial #566

Hello There,

The chill is in the air here in Ohio for sure.  We are suppose to see single digit temps in the next few days, burrrrrrrr.   This card should warm someone up though, at least their heart, right?

I made 30 of these and the Stampin’ Up! owl punch made quick work of it.   One thing about the owl punch that I don’t show here is that you can really customize your owl.  I’ve seen the owls created with designer paper and they are super cute.  I’m sure there are so many combinations of colors and DSP that you would never get tired of using this little guy.

*******************************************

Here is the link if you wish to enter for a chance to win this great set.  CLICK HERE

Winner will be selected on Saturday, January 19, 2013.

********************************************

Now on with today’s tutorial. . . . .  . .

Project Supplies:

Stampin’ Up! Stamps: Take Care (item #126312) and Netting background stamp (item#122655)

Card Stock: Stampin’ Up! Whisper White, Tempting Turquoise, Old Olive, Cajun Craze, Cherry Cobbler and Basic Black

Ink: Stampin’ Up! Basic Black, Tempting Turquoise, Lucky Limeade and Cajun Craze

Accessories: Stampin’ Up! sponges, ruler, Stampin’ Up! Owl Builder Punch (item #118074), Piercing tools, Soft Suede and Basic Black markers


Punched the pieces for the owl using the Owl Builder punch.  As you see I am making many of these cards today.   I punched the large circle for the eye and the chest piece using Whisper White card stock, the owl in both Cajun Craze and Lucky Limeade, the medium circle using Basic Black card stock and the heart using Cherry Cobbler card stock.

I wanted a design on the chest piece so I inked up my Netting background stamp and put the chest pieces on it and then put a piece of scrap paper over the stamp and rubbed gentle.   I did half of the pieces using Cajun Craze ink and half of them with Lucky Limeade ink.   I then sponged the edges with the same color they were stamp in.

For the sky, I used the direct to paper technique and quickly smeared the ink with the ink pad directly on the card stock.   The card stock is 3.5″ x 4.5″ Whisper White.  Every background you do with this method will look different.

Stamped the limb using Basic Black ink.

Using a ruler I added the swing seat using a Soft Suede Marker.  I drew it to be 2.75″ wide.

Removed the ruler and made the swing seat a bit thicker with the marker.


added the swing ropes using a ruler and a Basic Black marker.

Sponged Basic Black ink around the edge of the card stock and assembled the owls and adhered them to the card stock.  I tilted the owl on the right so it looks like it is snuggling up with the one on the left.

Added a 3.75″ x 5.25″ piece of Old Olive card stock and then pierced the right and left side of the Old Olive panel.

Added a Tempting Turquoise card base measuring 8.5″ x 5.5″ folded in half.

Here is the finished card.

May your day be spent with someone you love.

Check out all the great things happening at Stampin’ Up! below.

Until my next post. . . . . .

Hugs,

*******************************************

Weight loss in 2013:  6.6 lbs

*************************************************

It’s a Magical Paper Escape Every Month!

Check this out, you can now get a monthly kit called Paper Pumpkin from Stampin’ Up! that includes exclusive stamps and everything you will need for a great project.  You can get more info on this great product at www.mypaperpumpkin.com They even have a try me kit!  You won’t want to miss out on even one of these kits. . . . . . .

Also. . . . . . .

There is now a great stamp kit, Dude Your Welcome,  for the men in your life.  Check it out!

Guys don’t always have the easiest time expressing themselves, but with the Dude, You’re Welcome! kit, they’ll have

  • Four wood-mount stamps (double-mounted) with the perfect sentiment for every occasion
  • Twelve 4″ x 6″ postcards in four different (manly) colors
  • Twelve gray envelopes
  • A Basic Gray Classic Stampin’ Pad
  • An instructional guide (for the most novice stamper!)

Basically, the kit includes everything a dude needs to create the perfect manly card that any woman would adore, all packaged in an appropriately masculine box.

This set can be purchased now with item number 132807.  Great gift idea!

********************************************


CLICK HERE TO SEE THE LATEST STAMPIN’ UP! PROMOTION AND TO SHOP NOW!

************************************************************

Check out the brand new Spring Catalog and get all those supplies you need for you up coming projects.

CLICK HERE TO SHOP!

**********************************************************

Have you checked out the great clearance rack at Stampin’ Up!  CLICK HERE

New items added!

CHECK OUT MY STAMPING EVENTS Click here to see my event calendar


Lovely As A Tree Sympathy Card – Stampin’ Up! Tutorial #565

I have a Sympathy Card Tutorial for you today.  I created this for my dear neighbor who lost a loved one this past weekend.   I hope this card brings some comfort to her.

A little about the card, I used direct to paper to create the background for the trees.   Check out the tutorial below.  🙂

***********************************************

I’m just returning from Stampin’ Up’s Leadership Conference where I learned about some very exciting products that are coming out and had a great time with friends.

It’s a Magical Paper Escape Every Month!

Check this out, you can now get a monthly kit called Paper Pumpkin from Stampin’ Up! that includes exclusive stamps and everything you will need for a great project.  You can get more info on this great product at www.mypaperpumpkin.com They even have a try me kit!  You won’t want to miss out on even one of these kits. . . . . . .

Also. . . . . . .

There is now a great stamp kit, Dude Your Welcome,  for the men in your life.  Check it out!

Guys don’t always have the easiest time expressing themselves, but with the Dude, You’re Welcome! kit, they’ll have

  • Four wood-mount stamps (double-mounted) with the perfect sentiment for every occasion
  • Twelve 4″ x 6″ postcards in four different (manly) colors
  • Twelve gray envelopes
  • A Basic Gray Classic Stampin’ Pad
  • An instructional guide (for the most novice stamper!)

Basically, the kit includes everything a dude needs to create the perfect manly card that any woman would adore, all packaged in an appropriately masculine box.

This set can be purchased now with item number 132807.  Great gift idea!

********************************************

Now on with today’s tutorial. . . . .  . .

Project Supplies:

Stampin’ Up! Stamps: Lovely as a Tree  and Occasions Alphabet

Card Stock: Stampin’ Up! Whisper White, Old Olive and Not Quite Navy

Ink: Stampin’ Up! Not Quite Navy, River Rock, Always Artichoke, Old Olive, Certainly Celery and So Saffron

Accessories: Stampin’ Up! sponges, Print Poetry Designer Series Paper Stack, Midnight Muse Satin Stitched Ribbon, Summer Smooches Brads, Bigz Tasteful Trim Die, Big Shot Machine and Simply Scored board

It’s best to have your ink pad well inked for the Direct to Paper Technique.

I swiped the So Saffron ink pad directly across the 3 7/8″ x 4.4″ piece of Whisper White card stock.

Smeared the well inked River Rock ink pad on the paper creating mountain shapes.

Stamped the pine tree multiple times at different heights using Always Artichoke ink.

Sponged Certainly Celery ink over the pine trees.

Sponged Old Olive ink over the bottom half of the pine trees.

Tap the Always Artichoke ink pad at the bottom of the card stock.

Die cut a piece of DSP using the Tasteful Trim Die and Big Shot Machine.

Scored the die cut with the Simply Scored tool every 1/4 inch.

Added 2 Not Quite Navy panels (5″ x 6.5″ and 4″ x 4.5″), 2 Old Olive panels (4.75″ x 6.25″ and 4.25″ x 4.75″) and a 4.5″ x 6″ piece of Print Poetry Designer Series Paper Stack.

Put a line of adhesive where I want the Scallop strip to be and then started at the top and folded the piece a bit here and there to get some great texture.

Added Summer Smooches brads and Midnight Muse Satin Stitched Ribbon.

Stamped the Sympathy stamp from the Occasions Alphabet set using Not Quite Navy ink.

Added a Whisper White card base.

Here is the finished card measuring 5″ x 6.5″.

May your day be one of peace and harmony.

Check out the great deals at Stampin’ Up!  and my events calendar below.

Until my next post. . . . . .

Hugs,

*******************************************

Weight loss in 2013:  2.9 lbs

*************************************************

CLICK HERE TO SEE THE LATEST STAMPIN’ UP! PROMOTION AND TO SHOP NOW!


************************************************************

Check out the brand new Spring Catalog and get all those supplies you need for you up coming projects.

CLICK HERE TO SHOP!

**********************************************************

Have you checked out the great clearance rack at Stampin’ Up!  CLICK HERE

New items added!

***********************************************************

Michelle’s Free Stamp Program

Don’t miss out on my Customer free stamp set program. Check it out!  Along with a handmade thank you card from me for your order you will receive a token for each $50 in product you ordered using me as your demonstrator.  After you have collected 10 tokens you will receive a free current stamp set of your choosing, a value of $39 or less.   Here is a link to my online shopping page that you can shop at 24/7 (from the comfort of your home, even in your pj’s) and the products will be shipped directly to your door step from Stampin’ Up:   CLICK HERE TO SHOP.   My free stamp set program will be an on going program.  :)

***************************************************

CHECK OUT MY STAMPING EVENTS Click here to see my event calendar


Rooster Crows – Tutorial #563

Hello There,

I have chickens on my mind today.  My hens are laying like crazy, keeping Russ and I in fresh eggs, yummy.  We have hens, no roosters.  Did you know you don’t need a rooster for your hens to lay?  Alot of people don’t realize that.    You only need a rooster if you want fertilized eggs.   Boy you never know what you are going to learn on my blog, lol.

A rooster is appropriate for this scene though.  Can’t you just hear him crowing in the early morning.   There is a rooster a farm over from us and when we sit out on the deck in the morning we can hear him.  I love the sound in the distance.

Today’s tutorial features a new Stampin’ Up! Spring Catalog Embossing folder, Honeycomb.  When I first layed eyes on it I decided it would be great to use for chicken wire on cards.  What do you think?    Talk about texture in your card this embossing folder really embosses deep.

I also snuck a sneak peep in this card for you from our up coming Stampin’ Up! Sale-a-bration Catalog that will be active starting January 22, 2013.  It’s the little hello stamp from the Pretty Petites stamp set and coordinating Petite Curly Label Punch.   It really layers well with the Curly Label punch.    The sale-a-bration items will be free with a $50 order starting January 22nd.   So stay tuned for those.

This card has been added to my sales page.  Click here to check it out.

Spring Catalog

****************************************

Now on with today’s tutorial. . . . .  . .

Project Supplies:

Stampin’ Up! Stamps: A Fitting Occasion (item number 127049) and Pretty Petites (Sale-a-bration set coming soon)

Card Stock: Stampin’ Up! Whisper White, Basic Black and Old Olive

Ink: Stampin’ Up! Basic Black, More Mustard, Cajun Craze and Old Olive

Accessories: Stampin’ Up! Sponges, Honeycomb embossing folder (item#129378), Big Shot Machine, 2.5″ Circle Punch, 1″ Circle Punch, Curly Label Punch, Petite Curly Label Punch, Silver Marker, Basic Black marker, Silver Brads, post it notes and Old Olive Dotted Ribbon

Punched a 2.5″ Circle from Whisper White card stock.

Punched a 1″ circle from the sticky part of a post it note and used it as a mask for the sun.

Sponged More Mustard ink all over the card stock.


Used a post it note to mask for the rays and sponged with Cajun Craze ink along the edge of the post it note to create them.  Moved the post it note for each ray.


After all the rays were put in I sponged Cajun Craze ink around the edge of the 1″ circle mask.

Removed the circle and sponged More Mustard ink in the sun.

Sponged Old Olive ink at the bottom of the circle to create a grassy area.

Stamped the rooster with Basic Black ink.  It is easier to stamp the rooster before you put the fence in.

Add a crude fence using a Basic Black marker.

Sponged Basic Black ink around the edge of the card stock.

Cut a 4″ x 5.25″ and 3″ x 4.75″ Basic Black panels and punched a Basic Black Curly Label punch.  Edge each one with the Stampin’ Up! Silver Marker.  The silver makes the edges look like they are recessed.

Run the Panels through the Big Shot using the Honeycomb embossing Folder.

Added the main image panel, Old Olive ribbon, Curly Label Punch, Sentiment punched out with Petite Curly Label punch and Silver Brads.

Added an Old Olive card base and popped the small panel up using Stampin’ Dimensionals.

Here is the finished card measuring 4.25″ x 5.5″.

May your day be something to crow about.

Check out the great deals at Stampin’ Up! below.

Until my next post. . . . . .

Hugs,

*******************************************

Weight loss in 2013:  2.9 lbs

*************************************************

CLICK HERE TO SEE THE LATEST STAMPIN’ UP! PROMOTION AND TO SHOP NOW!


************************************************************

Check out the brand new Spring Catalog and get all those supplies you need for you up coming projects.

CLICK HERE TO SHOP!

**********************************************************

Have you checked out the great clearance rack at Stampin’ Up!  CLICK HERE

New items added!

***********************************************************

Michelle’s Free Stamp Program

Don’t miss out on my Customer free stamp set program. Check it out!  Along with a handmade thank you card from me for your order you will receive a token for each $50 in product you ordered using me as your demonstrator.  After you have collected 10 tokens you will receive a free current stamp set of your choosing, a value of $39 or less.   Here is a link to my online shopping page that you can shop at 24/7 (from the comfort of your home, even in your pj’s) and the products will be shipped directly to your door step from Stampin’ Up:   CLICK HERE TO SHOP.   My free stamp set program will be an on going program.  :)

***************************************************

CHECK OUT MY STAMPING EVENTS Click here to see my event calendar


Poppies – Tutorial #562

Hello There,

The sun is shining today and put me in the mood to stamp and color some flowers.   I pulled out the Beautiful Stampin’ Up! Stamp Pleasant Poppies (item #129499).  I used the emboss resist technique on this project in order to put the light poppies in front of a darker background.   I also left plenty of white showing in the flowers to give them that extra pop and to add a little more life to scene I added the bird from the Everything Eleanor set.

This card has been added to my sales page.  Click here to check it out.

****************************************

Now on with today’s tutorial. . . . .  . .

Project Supplies:

Stampin’ Up! Stamps: Pleasant Poppies (item#129499), Everything Eleanor (item#124164)

Card Stock: Stampin’ Up! Whisper White, Basic Black, Baja Breeze and Summer Starfruit

Ink: Stampin’ Up! Baja Breeze, Always Artichoke, Old Olive, Summer Starfruit, Basic Black

Accessories: Stampin’ Up! Sponges, Baja Breeze Seam Binding, White Gel Pen, So Saffron, More Mustard, Summer Starfruit and Basic Black markers, Ruler, Versamarker, Clear Embossing Powder and Heat Gun

Started with a 3″ x 5.5″ Whisper White card stock and stamped the poppies on it using Craft Basic Black ink.

Heat embossed the image using clear embossing powder and a heat gun.

Added So Saffron marker to the flowers and buds leaving plenty of white showing at the edges of the petals.

Added More Mustard marker at the base of the petals and then blended it in using a So Saffron marker.

Colored over the flowers and buds using a Versamarker and the heat embossed the images using clear embossing powder and heat gun.  Now the flowers are protected and I can put my background ink in without it ruining the flowers.

Sponged Summer Starfruit on the card stock.

Sponge Old Olive ink on.

Sponged Always Artichoke ink at the bottom of the card stock.

Sponged Baja Breeze ink at the top of the card stock for the sky.

Added a Basic Black marker line across the top of the card stock using a Ruler.

Stamped the bird from the Everything Eleanor set omitting the birds legs.  I omitted the birds legs by coloring the bird with Basic Black marker on the rubber and then stamping it.

Colored the stems in with Summer Starfruit.

Added just a few white gel pen dots to the stamens in the middle of the flowers.

Added a Whisper White 5″ x 6.5″ card base, Basic Black ” x 6.5″ panel, 4.75″ x .25″ Baja Breeze panel, 3.25″ x 5.75″ Basic Black panel, 4.75″ x 1″ strip of Summer Starfruit and Baja Breeze seam binding.

Here is the finished card.

May your day be out of this world wonderful!

Check out the great deals at Stampin’ Up! below.

Until my next post. . . . . .

Hugs,

*************************************************

CLICK HERE TO SEE THE LATEST STAMPIN’ UP! PROMOTION AND TO SHOP NOW!


************************************************************

Check out the brand new Spring Catalog and get all those supplies you need for you up coming projects.

CLICK HERE TO SHOP!

**********************************************************

Have you checked out the great clearance rack at Stampin’ Up!  CLICK HERE

New items added!

***********************************************************

Michelle’s Free Stamp Program

Don’t miss out on my Customer free stamp set program. Check it out!  Along with a handmade thank you card from me for your order you will receive a token for each $50 in product you ordered using me as your demonstrator.  After you have collected 10 tokens you will receive a free current stamp set of your choosing, a value of $39 or less.   Here is a link to my online shopping page that you can shop at 24/7 (from the comfort of your home, even in your pj’s) and the products will be shipped directly to your door step from Stampin’ Up:   CLICK HERE TO SHOP.   My free stamp set program will be an on going program.  :)

***************************************************

CHECK OUT MY STAMPING EVENTS Click here to see my event calendar