Thumped Hummingbird – Tutorial #512

Hey There,

I’m patiently waiting on my large Stampin’ Up! order that is filled to the brim with all the new goodies from the brand new catalog.  Tap, tap, tap, tap, where is Mr. Brown. . . .. . . . . . lol.  I’m feeling like an expectant mother.    Actually, my order won’t be here for a couple of more days, tap, tap, tap, tap. . . . . . .   Guess, I have to play with the wonderful things I already have and my chicks, grin.   Love the chicks!   I have a chick update for those who are interested at the bottom of this post.  Yep, once again they are trying to learn how to stamp.

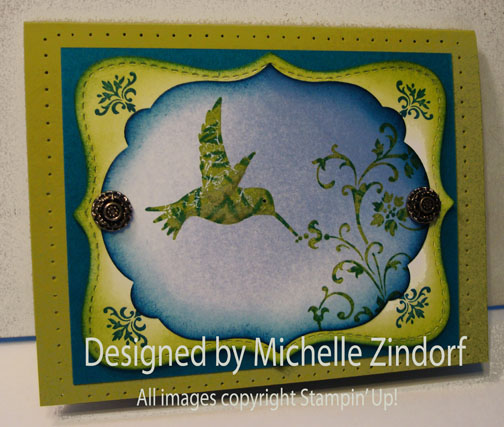
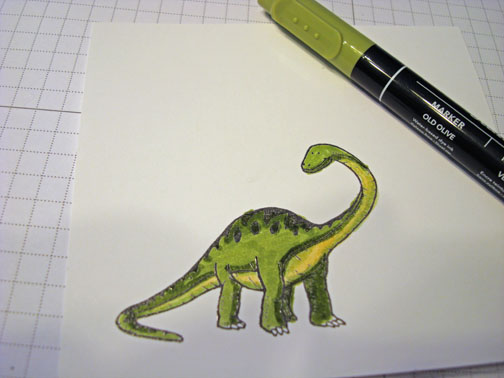
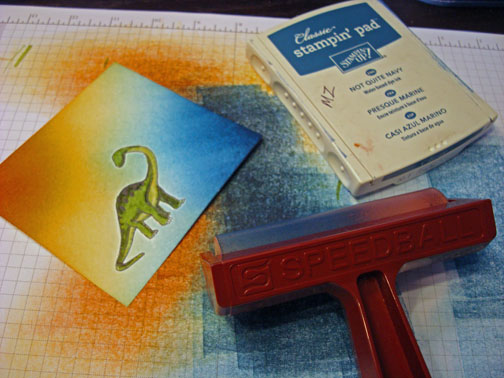
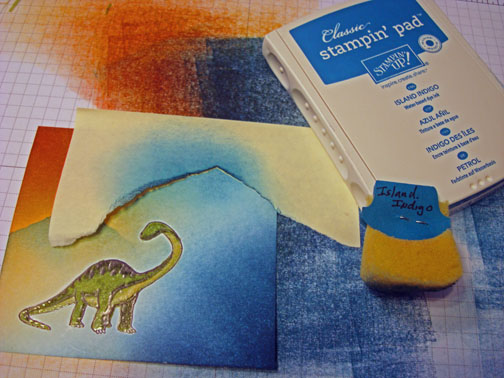
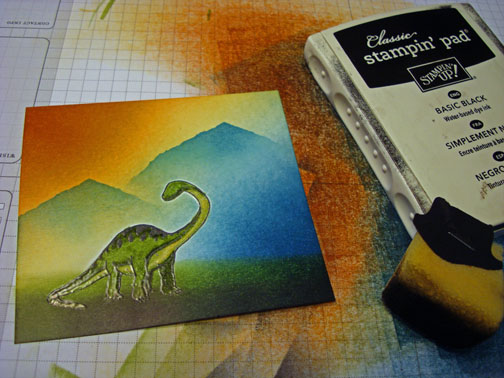
Today’s tutorial uses the wonderful Elements of Style Stamp set and the Tiny Tags Stamp set.   I’ve also pulled out the Big Shot and used a great stamping technique “Thumping”.    If you haven’t tried thumping, grab a solid stamp and an ink pad and a contrasting marker with a brush end and follow along.  It’s a simple but very lovely looking technique.

Reminders:

Check out what’s new at Stampin’ Up!  The brand new Annual Catalog has been released.   CLICK HERE TO LOOK AT THE CATALOG ONLINE. I got my order in and I’m ecstatic about the new products and, of course, the new stamps!    CLICK HERE TO PLACE AN ORDER. Contact me at mzindorf@aim.com or 937-344-1312 with product questions.

Want a new annual catalog shipped to you?     I will be happy to send you one.  The catalog is free, but there is a $5 shipping charge.   Note, I will only sell or ship within the United States do to Stampin’ Up! policies.  Please contact me at mzindorf@aim.com.  Payment can be sent via Paypal or check.

You can join my Stampin’ Up! team and become a Stampin’ Up! Demonstrator now for the great new price of $99, CLICK HERE TO CHECK IT OUT.

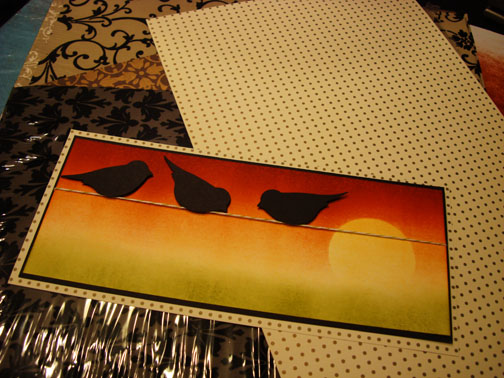
Want to purchase one of my original cards or some Stampin’ Up! retired sets CLICK HERE. I’ll be updating the sales page all this week.  So check back daily.

Now on with today’s tutorial. . . . .  . .

Supplies:

Stamps: Stampin’ Up! Elements of Style and Tiny Tags

Card Stock: Stampin’ Up! Lucky Limeade, Island Indigo and Whisper White

Ink: Stampin’ Up! Bashful Blue, Island Indigo, Lucky Limeade

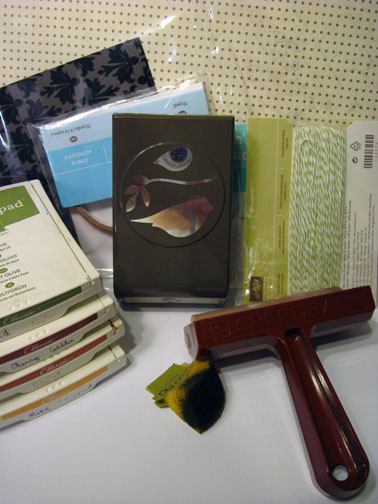
Accessories: Stampin’ Up! Sponges, Basic Black Marker, Sahara Sand Marker, Island Indigo Marker, Brayer, Antique Brads, Top Note Die, Framelits Labels Collection, Big Shot Machine, Mat Pack and Piercing Tool.

Are you getting inspiration from this blog?   One way you can help support it is to order your Stampin’ Up products through me.   Click HEREto place an order and have your order delivered directly to your door step from Stampin’ Up!


Here is a picture of the Stampin’ Up! framelets – Labels Collections.  Love them!


Used the 3rd to the largest framelet and die cut it using Whisper White card stock and the Big Shot Machine.

Also die cut a Top Note from Whisper White using the Big Shot Machine.

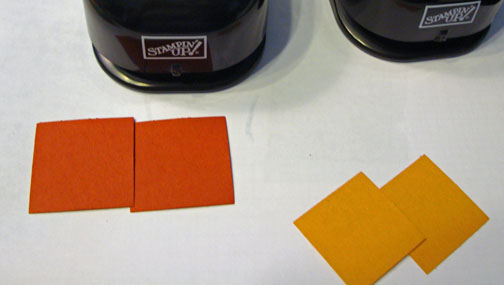
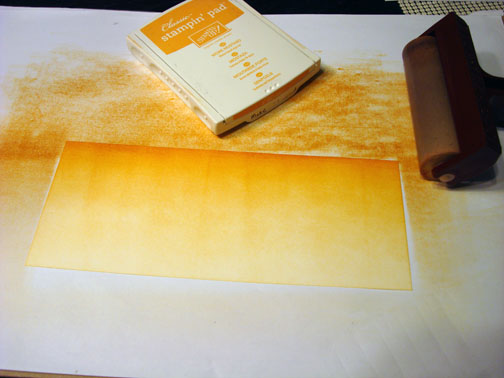
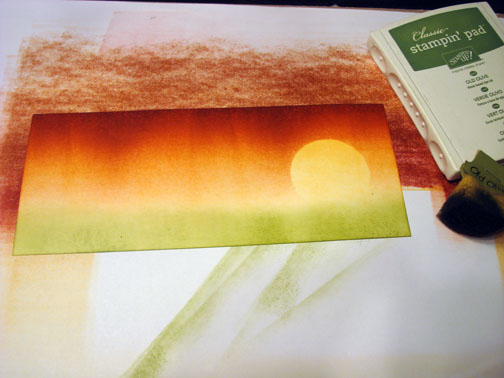
Brayer Bashful Blue ink at an angle on the card stock.

Loaded the hummingbird stamp with Lucky Limeade ink, tapped the side of the brush end of an Island Indigo marker on the inked up stamp and then huffed my breath on the stamp to moisten it and then stamp the image on my card stock.     This technique “thumping” gives this great marbled look.


Did the same process for the flourish.

Sponged Island Indigo ink around the edge of the card stock.

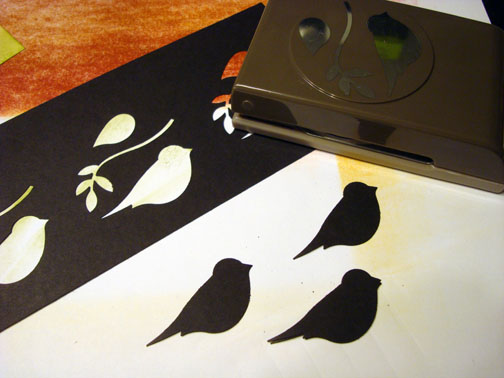
Added an eye on the bird using a Basic Black marker.

Added a shadow to the wing and bottom of the bird using the brush end of a Sahara Sand Marker.

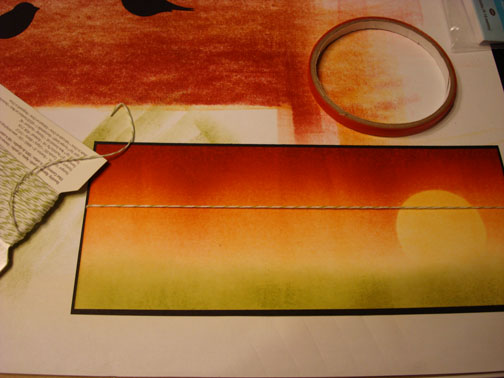
Sponged Lucky Limeade ink on the Top Note die cut, sponged Island Indigo ink around the very edge of the it and then stamp the flourish from the Tiny Tags set using Island Indigo on each corner.

Added a 3.75″ x 4.75″ piece of Island Indigo card stock to the front of a 8.5″ x 5″ piece of Lucky Limeade card stock that has been folded in half.

Using a piercing tool and mat pack, pierced holes around the edge of the card stock.

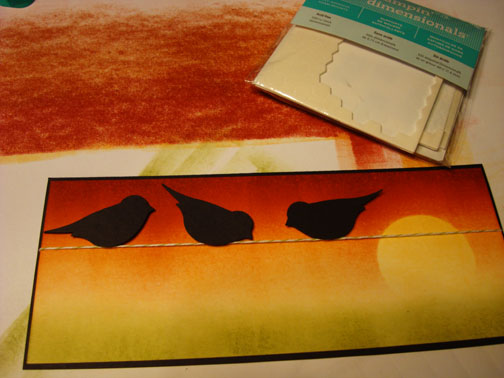
Adhered the main image panel to the top note panel and added 2 antique brads.   Adhered the top not then to the front of the card using Stampin’ Dimensionals.


Here is the finished card measuring 4.25″ x 5.5.

Now for a little chick update. . . . .

This is Red.  She is the most friendliest one of the bunch.  When I put my hand down in the brooder (cage) she jumps right up in my hand.    See how very big she is getting.    The girls are all looking like they are having a very bad feather day while their feathers are coming in and their fuzzy down feathers are being pushed out.   I bet you didn’t know that ink pads are great to perch on.

Red, spent just a couple of minutes on my stamp table before she decided to go to her favorite place, the crook of my arm.

Now, in walks Buffy.   Buffy has these creamy/gold beautiful feathers.   She will be a stunner when she reaches maturity, just wait!   Buffy is very laid back.   Her favorite thing to do is fall a sleep in your lap.  Hmmm, maybe I just bore her.

This wild feather girl is Sophie.  Sophie is shy and growing super fast.  She is, like the rest, are starting to get their combs in and check out those wings.   All those feathers weren’t there last week.

Now this is Bunny, she is my crazy girl.   If you let her, she would be into everything.   She doesn’t want to sit still like the rest.  She perched on as many things as she could in the short time she was on my desk.   It’s hard to tell in these pictures, but Bunny has Baja Breeze colored legs and multi-colored feathers.

The chicks get held daily so they won’t be a pain to hold and take care when they are full grown.   They really love being held.   Do you remember the Dr. Seuss book “Are you my Mommy.”   I think that they all asked me that daily and the answer now is yes.  🙂

May your day be filled with all the peeps you love.  🙂

Until my next post. . . . .  . . .

Hugs,

Get ready for Brayer and Direct to Paper Workshops!  I am coming to the following locations, click the location name for more information.

Sand Lake, Michigan (just North of Grand Rapids)

Lawrence, Kansas

Elizabethtown, Kentucky

West Bend, Wisconsin

Purcellville, Virginia

Orange, Massachusetts

Scottsdale, Arizona

Sacramento, California

Staley, North Carolina

St. Petersburg, Florida

Newburge, Indiana

I hope you can make it to one of my workshops in 2012.  I have decided not to travel after this year, so be sure to catch one this year!

Link to my Stampin’ Up website where you can order all of your must have Stampin’ Up products from me 24-7: http://michellezindorf.stampinup.net


Sunset Oak – Tutorial #511

Hey There,

Hope you had a wonderful Memorial Day Weekend.   Mine was spent helping one son move, up keep on the vegetable garden, some work on wedding invites for my youngest son’s wedding that will be in August, making and canning strawberry jam and a cookout with family.   Needless to say, it was a busy but wonderful weekend.

This morning I decided to create a project using the most popular of Stampin’ Up! sets, Lovely As A Tree.  That is in my opinion anyway.

Tree sets are so very easy to use and your creations can be either for a male or female.  Trees are unisex, correct?

Oh yeah, if you want to see how very much my chicks have grown since last week (they have doubled their size), you can see them at the bottom of this post.  🙂

Reminders before I start the tutorial:

You can join my Stampin’ Up! team and become a Stampin’ Up! Demonstrator now for the great new price of $99, CLICK HERE TO CHECK IT OUT.

Today and tomorrow (May 30-31, 2012) is the last chance to get some of the retired sets and accessories from Stampin’ Up!

. . .  . Check out what’s going, going, going by clicking here.

Don’t miss out on my Customer free stamp set program. Check it out!  Along with a handmade thank you card from me for your order you will receive a token for each $50 in product you ordered using me as your demonstrator.  After you have collected 10 tokens you will receive a free current stamp set of your choosing, a value of $39 or less.   Here is a link to my online shopping page that you can shop at 24/7 (from the comfort of your home, even in your pj’s) and the products will be shipped directly to your door step from Stampin’ Up:   CLICK HERE TO SHOP.   My free stamp set program will be an on going program.  :)

Want to purchase one of my orginal cards or some Stampin’ Up! retired sets CLICK HERE.

Now on with today’s tutorial. . . . .  . .

Supplies:

Stamps: Stampin’ Up! Lovely as a Tree

Card Stock: Stampin’ Up! Basic Black, Cajun Craze and Whisper White

Ink: Stampin’ Up! Basic Black, Cherry Cobber, Daffodil Delight and Cajun Craze

Accessories: Stampin’ Up! Sponges, 2.5″ Circle Punch, Post it note, gold brads, Brayer, Daffodil Delight and Sahara Sand Markers, Gold Metallic Marker

Are you getting inspiration from this blog?   One way you can help support it is to order your Stampin’ Up products through me.   Click HEREto place an order and have your order delivered directly to your door step from Stampin’ Up!    Want to become a Stampin’ Up Demonstrator , receive a 20% discount on product and earn instant income on orders, get to purchase products before they are released to the public?  Consider being part of my Stampin’ Up Team and start your own business or become a Hobby Demo just for the discount.  New special join price of $99.   Click HERE for more information.


Punched a 2.5″ Circle from a Post it note and used it as mask for the sun on a 3.5″ square piece of Whisper White card stock.

Brayered Cherry Cobbler ink all over the card stock.


Removed the sun mask and sponged Daffodil Delight ink in the sun.

Sponged Cajun Craze ink around the edge of the sun.

Stamped the Oak Tree using Basic Black ink.

Sponged Basic Black ink in for the ground.  The ink is darker at the top of the ground and very light at the bottom of the ground.


Colored in the trunk of the tree using a Sahara Sand marker.

Colored in the middle of the tree using a Daffodil Delight marker.  The marker will mix with a bit of the Basic Black from the tree and create a warm gray tone.

Edge the main image panel and a 2.5″ x 6.5″ piece of Basic Black card stock using a Gold Metallic Marker.

Added a Cajun Craze card base 6.5″ x 10″ folded in half, a 3 5/8″ Whisper White square, 3.75″ Basic Black Square, 4 Gold Brads and popped the main image panel up using Stampin’ Dimensionals.

Here is the finished card measuring 5″ x 6.5″.

Before I close, here is a little update on the chicks.  In just a weeks time they have doubled their size and now have feathers sprouting out.    We did a little photo shoot of them hanging out on my desk.

My girls all have names now.  From top left to bottom right here are their names:    Red, Buffy, Sophie and Bunny.   Yep, we are weird and so our chicks have weird names, lol.  They are all different breeds, top left to bottom right here are their breeds:  Speckled Sussex,  Buff Orpington, Black Australorp and Ameraucana.

They love to sit on my shoulder, lap or just take a nap in my hand.  They are super cute!  They live in a big plastic container with their light keeping them at a steady temperature in my living room for another 3 weeks.   I see these little ladies growing up fast and will be sad to put them outside in the coop when the time comes.  Or on the other hand, they will be quite big if they keep growing at this rate and will desperately need to be up out in the coop.


Have the best day ever!  Cheep, cheep!

Until my next post. . . . .  . . .

Hugs,

Get ready for Brayer and Direct to Paper Workshops!  I am coming to the following locations, click the location name for more information.

Sand Lake, Michigan (just North of Grand Rapids)

Lawrence, Kansas

Elizabethtown, Kentucky

West Bend, Wisconsin

Purcellville, Virginia

Orange, Massachusetts

Scottsdale, Arizona

Sacramento, California

Staley, North Carolina

St. Petersburg, Florida

Newburge, Indiana

I hope you can make it to one of my workshops in 2012.  I have decided not to travel after this year, so be sure to catch one this year!

Link to my Stampin’ Up website where you can order all of your must have Stampin’ Up products from me 24-7: http://michellezindorf.stampinup.net


Purple Fish – Tutorial #509

Hey There,

As promised, here is another Cricut project, this time using the Splish Splash cartridge.   Love combining my Stampin’ Up! products with the Cricut Dies.  It’s a breeze to get everything to be color coordinated since the Stampin’ Up! paper, markers and inks all match.   I’ve had this under water scene in my head for a while so, here it is finally on paper.   My brayer work is done at an angle so I got this great light effect.  🙂   Hope you enjoy this project!

Reminders before I start the tutorial:

You can join my Stampin’ Up! team and become a Stampin’ Up! Demonstrator now for the great new price of $99, CLICK HERE TO CHECK IT OUT.

The Stampin’ Up retired stamp and retired accessory lists are out.  Hop on over to my Stampin’ Up! sales page to check it out.  Once the products are gone, there gone!

. . .  . Check out what’s going, going, going by clicking here.

Don’t miss out on my Customer free stamp set program. Check it out!  Along with a handmade thank you card from me for your order you will receive a token for each $50 in product you ordered using me as your demonstrator.  After you have collected 10 tokens you will receive a free current stamp set of your choosing, a value of $39 or less.   Here is a link to my online shopping page that you can shop at 24/7 (from the comfort of your home, even in your pj’s) and the products will be shipped directly to your door step from Stampin’ Up:   CLICK HERE TO SHOP.   My free stamp set program will be an on going program.  :)

Want to purchase one of my orginal cards or some Stampin’ Up! retired sets CLICK HERE.

Now on with today’s tutorial. . . . .  . .

Supplies:

Stamps: None

Card Stock: Stampin’ Up! Whisper White, Elegant Eggplant, Perfect Plum, Always Artichoke and Lucky Limeade

Ink: Stampin’ Up! Crumb Cake, Elegant Eggplant, Island Indigo and Pool Party

Accessories: Stampin’ Up! Sponges, Stampin’ Up Markers (Soft Suede, Elegant Eggplant and Island Indigo), Brayer and Post it note.

Are you getting inspiration from this blog?   One way you can help support it is to order your Stampin’ Up products through me.   Click HEREto place an order and have your order delivered directly to your door step from Stampin’ Up!    Want to become a Stampin’ Up Demonstrator , receive a 20% discount on product and earn instant income on orders, get to purchase products before they are released to the public?  Consider being part of my Stampin’ Up Team and start your own business or become a Hobby Demo just for the discount.  New special join price of $99.   Click HERE for more information.

Cut my dies using the Cricut Imagine and set my machine to cut the images at 3″.  The main body of the fish is cut out of Perfect Plum, fish accents out of Elegant Eggplant and the plants out of Always Artichoke and Lucky Limeade.

Masked the bottom 1″ of the 4.5″ square piece of Whisper White card stock using a post it note with a wee bit of the sticky edge torn off.

Brayered Pool Party ink at an angle.  Starting at the bottom right.

Brayered Island Indigo ink at that same angle, not covering the Pool Party ink entirely.

Sponged a bit of Elegant Eggplant at the back and bottom of the fish’s head.

Glued the accents onto my fish.

Removed the post it note mask and glued my dies on the card stock.

Added bubbles using the Island Indigo marker.

Sponged Crumb Cake ink at the bottom of the sand area.

Colored in the fish’s eyes and spots using an Elegant Eggplant Marker.

Added a 5.25″ Lucky Limeade panel and a 4 7/8″ Elegant Eggplant panel.  Also added some dots in the sand area using a Soft Suede Marker.

Here is the finished project measuring 5.25″ Square.

May your mind be filled with happy thoughts today.

Until my next post. . . . .  . . .

Hugs,

Get ready for Brayer and Direct to Paper Workshops!  I am coming to the following locations, click the location name for more information.

Sand Lake, Michigan (just North of Grand Rapids)

Lawrence, Kansas

Elizabethtown, Kentucky

West Bend, Wisconsin

Purcellville, Virginia

Orange, Massachusetts

Scottsdale, Arizona

Sacramento, California

Staley, North Carolina

St. Petersburg, Florida

Newburge, Indiana

I hope you can make it to one of my workshops in 2012.  I have decided not to travel after this year, so be sure to catch one this year!

Link to my Stampin’ Up website where you can order all of your must have Stampin’ Up products from me 24-7: http://michellezindorf.stampinup.net


Dinoroar – Tutorial #508


It’s Prehistoric Time!

My project today uses the emboss resist technique, brayering and a bit of masking.   Hope you hang out a while and check out this project or better yet, how about getting out those stamps and ink and follow along.

Reminders before I start the tutorial:

You can join my Stampin’ Up! team and become a Stampin’ Up! Demonstrator now for the great new price of $99, CLICK HERE TO CHECK IT OUT.

The Stampin’ Up retired stamp and retired accessory lists are out.  Hop on over to my Stampin’ Up! sales page to check it out.  Once the products are gone, there gone!

. . .  . Check out what’s going, going, going by clicking here.

Don’t miss out on my Customer free stamp set program. Check it out!  Along with a handmade thank you card from me for your order you will receive a token for each $50 in product you ordered using me as your demonstrator.  After you have collected 10 tokens you will receive a free current stamp set of your choosing, a value of $39 or less.   Here is a link to my online shopping page that you can shop at 24/7 (from the comfort of your home, even in your pj’s) and the products will be shipped directly to your door step from Stampin’ Up:   CLICK HERE TO SHOP.   My free stamp set program will be an on going program.  :)

Now on with today’s tutorial. . . . .  . .

Supplies:

Stamps: Stampin’ Up! Dinoroar (item #122537)

Card Stock: Stampin’ Up! Whisper White, Basic Black, Cajun Craze, More Mustard and Old Olive

Ink: Stampin’ Up! Basic Black, Old Olive, Island Indigo, Not Quite Navy, Cajun Craze and More Mustard

Accessories: Stampin’ Up! Sponges, 1 3/8″ square punch, 1″ square punch, Post it note, Brayer, Stampin’ Dimensionals, Veramark Marker, Clear Embossing Powder, Heat Gun, Basic Black brads, Markers (Old Olive, Lucky Limeade, So Saffron and Certainly Celery).

Are you getting inspiration from this blog?   One way you can help support it is to order your Stampin’ Up products through me.   Click HEREto place an order and have your order delivered directly to your door step from Stampin’ Up!    Want to become a Stampin’ Up Demonstrator , receive a 20% discount on product and earn instant income on orders, get to purchase products before they are released to the public?  Consider being part of my Stampin’ Up Team and start your own business or become a Hobby Demo just for the discount.  New special join price of $99.   Click HERE for more information.


Started this project by stamping the Dinosaur with Basic Black ink on a 4.25″ x 4″ piece of Whisper White card stock.

Heat embossed the image using clear embossing powder and heat gun.

Colored the underside of the dinosaur with a So Saffron marker.

Added Certainly Celery to the edges of the underside of the dinosaur.

Colored in the rest of the Dinosaur using a Lucky Limeade marker.

Added Old Olive marker to the dinosaur’s back, 2 legs and the edges of the Lucky Limeade areas.

Colored over the Dinosaur with a Versamark Marker (be careful to stay within the embossed image) and heat embossed the image using clear embossing powder.

Brayered More Mustard ink at an angle over 1/2 of the card stock.

Brayered Cajun Craze ink at an angle, not cover the More Mustard ink entirely.

Brayered Island Indigo ink at the opposite side of the card stock at an angle.

Brayered Not Quite Navy ink at an angle, not covering the Island Indigo ink entirely.

Ripped a post it not in a mountain shape to use as a mask to create the mountains.

Sponged Island Indigo ink in at mountain shape and then moved the post it note and sponged in the second mountain.


Sponged Old Olive ink at the bottom of the card stock.

Sponged Basic Black ink at the very bottom of the card stock.

Punched two 1 3/8″ Squares from Cajun Craze card stock and two 1″ squares from More Mustard ink.  Cut the squares in half at an angle.

Added a 5″ x 6.5″ Basic Black panel, 4.75″ x 6.25″ Old Olive Panel, 4.5″ x 5″ Basic Black panel, the triangles and Basic Black brads.

Here is the finished project measuring 5″ x 6.5″.

May you be right were you want to be today.


Until my next post. . . . .  . . .

Hugs,

Get ready for Brayer and Direct to Paper Workshops!  I am coming to the following locations, click the location name for more information.

Sand Lake, Michigan (just North of Grand Rapids)

Lawrence, Kansas

Elizabethtown, Kentucky

West Bend, Wisconsin

Purcellville, Virginia

Orange, Massachusetts

Scottsdale, Arizona

Sacramento, California

Staley, North Carolina

St. Petersburg, Florida

Newburge, Indiana

I hope you can make it to one of my workshops in 2012.  I have decided not to travel after this year, so be sure to catch one this year!

Link to my Stampin’ Up website where you can order all of your must have Stampin’ Up products from me 24-7: http://michellezindorf.stampinup.net


Horses – Tutorial #505

Hey There,

I bet you thought I have fell off of the plant since I haven’t posted for so long.  Well, in the last 3 weeks I had 3 trips.  Two out of state brayer workshop locations and a fantastic Stampin’ Up Incentive trip to Disney with my family.    Let me tell you this girl is wore out!

Here is a picture of Russ, Hailie (my grand daughter) and me in front of the magic castle.   I think the clouds worked in our favor for this shot!


I have a super fun tutorial for you today.   This one has a bit of Southwest feel, thanks to the Cricut Horse Die Cuts from the Yee Haw Cartridge.  That’s right I have a Cricut machine.   I resisted and resisted for years and then my wonderful Husband, Russ bought me the Cricut Imagine this past Christmas.   Like stamps I have been collecting cartridges (over 200 now), lol.  I know, I know, I have major issues.  I keep my cartridges stored in these Art Bin boxes.  Each box holds 16 cartridges with the books.

Anyhow, for you Cricut fans I will try to put some cricut projects up on this blog for you.  Plus, I will get to use some of my stash, grin.

Reminders before I start the tutorial:

The Stampin’ Up stamp and accessory lists are out.  Hop on over to my Stampin’ Up! sales page to check it out.

. . .  . Check out what’s going, going, going by clicking here.

Don’t miss out on my Customer free stamp set program. Check it out!  Along with a handmade thank you card from me for your order you will receive a token for each $50 in product you ordered using me as your demonstrator.  After you have collected 10 tokens you will receive a free current stamp set of your choosing, a value of $39 or less.   Here is a link to my online shopping page that you can shop at 24/7 (from the comfort of your home, even in your pj’s) and the products will be shipped directly to your door step from Stampin’ Up:   CLICK HERE TO SHOP.   My free stamp set program will be an on going program.  :)

Now on with today’s tutorial. . . . .  . .

Supplies:

Stamps: None

Card Stock: Stampin’ Up! Basic Black, Whisper White and Crumb Cake

Ink: Stampin’ Up! Basic Black, Soft Suede, More Mustard, Cherry Cobbler and Cajun Craze

Accessories: Stampin’ Up! Sponges, 2.5″ Circle Punch, Decorative Label Punch, Brayer, Antique Brads, Gold Brads, Post it Notes, Cricut Imagine Machine, Yee-haw Cricut Cartridge.

Are you getting inspiration from this blog?   One way you can help support it is to order your Stampin’ Up products through me.   Click HEREto place an order and have your order delivered directly to your door step from Stampin’ Up!    Want to become a Stampin’ Up Demonstrator , receive a 20% discount on product and earn instant income on orders, get to purchase products before they are released to the public?  Consider being part of my Stampin’ Up Team and start your own business or become a Hobby Demo just for the discount.  Click HERE for more information.


Cut two, 2.5″ horses out of Basic Black card stock using the Cricut machine and Yee-haw Cartridge.


Punched a 2.5″ circle from a Post it Note and used it as a mask for the sun.  Put the mask on a 4″ x 4.5″ piece of Whisper White card stock.

Brayered More Mustard ink, Cajun Craze ink and Cherry Cobbler ink on the card stock in the order shown below.


Took the sun mask off and brayered More Mustard ink over the card stock again.


Roughly sponged Soft Suede ink at the bottom of the card stock using a pouncing motion.

Sponged Basic Black  ink at the bottom of the card stock using a pouncing motion.

Glued the horses on the card stock, centering them over the sun.

Punched a Decorative label from Basic Black card stock and cut it in half.   Added the punch, a 5″ x 6.5″ Basic Black panel, 4.75″ x 6.25″ Soft Suede Panel and a 4 1/8″ x 4 5/8″ Basic Black panel.

Added 2 Antique Brads and 4 Gold Brads.

Here is the finished project measuring 5″ x 6.5″.

May your day be filled with blessings.

Until my next post. . . . .  . . .

Hugs,

Get ready for Brayer and Direct to Paper Workshops!  I am coming to the following locations, click the location name for more information.

Sand Lake, Michigan (just North of Grand Rapids)

Lawrence, Kansas

Elizabethtown, Kentucky

West Bend, Wisconsin

Purcellville, Virginia

Orange, Massachusetts

Scottsdale, Arizona

Sacramento, California

Staley, North Carolina

St. Petersburg, Florida

Newburge, Indiana

I hope you can make it to one of my workshops in 2012.  I have decided not to travel full time after this year, so be sure to catch one this year!

Link to my Stampin’ Up website where you can order all of your must have Stampin’ Up products from me 24-7: http://michellezindorf.stampinup.net


Cat’s Night Out – Tutorial #503

Hey There,

Today’s tutorial is a fun little night time project using one of the coolest Stampin’ Up sets, C is for Cat that will be retired at the end of May, 2012.   Sad to see stamp sets go, because they are like old friends, but boy oh boy is it exciting to see new sets.   You can check out all the soon to be retired stamp sets here so get out that wish list:

. . .  . Check out what’s going, going, going by clicking here.

Reminders before I start on the tutorial:

Don’t miss out on my Customer free stamp set program. Check it out!  Along with a handmade thank you card from me for your order you will receive a token for each $50 in product you ordered using me as your demonstrator.  After you have collected 10 tokens you will receive a free current stamp set of your choosing, a value of $39 or less.   Here is a link to my online shopping page that you can shop at 24/7 (from the comfort of your home, even in your pj’s) and the products will be shipped directly to your door step from Stampin’ Up:   CLICK HERE TO SHOP.   My free stamp set program will be an on going program.  :)

Now on with today’s tutorial. . . . .  . .

Supplies

Stamps: Stampin’ Up! C is for Cat

Card Stock: Stampin’ Up! Whisper White, Basic Black, Pacific Point an Pacific Point Designer Series Paper

Ink: Stampin’ Up! Basic Black, Pacific Point, Peach Parfait and Night of Navy

Accessories: Stampin’ Up! Sponges, White Gel Pen, Crimper, Star Die, Big Shot, Brayer Basic Black Marker, Basic Black Brads, 1 3/4″ circle Punch, 3/8″ circle punch, Dimensionals and post it notes.

Want a free copy of the current Stampin’ Up! Occasions Mini Catalog?  Just e-mail your address to mzindorf@aim.com and I will get one right out to you.  Get your copy of the 2011-2012 Stampin’ Up! Idea Book & Catalog by sending $9.95 to me at P.O. box 116, West Alexandria, Ohio 45381 or via paypal to mzindorf@aim.com, shipping is free. Are you getting inspiration from this blog?   One way you can help support it is to order your Stampin’ Up products through me.   Click HEREto place an order and have your order delivered directly to your door step from Stampin’ Up!    Want to become a Stampin’ Up Demonstrator , receive a 20% discount on product and earn instant income on orders, get to purchase products before they are released to the public?  Consider being part of my Stampin’ Up Team and start your own business or become a Hobby Demo just for the discount.  Click HERE for more information.


Started with a 3.25″ x 4″ piece of Whisper White Card Stock.  Added a 1 3/4″ circle punched from the sticky part of a post it note to mask for the moon.

Brayered Pacific Point from the top of the card stock.

Brayered Night of Navy at the top of the card stock.


Removed the moon mask.  Punched a 1 3/4″ circle from a piece of card stock and lined the negative image up with the moon and sponged Peach Parfait ink around the circle leaving the middle of the moon light.


Stamped the cat with Basic Black ink and then colored in the color and eye of the cat with a Basic Black marker to make it a solid image.


Masked with post it notes for the post the cat is sitting on and sponged Basic Black ink in the unmasked area.


Added White Gel pen for highlights around the cat.

Added a 5″ x 6.5″ piece of Basic Black card stock, a 4.75″ x 6.25″ piece of Pacific Point DSP, 3.5″ x 4.25″ piece of Basic Black and a 3″ x 5″ piece of Pacific Point card stock that has been put through the crimper.  Hello crimper, where have you been hiding, grin.  Don’t you just love pulling out a tool you haven’t seen in a while!

Die cut stars from Whisper White card stock using the Stars die and Big Shot Machine.

Punched 3/8″ circles from the bottom of the crimped Pacific Point card stock and then started assembling.

Adhered the stars using Stampin’ Dimensionals so they would stand out.  Also added Basic Black brads in the punched holes and a couple of Basic Black strips that have been popped up with Dimensionals for added poles.

Here is the finished project measuring 5″ x 6.5″.

I’m off to teach brayering to some excited students in Sparta, New Jersey.   Can’t wait to get there!

May your weekend be full of pleasant surprises.

Until my next post. . . . .  . . .

Hugs,

Get ready for Brayer and Direct to Paper Workshops!  I am coming to the following locations, click the location name for more information.

Sparta, New Jersey (Sold Out)

Post Falls, Idaho (outside of Coeurd’Alene)

Sand Lake, Michigan (just North of Grand Rapids)

Lawrence, Kansas

Elizabethtown, Kentucky

West Bend, Wisconsin

Longmont (Gunbarrel), Colorado

Purcellville, Virginia

Orange, Massachusetts

Scottsdale, Arizona

Sacramento, California

Staley, North Carolina

St. Petersburg, Florida

Newburge, Indiana

I hope you can make it to one of my workshops in 2012.  I have decided not to travel full time after this year, so be sure to catch one this year!

Link to my Stampin’ Up website where you can order all of your must have Stampin’ Up products from me 24-7: http://michellezindorf.stampinup.net


Spring Tree – Tutorial #502

Well Hello There and happy tax day to those of you in the USA.   I can hear some of you groaning from here.  I’ve yet to finalize my 2011 tax returns.  It’s on my list of things to get done today.  But of course, I put stamping a card tutorial at the top of my to do list, lol.   Priorities you know. . . . . grin.

I have a couple of announcements today also. . . .  .

I have added two great locations to my brayer and direct to paper workshop calendar.  Look for me to come to Purcellville, Virginia and Newburge, Indiana.  A complete list of my workshop locations can be found by clicking here.  Hope you get the chance to come create with me.

Also Stampin’ Up! has released the retiring stamp and accessories list.   Don’t miss out on those items that are on your wish list before they are gone. . . .  . Check out what’s going, going, going by clicking here.

Reminders before I start on the tutorial:

Don’t miss out on my Customer free stamp set program. Check it out!  Along with a thank you card from me for your order you will receive a token for each $50 in product you ordered using me as your demonstrator.  After you have collected 10 tokens you will receive a free current stamp set of your choosing, a value of $39 or less.   Here is a link to my online shopping page that you can shop at 24/7 (from the comfort of your home, even in your pj’s) and the products will be shipped directly to your door step from Stampin’ Up:   CLICK HERE TO SHOP.   My free stamp set program will be an on going program.  :)

Now on with today’s tutorial. . . . .  . .

Supplies

Stamps: Stampin’ Up! Thoughts & Prayers (Item number 113252) and Thank You Kindly (Item number 111700)

Card Stock: Stampin’ Up! Whisper White, Old Olive, Early Espresso and Stampin’ Up Designer Series

Ink: Stampin’ Up! Basic Black, Old Olive, Cajun Craze, Crumb Cake and So Saffron

Accessories: Stampin’ Up!  Baker’s Twine (Lucky Limeade), Sticky Strip, Brayer, Stamp-a-ma-jig, mat pack, piercing tool, 3/8″ circle punch, 1/2″ circle Punch, Corner round punch, Markers (Always Artichoke and Early Espresso), white gel pen, post it note.

Want a free copy of the current Stampin’ Up! Occasions Mini Catalog?  Just e-mail your address to mzindorf@aim.com and I will get one right out to you.  Get your copy of the 2011-2012 Stampin’ Up! Idea Book & Catalog by sending $9.95 to me at P.O. box 116, West Alexandria, Ohio 45381 or via paypal to mzindorf@aim.com, shipping is free. Are you getting inspiration from this blog?   One way you can help support it is to order your Stampin’ Up products through me.   Click HEREto place an order and have your order delivered directly to your door step from Stampin’ Up!    Want to become a Stampin’ Up Demonstrator , receive a 20% discount on product and earn instant income on orders, get to purchase products before they are released to the public?  Consider being part of my Stampin’ Up Team and start your own business or become a Hobby Demo just for the discount.  Click HERE for more information.


Brayered So Saffron ink on a 5.75″ x 3.25″ piece of Whisper White card stock.


Smeared a Crumb Cake ink pad from the bottom towards the top.

Brayered Cajun Craze ink at the top of the card stock.

Loaded the tree stamp with Old Olive ink and then colored some of the top leaves with Always Artichoke marker and the trunk with Early Espresso marker before stamping it on the card stock.  I used a post it note to stamp the bottom of the tree trunk on.  That way I would not have the part of the tree trunk on the card stock that flares out at the bottom.  Makes it easier to extend the trunk to the bottom of the card stock to make the tree taller.

Extended the tree trunk to the bottom of the card stock using an Early Espresso marker and also added some Wisteria type flowers on the tree using a White gel pen.

Dragged the Old Olive pad from the bottom of the card stock toward the top to create grass.

Cut some a bit of the top of the card stock off and rounded the bottom corners of the top piece and the top corners of the bottom piece using the corner rounder.

Held the two pieces of card stock together and punched a 3/8″ circle punch in the middle of them.

Also used the 3/8″ circle punch on Cajun Craze card stock.  Then lined the holes up in the middle of a 1/2″ circle punch and punched them out.


Glued them on the card stock over the holes.

Layered a 5″ x 6.5″ Old Olive card stock panel, 4.75″ x 6.25″ Early Espresso panel and a 4.5″ x 6″ piece of Stampin’ Up! Old Olive DSP.   Adhered the top and bottom of the main image panel on the card stock using Sticky Strip.  I did not adhere the areas of the main image panel that have the circles punch in them.

Pierced holes around the main image panels using the mat pack and piercing tool.

Drew White Gel Pen lines from one hole to the next to create faux stitching.

Added Lucky Limeade Baker’s Twine through the circle holes.

Added White Gel pen grasses around the tree trunk.

Stamped the sentiment on the right side of the card three times using Basic Black ink and a Stamp-a-ma-jig for placement.

Here is the finished card measuring 5″ x 6.5″

May your day be one of pure delight.

Until my next post. . . . .  . . .

Hugs,

Get ready for Brayer and Direct to Paper Workshops!  I am coming to the following locations, click the location name for more information.

Sparta, New Jersey (Sold Out)

Post Falls, Idaho (outside of Coeurd’Alene)

Sand Lake, Michigan (just North of Grand Rapids)

Lawrence, Kansas

Elizabethtown, Kentucky

West Bend, Wisconsin

Longmont (Gunbarrel), Colorado

Purcellville, Virginia

Orange, Massachusetts

Scottsdale, Arizona

Sacramento, California

Staley, North Carolina

St. Petersburg, Florida

Newburge, Indiana


Here is a link to my workshop calendar where you can see all of my travel schedule and to get info on beginner and advanced Brayer workshops, along with the newly added Direct to Paper Workshop: http://zindorf.blogs.splitcoaststampers.com/workshop-calendar

Don’t see a workshop in your State?  Interested in hosting the workshops in your area   Click HERE to get hostess information.

Link to my Stampin’ Up website where you can order all of your must have Stampin’ Up products from me 24-7: http://michellezindorf.stampinup.net


3 Birds on a Line – Tutorial #498

Hey There,

It’s such a beautiful morning here in West Alexandria, Ohio so I wanted to depict that in this morning’s tutorial.   It really cannot get much simpler than to punch out some birds in Basic Black card stock in order to create silhouettes.   Follow along or better yet, pull out some card stock and make this.  Either way I hope you enjoy it.

I’m heading outside to dig in the dirt a while.  🙂

Reminders before I start on the tutorial:

Only 3 days left to pick up those free Sale-a-bration sets.  Stampin’ Up! Sale-a-bration sales period runs from January 24 – March 31, 2012. During this sales period you will receive your choice of a free stamp set from the Sale-a-bration catalog for every $50 in product you order.   CLICK HERE TO CHECK OUT THIS YEAR’S SALE-A-BRATION CATALOG! You won’t want to miss out on the sale-a-bration sets, paper and embellishments.

Don’t miss out on my Customer free stamp set program. Check it out!  Along with a thank you card from me for your order you will receive a token for each $50 in product you order using me as your demonstrator.  After you have collected 10 tokens you will receive a free current stamp set of your choosing, a value of $39 or less.   Here is a link to my online shopping page that you can shop at 24/7 (from the comfort of your home, even in your pj’s) and the products will be shipped directly to your door step from Stampin’ Up:   CLICK HERE TO SHOP.   My free stamp set program will be an on going program.  :)

Don’t forget the Stampin’ Up! new Occasions Mini Catalog CLICK HERE TO TAKE A LOOK AT IT. I know you will fall in love with the new stamp sets, dies and accessories.   They are to die for. . .

Now on with today’s tutorial. . . . .  . .

Supplies:

Stamps: None

Card Stock: Stampin’ Up! Whisper White and Basic Black

Ink: Stampin’ Up! More Mustard, Cajun Craze, Cherry Cobbler and Old Olive

Accessories: Stampin’ Up!  Sponge, brayer, Large Bird Punch, Sticky Tape, Stampin’ Dimensionals, Lucky Limeade Baker’s Twine, 1 3/4″ Circle Punch and Stampin’ Up Mocha Morning Designer Series Paper.

Want a free copy of the current Stampin’ Up! Occasions Mini Catalog?  Just e-mail your address to mzindorf@aim.com and I will get one right out to you.  Get your copy of the 2011-2012 Stampin’ Up! Idea Book & Catalog by sending $9.95 to me at P.O. box 116, West Alexandria, Ohio 45381 or via paypal to mzindorf@aim.com, shipping is free. Are you getting inspiration from this blog?   One way you can help support it is to order your Stampin’ Up products through me.   Click HEREto place an order and have your order delivered directly to your door step from Stampin’ Up!    Want to become a Stampin’ Up Demonstrator , receive a 20% discount on product and earn instant income on orders, get to purchase products before they are released to the public?  Consider being part of my Stampin’ Up Team and start your own business or become a Hobby Demo just for the discount.  Click HERE for more information.


On a 3.5″ x 8.5″ piece off Whisper White card stock brayer More Mustard ink.

Mask the sun with a 1 3/4″ circle punched from a post it note and brayer Cajun Craze ink at the top of the card stock.

Brayer Cherry Cobbler ink at the very top of the card stock.

Remove the sun mask and sponge Old Olive ink at the bottom of the card stock.

Punch 3 birds from Basic Black card stock.

Adhere a piece of Lucky Limeade Baker’s Twine to the main image panel and attach the main image panel to a 3 5/8″ x 8 5/8″ piece of Basic Black card stock.

Attach the birds using Stampin’ Dimensionals.

Adhere the main image panel to a piece of Designer Series Paper and a Basic Black panel that measures 4″ x 9″.

Here is the finished card measuring 4″ x 9″.


May you find joy in everything you do today.

Until my next post. . . . .  . . .

Hugs,

Get ready for Brayer and Direct to Paper Workshops!  I am coming to the following locations, click the location name for more information.

Indiana, Pennsylvania

Sparta, New Jersey (Sold Out)

Piedmont, Alabama

Post Falls, Idaho (outside of Coeurd’Alene)

Sand Lake, Michigan (just North of Grand Rapids)

Lawrence, Kansas

Elizabethtown, Kentucky

West Bend, Wisconsin

Longmont (Gunbarrel), Colorado

Orange, Massachusetts

Scottsdale, Arizona

Sacramento, California

Staley, North Carolina

St. Petersburg, Florida


Here is a link to my workshop calendar where you can see all of my travel schedule and to get info on beginner and advanced Brayer workshops, along with the newly added Direct to Paper Workshop: http://zindorf.blogs.splitcoaststampers.com/workshop-calendar

Don’t see a workshop in your State?  Interested in hosting the workshops in your area   Click HERE to get hostess information.

Link to my Stampin’ Up website where you can order all of your must have Stampin’ Up products from me 24-7: http://michellezindorf.stampinup.net


Sweet Bunny – Tutorial #496

Hey There,

I’m working on Wedding Invitations for my youngest Son’s wedding but, I took some time out this morning to do a little recreational stamping.  The Stampin’ Up! set “Everybunny” that I used here is too stinking cute!  I think this card could be used both for a baby card or for Easter.

Anyhow, I’m itching to get out in my garden since our temperatures here in Ohio have been a wonderful 70 degrees.  Along with the daffodils popping up I’m also seeing some weeds.  I best get out there this afternoon and start heading them off before they take over.     So how has your temperatures been?  Mild I hope.

Reminders before I start on the tutorial:

Last month to pick up those free Sale-a-bration sets.  Stampin’ Up! Sale-a-bration sales period runs from January 24 – March 31, 2012. During this sales period you will receive your choice of a free stamp set from the Sale-a-bration catalog for every $50 in product you order.   CLICK HERE TO CHECK OUT THIS YEAR’S SALE-A-BRATION CATALOG! You won’t want to miss out on the sale-a-bration sets, paper and embellishments.

Don’t miss out on my Customer free stamp set program. Check it out!  Along with a thank you card from me for your order you will receive a token for each $50 in product you order using me as your demonstrator.  After you have collected 10 tokens you will receive a free current stamp set of your choosing, a value of $39 or less.   Here is a link to my online shopping page that you can shop at 24/7 (from the comfort of your home, even in your pj’s) and the products will be shipped directly to your door step from Stampin’ Up:   CLICK HERE TO SHOP.   My free stamp set program will be an on going program.  :)

Don’t forget the Stampin’ Up! new Occasions Mini Catalog CLICK HERE TO TAKE A LOOK AT IT. I know you will fall in love with the new stamp sets, dies and accessories.   They are to die for. . .

Now on with today’s tutorial. . . . .  . .

Supplies:

Stamps: Stampin’ Up! Everybunny (item number 122707)

Card Stock: Stampin’ Up! Whisper White, Blushing Bride and Bashful Blue

Ink: Stampin’ Up! Lucky Limeade, Bashful Blue and Stazon Jet Black

Accessories: Stampin’ Up!  Whisper White Organza Ribbon, White Gel Pen, Markers (Sahara Sand, Blush Blossom, Blushing Bride and Regal Rose), Big Shot Machine, Small Dots Texture Plate, Word Window Punch, 2.5″ Circle Punch, Brayer, Silver Brads.

Want a free copy of the current Stampin’ Up! Occasions Mini Catalog?  Just e-mail your address to mzindorf@aim.com and I will get one right out to you.  Get your copy of the 2011-2012 Stampin’ Up! Idea Book & Catalog by sending $9.95 to me at P.O. box 116, West Alexandria, Ohio 45381 or via paypal to mzindorf@aim.com, shipping is free. Are you getting inspiration from this blog?   One way you can help support it is to order your Stampin’ Up products through me.   Click HEREto place an order and have your order delivered directly to your door step from Stampin’ Up!    Want to become a Stampin’ Up Demonstrator , receive a 20% discount on product and earn instant income on orders, get to purchase products before they are released to the public?  Consider being part of my Stampin’ Up Team and start your own business or become a Hobby Demo just for the discount.  Click HERE for more information.


Punched a 2.5″ circle from Whisper White Card stock.

Brayer Bashful Blue ink at the top of the circle.

Brayer Lucky Limeade ink at the bottom of the card stock.

Stamped the bunny using Stazon Jet Black ink.

Colored the bunny in using a white gel pen.

Added a shadow to the bunny’s ear, left side of his face and his paws.

Colored the egg using a Blush Blossom marker.

Added a shadow to the bottom of the egg using a Blushing Bride marker and then added just a bit of Regal Rose at the very bottom of the egg.

Used the Sahara Sand marker below the egg to color in the shadow.

Used the Big Shot machine and the Small Dots Texture plate on a 4.75″ x 6.25″ piece of Whisper White card stock.

Taped the edge of my card stock to a glass mat.

Used Stampin’ Up Circle Scissors to cut two circle rings, one from Blushing Bride card stock and one from Bashful Blue card stock.   The Bashful Blue one is smaller than the Blushing Bridge one.


Adhered the rings and the main image circle to the textured panel.


Punched two Bashful Blue window punches and held them together and cut one end off of them.

Ahered the word window punches to the card stock and then added brads around the top of the bashful Blue ring.


Added Whisper White Ribbon and a Blushing Bride panel 6.5″ x 5″.

The finished card measures 5″ x 6.5″.


May you get to feel the sun on your face today.

Until my next post. . . . .  . . .

Hugs,

Get ready for Brayer and Direct to Paper Workshops!  I am coming to the following locations, click the location name for more information.

Indianapolis, Indiana (Sold Out)

Indiana, Pennsylvania

Sparta, New Jersey (Sold Out)

Piedmont, Alabama

Post Falls, Idaho (outside of Coeurd’Alene)

Sand Lake, Michigan (just North of Grand Rapids)

Lawrence, Kansas

Elizabethtown, Kentucky

West Bend, Wisconsin

Longmont (Gunbarrel), Colorado

Orange, Massachusetts

Scottsdale, Arizona

Sacramento, California

Staley, North Carolina


Here is a link to my workshop calendar where you can see all of my travel schedule and to get info on beginner and advanced Brayer workshops, along with the newly added Direct to Paper Workshop: http://zindorf.blogs.splitcoaststampers.com/workshop-calendar

Don’t see a workshop in your State?  Interested in hosting the workshops in your area   Click HERE to get hostess information.

Link to my Stampin’ Up website where you can order all of your must have Stampin’ Up products from me 24-7: http://michellezindorf.stampinup.net


Up, Up and Away Bunny – Tutorial #494


Hi There,

I spent the entire day yesterday in the kitchen to fill my freezer back up to capacity with freezer meals.  I put away 5 meals each of the following, beef stew, Salisbury steak, teriyaki Roast.  I had found yellow, red and orange bell peppers on sale too, so I purchased a bunch to have on hand in the freezer for fajitas.   Also, when I am gone teaching for the weekend, Russ runs out of fresh bread so the first thing he ask for me to do is make bread.  So, I also made french bread and Apple Wheat bread.   Oh, and lets not forget the no bake cookies I made.  Yes indeed, it was a busy Monday and the crockpots, oven and bread machine were working over time!  I guess you now know what I do when I am not blogging or traveling.  🙂

Also, this arrived while I was in Tennessee this past weekend.  It’s my chicken coop!!!  Woohoo!

My oldest son, Jesse took mercy on me and came over and assembled it.  It’s all ready now for the chickens, but they will not be arriving until the end of May.  They will be 1 day old chicks when they arrive at my post office and will live in the house with us for weeks before they get to be moved to their permanent coop and run.   I’ll keep you updated on my chicken saga for sure.

It reminds me of a doll house, lol.  I will be building on to this, no doubt.

My dog, Lucas who is 100 lbs keeps looking at.  I can just see his canine brain working and wondering if it is some type of dog house.  See the worried look on his face.  He’s an indoor dog.

Also, I have an announcement. . .  . .  I have added Scottsdale, Arizona Brayer and Direct to Paper Workshops to my workshop calendar for October 6-7, 2012.  Be sure to register early so you don’t miss out.   CLICK HERE TO GET THE DETAILS.

Now a little about today’s tutorial. . . .  . .

I broke out my forgotten Prisma Color pencils and paint thinner for this project.  When you dip the end of the pencil in the paint thinner is melts like butter on your card stock.   Lovely technique.  Join me, won’t you.

Reminders before I start on the tutorial:

Last month to pick up those free Sale-a-bration sets.  Stampin’ Up! Sale-a-bration sales period runs from January 24 – March 31, 2012. During this sales period you will receive your choice of a free stamp set from the Sale-a-bration catalog for every $50 in product you order.   CLICK HERE TO CHECK OUT THIS YEAR’S SALE-A-BRATION CATALOG! You won’t want to miss out on the sale-a-bration sets, paper and embellishments.

Don’t miss out on my Customer free stamp set program. Check it out!  Along with a thank you card from me for your order you will receive a token for each $50 in product you order using me as your demonstrator.  After you have collected 10 tokens you will receive a free current stamp set of your choosing, a value of $39 or less.   Here is a link to my online shopping page that you can shop at 24/7 (from the comfort of your home, even in your pj’s) and the products will be shipped directly to your door step from Stampin’ Up:   CLICK HERE TO SHOP.   My free stamp set program will be an on going program.  :)

Don’t forget the Stampin’ Up! new Occasions Mini Catalog CLICK HERE TO TAKE A LOOK AT IT. I know you will fall in love with the new stamp sets, dies and accessories.   They are to die for. . .

Now on with today’s tutorial. . . . .  . .

Supplies:

Stamps: Stampin’ Up! Everybunny (item number 122707)

Card Stock: Stampin’ Up! Whisper White, Pretty in Pink and Old Olive

Ink: Stampin’ Up! Basic Black, Old Olive, Pacific Point, Tempting Turquoise and Stazon Jet Black

Accessories: Stampin’ Up!  sponge, White Gel Pen, Prismacolor pencils, Odorless Paint Thinner, Brayer, Scallop punch, Blushing Bride Ribbon (item number 125570).

Want a free copy of the current Stampin’ Up! Occasions Mini Catalog?  Just e-mail your address to mzindorf@aim.com and I will get one right out to you.  Get your copy of the 2011-2012 Stampin’ Up! Idea Book & Catalog by sending $9.95 to me at P.O. box 116, West Alexandria, Ohio 45381 or via paypal to mzindorf@aim.com, shipping is free. Are you getting inspiration from this blog?   One way you can help support it is to order your Stampin’ Up products through me.   Click HEREto place an order and have your order delivered directly to your door step from Stampin’ Up!    Want to become a Stampin’ Up Demonstrator , receive a 20% discount on product and earn instant income on orders, get to purchase products before they are released to the public?  Consider being part of my Stampin’ Up Team and start your own business or become a Hobby Demo just for the discount.  Click HERE for more information.


Brayered Tempting Turquoise ink on a 3″ x 4″ piece of Whisper White card stock.


Brayered Pacific Point ink at the top of the card stock.

Sponged Old Olive ink at the bottom of the card stock.

Brayered Basic Black ink at the very bottom of the card stock.

Stamp the image using Stazon Jet Black ink.

Got out my Prismacolor pencils and Odorless Paint Thinner.  When using these pencils I like to dip the tip of the pencil in the paint thinner and then color with it.  The color melts onto the card stock like butter and it’s really smooth.

I pour just a little bit of the paint thinner in the cap from the bottle to use with my pencils.  Colored the bunny in with Peach Beige.

Added a shadow on the bunny using Prismacolor Light Umber.

Colored in the balloon using Prismacolor Hot Pink.

Added Prismacolor Process Red to the sides and bottom of the balloon to add depth.

Colored in the stripes and basket using Prismacolor Canary Yellow.

Colored in the dots, flowers and added highlights to the stripes on the balloon, basket Ribbon and the bunny using a White Gel Pen.

Added some Prismacolor Scarlet Lake to the sides and bottom of the balloon to create a bit more roundness.

Added Light Umber to the bottom and top of the basket.

Added 2 Pretty in Pink Panels, One Whisper White panel and an Old Olive Strip of card stock that has been punched with the Scallop Boarder punch.  Also added Blushing Bride ribbon.

Here is the finished project.  Please realize that the pencil colors will change on the project since they are layered over blue ink.  For instance the pinks will turn purple, yellow will turn green and the tan will turn gray.  🙂

Happy Stamping!

Until my next post. . . . .  . . .

Hugs,

Get ready for Brayer and Direct to Paper Workshops!  I am coming to the following locations, click the location name for more information.

Greeneville, Tennessee

Indianapolis, Indiana (Sold Out)

Indiana, Pennsylvania

Sparta, New Jersey (Sold Out)

Piedmont, Alabama

Post Falls, Idaho (outside of Coeurd’Alene)

Sand Lake, Michigan (just North of Grand Rapids)

Lawrence, Kansas

Elizabethtown, Kentucky

West Bend, Wisconsin

Longmont (Gunbarrel), Colorado

Orange, Massachusetts

Scottsdale, Arizona

Sacramento, California

Staley, North Carolina


Here is a link to my workshop calendar where you can see all of my travel schedule and to get info on beginner and advanced Brayer workshops, along with the newly added Direct to Paper Workshop: http://zindorf.blogs.splitcoaststampers.com/workshop-calendar

Don’t see a workshop in your State?  Interested in hosting the workshops in your area   Click HERE to get hostess information.

Link to my Stampin’ Up website where you can order all of your must have Stampin’ Up products from me 24-7: http://michellezindorf.stampinup.net