Life is a bit more on the normal side for me this month since I will not be traveling any. My husband is so use to me being gone a lot he may just kick me out around mid December, lol.
December! I cannot believe it is December already. Yesterday I did some Fall clean up in my perennial gardens and it was in the 50’s. I was wearing a light jacket for Pete’s sake. Now today we are suppose to get snow showers. That is okay with me since I don’t have to get out and drive any where.
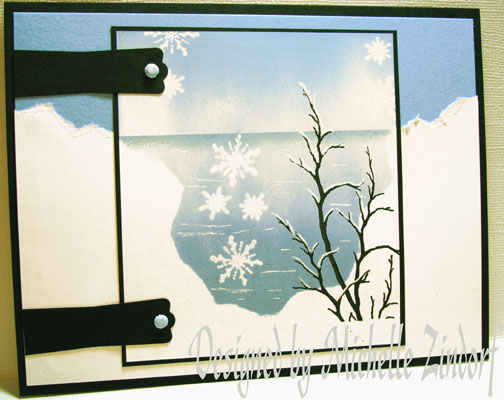
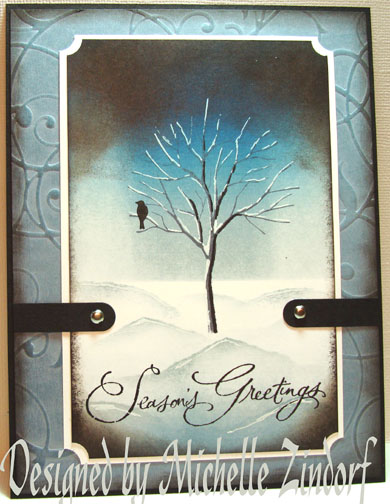
Maybe the snow will get me in the mood to do some Christmas shopping. How many of you are now doing their Christmas shopping on line? Personally, I like to go to the stores and shop. Anyhow, knowing we are going to see some snow fall today put me in the mood for this chilly card.
Let’s get started. . . . . . . . . . .
Supplies:
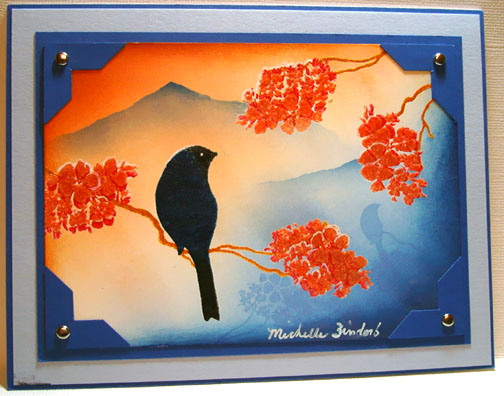
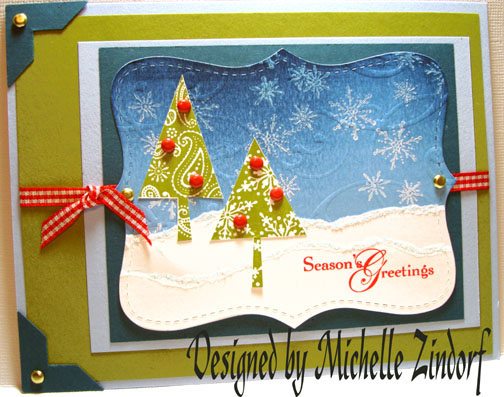
| Stamps: Stampin’ Up! Bird on a Branch and Serene Snowflakes |
| Paper: Stampin’ Up! Whisper White, Bashful Blue and Basic Black |
| Ink: Stampin’ Up! Basic Black, Bordering Blue and Bashful Blue |
| Accessories: Stampin’ Up! Bashful Blue Brads, piercing tool, Brayer, Modern Label Punch, White Gel Pen, Versamark pad, clear embossing powder, heat gun, sponge and post it notes |
Want a free 39 page, Stampin’ Up Mini catalog? If you are a resident of the United States, just e-mail your mailing address to me and I will get one in the mail to you. Are you inspired by this Blog? One way you can help support this blog is by ordering your Stampin’ Up products through me. You can order from me 24-7 from this link: http://michellezindorf.stampinup.net or e-mail me at mzindorf@aim.com. If you are within the United States. Want a copy of the brand new 2009-2010 Stampin’ Up Catalog for $9.95 with free shipping, just e-mail me at mzindorf@aim.com and I will get one in the mail to you. Want to become a Stampin’ Up Demonstrator and earn instant income? Consider being part of my Stampin’ Up Team. Also check out the Stampin’ Up specials, click this link to check it out: http://www.stampinup.net/esuite/home/michellezindorf/promotions

I masked the 3.75″ x 4.25″ piece of Whisper White card stock with 3 torn post it notes to protect the white of the card stock where I would like to have snow.

Stamped a few snowflakes from the Stampin’ Up! set Serene Snowflakes using Versamark only.

Heat embossed the snow flake images using clear embossing powder and a heat gun.

Now that my snowflakes are heat embossed they will resist the ink over them.
Brayered Bashful Blue ink at the top and bottom of the card stock.


Brayered Bordering Blue ink at the bottom of the card stock, not covering the Bashful Blue ink entirely.

Put an untorn post it note at the top of the card stock and sponged Bordering Blue ink right at the post it note edge to create my horizon line.

Removed all of the post it notes.

Masked a bit of the snow with a post it note. Stamped the twig image from the Stampin’ Up! set Bird on a Branch 4 times using Basic Black ink.

Added a few dashing in the water and snow on the twigs using a white gel pen.

Started putting together my layout. Tore a 4.75″ x 6.25″ piece of Whisper White card stock so the torn edges continued the snow in the main image panel.

Added 2 Basic Black Modern Label punches to the left side of the card. I cut one end off of each punch so they would like up with the edge of the card.

Added Bashful Blue brads using a piercing tool to start the brads.

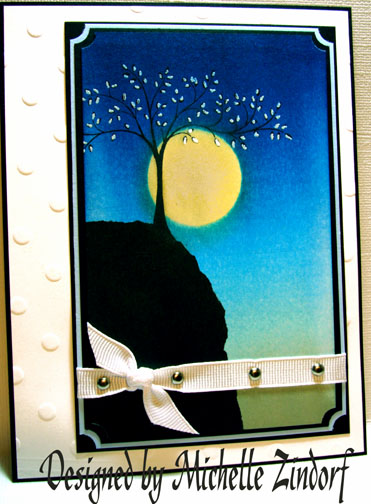
Here is the finished card measuring 5″ x 6.5″.
May you be warm and cozy wherever you are today.
Until my next post. . . . . . . . . . .
Hugs,
Michelle
PS I have added North Liberty, Indiana to my travels in 2010. 🙂
 Get ready for Brayer Workshops! I am coming to:
2010
Dayton, Ohio at Marco Paper
Phoenix, Arizona
Monroe, Louisiana
Jacksonville, Florida
St. Louis, Missouri
Mechanicsville, Virginia
Raleigh, North Carolina
Colleyville, Texas
Colorado Springs, Colorado
Boise area of Meridian, Idaho
Riverside, California (Southern California)
Salem, Oregon
Wheaton, Illinois
St. Cloud, Minnesota
Rockville, Maryland
North Chili, New York (near Rochester)
New Johnsonville, Tennessee
Kenova (Huntington), West Virginia
Helena, Montana
Middleburg Heights, Ohio
Venice, Florida
Grinnell, Iowa
Piedmont, Alabama (Near GA border close to Cedartown)
Auburn, Washington (near Seattle)
Elk Grove Village, Illinois
Savannah, Georgia
Atlanta, Georgia
North Liberty, Indiana
Saledad, California
Here is a link to my workshop calendar where you can see all of my travel schedule and to get info on beginner and advanced Brayer workshops: http://zindorf.blogs.splitcoaststampers.com/workshop-calendar
Link to my Stampin’ Up website where you can order all of your must have Stampin’ Up products from me 24-7: http://michellezindorf.stampinup.net
Frequently asked questions answers: http://zindorf.blogs.splitcoaststampers.com/frequently-asked-questions/


