
Hello There,
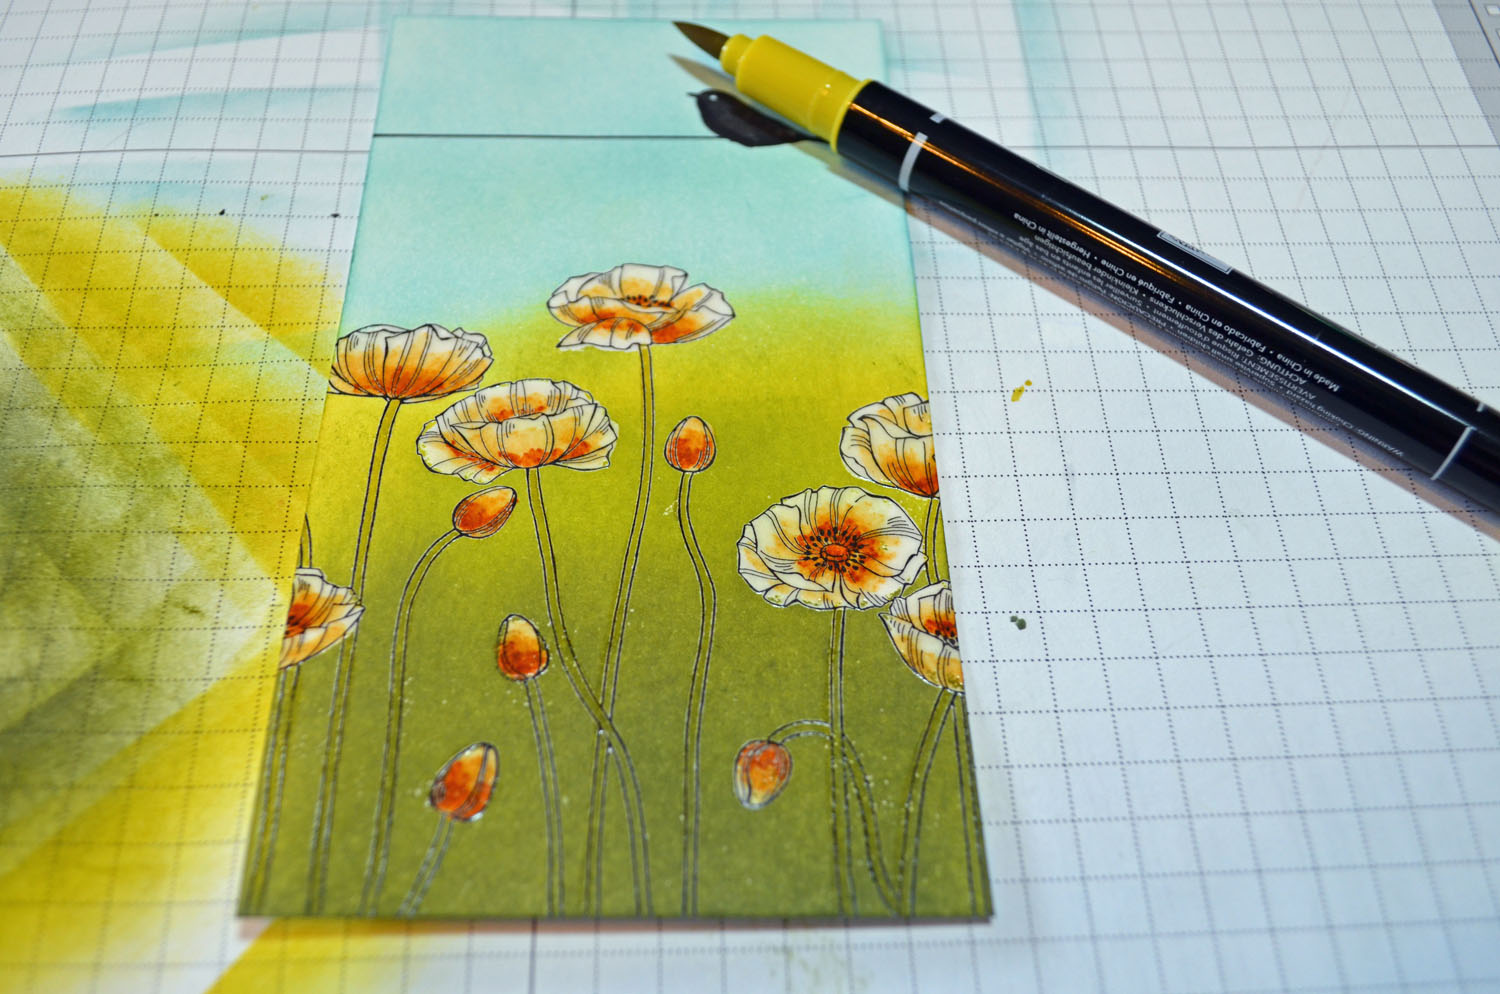
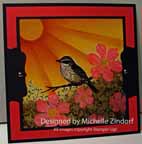
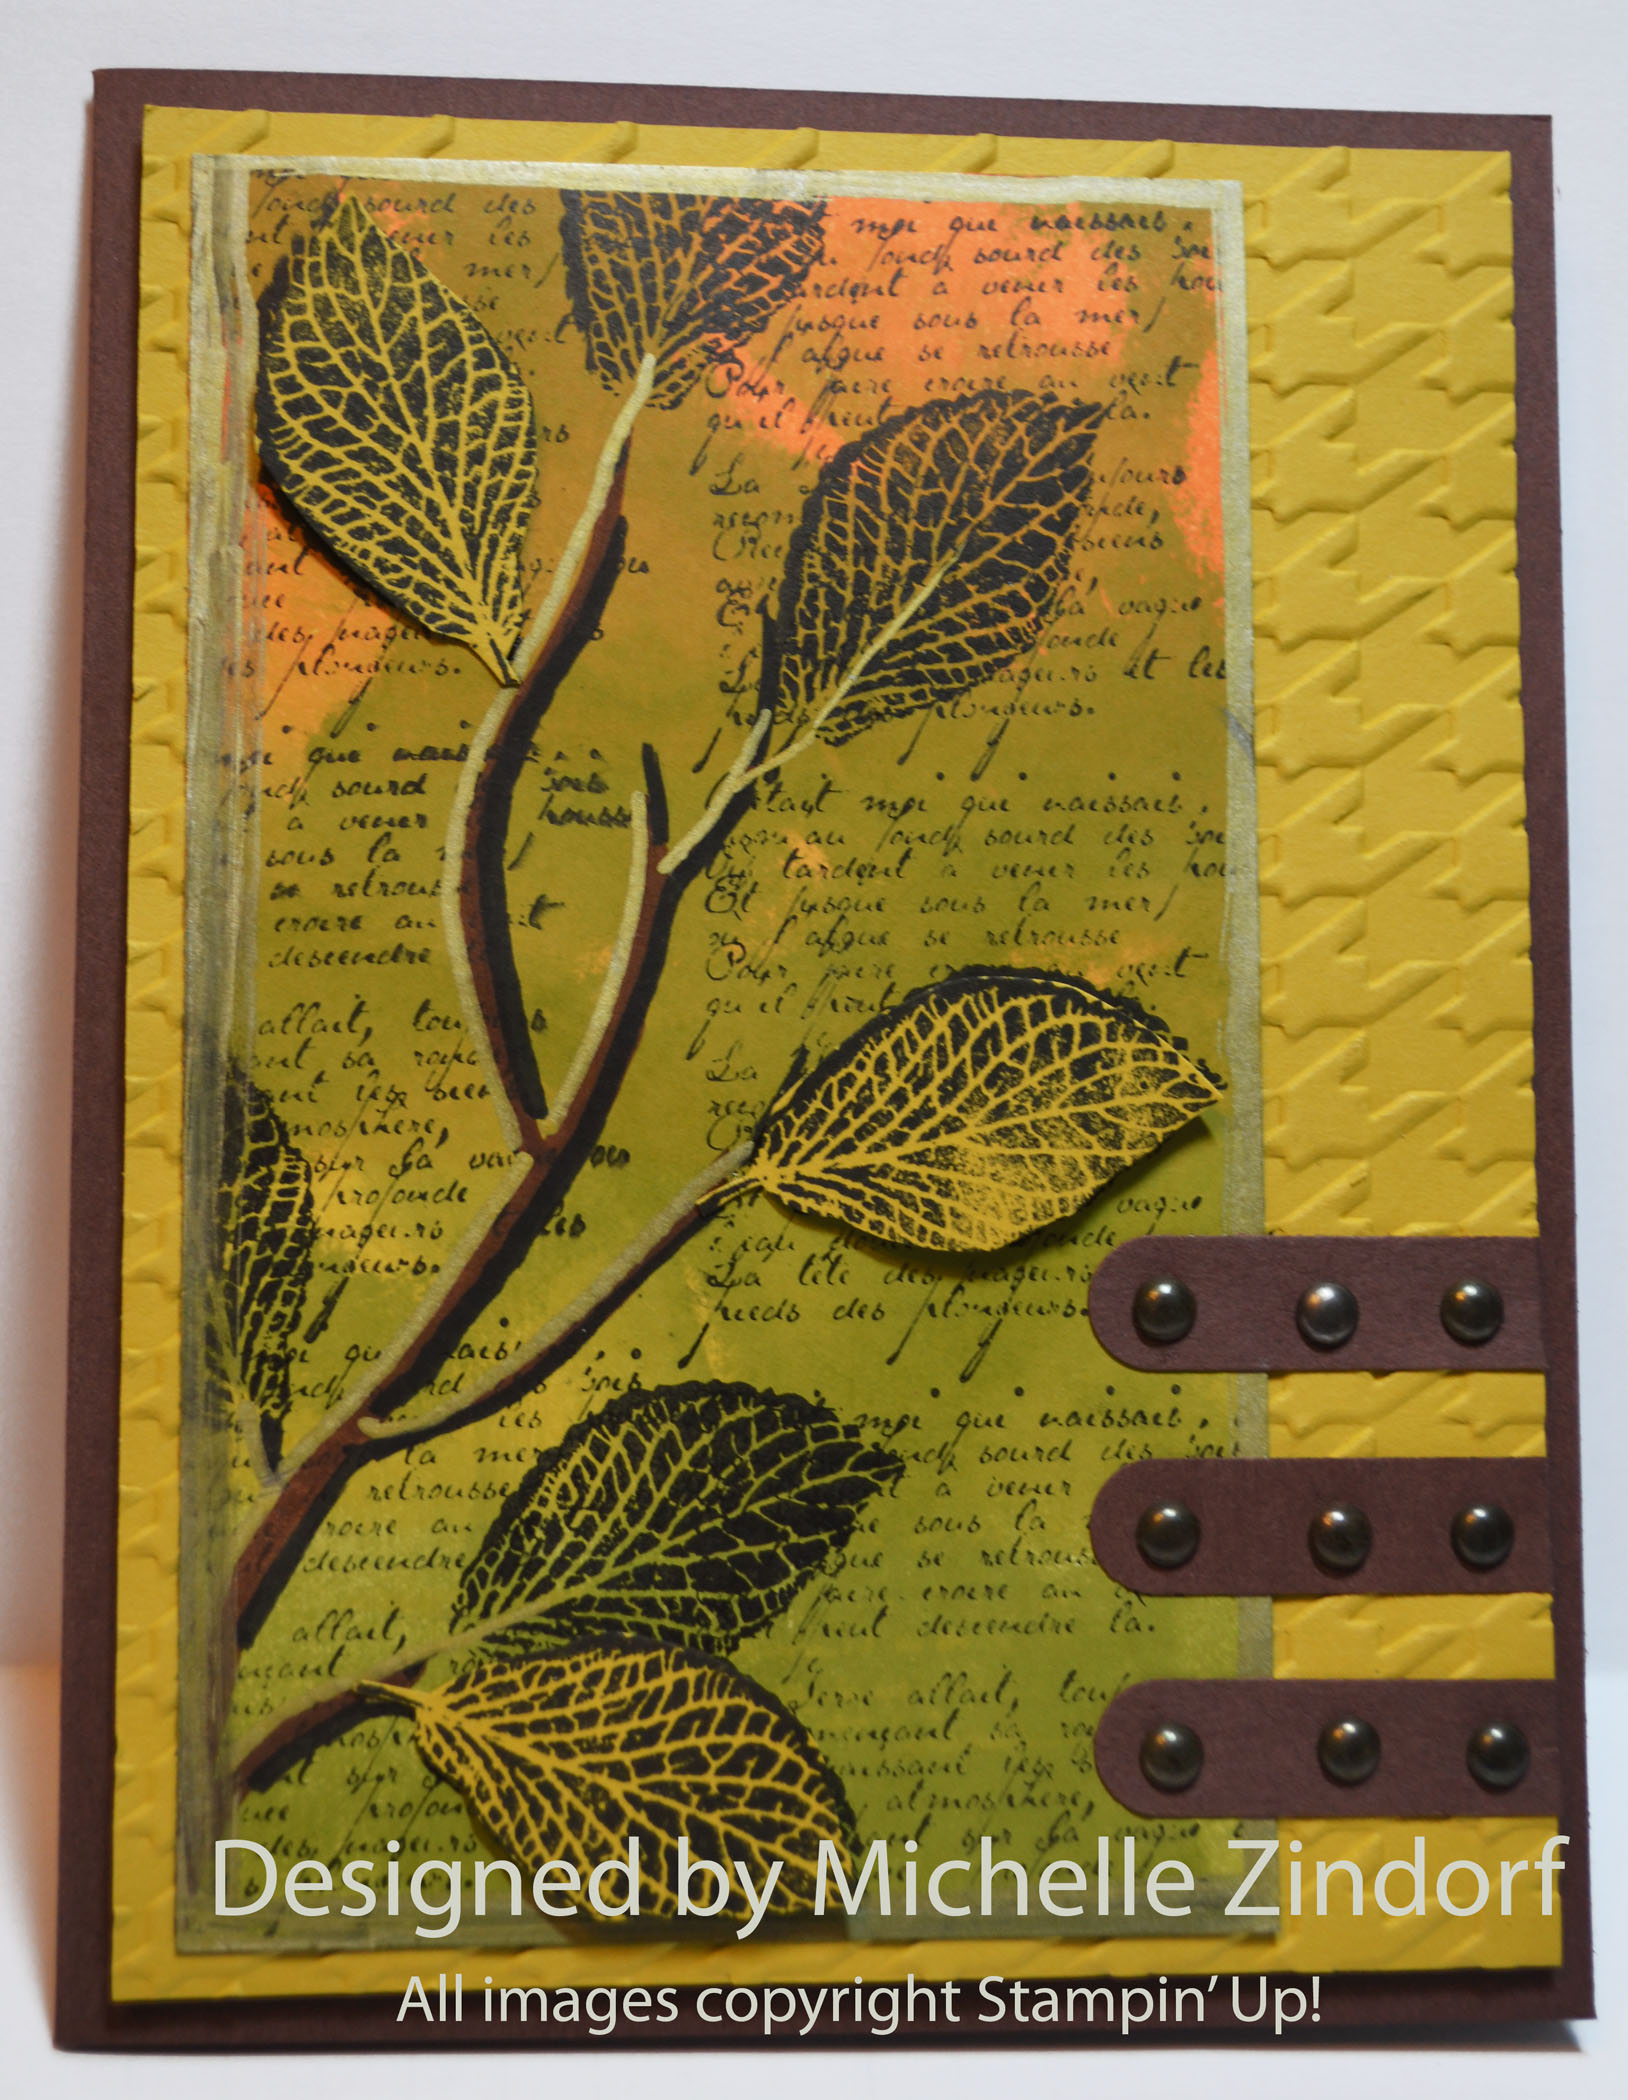
The sun is shining today and put me in the mood to stamp and color some flowers. I pulled out the Beautiful Stampin’ Up! Stamp Pleasant Poppies (item #129499). I used the emboss resist technique on this project in order to put the light poppies in front of a darker background. I also left plenty of white showing in the flowers to give them that extra pop and to add a little more life to scene I added the bird from the Everything Eleanor set.
This card has been added to my sales page. Click here to check it out.
****************************************
Now on with today’s tutorial. . . . . . .
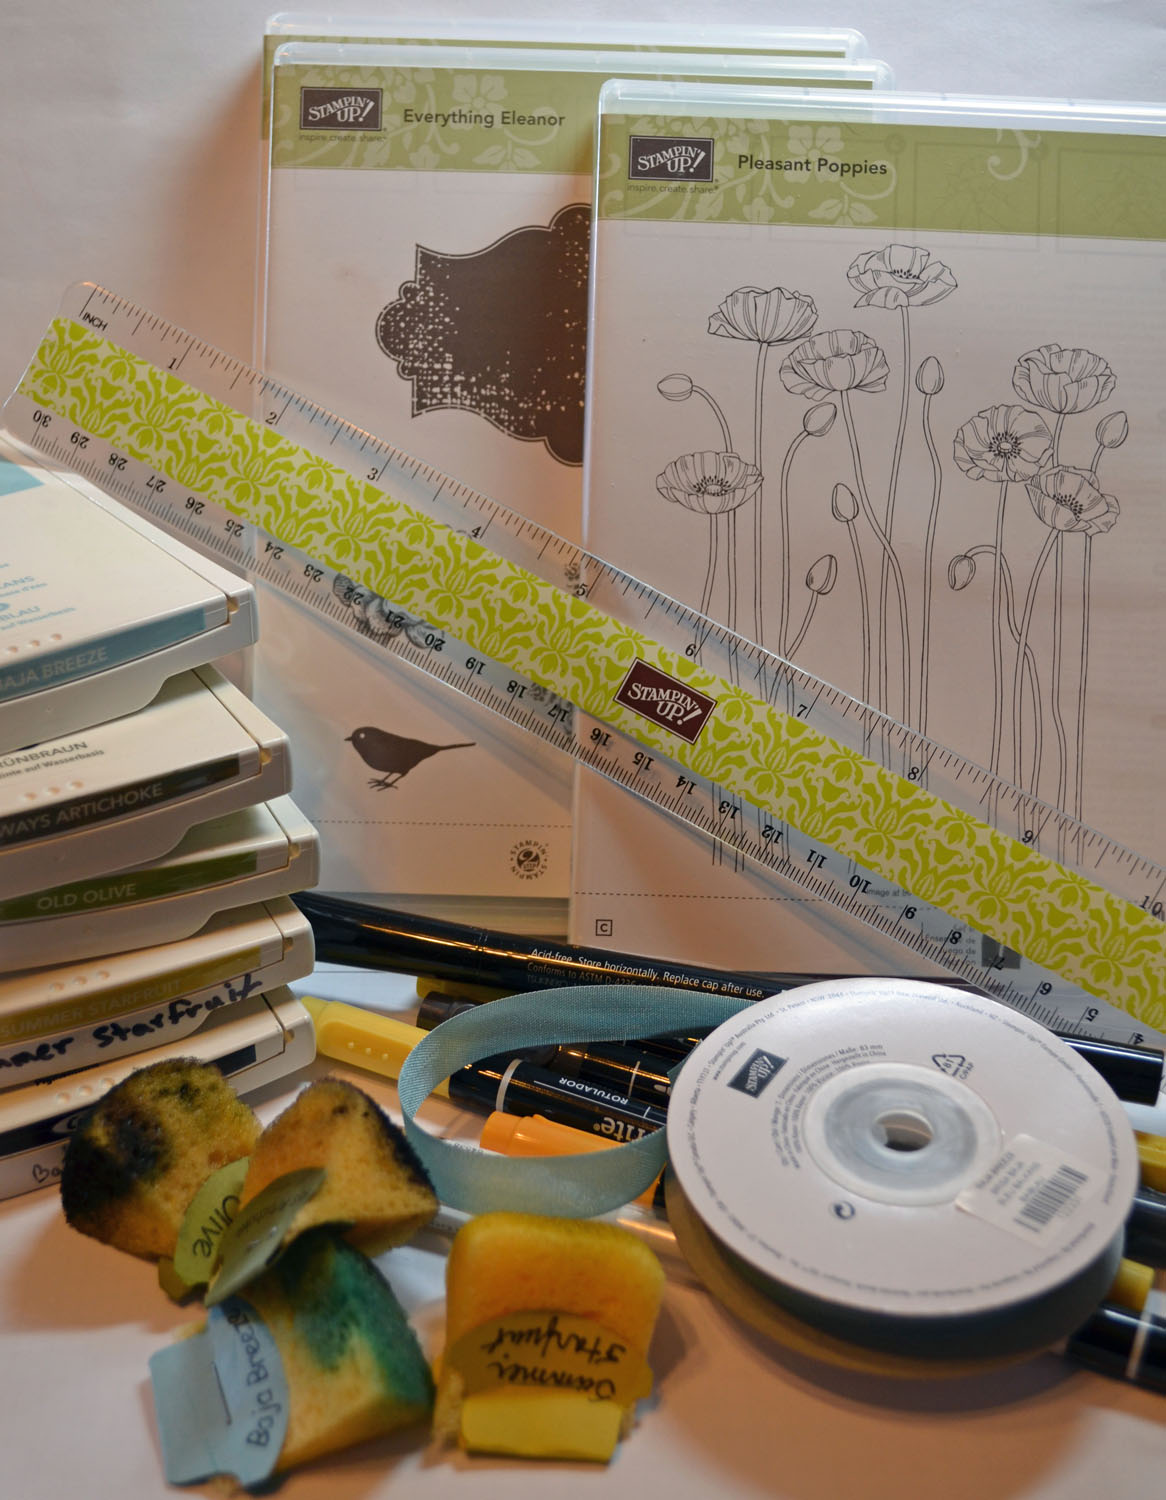
Project Supplies:
Stampin’ Up! Stamps: Pleasant Poppies (item#129499), Everything Eleanor (item#124164)
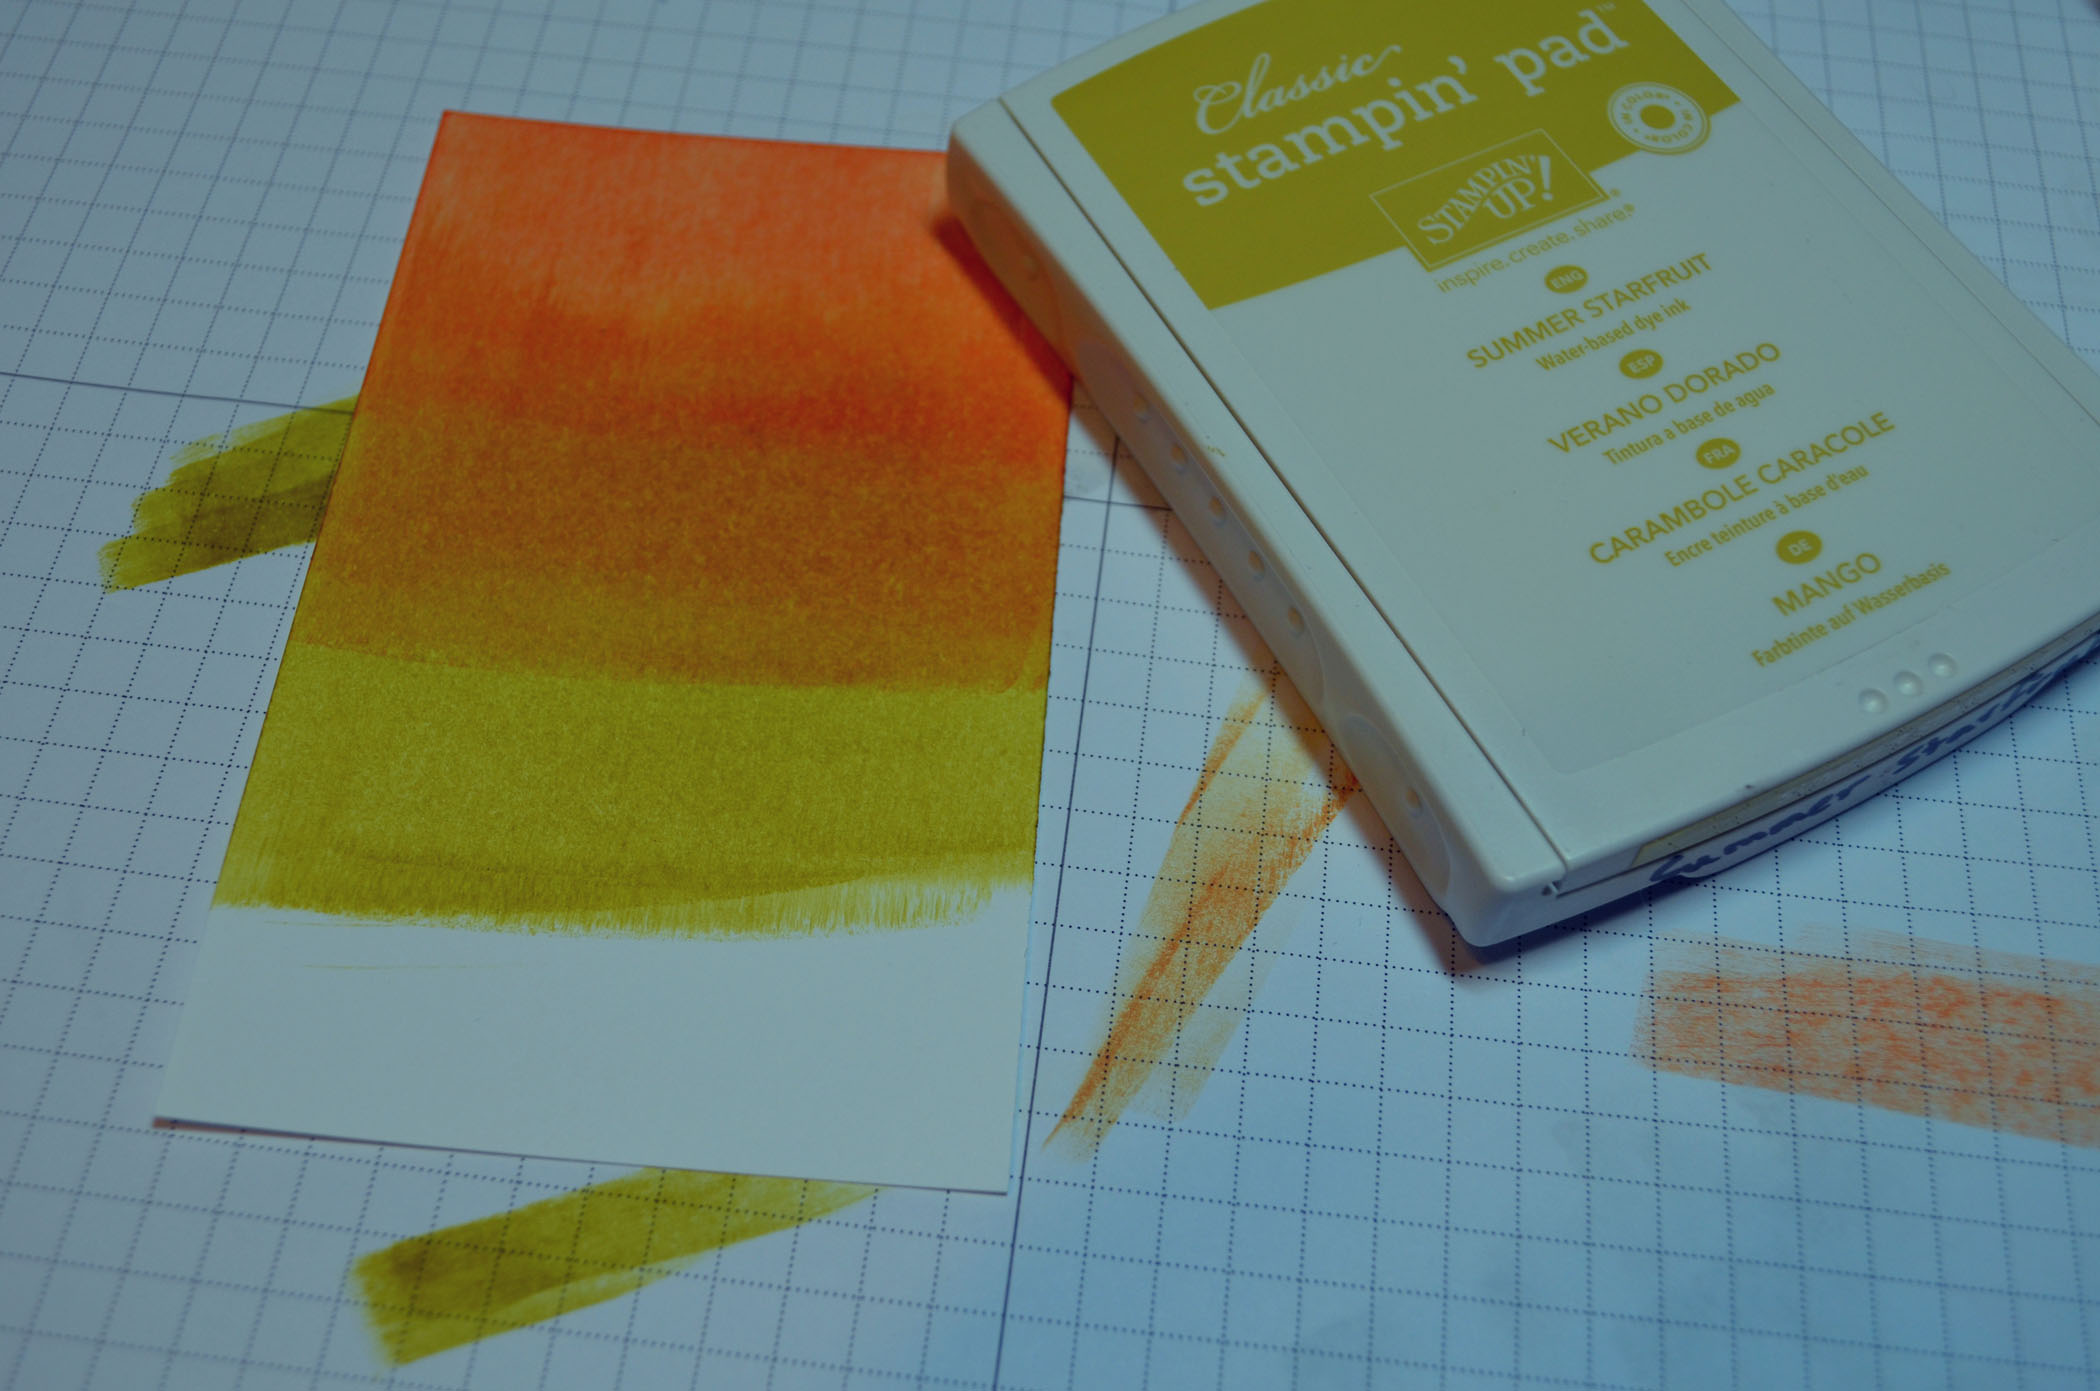
Card Stock: Stampin’ Up! Whisper White, Basic Black, Baja Breeze and Summer Starfruit
Ink: Stampin’ Up! Baja Breeze, Always Artichoke, Old Olive, Summer Starfruit, Basic Black
Accessories: Stampin’ Up! Sponges, Baja Breeze Seam Binding, White Gel Pen, So Saffron, More Mustard, Summer Starfruit and Basic Black markers, Ruler, Versamarker, Clear Embossing Powder and Heat Gun
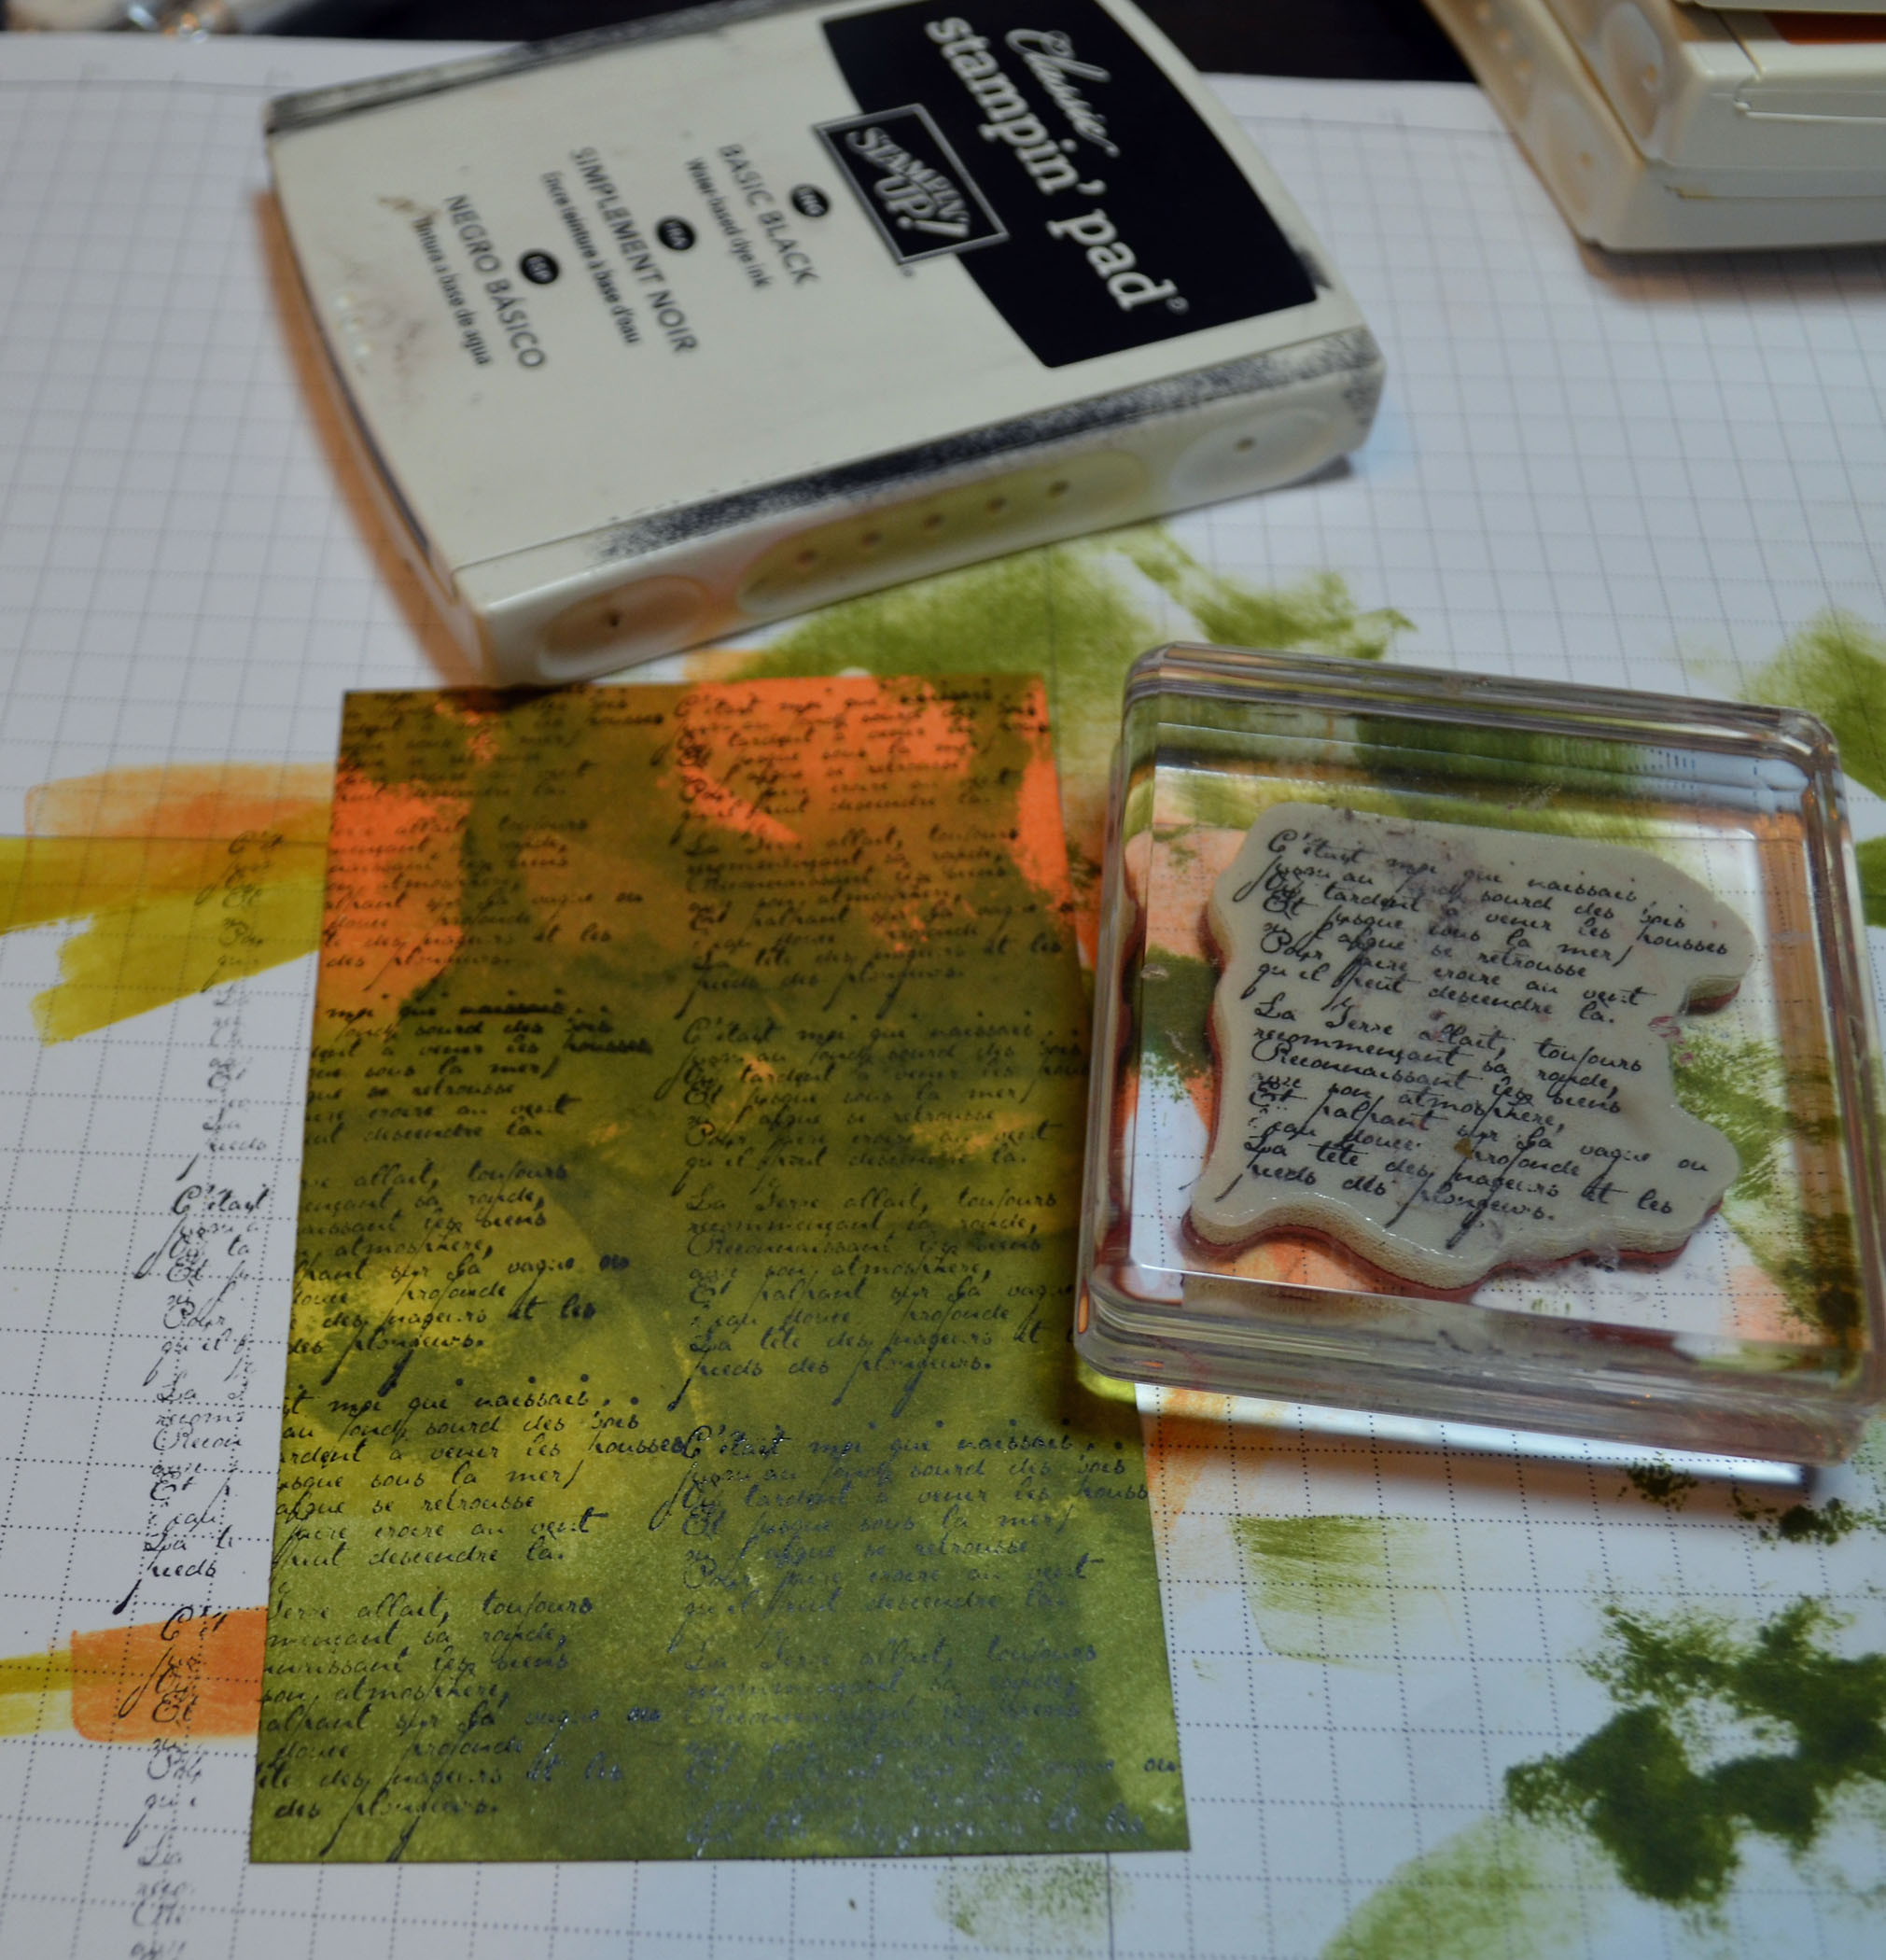
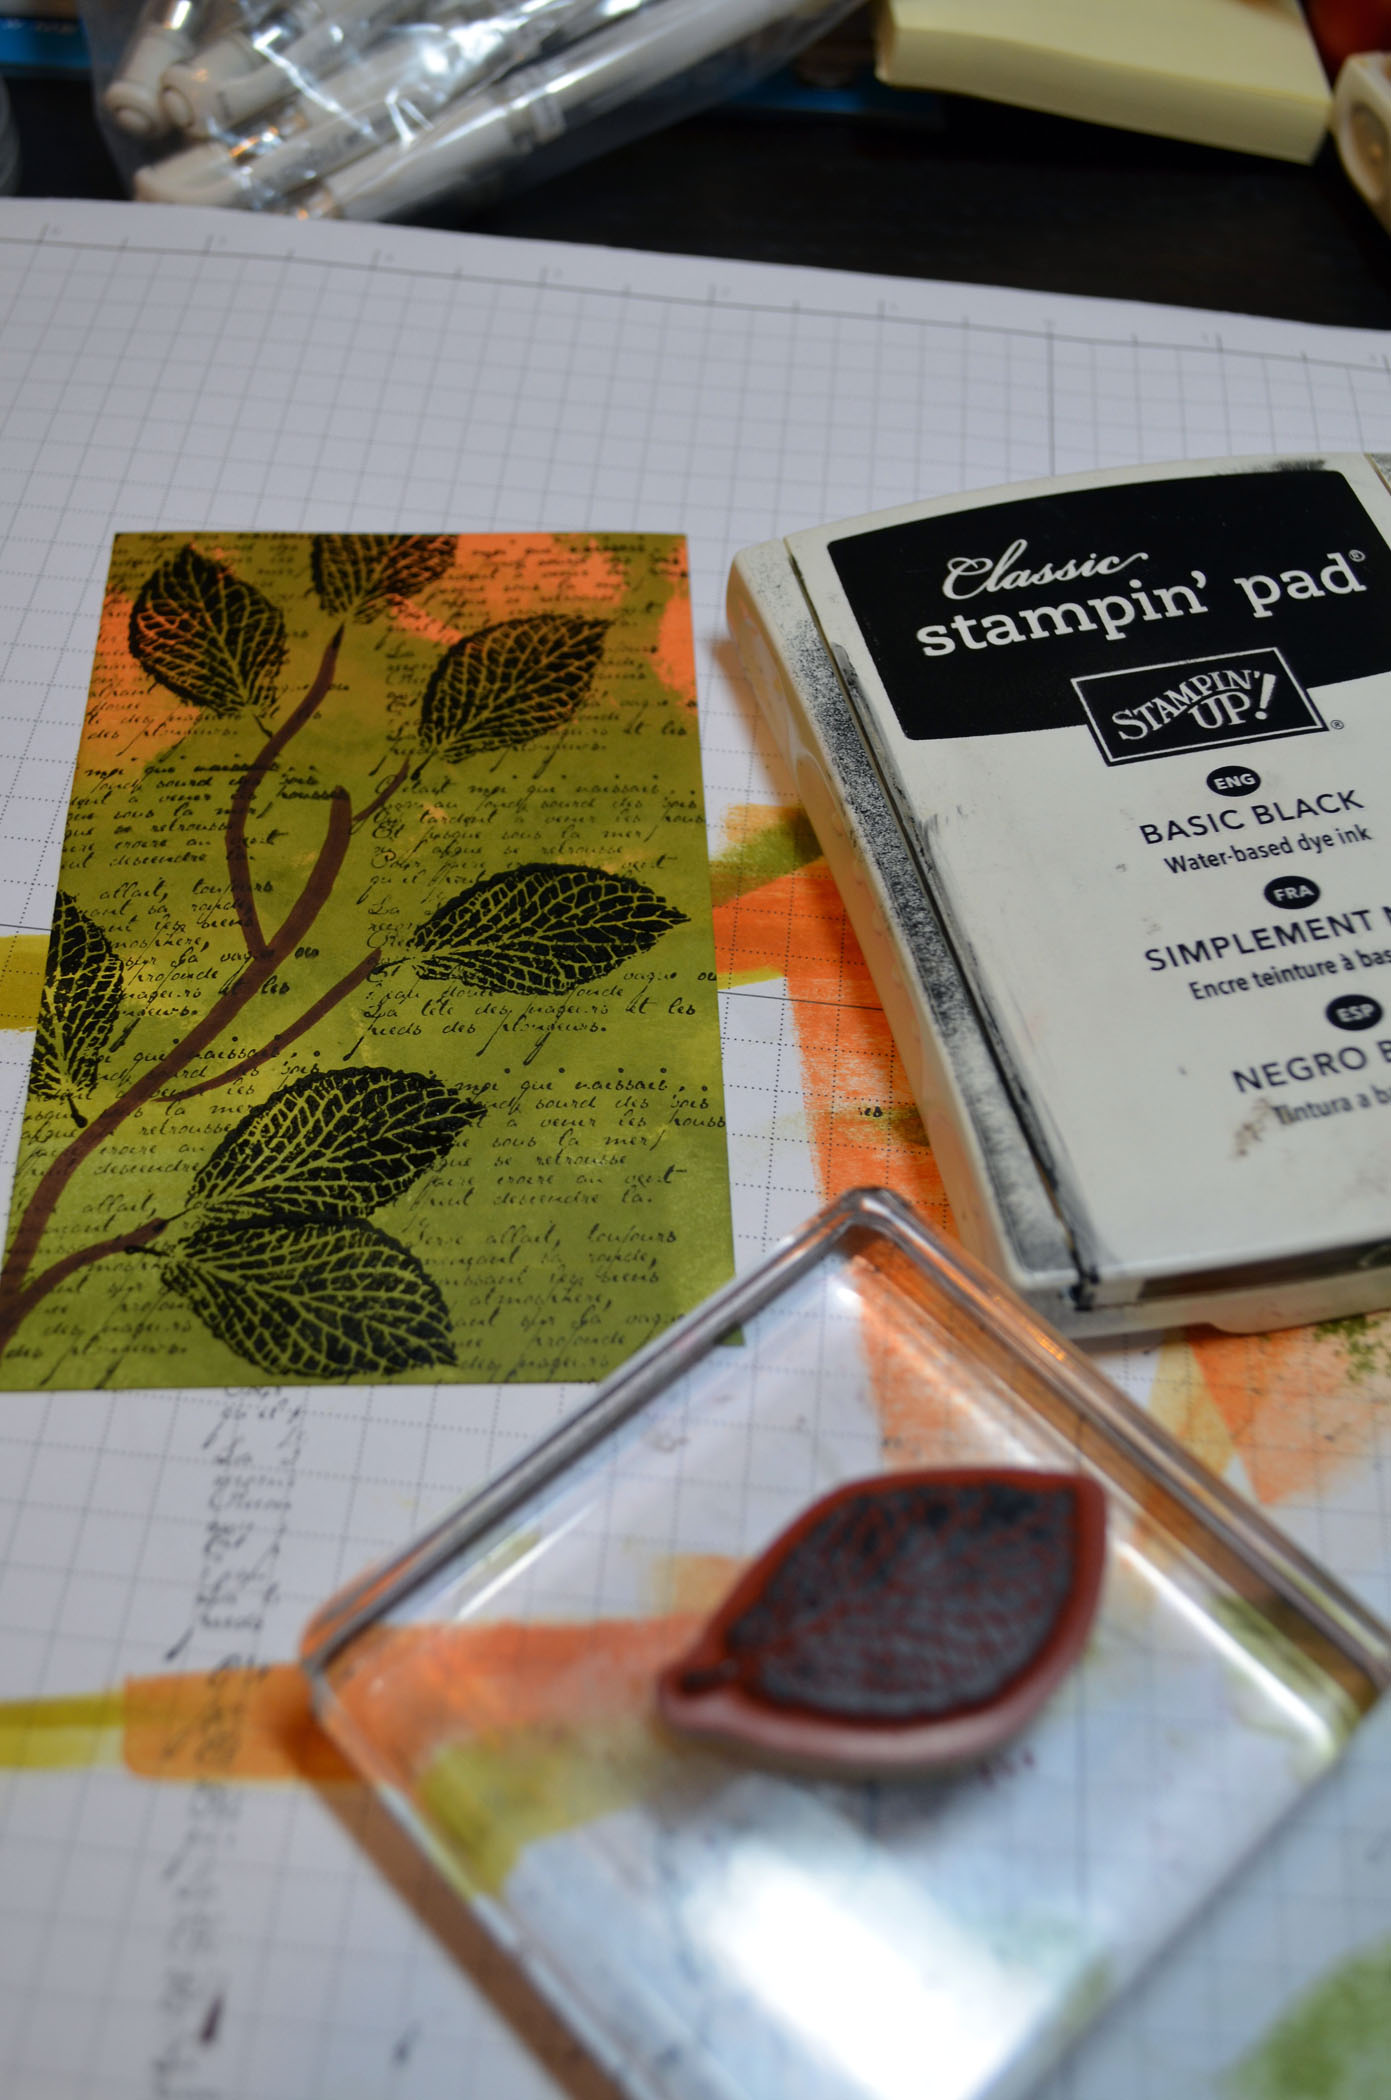
Started with a 3″ x 5.5″ Whisper White card stock and stamped the poppies on it using Craft Basic Black ink.
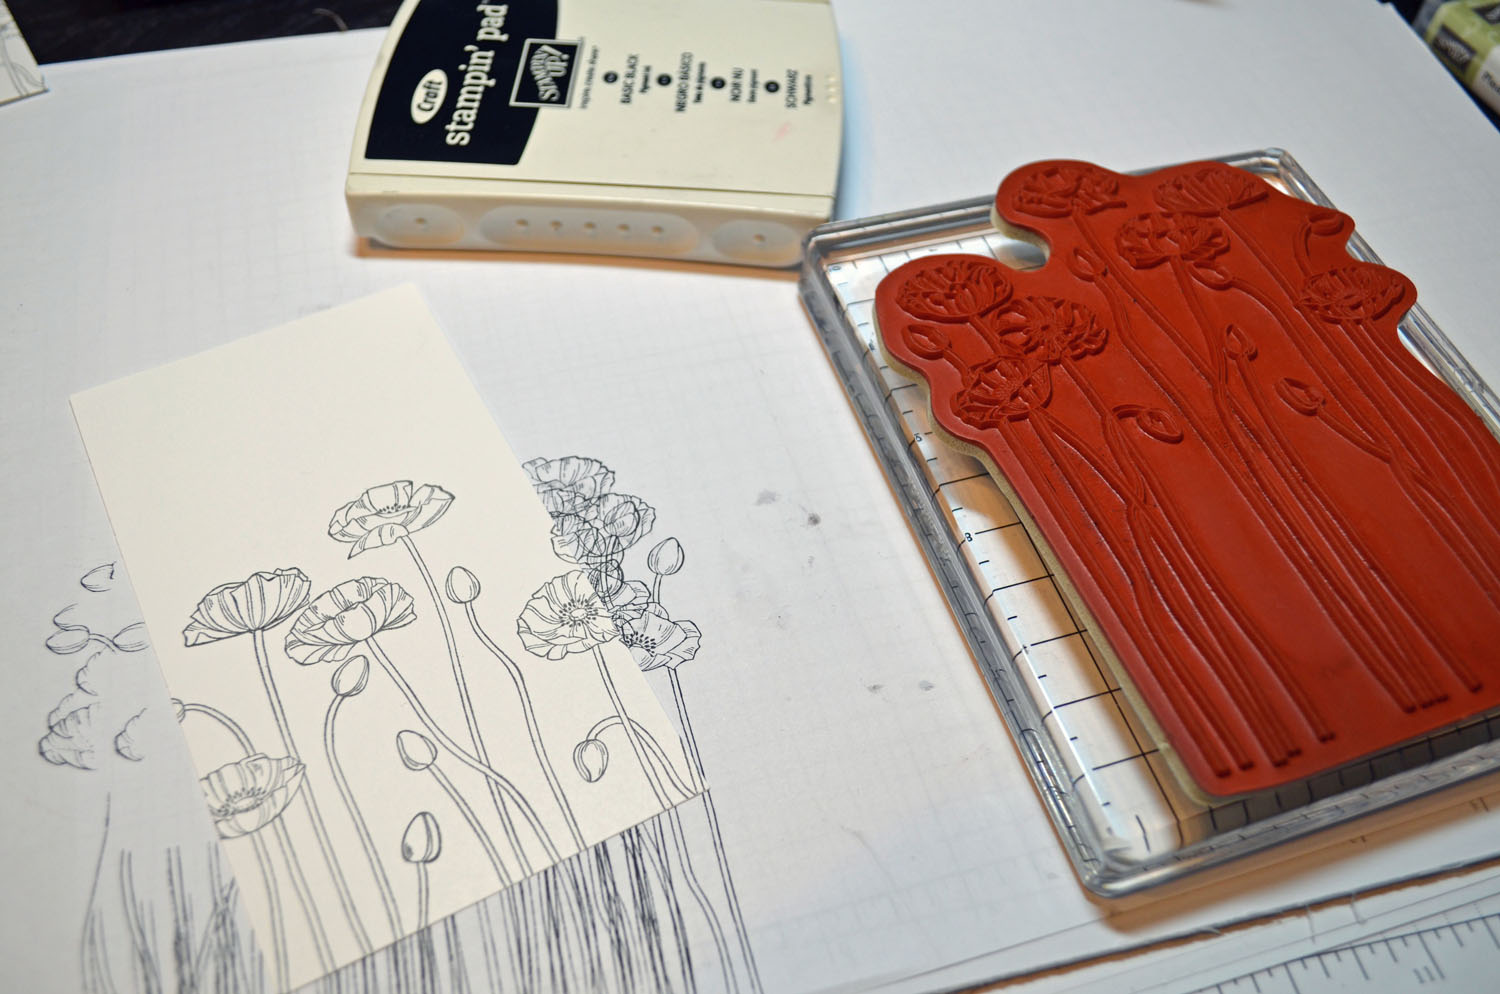
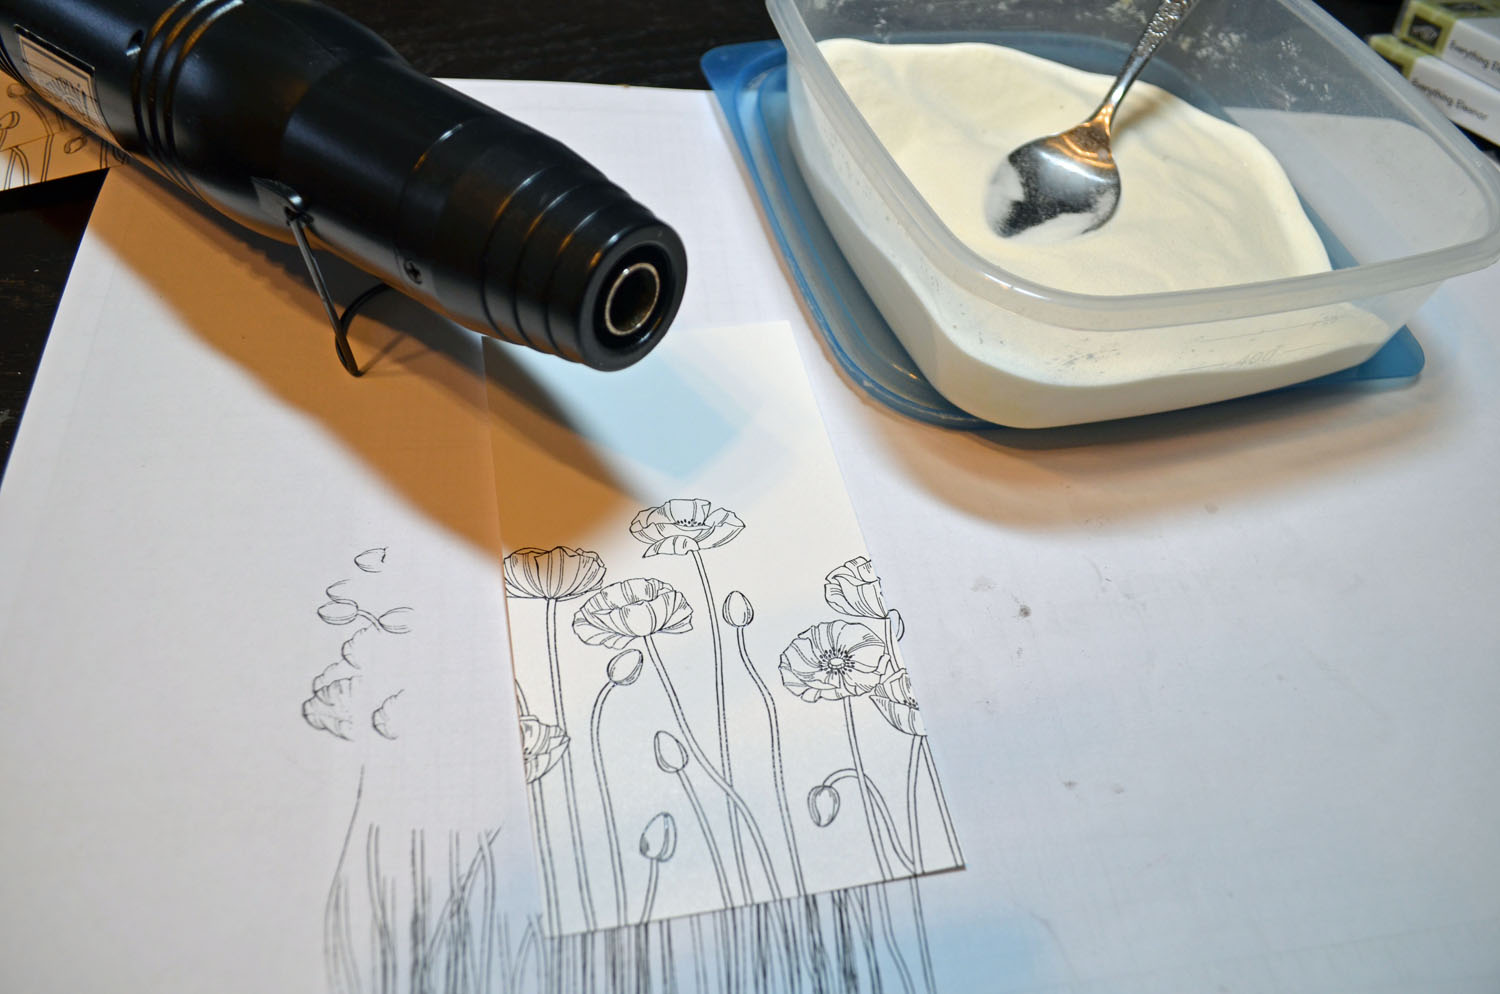
Heat embossed the image using clear embossing powder and a heat gun.
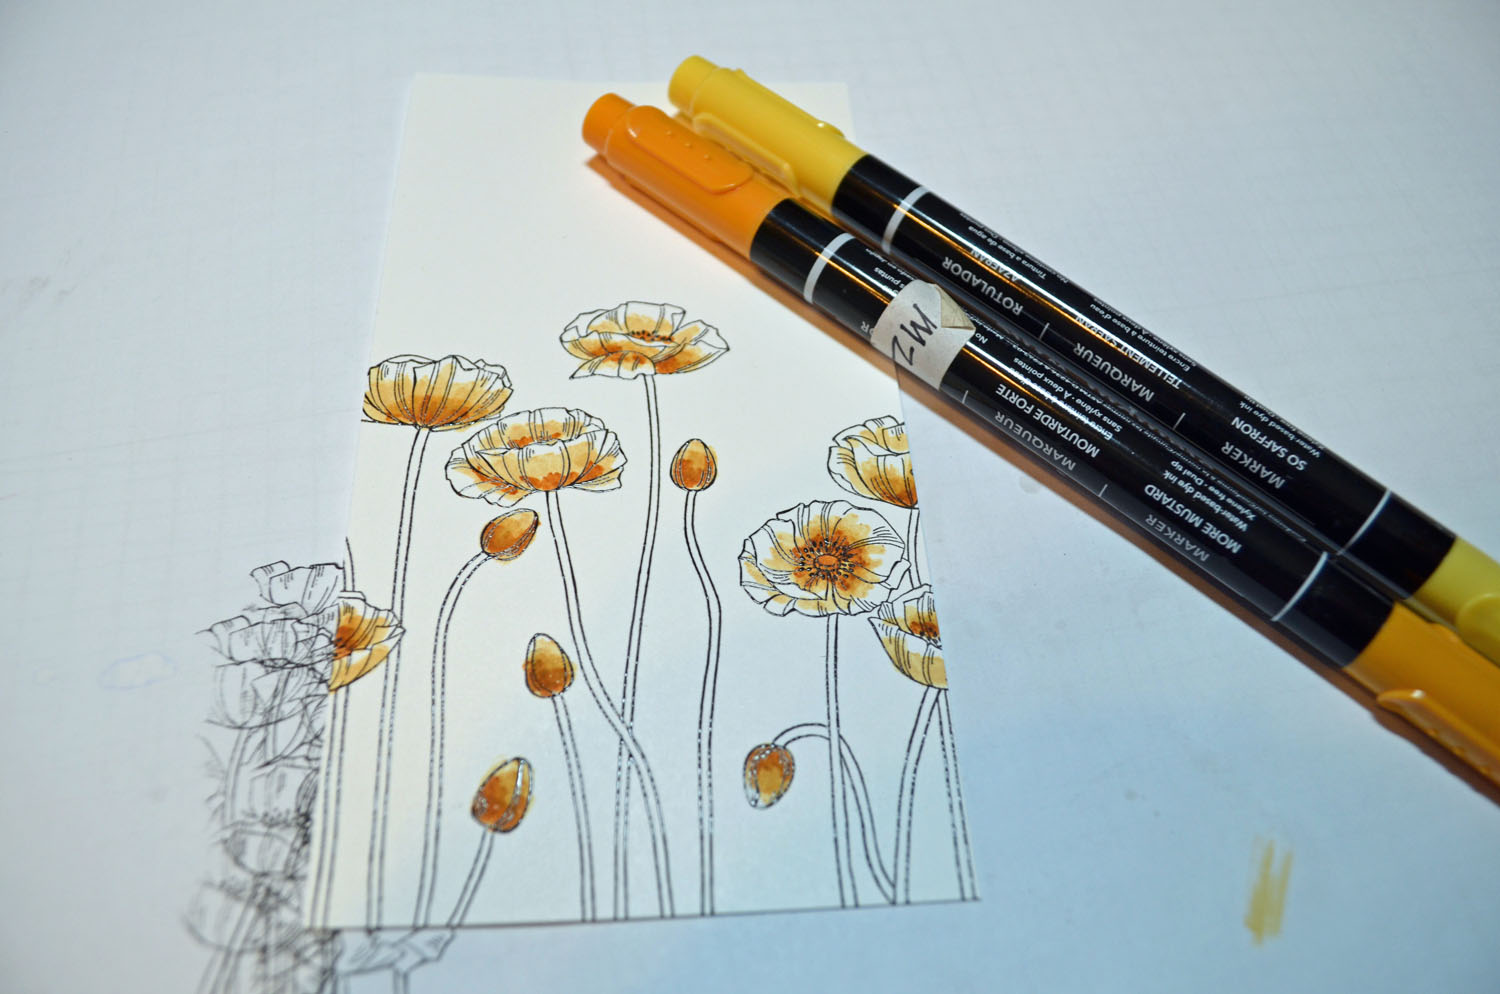
Added So Saffron marker to the flowers and buds leaving plenty of white showing at the edges of the petals.
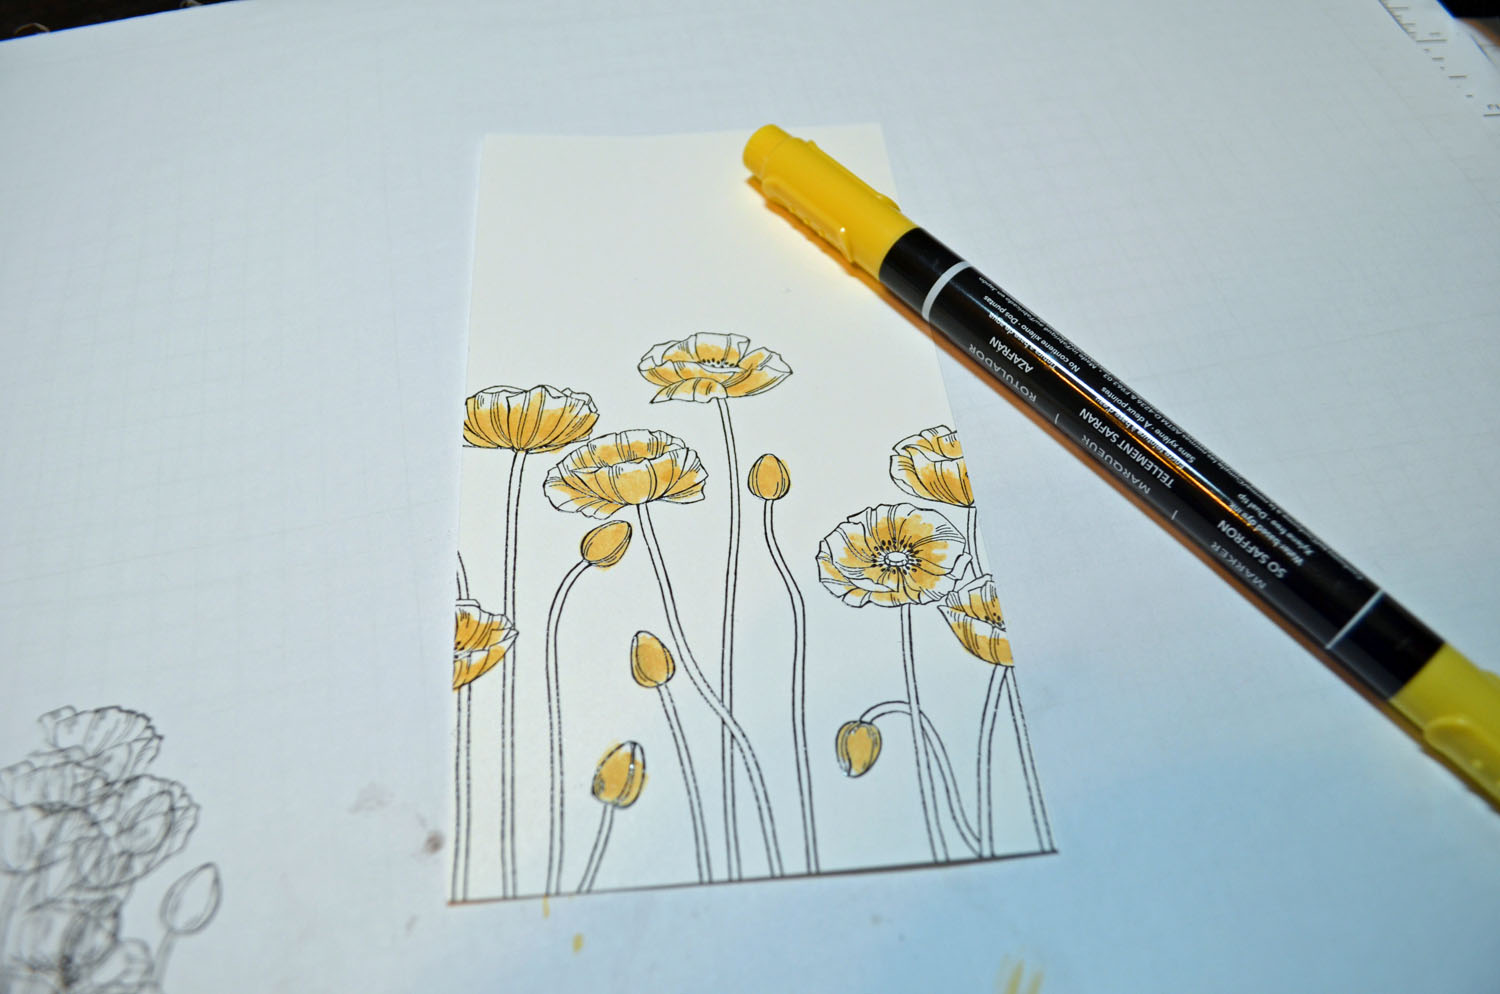
Added More Mustard marker at the base of the petals and then blended it in using a So Saffron marker.
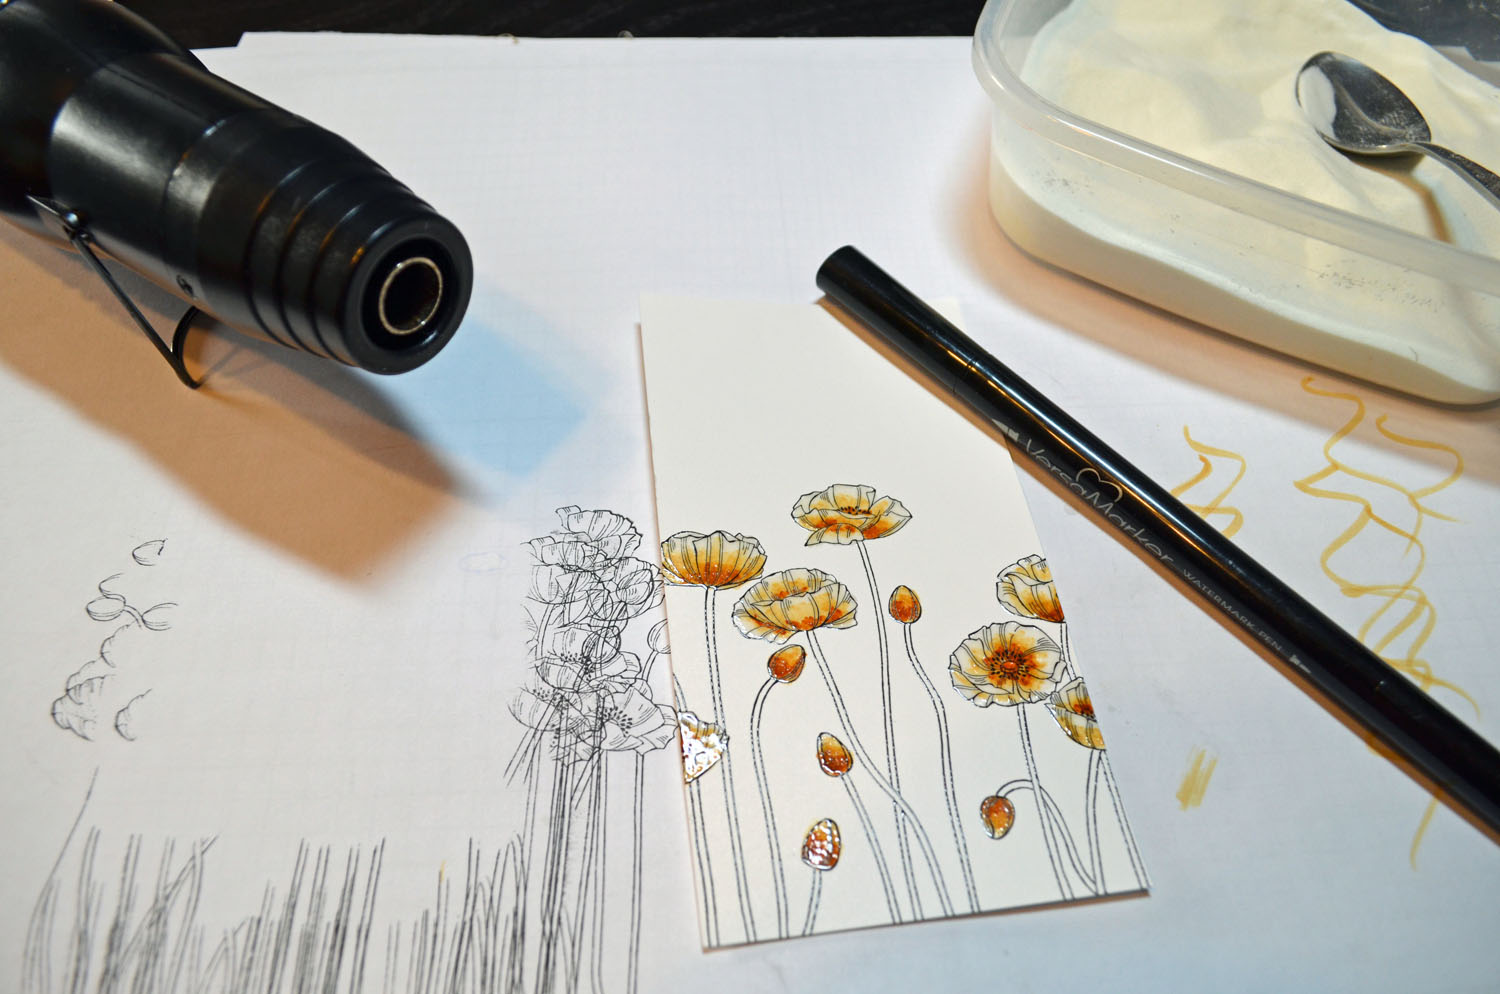
Colored over the flowers and buds using a Versamarker and the heat embossed the images using clear embossing powder and heat gun. Now the flowers are protected and I can put my background ink in without it ruining the flowers.
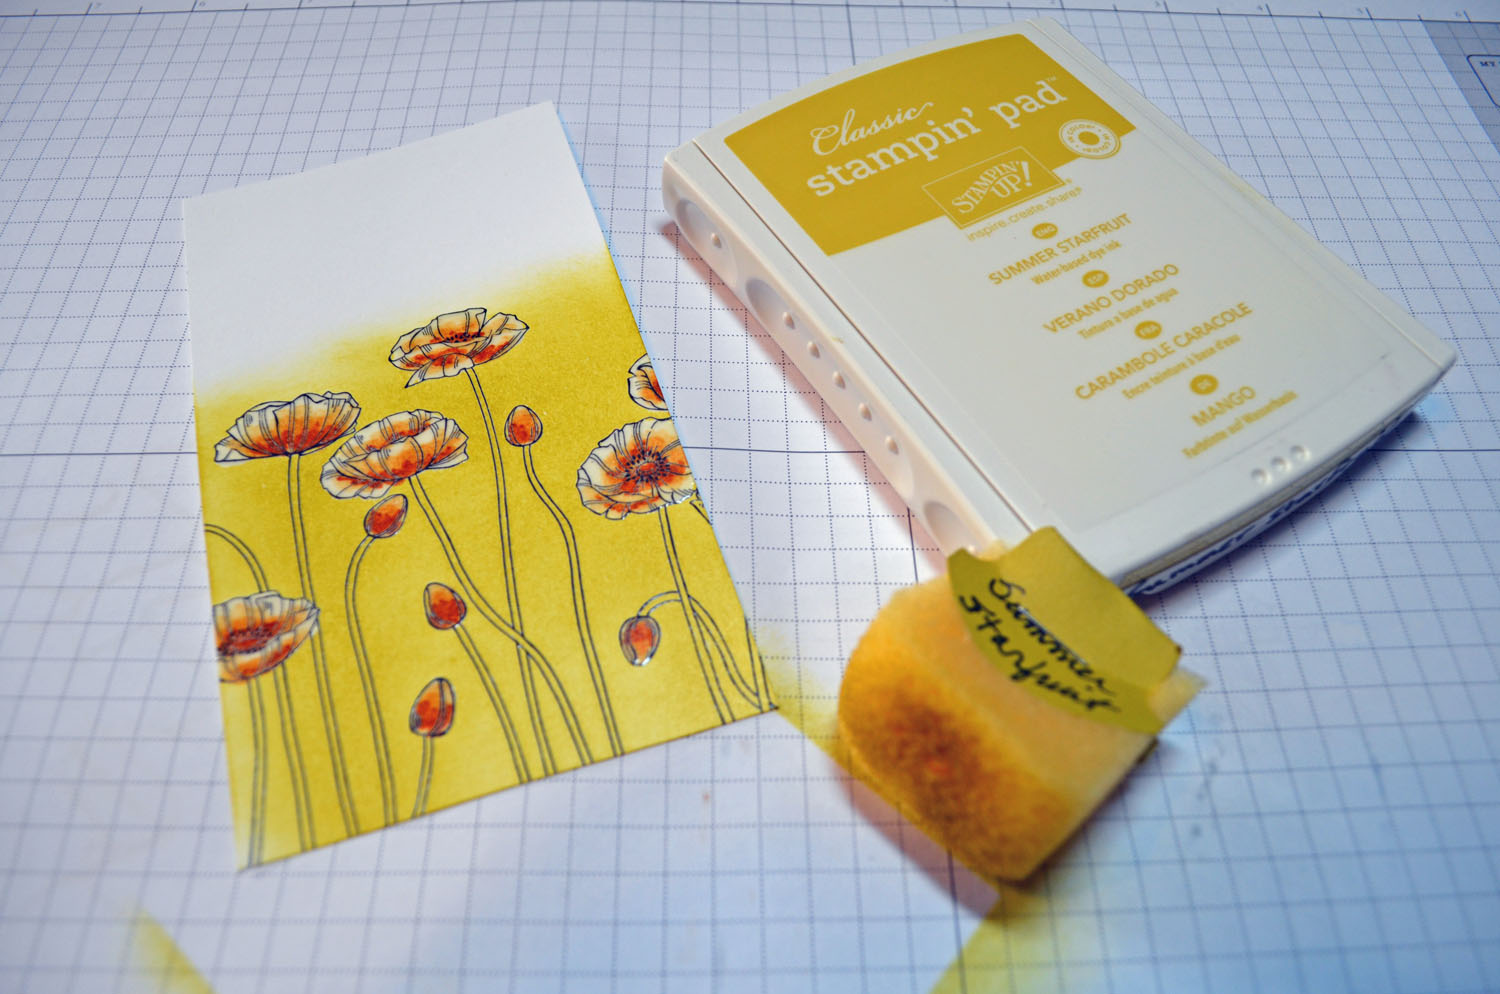
Sponged Summer Starfruit on the card stock.
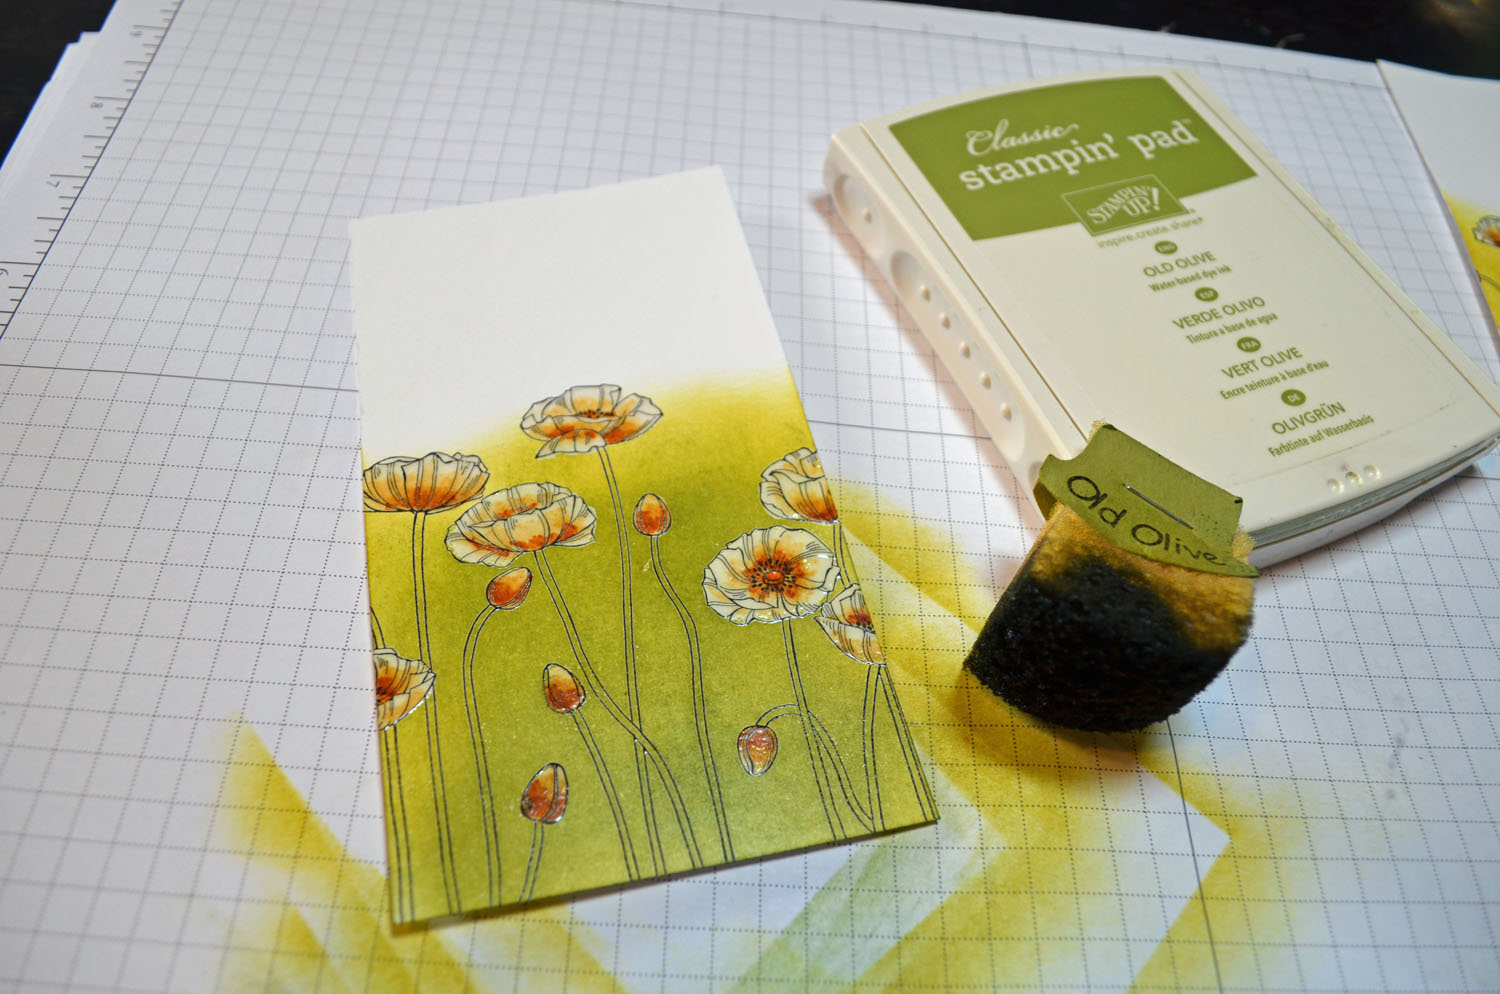
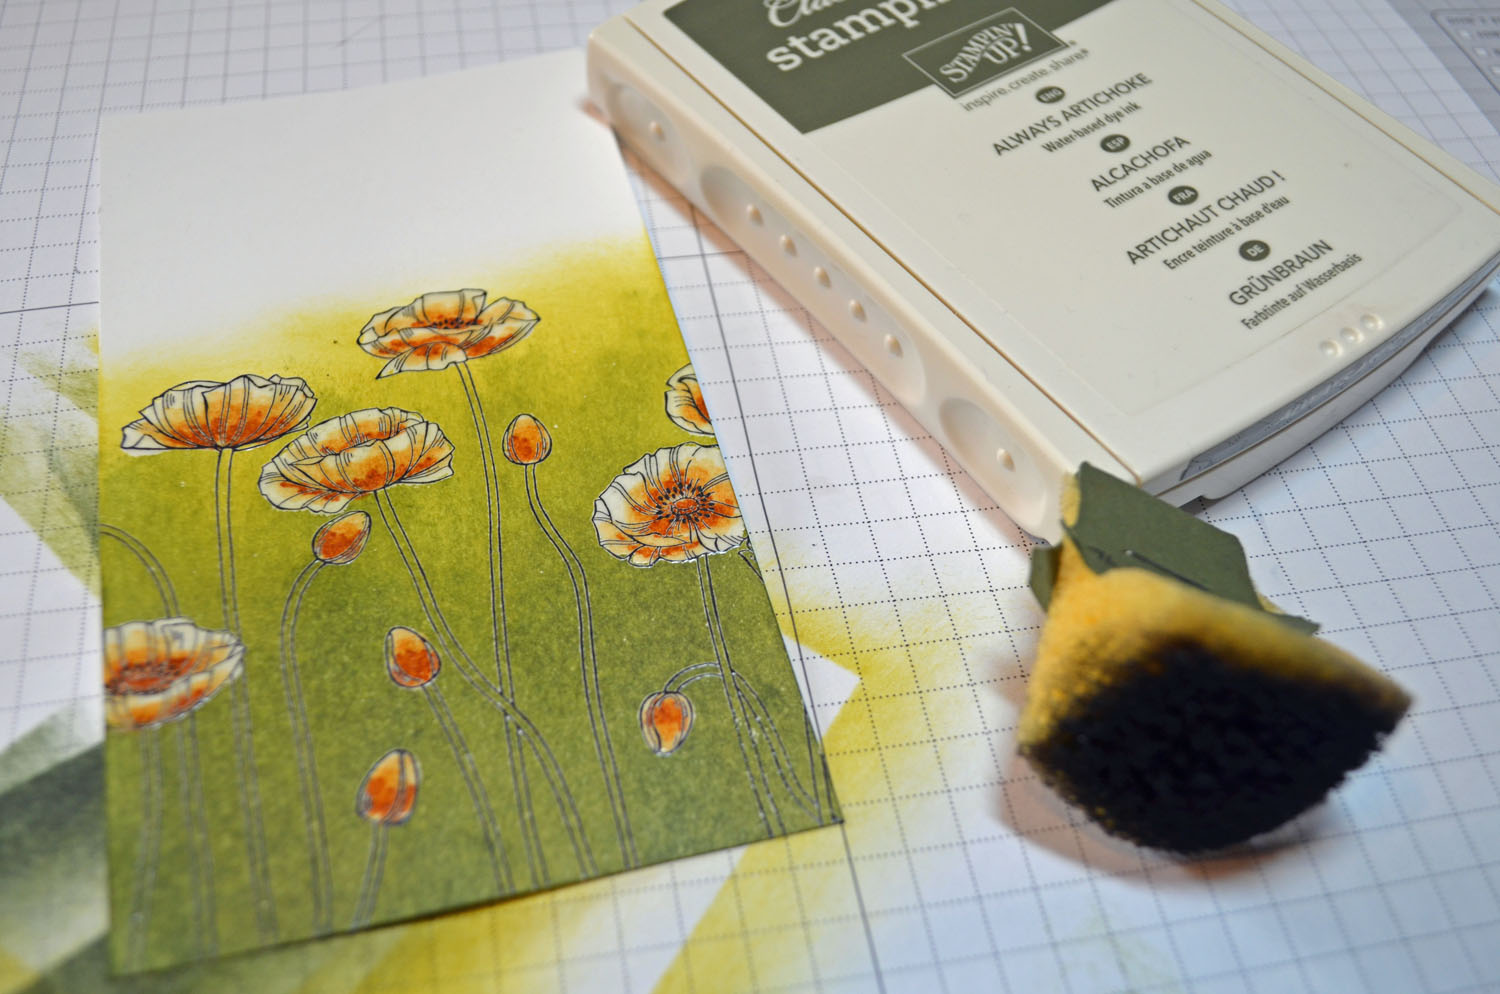
Sponge Old Olive ink on.
Sponged Always Artichoke ink at the bottom of the card stock.
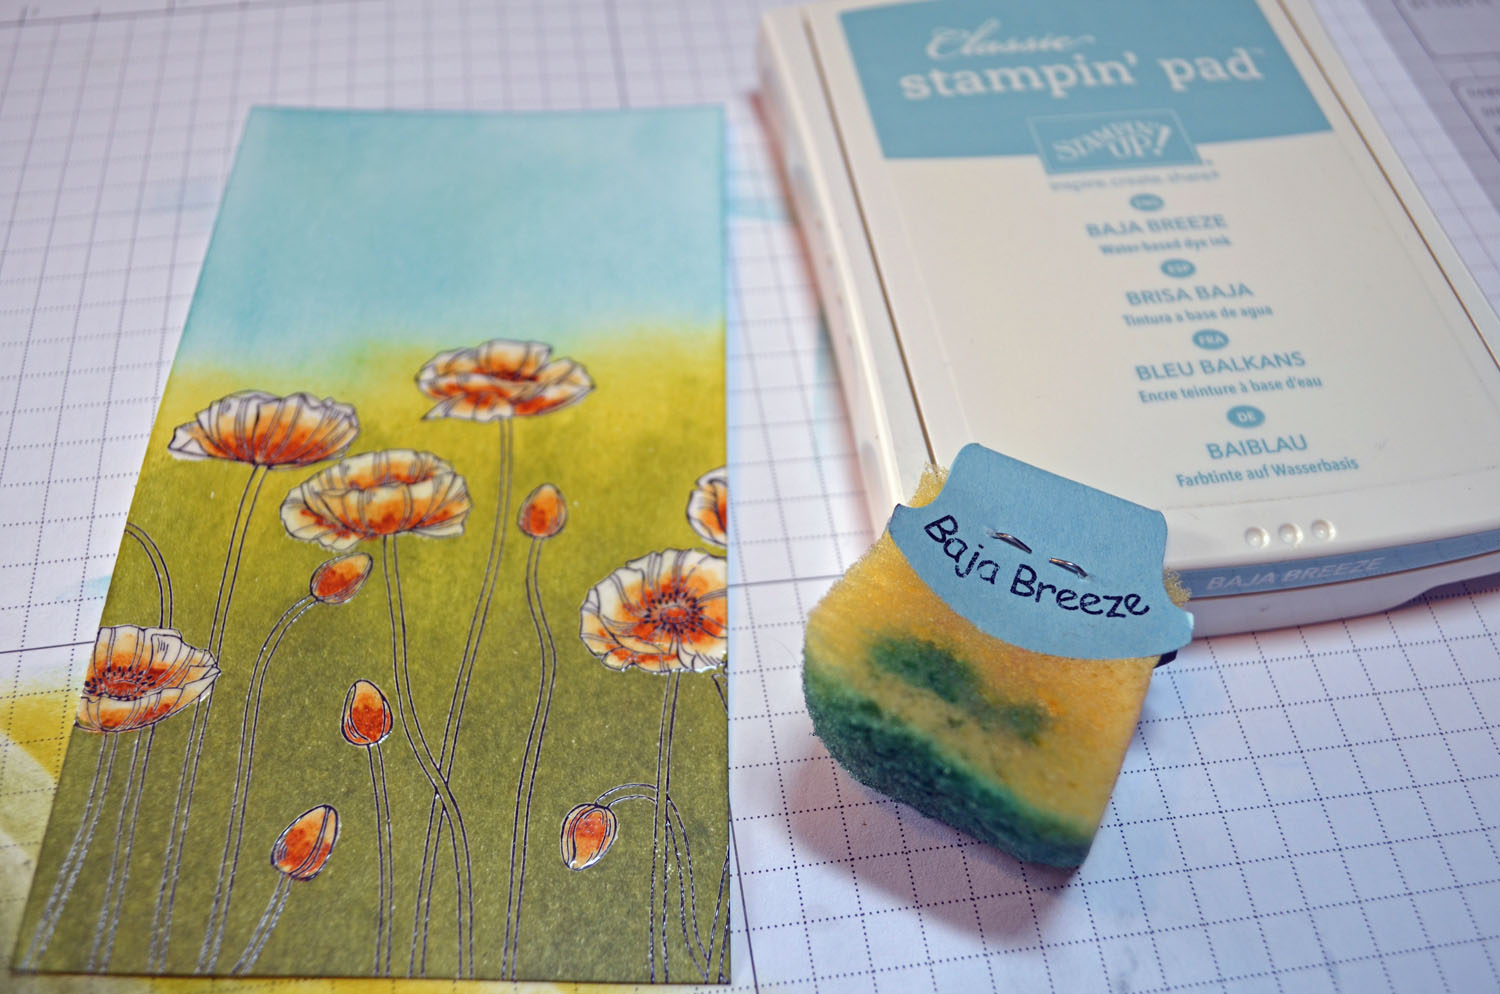
Sponged Baja Breeze ink at the top of the card stock for the sky.
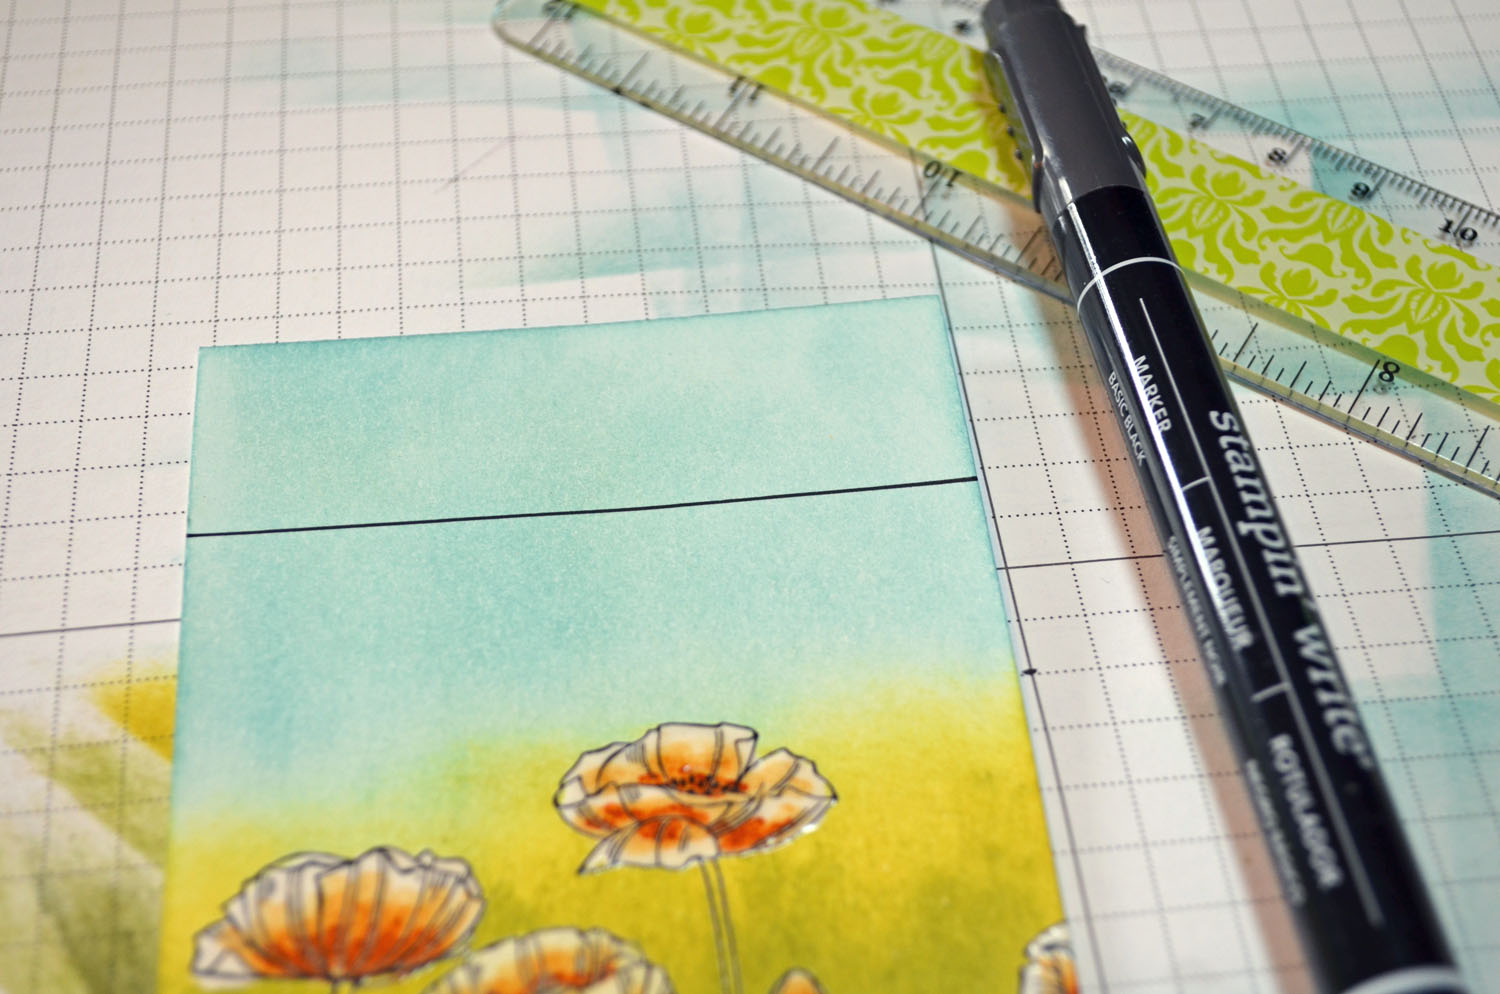
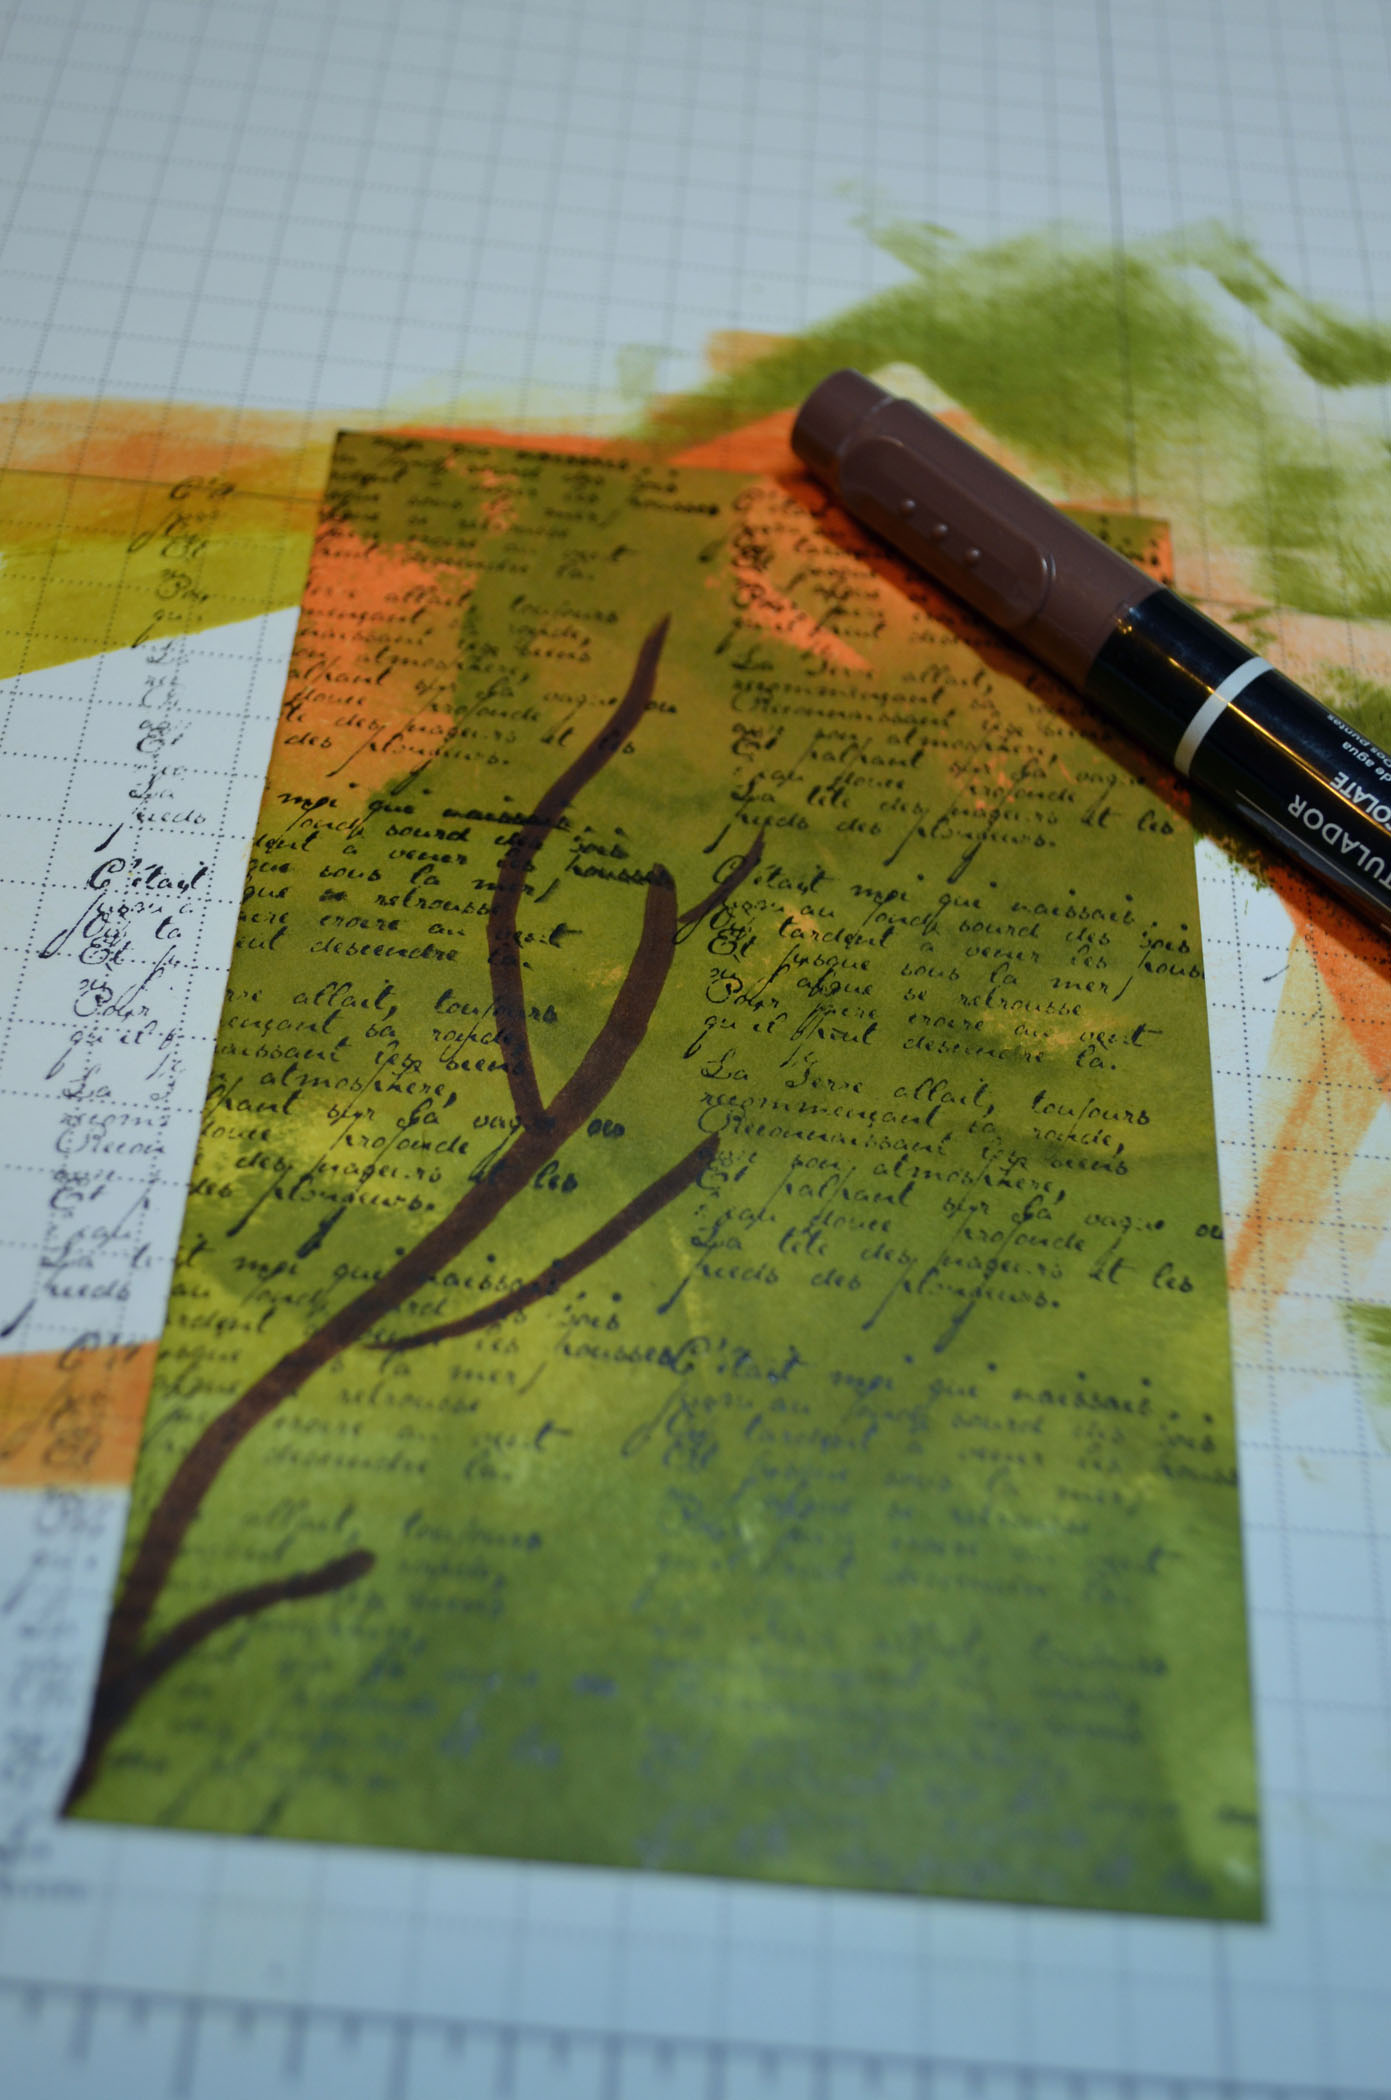
Added a Basic Black marker line across the top of the card stock using a Ruler.
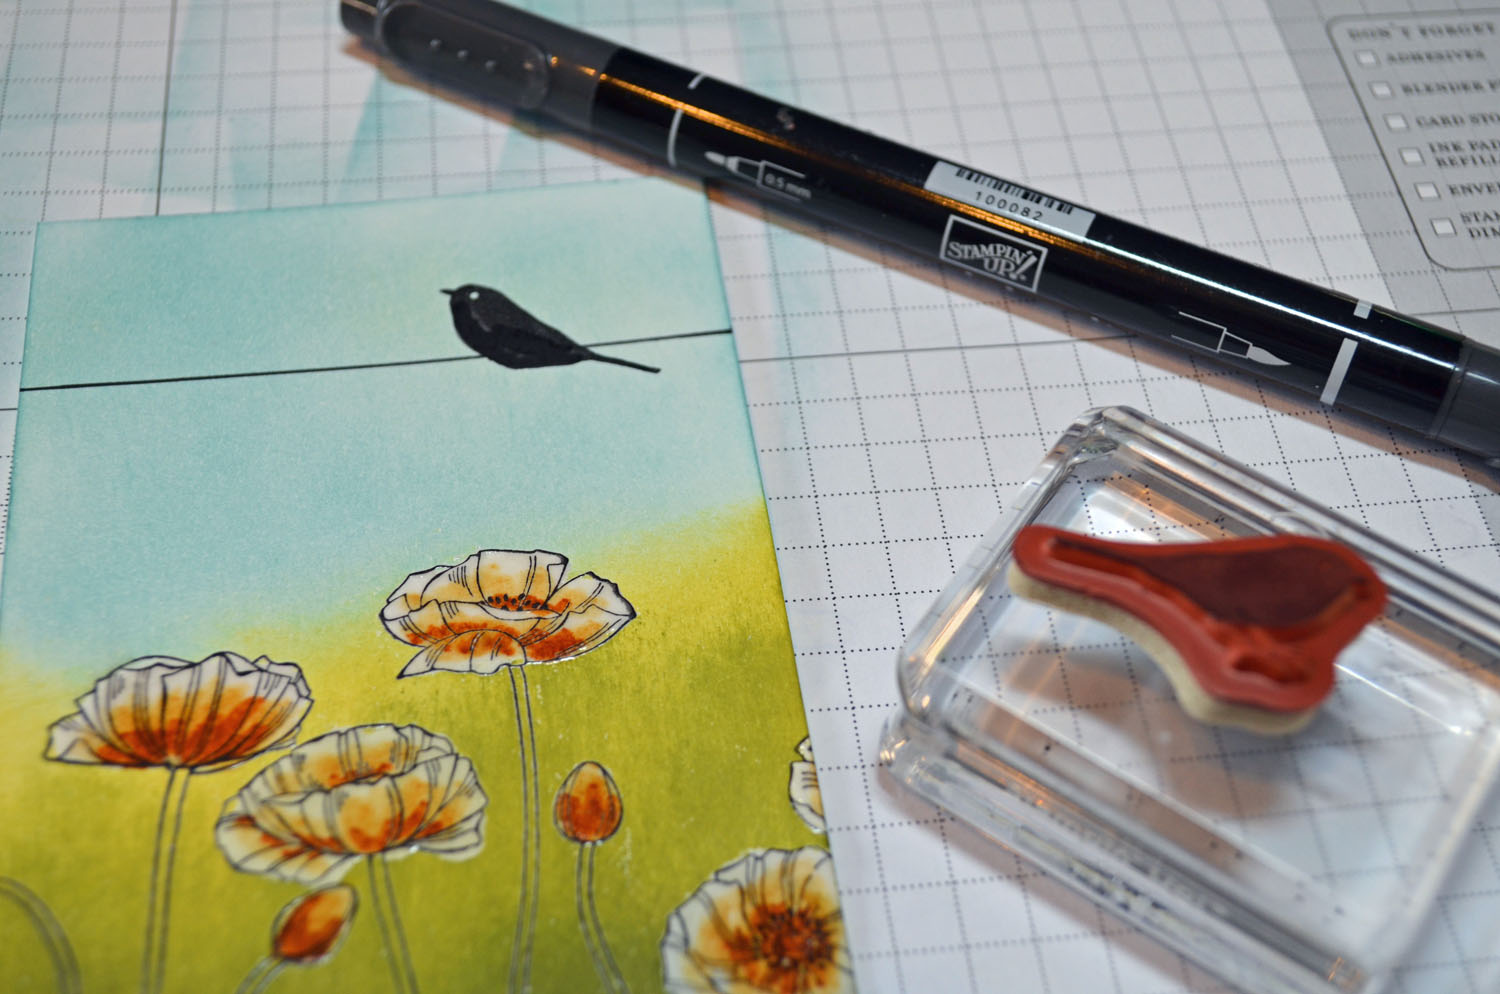
Stamped the bird from the Everything Eleanor set omitting the birds legs. I omitted the birds legs by coloring the bird with Basic Black marker on the rubber and then stamping it.
Colored the stems in with Summer Starfruit.
Added just a few white gel pen dots to the stamens in the middle of the flowers.

Added a Whisper White 5″ x 6.5″ card base, Basic Black ” x 6.5″ panel, 4.75″ x .25″ Baja Breeze panel, 3.25″ x 5.75″ Basic Black panel, 4.75″ x 1″ strip of Summer Starfruit and Baja Breeze seam binding.
Here is the finished card.

May your day be out of this world wonderful!
Check out the great deals at Stampin’ Up! below.
Until my next post. . . . . .
Hugs,

*************************************************
CLICK HERE TO SEE THE LATEST STAMPIN’ UP! PROMOTION AND TO SHOP NOW!


************************************************************
Check out the brand new Spring Catalog and get all those supplies you need for you up coming projects.

**********************************************************
![]()
Have you checked out the great clearance rack at Stampin’ Up! CLICK HERE
New items added!
***********************************************************
Michelle’s Free Stamp Program
Don’t miss out on my Customer free stamp set program. Check it out! Along with a handmade thank you card from me for your order you will receive a token for each $50 in product you ordered using me as your demonstrator. After you have collected 10 tokens you will receive a free current stamp set of your choosing, a value of $39 or less. Here is a link to my online shopping page that you can shop at 24/7 (from the comfort of your home, even in your pj’s) and the products will be shipped directly to your door step from Stampin’ Up: CLICK HERE TO SHOP. My free stamp set program will be an on going program. ![]()
***************************************************
CHECK OUT MY STAMPING EVENTS Click here to see my event calendar


