
Hi There,
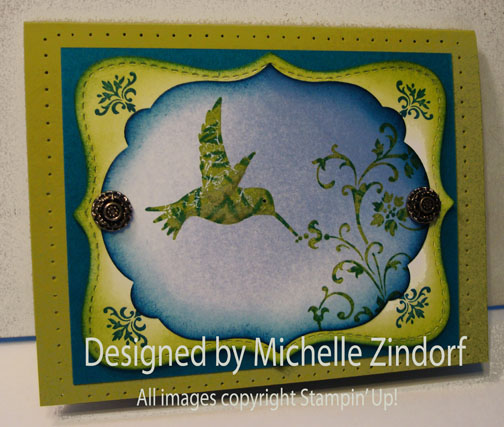
Today’s card was made using the Shaving Cream Technique. This technique is an oldie but goodie! It makes such wonderful backgrounds and no two are a like. So grab that shaving cream and your re-inkers and follow the tutorial below.
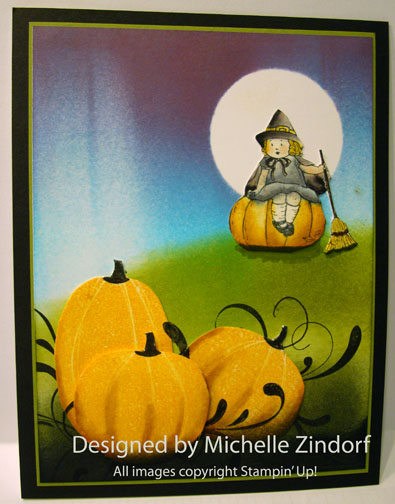
Also, there are 3 sneak peek Stampin’ Up! Holiday Mini Catalog products used on this card. The holiday mini catalog will be out August 1, 2012. Woohoo! So write these products down because you will definitely want to add them to your list of must haves.
Here are a few Stampin’ Up Reminders before I start the project. During the month of July, with any $50 purchase, you can get this beautiful stamp set for $5.

Want a new annual catalog shipped to you? I will be happy to send you one. The catalog is free, but there is a $5 shipping charge. Note, I will only sell or ship within the United States do to Stampin’ Up! policies. Please contact me at mzindorf@aim.com. Payment can be sent via Paypal or check.
You can join my Stampin’ Up! team and become a Stampin’ Up! Demonstrator now for the great new price of $99, CLICK HERE TO CHECK IT OUT. Contact me whether you want to start your own business or just enjoy the 20% discount on products.
Want to purchase one of my original cards or some Stampin’ Up! retired sets CLICK HERE.
Now on with today’s tutorial. . . . . . .
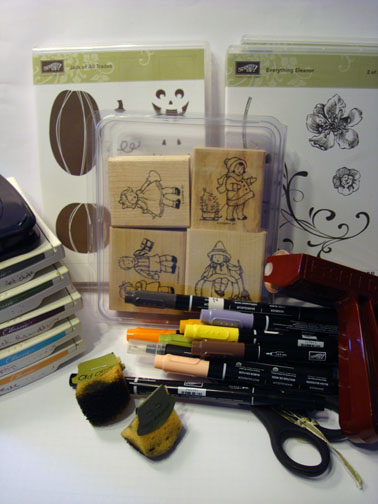
Supplies:
Stamps: Stampin’ Up! Elements of Style
Card Stock: Stampin’ Up! Whisper White, Calypso Coral and Old Olive
Ink: Stampin’ Up! Re-inkers (Calypso Coral, Lucky Limeade and Tangerine Tango), Stazon Jet Black
Accessories: Stampin’ Up! Stampin’ Dazzle Silver Marker, Framelits – Window Frames Collection, Textured Impressions Embossing Folder Lacy Brocade, Stampin’ Dimensionals, Whisper White Organza Ribbon, Shaving Cream, paper plate or plastic container and paper towels.
![]() Are you getting inspiration from this blog? One way you can help support it is to order your Stampin’ Up products through me. Click HERE to place an order and have your order delivered directly to your door step from Stampin’ Up!
Are you getting inspiration from this blog? One way you can help support it is to order your Stampin’ Up products through me. Click HERE to place an order and have your order delivered directly to your door step from Stampin’ Up!
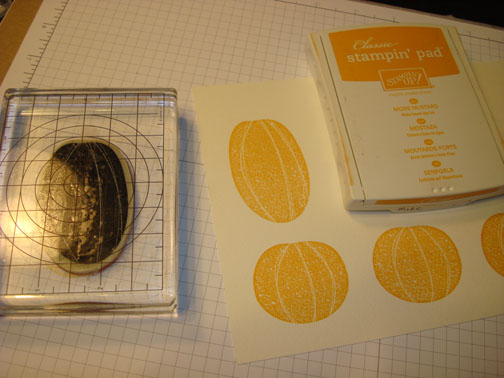
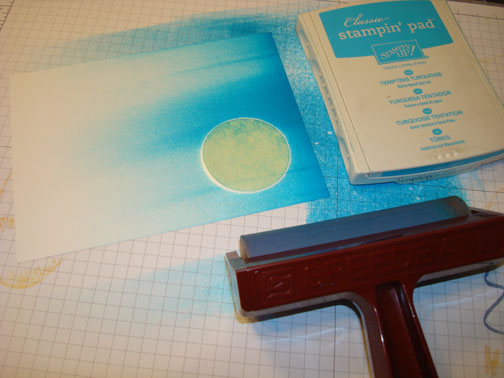
Put shaving cream in a plastic container or on a paper plate.

Drop a few dots of re-inkers in the shaving cream. I used Calypso Coral, Tangerine Tango and Lucky Limeade.

I used the wood end of a paint brush to swirl the colors around. Be sure not to mix to much or the colors will muddy.

Put your Whisper White card stock down into the shaving cream and press just a bit so that the paper comes in contact with the color. Lift the card stock out. It will look like this, YIKES!

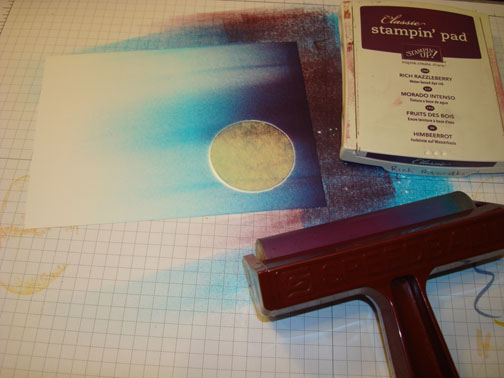
If you want another background, but lighter in color put another piece of card stock over the first one so the shaving cream is sandwiched in between the two pieces of card stock.

Pull them apart and wipe the shaving cream off of the card stock with a paper towel.

The light piece on the far left is the piece I put on top of the 1st one. See how much lighter it is.
If you continue to use the shaving cream with additional pieces of card stock the colors will mix more and more (like the ones on the far right).

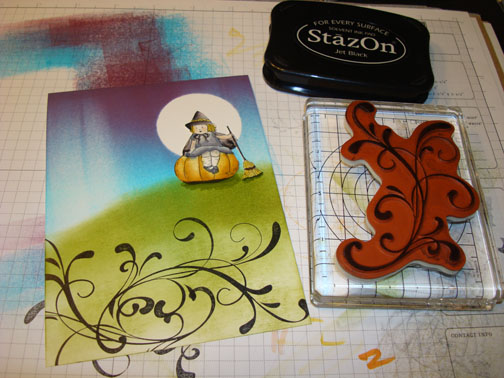
Cut the card stock using the big shot machine and the NEW FRAMLITS WINDOW FRAMES COLLECTION die cut. Also cut the next size up using Lucky Limeade card stock.


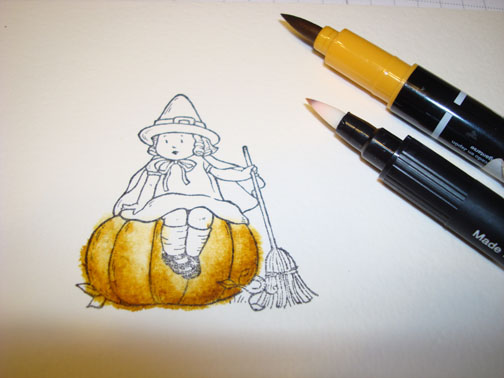
Stamped the humming bird and the flourish using Stazon Jet Black ink.


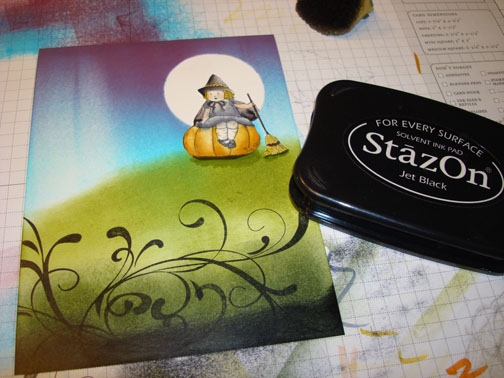
Used the NEW STAMPIN’ DAZZLE Silver marker around the edge of the two die cuts.

Used the NEW LACY BROCADE Embossing Folder on a 4.25″ piece of Whisper White card stock.

Added a 5.5″ square Lucky Limeade card base and a 4 3/8″ square Calypso Coral panel.

Added some Whisper White Organza Ribbon and popped the die cuts up with Stampin’ Dimensionals.

Here is the finished card measuring 5.5″ square.
I’m a little late posting today. I was busy in the kitchen putting up some mashed potatoes.


When I find bags of potatoes on sale really cheap, I cannot resist buying them in order to freeze mashed potatoes. All you have to do is peel, boil and make your regular mashed potato recipe and then freeze either in quart bags or food saver bags. I can’t live without my food saver.
If you didn’t know, I love to make at least 4 of something that I am cooking. That way we get to freeze 3.
I got 8 batches of mashed potatoes out of 10 lbs of potatoes with only a little more time than it would have took me to make one batch. Great side to be able to pull out of the freezer and quickly heat.
Also, when you make your own dishes to freeze you know just what went into them. No preservatives!!!
Well I’m going to be on the road for over a week. I’m heading to Lawrence, Kansas tomorrow to teach this weekend and then I’m off to Stampin’ Up’s convention in Salt Lake City, Utah. Hang tight and check out some of my past tutorials while I’m gone. Better yet, how about making some cards using the tutorials. Either way, thank you for hanging out with me here on my blog. I hope you find yourself inspired.
Until my next post. . . . . . .
Hugs,


 Get ready for Brayer and Direct to Paper Workshops! I am coming to the following locations, click the location name for more information.
I hope you can make it to one of my workshops in 2012. I have decided not to travel after this year, so be sure to catch one this year!
Link to my Stampin’ Up website where you can order all of your must have Stampin’ Up products from me 24-7: http://michellezindorf.stampinup.net


