
Hey There,
Hope you had a wonderful Memorial Day Weekend. Mine was spent helping one son move, up keep on the vegetable garden, some work on wedding invites for my youngest son’s wedding that will be in August, making and canning strawberry jam and a cookout with family. Needless to say, it was a busy but wonderful weekend.
This morning I decided to create a project using the most popular of Stampin’ Up! sets, Lovely As A Tree. That is in my opinion anyway.
Tree sets are so very easy to use and your creations can be either for a male or female. Trees are unisex, correct?
Oh yeah, if you want to see how very much my chicks have grown since last week (they have doubled their size), you can see them at the bottom of this post. 🙂
Reminders before I start the tutorial:
You can join my Stampin’ Up! team and become a Stampin’ Up! Demonstrator now for the great new price of $99, CLICK HERE TO CHECK IT OUT.
Today and tomorrow (May 30-31, 2012) is the last chance to get some of the retired sets and accessories from Stampin’ Up!

. . . . Check out what’s going, going, going by clicking here.
Don’t miss out on my Customer free stamp set program. Check it out! Along with a handmade thank you card from me for your order you will receive a token for each $50 in product you ordered using me as your demonstrator. After you have collected 10 tokens you will receive a free current stamp set of your choosing, a value of $39 or less. Here is a link to my online shopping page that you can shop at 24/7 (from the comfort of your home, even in your pj’s) and the products will be shipped directly to your door step from Stampin’ Up: CLICK HERE TO SHOP. My free stamp set program will be an on going program. ![]()
Want to purchase one of my orginal cards or some Stampin’ Up! retired sets CLICK HERE.
Now on with today’s tutorial. . . . . . .
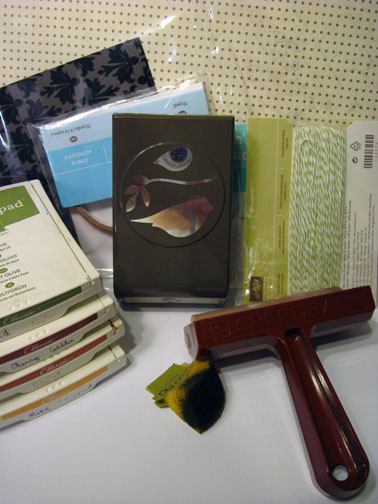
Supplies:
Stamps: Stampin’ Up! Lovely as a Tree
Card Stock: Stampin’ Up! Basic Black, Cajun Craze and Whisper White
Ink: Stampin’ Up! Basic Black, Cherry Cobber, Daffodil Delight and Cajun Craze
Accessories: Stampin’ Up! Sponges, 2.5″ Circle Punch, Post it note, gold brads, Brayer, Daffodil Delight and Sahara Sand Markers, Gold Metallic Marker
![]() Are you getting inspiration from this blog? One way you can help support it is to order your Stampin’ Up products through me. Click HEREto place an order and have your order delivered directly to your door step from Stampin’ Up! Want to become a Stampin’ Up Demonstrator , receive a 20% discount on product and earn instant income on orders, get to purchase products before they are released to the public? Consider being part of my Stampin’ Up Team and start your own business or become a Hobby Demo just for the discount. New special join price of $99. Click HERE for more information.
Are you getting inspiration from this blog? One way you can help support it is to order your Stampin’ Up products through me. Click HEREto place an order and have your order delivered directly to your door step from Stampin’ Up! Want to become a Stampin’ Up Demonstrator , receive a 20% discount on product and earn instant income on orders, get to purchase products before they are released to the public? Consider being part of my Stampin’ Up Team and start your own business or become a Hobby Demo just for the discount. New special join price of $99. Click HERE for more information.

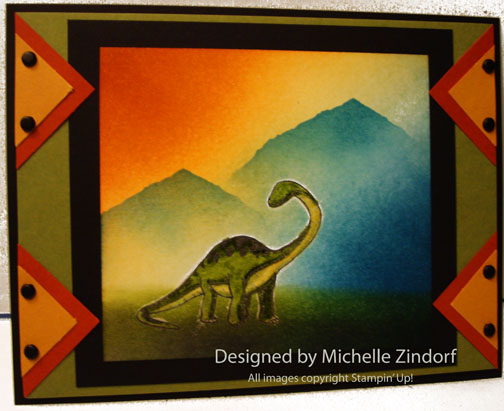
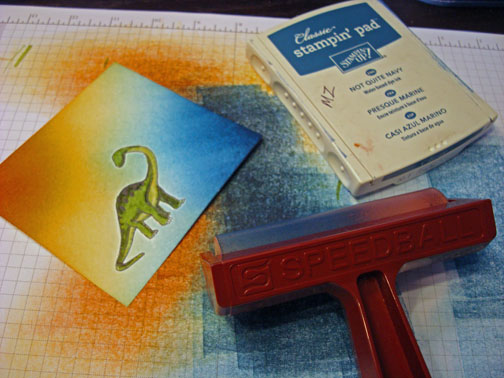
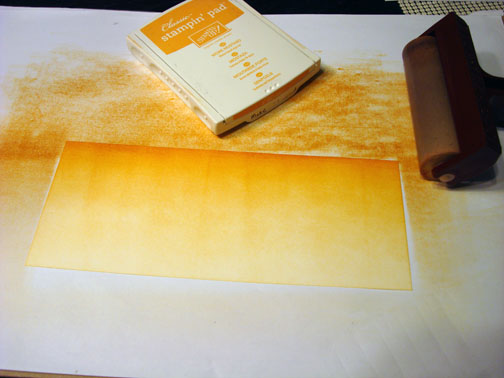
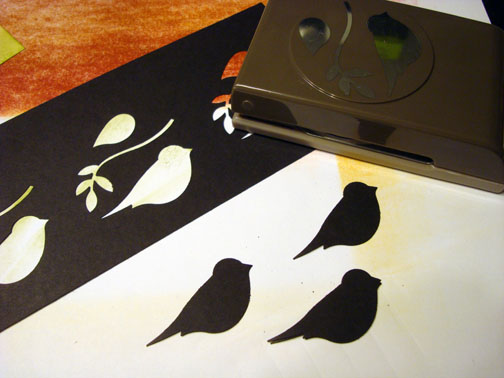
Punched a 2.5″ Circle from a Post it note and used it as mask for the sun on a 3.5″ square piece of Whisper White card stock.

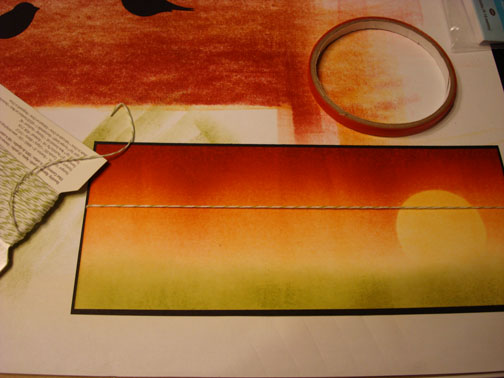
Brayered Cherry Cobbler ink all over the card stock.

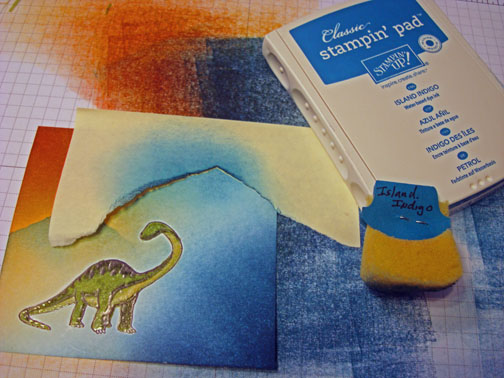
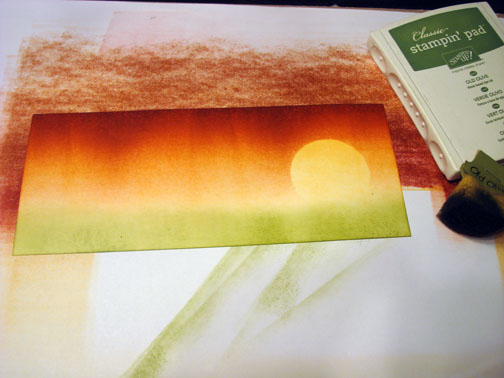
Removed the sun mask and sponged Daffodil Delight ink in the sun.

Sponged Cajun Craze ink around the edge of the sun.

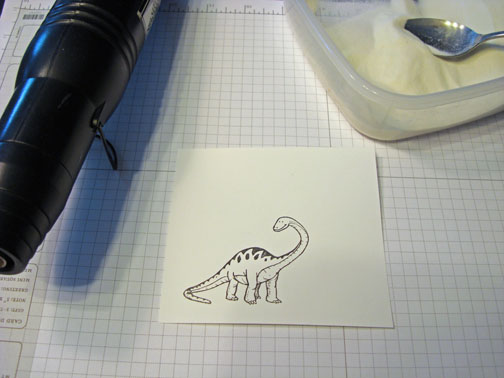
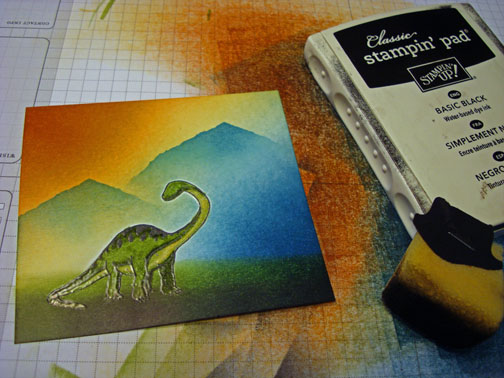
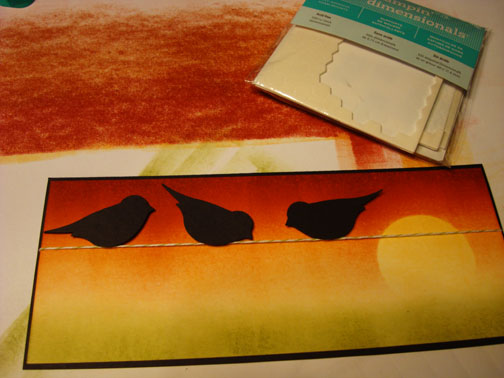
Stamped the Oak Tree using Basic Black ink.

Sponged Basic Black ink in for the ground. The ink is darker at the top of the ground and very light at the bottom of the ground.

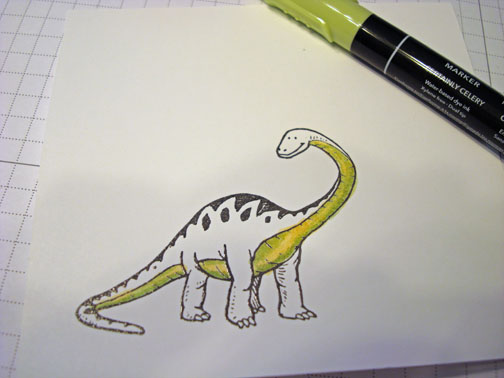
Colored in the trunk of the tree using a Sahara Sand marker.

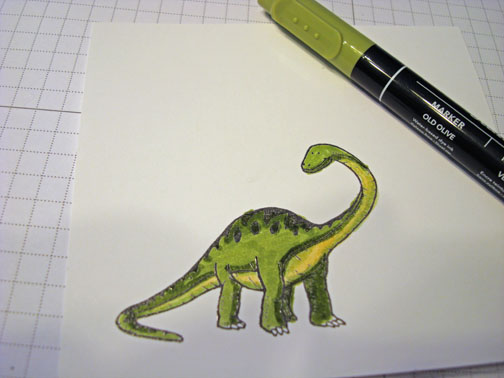
Colored in the middle of the tree using a Daffodil Delight marker. The marker will mix with a bit of the Basic Black from the tree and create a warm gray tone.

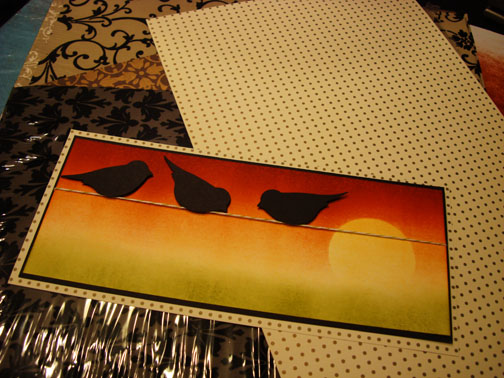
Edge the main image panel and a 2.5″ x 6.5″ piece of Basic Black card stock using a Gold Metallic Marker.

Added a Cajun Craze card base 6.5″ x 10″ folded in half, a 3 5/8″ Whisper White square, 3.75″ Basic Black Square, 4 Gold Brads and popped the main image panel up using Stampin’ Dimensionals.

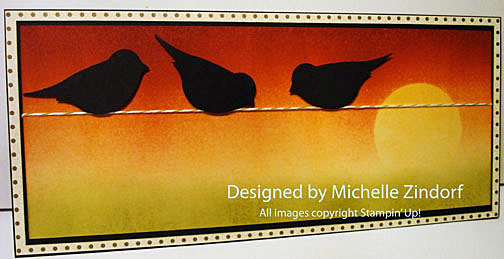
Here is the finished card measuring 5″ x 6.5″.
Before I close, here is a little update on the chicks. In just a weeks time they have doubled their size and now have feathers sprouting out. We did a little photo shoot of them hanging out on my desk.
My girls all have names now. From top left to bottom right here are their names: Red, Buffy, Sophie and Bunny. Yep, we are weird and so our chicks have weird names, lol. They are all different breeds, top left to bottom right here are their breeds: Speckled Sussex, Buff Orpington, Black Australorp and Ameraucana.
They love to sit on my shoulder, lap or just take a nap in my hand. They are super cute! They live in a big plastic container with their light keeping them at a steady temperature in my living room for another 3 weeks. I see these little ladies growing up fast and will be sad to put them outside in the coop when the time comes. Or on the other hand, they will be quite big if they keep growing at this rate and will desperately need to be up out in the coop.


Have the best day ever! Cheep, cheep!
Until my next post. . . . . . . .
Hugs,


 Get ready for Brayer and Direct to Paper Workshops! I am coming to the following locations, click the location name for more information.
Sand Lake, Michigan (just North of Grand Rapids)
I hope you can make it to one of my workshops in 2012. I have decided not to travel after this year, so be sure to catch one this year!
Link to my Stampin’ Up website where you can order all of your must have Stampin’ Up products from me 24-7: http://michellezindorf.stampinup.net


