Hey There,
Happy Halloween! I hope you are enjoying your Autumn Season.
I’ve been hanging out cooking and filling my freezer with freezer meals. I put over 50 meals in the freezer in the past few days. It is now well stocked and all Russ and I have to do is pull something out and bake it or put it in the crock pot. All the real work is done. Feels good having so much done and saving money in the long run because we were able to buy in bulk, grin.
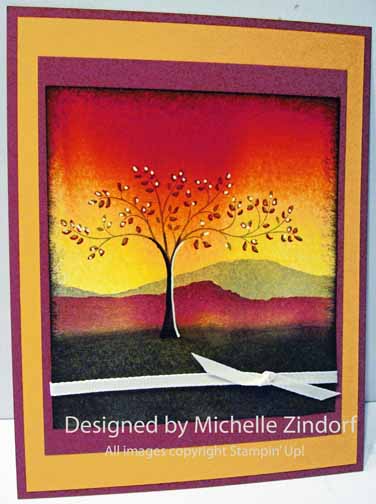
A little about today’s project. The Stampin’ Up! Thoughts & Prayers Tree is so lovely. Don’t you think it is a beautiful image? LOL, of course I haven’t met a tree stamp that I didn’t like. If you read this blog regularly, you know that already.
This tutorial is all about layering the moutains and highlights. Hang out and check it out.
*************************************************************************************
BIG SHOT – CUSTOMER GIVE AWAY. . . . . . DON’T MISS OUT! THIS IS THE LAST DAY TO GET ENTERED!!!!!!

Until October 31, 2011 you can get a chance to win a free brand new Big Shot Die Cut Machine worth $99.95.
How to enter. . . . Every person that orders Stampin’ Up! products through my Stampin’ Up Web Site (CLICK HERE TO SHOP) until October 31, 2011 will receive 1 entry for each $25 increment of products purchased. So if you place a product order that totals $50 that is 2 chances to win! How about those beans. I love giving things away! I will announce the winner on November 1, 2011.
Click here to shop now. Your order will be delivered right to your door step straight from Stampin’ UP!
************************************************************************************
Now on with today’s tutorial. . . . .
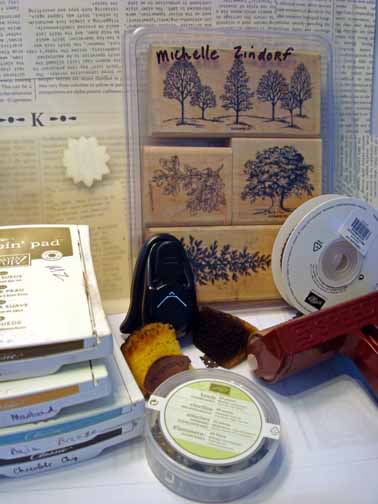
Supplies:
| Stamps: Stampin’ Up!Thoughts & Prayers |
| Paper: Stampin’ UP! Rich Razzelberry, More Mustard and Whisper White |
| Ink: Stampin’ Up! Basic Black, Rich Razzelberry, Wisteria Wonder, Old Olive, Cherry Cobbler, Cajun Craze and More Mustard |
| Accessories: Stampin’ UP! sponges, Markers (Chocolate Chip, Cherry Cobber), Brayer, Whisper White ribbon, Post it notes |
| Techniques: Brayered Sky |
Want a free copy of the brand new Stampin’ Up! Holiday Mini Catalog? Just e-mail your address and I will get one right out to you. Get your copy of the new 2011-2012 Stampin’ Up! Idea Book & Catalog by sending $9.95 to me at P.O. box 116, West Alexandria, Ohio 45381 or via paypal to mzindorf@aim.com, shipping is free. ![]() Are you getting inspiration from this blog? One way you can help support it is to order your Stampin’ Up products through me. Click HEREto place an order and have your ordered delivered directly to your door step from Stampin’ Up! Want to become a Stampin’ Up Demonstrator , receive a 20% discount on product and earn instant income on orders? Consider being part of my Stampin’ Up Team and start your own business or become a Hobby Demo just for the discount. Click HERE for more information.
Are you getting inspiration from this blog? One way you can help support it is to order your Stampin’ Up products through me. Click HEREto place an order and have your ordered delivered directly to your door step from Stampin’ Up! Want to become a Stampin’ Up Demonstrator , receive a 20% discount on product and earn instant income on orders? Consider being part of my Stampin’ Up Team and start your own business or become a Hobby Demo just for the discount. Click HERE for more information.

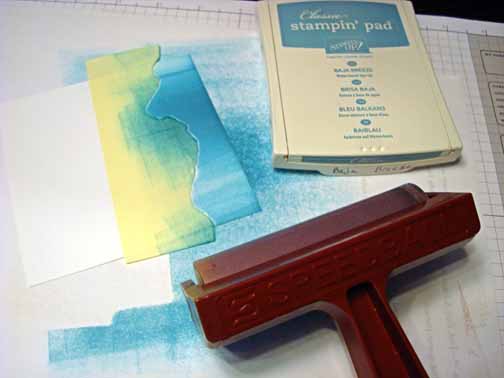
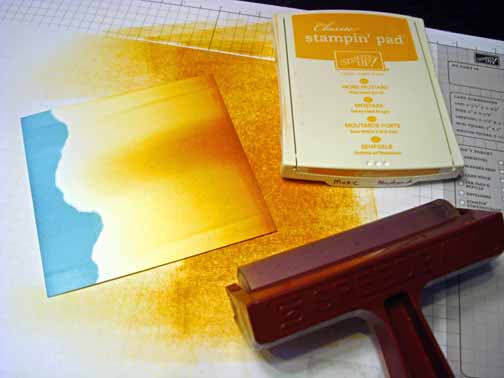
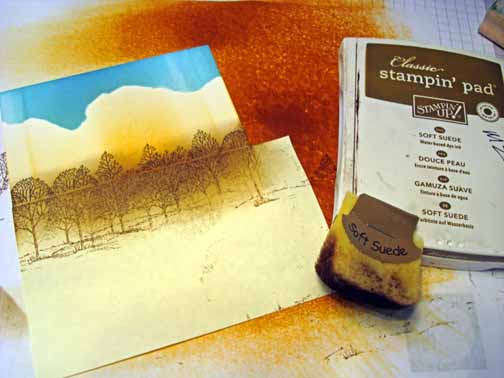
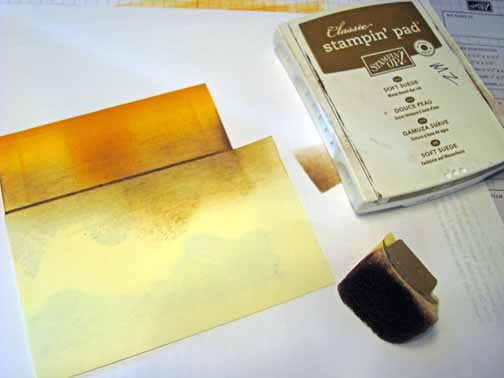
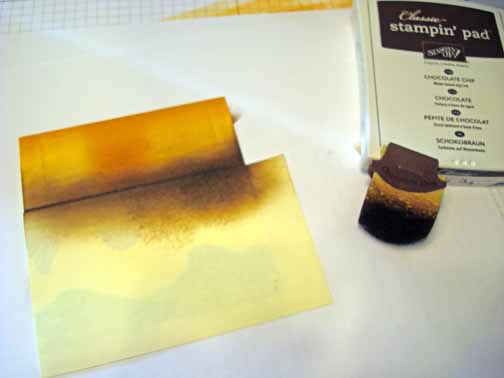
Brayered More Mustard ink on the 4″ x 4.5″ piece of Whisper White card stock.

Brayered Cajun Craze ink at the top of the card stock, not covering the More Mustard ink entirely.

Brayered Cherry Cobbler ink at the top of the card stock, not covering the Cajun Craze ink entirely.

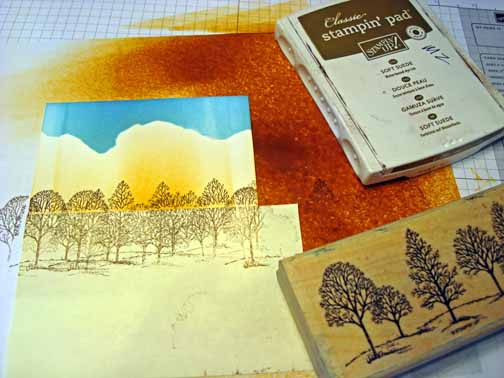
Stamped the Thoughts and Prayers Tree using Old Olive ink.

Ripped a post it note and used it to create my mountains furthest away in the scene.

Sponged Wisteria Wonder ink on to create the mountains.

Ripped a different pattern in the post it note and put it on to create the second layer of mountains.

Sponged Rich Razzel berry ink on for the second mountains and colored over the trunk of the tree with a Chocolate Chip marker.

Added a little bit of Cherry Cobbler marker to some of the leaves on the tree.

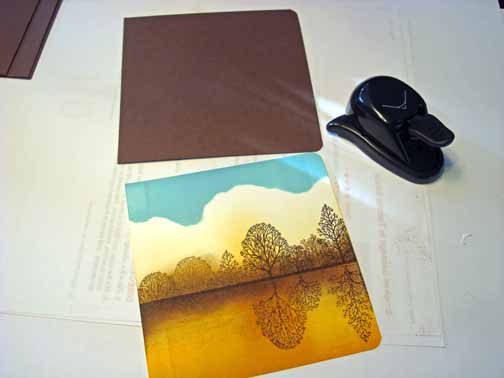
Sponged Basic Black ink at the bottom of the card stock and distressed the edges of the panel with Basic Black ink.

Added Whisper White ribbon.

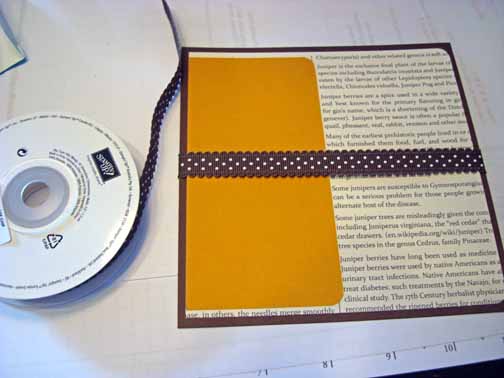
Added Three panels, 2 Rich Razzel Berry and 1 More Mustard. The measurements are in the photo.

Added a few White Gel pen highlights to some of the leaves and a highlight down the right side of the trunk.
Here is the finished card measuring 5″ x 6.5″.

May your day be filled with joy and laughter.
Until my next post. . . . . . .
Hugs,

 Get ready for Brayer Workshops! I am coming to the following locations, click the location name for more information.
Dayton, Ohio – Direct to Paper Workshops
Post Falls, Idaho (outside of Coeurd’Alene)
Sand Lake, Michigan (just North of Grand Rapids)
Longmont (Gunbarrel), Colorado
Here is a link to my workshop calendar where you can see all of my travel schedule and to get info on beginner and advanced Brayer workshops, along with the newly added Direct to Paper Workshop: http://zindorf.blogs.splitcoaststampers.com/workshop-calendar
Don’t see a workshop in your State? Interested in hosting the workshops in your area Click HERE to get hostess information.
Link to my Stampin’ Up website where you can order all of your must have Stampin’ Up products from me 24-7: http://michellezindorf.stampinup.net


