
Hello, hope all is well with you. Things are busy as usual here, but all is well.
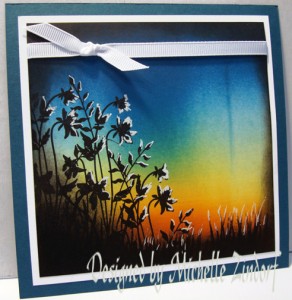
I have a fun scene for you today. I live in a rural area and this is a scene that I often get to see in person. Farms, fields, animals, love it! The banner at the top of my blog is a photo of a pastel painting I created of the farm directly across the road from my house. I truly love living in a home that is surrounded by farms. I get to enjoy the country life without having to work a farm. 🙂 Anyhow, today’s tutorial uses brayering along with the emboss resist technique. This is a great way to get light colored images in front of dark backgrounds. It also makes it possible to get depth in your scenes.
Let’s get started. . . . . . .
Supplies:
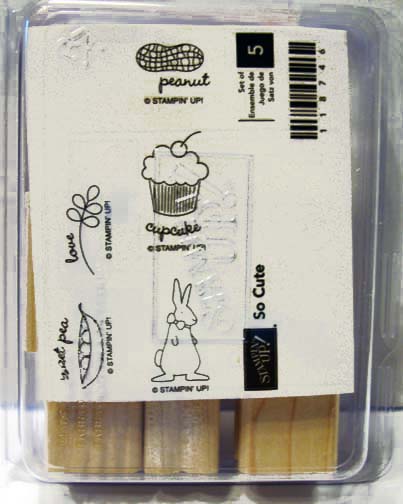
| Stamps: Stampin’ Up! Farm Life, Inspired by Nature |
| Paper: Stampin’ Up! Whisper White, Pear Pizzazz and Basic Black |
| Ink: Stampin’ Up! Whiper White, Basic Black, More Mustard, Chocolate Chip, Cajun Craze and So Saffron |
| Accessories: Stampin’ Up! sponge, paper snips, Markers (Basic Black, So Saffron, Sahara Sand, Crumb Cake), Ticket Corner Punch, Old Olive Brads, Post it notes, Brayer, Clear embossing powder, heat gun, paper towel |
The Stampin’ Up USA Idea book and Catalog is here. For your copy, please send a check for $9.95 to Michelle Zindorf, P.O. Box 116, West Alexandria, OH 45381 or send it via paypal to mzindorf@aim.com USA only. My current customers will receive a new Summer Mini Catalog automatically from me. Not a current customer and want a free copy of the new Summer Mini Catalog ? E-mail your mailing address to mzindorf@aim.com and I will get one in the mail to you. ![]() Are you getting inspiration from this blog? One way you can help support it is to order your Stampin’ Up products through me. Click HERE to place an order. Want to become a Stampin’ Up Demonstrator , receive a 20% discount on product and earn instant income on orders? Consider being part of my Stampin’ Up Team and start your own business or become a Hobby Demo just for the discount. Click HERE for more information.
Are you getting inspiration from this blog? One way you can help support it is to order your Stampin’ Up products through me. Click HERE to place an order. Want to become a Stampin’ Up Demonstrator , receive a 20% discount on product and earn instant income on orders? Consider being part of my Stampin’ Up Team and start your own business or become a Hobby Demo just for the discount. Click HERE for more information.

Colored my Stampin’ Up! Farm Life stamp in with a Versamark marker and then with a Basic Black marker before stamping it on a 3″ x 5.5″ piece of Whisper White card stock. I did not color the clouds on the stamp.

Heat embossed the image using clear embossing powder and a heat gun.

Colored the right side of the barn and silo using a Sahara Sand marker. Colored the roofs, twice using the same Sahara Sand marker, letting the marker dry in between coats. This gives you a darker color.

Colored the hay bales using a So Saffron marker.

Added Crumb Cake marker to the base of the hay bales.

Colored the trees and bushes using a Certainly Celery marker.

Colored over the embossed images (be very careful to stay within the lines) using a Versamark marker. Heat embossed the images using clear embossing powder and a heat gun to protect the images.


Now that my images are embossed I can brayer over them.
Brayered So Saffron ink at the top of the card stock.

Ripped the edge off of a couple of post it notes and used them to mask the sky area of my scene.

Brayered Cajun Craze ink at the bottom of the card stock.

Removed the mask and gently wiped my embossed images off with a paper towel.

Added Certainly Celery marker to the horizon line.

Stamped the Wheat Stamp using Chocolate Chip ink.

Stamped the Wheat stamp a bit lower using Basic Black ink.

I wanted a bit more drama in the sky area so I brayered More Mustard ink right at the top of the card stock.

Sponged Basic Black ink on the edges of the card stock.

Stamped the stampin’ Up Inspired by Nature Stamp using Whisper White ink on Basic Black card stock. Cut the images out with Stampin’ Up Paper Snip scissors.


Added a Basic Black panel, Pear Pizzazz panel and a Whisper White Panel. Used the Stampin’ Up! Ticket Corner punch on the Whisper White panel and the Main Image panel. Adhered the cut our flowers to the front of the card stock. Added white Gel Pen highlights to the flowers.

Added a strip of Basic Black card stock and 2 Old Olive brads.
Here is the finished card measuring 5″ x 6.5″.
May your day be filled with peace and sunshine.
Until my next post. . . . . .
Hugs,
Michelle
 Get ready for Brayer Workshops! I am coming to the following locations, click the location name for more information.
Owings Mills, Maryland (Baltimore Area)
Staley , North Carolina (South of Greensboro)
Jefferson, Louisiana (New Orleans Area)
Here is a link to my workshop calendar where you can see all of my travel schedule and to get info on beginner and advanced Brayer workshops: http://zindorf.blogs.splitcoaststampers.com/workshop-calendar
Don’t see a workshop in your State? Interested in hosting the workshops in your area in 2012? Click HERE to get hostess information.
Link to my Stampin’ Up website where you can order all of your must have Stampin’ Up products from me 24-7: http://michellezindorf.stampinup.net
Link to my Scentsy website where you can order the best smelling, safest wickless candles from me 24-7: https://zindorf.scentsy.us/Home


