
Happy New Year!!! I hope your holiday was one to remember. Mine was spent at home with Russ safe and sound in our little home. We watched the ball go down in New York from our sofa here in Ohio. I know, party animals, right, lol.
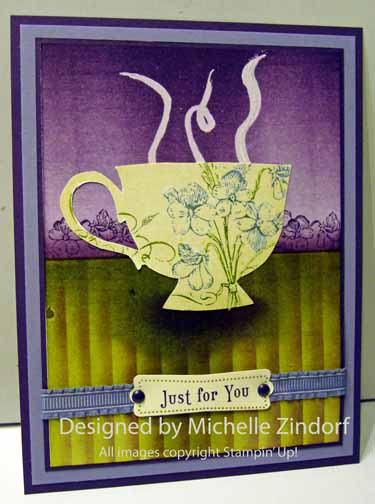
As I started the 1st day of this year, my mind went to the next holiday I will need cards for, Valentine’s Day. Creating a Valentine’s Day card also gave me an excuse to give a little sneak peek of a couple of stamps you will find in the upcoming Stampin’ Up Occasions Mini Catalog from the stamp set P.S. I Love You. Wonderful set and perfect to make cards for the one’s you love.
The tutorial below features a background made using plastic wrap and ink. With a little masking you can also learn how to make an object recede in your scene. Check out the heart. It is not a cut out. Team that heart with a cupid image and some white clouds and you have an out of this world Valentine.
FYI, The Stampin’ Up! Occasions Mini catalog will be in effect January 4 – April 30, 2012. My current Stampin’ Up! customers will receive this mini catalog automatically from me. If you would like an Occasions Mini Catalog, please e-mail your address to: mzindorf@aim.com and I will get one in the mail to you. You won’t want to miss out on the exceptionally wonderful things in this mini! If you have ordered from me in the past year and have not received your mini catalog, please e-mail me.
Before the tutorial I have an announcement to make!
**********************************************************************************************
The Winner of the Stampin’ Up! Clear Mount Acrylic Blocks and Block Storage Caddy in my Customer give away for December, 2011 is. . . . . . . . . . .
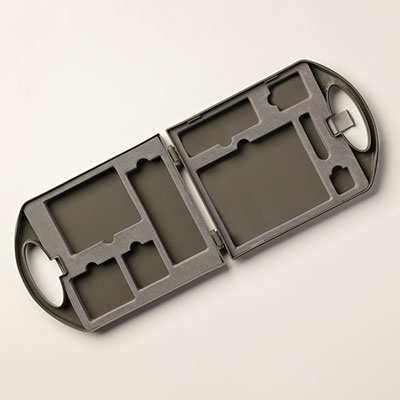
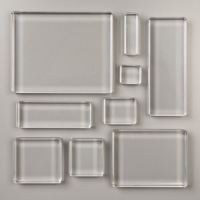
Valory Johnson! Congratulations! Your the winner, I’ll be shipping this great block set out to you, enjoy.
Thanks to all of my Stampin’ Up! Customers. I hope you enjoyed the thank you that was sent to you.
*****************************************************************************
Now on with the tutorial. . . . .
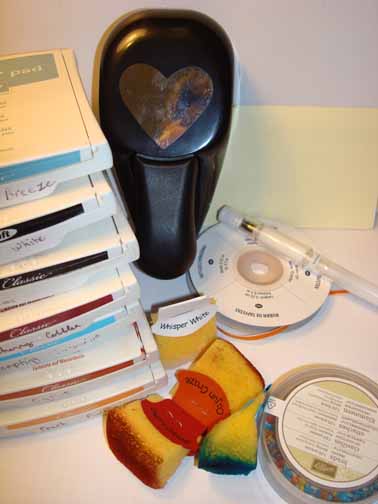
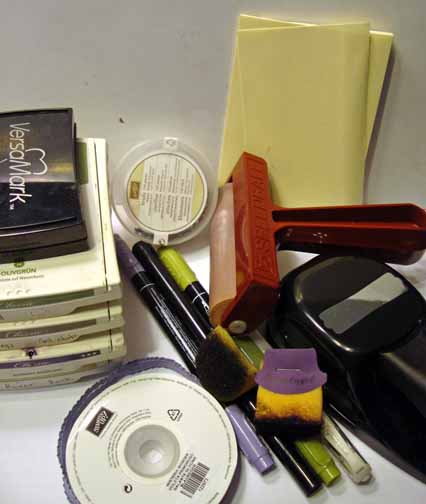
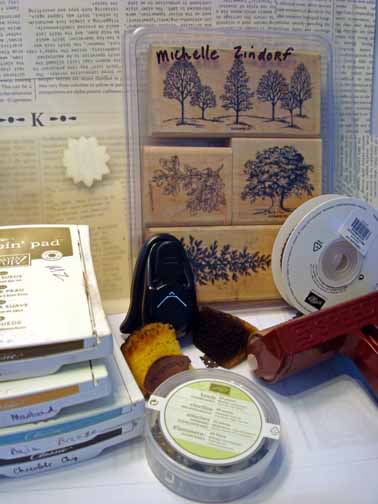
Supplies:
Stamps: Stampin’ Up! P.S. I Love You
Card Stock: Stampin’ Up! Basic Black, Baja Breeze and Whisper White
Ink: Stampin’ Up! Baja Breeze, Whisper White, Basic Black, Cherry Cobbler, Tempting Turquoise, Cajun Craze and Peach Parfait
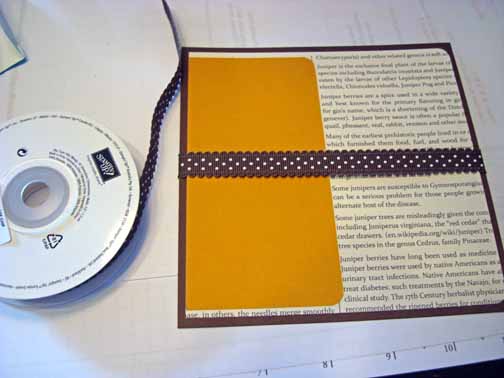
Accessories: Stampin’ Up! Sponges, Pumpkin Pie Ribbon, Pumpkin Pie brads, White Gel Pen, Heart Punch and Post It Notes
Want a free copy of the current Stampin’ Up! Mini Catalog? Just e-mail your address to mzindorf@aim.com and I will get one right out to you. Get your copy of the 2011-2012 Stampin’ Up! Idea Book & Catalog by sending $9.95 to me at P.O. box 116, West Alexandria, Ohio 45381 or via paypal to mzindorf@aim.com, shipping is free. ![]() Are you getting inspiration from this blog? One way you can help support it is to order your Stampin’ Up products through me. Click HEREto place an order and have your order delivered directly to your door step from Stampin’ Up! Want to become a Stampin’ Up Demonstrator , receive a 20% discount on product and earn instant income on orders, get to purchase products before they are released to the public? Consider being part of my Stampin’ Up Team and start your own business or become a Hobby Demo just for the discount. Click HERE for more information.
Are you getting inspiration from this blog? One way you can help support it is to order your Stampin’ Up products through me. Click HEREto place an order and have your order delivered directly to your door step from Stampin’ Up! Want to become a Stampin’ Up Demonstrator , receive a 20% discount on product and earn instant income on orders, get to purchase products before they are released to the public? Consider being part of my Stampin’ Up Team and start your own business or become a Hobby Demo just for the discount. Click HERE for more information.
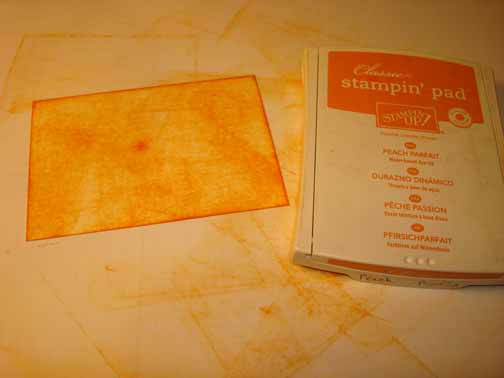
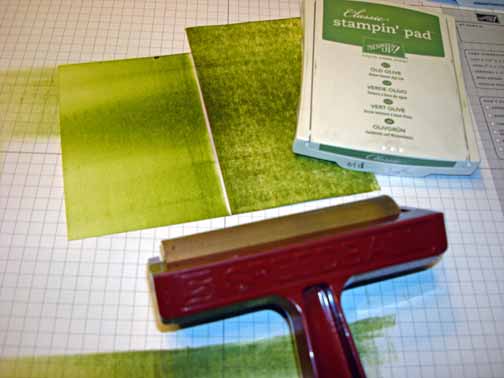
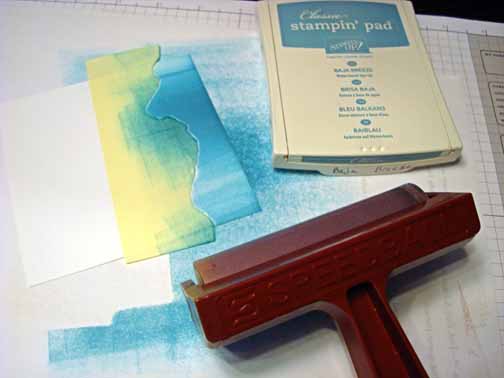
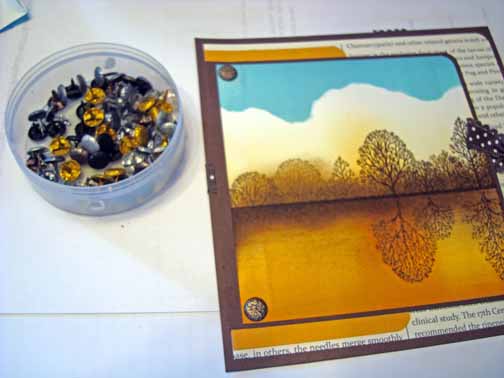
Using the edge of a Peach Parfait ink pad, applied the ink in a swiping motion on a 3″ x 4.25″ piece of Whisper White card stock.
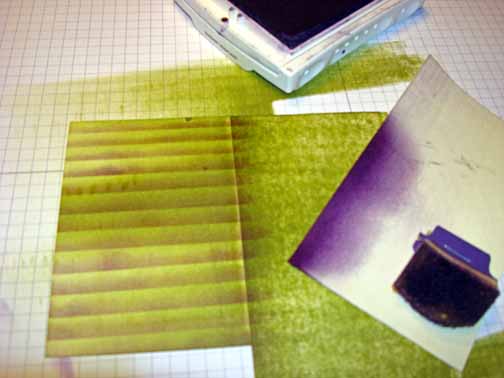
Using a crumpled up piece of plastic wrap, dabbed Cajun Craze ink on the card stock.
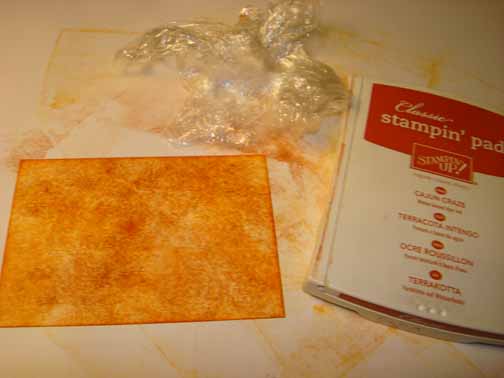
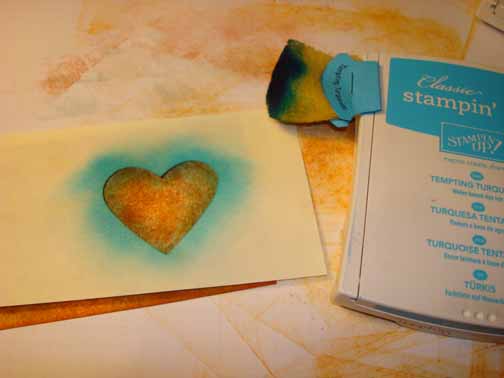
Applied Baja Breeze ink on the card stock using the crumpled plastic wrap.
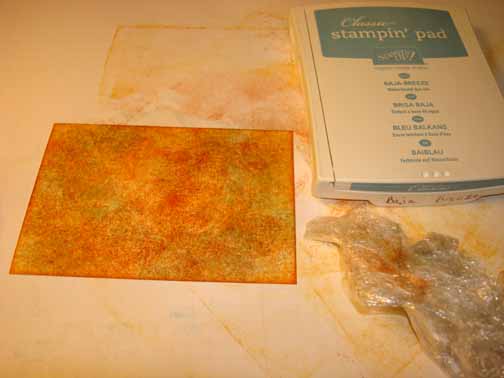
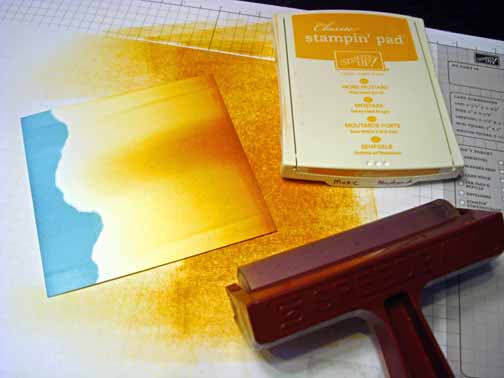
Punched a heart out of the sticky part of a post it note and used it as a mask to create the heart.
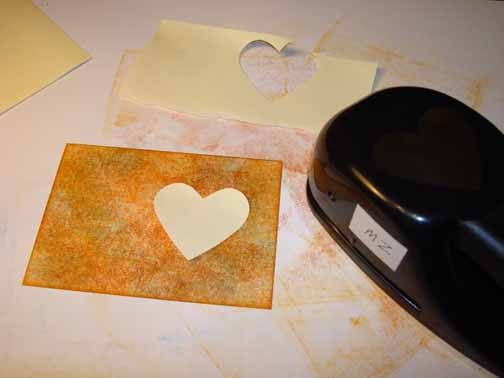
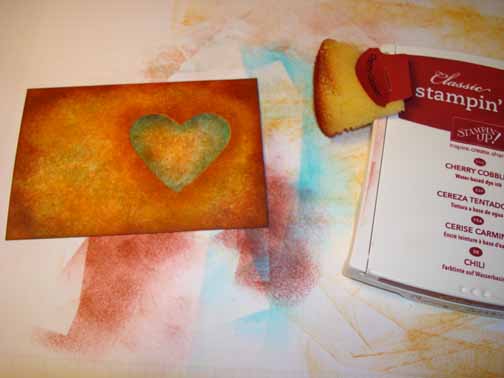
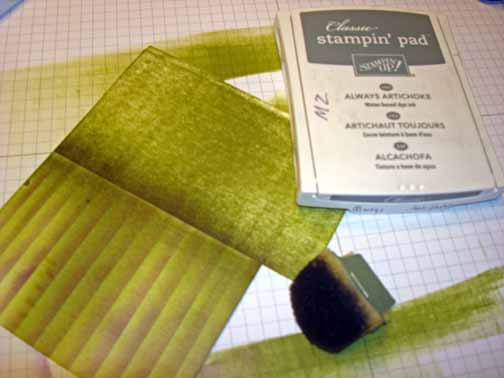
Rubbed the Peach Parfait ink pad all over the card stock.

Sponged Cajun Craze ink around the edge of the heart mask.
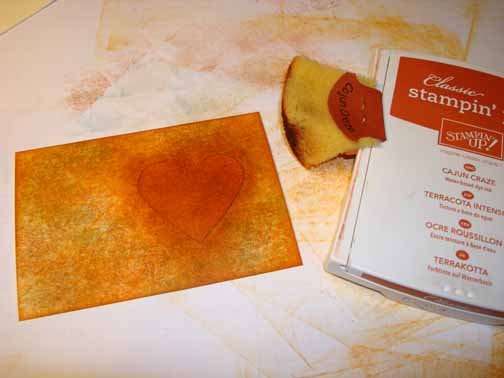
Removed the heart mask.

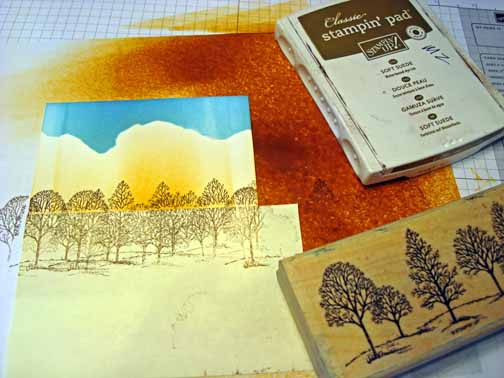
Punched another heart from a post it note, this time from the center. Put the negative piece on so the heart on the card stock shows through the post it note heart. Sponge Tempting Turquoise around the edge of the heart shape.
Remove the mask and sponge Cherry Cobbler ink around the edge of the card stock.
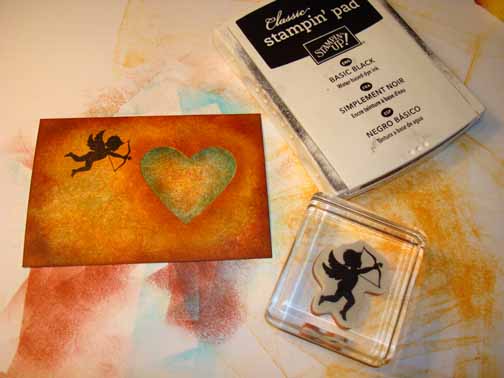
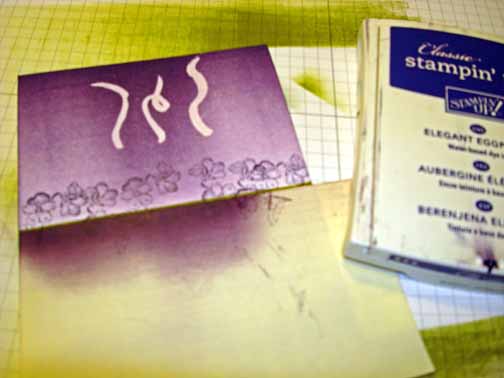
Stamped the cupid stamp using Basic Black ink.
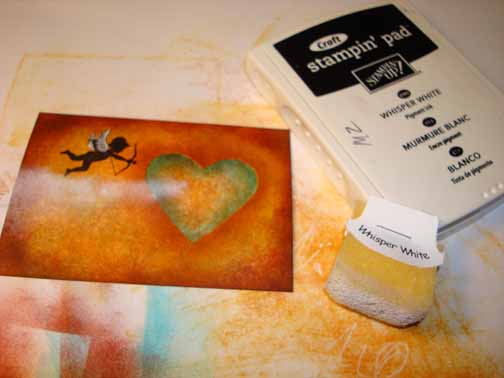
Added white gel pen to the cupids wings.

Sponged Whisper White ink on to create a cloud.
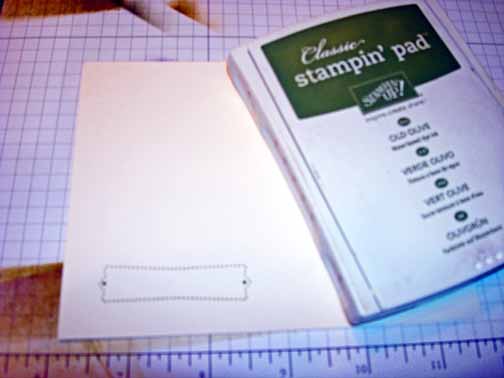
Added 2 Basic Black card stock panels and one Baja Breeze panel. Stamped the sentiment using Whisper White ink.

Extended the cloud to the left side of the background panels.

Added Pumpkin Pie ribbon and Pumpkin Pie brads.
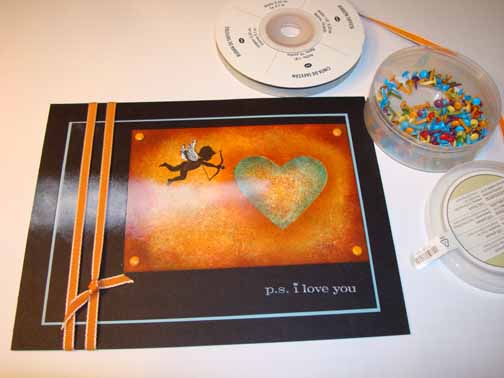
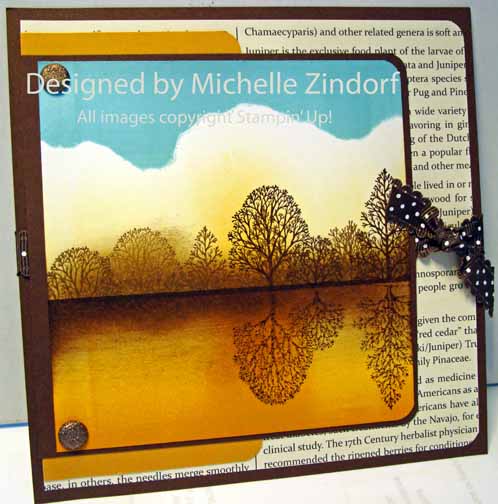
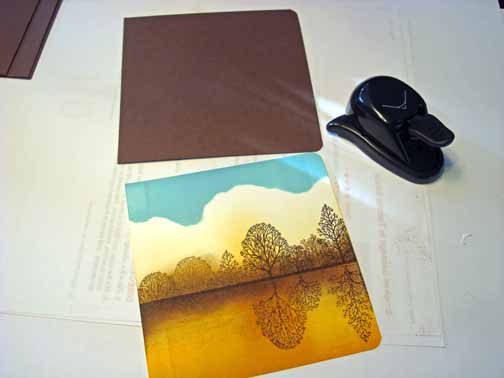
Here is the finished card measuring 5″ x 6.5″.
May your new year be filled with the ones you love, good health and prosperity.
Until my next post. . . . . . .
Hugs,


 Get ready for Brayer and Direct to Paper Workshops! I am coming to the following locations, click the location name for more information.
Dayton, Ohio – Direct to Paper Workshops
Dayton, Ohio – Brayer Workshops
Post Falls, Idaho (outside of Coeurd’Alene)
Sand Lake, Michigan (just North of Grand Rapids)
Longmont (Gunbarrel), Colorado
Here is a link to my workshop calendar where you can see all of my travel schedule and to get info on beginner and advanced Brayer workshops, along with the newly added Direct to Paper Workshop: http://zindorf.blogs.splitcoaststampers.com/workshop-calendar
Don’t see a workshop in your State? Interested in hosting the workshops in your area Click HERE to get hostess information.
Link to my Stampin’ Up website where you can order all of your must have Stampin’ Up products from me 24-7: http://michellezindorf.stampinup.net


