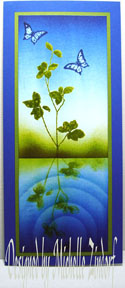
Customer Appreciation Card

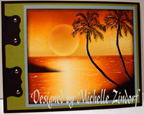
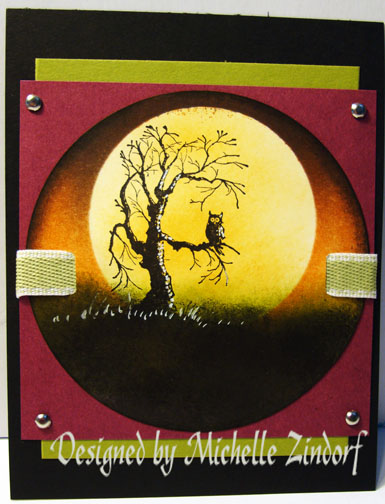
I dearly love and appreciate each of my Stampin’ Up Customers.  I never can say thank you enough for allowing me to be your Stampin’ Up Demonstrator.

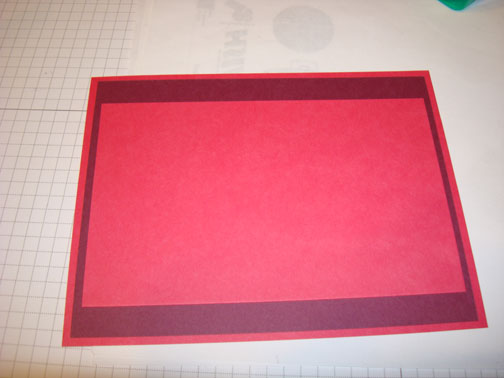
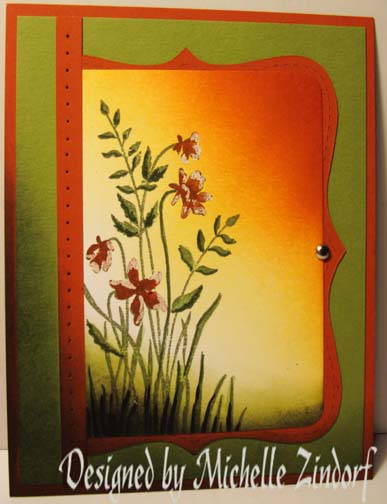
So the handmade card above will be sent to my Stampin’ Up Customers who place a $50 Stampin’ Up Merchandise order prior to March 31, 2011 in appreciation for their business. 

Ordering from me is quick and easy using my Stampin’ Up Website.  You can order from me 24/7 and your order will be shipped directly to you from Stampin’ Up!  

Click here to place an order. 

This is truly the very best time of year to place a Stampin’ Up order of $50.  For every $50 in merchandise you purchase you will receive a free Sale-a-bration stamp set.  Click here to see the AWESOME free Sale-a-bration sets.   Gotta love free Stamps!

Sorry, no tutorial for the customer appreciation card.    I do however have the supply list below:

Supplies:

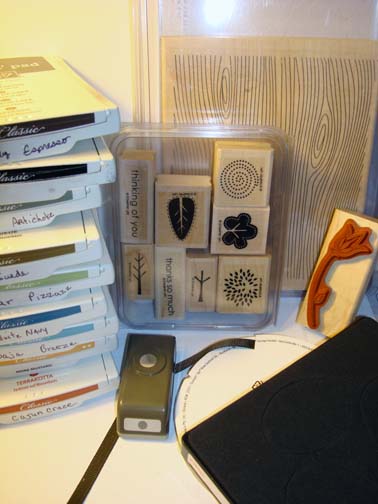
Stamps:  Stampin’ Up set Just Believe

Ink:  Stampin’ Up Basic Black, Cajun Craze, Not Quite Navy, Night of Navy, Pumpkin Pie and Daffodil Delight

Card Stock:  Stampin’ Up Whisper White and Not Quite Navy

Accessories:  Brayer, Whisper White Ribbon, White Gel Pen and Sponge

May your day be filled with wonder and delight.

Until my next post. . . .  . . .

Huge Hugs,

Michelle

   Get ready for Brayer Workshops!  I am coming to the following locations, click the location name for more information.  

Virginia Beach, Virginia  

Houston, Texas  

Wichita, Kansas  

Syracuse (Bridgeport), New York  

St. Peters, Missouri  

La Porte, Indiana  

Orlando (Davenport), Florida  

St. Cloud, Minnesota  

Colorado Springs, Colorado  

Ottumwa, Iowa  

Owings Mills, Maryland (Baltimore Area) 

Cleveland (Euclid), Ohio  

Staley , North Carolina (South of Greensboro)  

Monroe, Connecticut  

Sturgis, South Dakota  

Leesburg, Florida  

Montreal, Wisconsin  

Savannah, Georgia  

Lincoln, Illinois  

Jefferson, Louisiana (New Orleans Area)  

Here is a link to my workshop calendar where you can see all of my travel schedule and to get info on beginner and advanced Brayer workshops:   http://zindorf.blogs.splitcoaststampers.com/workshop-calendar   

Don’t see a workshop in your State?  Interested in hosting the workshops in your area in 2012?   Click HERE to get hostess information.  

Link to my Stampin’ Up website where you can order all of your must have Stampin’ Up products from me 24-7:  http://michellezindorf.stampinup.net


Sunny Day – Tutorial #395

Today’s tutorial was made for my Stampin’ Up Down Line Team Technique Swap.   The technique I used on the flower petals is called “Shadow Stamping”.  This is a very quick, but Wow result, giving you great color variation.   

Let’s get started. . . . .

Supplies:

Stamps: Stampin’ Up! Build a Blossom
Paper: Stampin’ Up! Whisper White, Early Espresso, Cajun Craze and Tempting Turquoise
Ink: Stampin’ Up! Pacific Point, Cajun Craze, Daffodil Delight, Basic Black, Tempting Turquoise
Accessories: Stampin’ Up Sponge, Gold Brads, Blossom Petals Punch, 1 1/4″ circle punch, 3.5″ circle Die Cut, Big Shot Machine, Brayer, Post it Note, Mat Pack, Piercing Tool


Don’t forget it is Sale-a-bration time at Stampin’ Up.  Receive a free Sale-a-bration set for each $50 in merchandise purchased.   Click HERE to place an order.   Your order will be shipped directly to your door step from Stampin’ Up!

The Stampin’ Up USA Idea book and Catalog is here.   For your copy, please send a check for $9.95 to Michelle Zindorf, P.O. Box 116, West Alexandria, OH 45381 or send it via paypal to mzindorf@aim.com USA only.     My current customers will receive a new Occasions Mini Catalog automatically from me.   Not a current customer and want a free copy of the new Occasions Mini Catalog ?  E-mail your mailing address to mzindorf@aim.com and I will get one in the mail to you.  )  Are you getting inspiration from this blog?   One way you can help support it is to order your Stampin’ Up products through me.   Click HERE to place an order.    Want to become a Stampin’ Up Demonstrator , receive a 20% discount on product and earn instant income on orders?  Consider being part of my Stampin’ Up Team and start your own business or become a Hobby Demo just for the discount.  Click HERE for more information.

Cut a 3.5″ circle our of a piece of Whisper White card stock using a circle die and my big shot machine.

Punched a 1 3/4″ circle from the stick part of a post it note and used it as a mask for the sun.  Brayered Tempting Turquoise ink on the card stock.

Brayered Pacific Point ink at the top of the card stock, not covering the Tempting Turquoise ink entirely.

Removed the sun mask and sponged Daffodil Delight ink on the sun.

Loaded the petal from the Stampin’ Up set “Build a Blossom” with Daffodil Delight ink and then rolled the edges of the stamp on a Cajun Craze ink before stamping.  This technique is called Shadow stamping.  🙂   I stamped the petals on Whisper White card stock.

Punched the petals out using the matching punch.

Adhered the petals to the die cut circle.

Punched a 1 1/4″ circle from Early Espresso card stock and then sponged Basic Black ink on the circle edges.

Adhered the Early Espresso circle to the center of the petals and cut the part of the circle off that hangs over the die cut edge.

Added 2 Cajun Craze panels, 1 Tempting Turquoise panel and 1 Early Espresso panel.

Added Pierced rows at the top and left side of the card stock using the Stampin’ Up Mat pack and piercing tool.

Pierced holes in the flower center using the piercing tools.

Added 4 gold brads.

Here is the finished card measuring 5.25″ square.

May your day be filled with laughter and love.

Until my next post. . . . . . .  .

Hugs,

Michelle

   Get ready for Brayer Workshops!  I am coming to the following locations, click the location name for more information.  

Virginia Beach, Virginia  

Houston, Texas  

Wichita, Kansas  

Syracuse (Bridgeport), New York  

St. Peters, Missouri  

La Porte, Indiana  

Orlando (Davenport), Florida  

St. Cloud, Minnesota  

Colorado Springs, Colorado  

Ottumwa, Iowa  

Owings Mills, Maryland (Baltimore Area) 

Cleveland (Euclid), Ohio  

Staley , North Carolina (South of Greensboro)  

Monroe, Connecticut  

Sturgis, South Dakota  

Leesburg, Florida  

Montreal, Wisconsin  

Savannah, Georgia  

Lincoln, Illinois  

Jefferson, Louisiana (New Orleans Area)  

Here is a link to my workshop calendar where you can see all of my travel schedule and to get info on beginner and advanced Brayer workshops:   http://zindorf.blogs.splitcoaststampers.com/workshop-calendar   

Don’t see a workshop in your State?  Interested in hosting the workshops in your area in 2012?   Click HERE to get hostess information.  

Link to my Stampin’ Up website where you can order all of your must have Stampin’ Up products from me 24-7:  http://michellezindorf.stampinup.net


The Boot – Tutorial #394

Super quick post today.  🙂  Right after I am done here I’m off to go clothes shopping.   I need to go down one size!!!!  Now that’s exciting!

There have been some inquiries on how I am loosing weight.  I am walking 2 (20 minute) miles, 5 times a week on my treadmill and following the Weight Watchers weight loss plan. 

Now let’s get started on this tutorial so I can go shopping!

Supplies:

Stamps: Stampin’ Up! Out West and Vintage Vogue
Paper: Stampin’ Up! River Rock, Soft Suede and Basic Black
Ink: Stampin’ Up! Basic Black Craft Ink and Soft Suede Classic Ink
Accessories: Stampin’ Up! Crumb Cake Taffeta Ribbon, Antique Brads, Soft Suede & Crumb Cake Markers, Versamark Marker, Clear Embossing Powder, Heat Gun, Sponges


The Stampin’ Up USA Idea book and Catalog is here.   For your copy, please send a check for $9.95 to Michelle Zindorf, P.O. Box 116, West Alexandria, OH 45381 or send it via paypal to mzindorf@aim.com USA only.     My current customers will receive a new Occasions Mini Catalog automatically from me.   Not a current customer and want a free copy of the new Occasions Mini Catalog ?  E-mail your mailing address to mzindorf@aim.com and I will get one in the mail to you.  )  Are you getting inspiration from this blog?   One way you can help support it is to order your Stampin’ Up products through me.   Click HERE to place an order.    Want to become a Stampin’ Up Demonstrator , receive a 20% discount on product and earn instant income on orders?  Consider being part of my Stampin’ Up Team and start your own business or become a Hobby Demo just for the discount.  Click HERE for more information.

Stamped the boot using Craft (Pigment) Basic Black ink on a 3.25″ piece of River Rock card stock and then heat embossed the image using clear embossing powder and a heat gun.

Colored the bottom of the boot using a Soft Suede marker and the top of the boot and heal with a Crumb Cake marker.

Colored over the image using a Versamark marker and heat embossed it using clear embossing powder and a heat gun.

Sponged Soft Suede ink at the bottom of the card stock.

Sponged Basic Black ink at the bottom of the card stock.   Oops! Accidently deleted some of my pictures, stamped the flowers from the Stampin’ Up Vintage Vogue set using Soft Suede ink around the edge of the card stock.  Sponged Basic Black ink around the edges of the card stock.  Cute two pieces of Soft Suede card stock, one 5″ x 1″ and the other 5″ x .75″.   Stamped the Flowers from the Stampin’ Up set Vintage Vogue on the pieces using Basic Black ink.  Sponged Basic Black ink around the edges of the pieces of card stock.

Now if you haven’t tried this, you need to, just to see how beautiful it is in person. 

Stamped the flowers all over a 5″ square piece of Basic Black card stock using Craft Basic Black ink.  Heat embossed the images using clear embossing powder. 

Assembled the card adding a 5.25″ square panel of River Rock card stock and a 5.5″ square panel of Basic Black card stock.  Added Crumb Cake Taffeta Ribbon and Antique Brads.

Here is the finished card measuring 5.5″ square.

May your weekend be as special as you are!

Until my next post. . . .  . .

Hugs,

Michelle

   Get ready for Brayer Workshops!  I am coming to the following locations, click the location name for more information.  

Virginia Beach, Virginia  

Houston, Texas  

Wichita, Kansas  

Syracuse (Bridgeport), New York  

St. Peters, Missouri  

La Porte, Indiana  

Orlando (Davenport), Florida  

St. Cloud, Minnesota  

Colorado Springs, Colorado  

Ottumwa, Iowa  

Owings Mills, Maryland (Baltimore Area) 

Cleveland (Euclid), Ohio  

Staley , North Carolina (South of Greensboro)  

Monroe, Connecticut  

Sturgis, South Dakota  

Leesburg, Florida  

Montreal, Wisconsin  

Savannah, Georgia  

Lincoln, Illinois  

Jefferson, Louisiana (New Orleans Area)  

Here is a link to my workshop calendar where you can see all of my travel schedule and to get info on beginner and advanced Brayer workshops:   http://zindorf.blogs.splitcoaststampers.com/workshop-calendar   

Don’t see a workshop in your State?  Interested in hosting the workshops in your area in 2012?   Click HERE to get hostess information.  

Link to my Stampin’ Up website where you can order all of your must have Stampin’ Up products from me 24-7:  http://michellezindorf.stampinup.net  

Frequently asked questions answers:  http://zindorf.blogs.splitcoaststampers.com/frequently-asked-questions/


Silver Tree – Tutorial #393


Wow!  It feels so very good to get to hang out in my stamping room and create something today.  I’ve not had the chance here lately.   With the ice storm that came through our power was touch and go.  Brrrr, the house gets cold fast without heat, let me tell you.  It did look really romantic here with all the candles a blaze, lol. 

I’m considering running out today to get some sort of wood burning stove, hmmmm.  I feel a purchase coming on.  🙂

I hope you are warm, snug in your home with heat and lights. 

Ready for a tutorial?  Let’s get started. . . . .  .

Supplies:

Stamps: Stampin’ Up! Trendy Trees
Paper: Stampin’ Up! Whisper White, Tempting Turquoise and Basic Black card stock
Ink: Stampin’ Up! Metallic Silver, Tempting Turquoise, Not Quite Navy, Night of Navy and Basic Gray
Accessories: Stampin’ Up! Sponges, Brayer, White Gel Pen, Photo Corner Punch, Silver Brads and post it notes

The Stampin’ Up USA Idea book and Catalog is here.   For your copy, please send a check for $9.95 to Michelle Zindorf, P.O. Box 116, West Alexandria, OH 45381 or send it via paypal to mzindorf@aim.com USA only.     My current customers will receive a new Occasions Mini Catalog automatically from me.   Not a current customer and want a free copy of the new Occasions Mini Catalog ?  E-mail your mailing address to mzindorf@aim.com and I will get one in the mail to you.  )  Are you getting inspiration from this blog?   One way you can help support it is to order your Stampin’ Up products through me.   Click HERE to place an order.    Want to become a Stampin’ Up Demonstrator , receive a 20% discount on product and earn instant income on orders?  Consider being part of my Stampin’ Up Team and start your own business or become a Hobby Demo just for the discount.  Click HERE for more information.

Punched a 1 3/4″ circle from a post it note.

Re-lined up the punch as shown below and punched the quarter moon mask from the sticky part of the post it note.

Started with a 4″ x 4.75″ piece of Whisper White card stock.  Masked the moon and added a post it note to mask the bottom half of the card stock.

Brayered Not Quite Navy ink at the top of the card stock.

Brayered Night of Navy ink at the top of the card stock, not covering the Not Quite Navy ink entirely.

Removed the masks and then masked the the top half of the card stock.

Brayered Tempting Turquoise ink at the bottom of the card stock.

Brayered Not Quite Navy ink at the bottom of the card stock, not covering the Tempting Turquoise ink entirely.

Sponged Tempting Turquoise ink at the post it note edge to darken the horizon line.

Removed all the masks.

Put a post it note mask 1/2″ from the horizon line.  Added a torn post it note mask to create a hill shape.

Sponged Basic Gray ink in the hill area.

Sponged Silver Metallic ink in the hill area getting lighter towards the bottom of the hill.

Ripped another post it note mask and sponged Basic Gray ink at the new masks edge to create a second hill.

Removed the post it note masks and Stamped the Stampin’ Up Trendy Tree Trunk and leaves stamps upside down using Tempting Turquoise ink.

Stamped Trendy Tree Trunk using Basic Black ink.

Stamped the Leaves using Silver Metallic ink.

Added White Gel Pen water lines.

Added White Gel Pen dots in the sky for stars.

Punched 5 small photo corner punches out of Tempting Turquoise card stock.

Added 2 Tempting Turquoise card stock panels and 1 Basic Black panel.  Assembled and added 4 silver brads and the photo corner punches.

Here is the finished card measuring 5″ x 6.5″.

May your day be one of complete bliss.

Until my next post. . . . .  . .

Hugs,

Michelle

   Get ready for Brayer Workshops!  I am coming to the following locations, click the location name for more information.  

Virginia Beach, Virginia  

Houston, Texas  

Wichita, Kansas  

Syracuse (Bridgeport), New York  

St. Peters, Missouri  

La Porte, Indiana  

Orlando (Davenport), Florida  

St. Cloud, Minnesota  

Colorado Springs, Colorado  

Ottumwa, Iowa  

Owings Mills, Maryland (Baltimore Area) 

Cleveland (Euclid), Ohio  

Staley , North Carolina (South of Greensboro)  

Monroe, Connecticut  

Sturgis, South Dakota  

Leesburg, Florida  

Montreal, Wisconsin  

Savannah, Georgia  

Lincoln, Illinois  

Jefferson, Louisiana (New Orleans Area)  

Here is a link to my workshop calendar where you can see all of my travel schedule and to get info on beginner and advanced Brayer workshops:   http://zindorf.blogs.splitcoaststampers.com/workshop-calendar   

Don’t see a workshop in your State?  Interested in hosting the workshops in your area in 2012?   Click HERE to get hostess information.  

Link to my Stampin’ Up website where you can order all of your must have Stampin’ Up products from me 24-7:  http://michellezindorf.stampinup.net  

Frequently asked questions answers:  http://zindorf.blogs.splitcoaststampers.com/frequently-asked-questions/


Sweet Valentine – Tutorial #390

Good Morning World!  I have finally crawled my way out of the sick bed and made my way to my office to do a little creating.   One thing that is extremely nice about working from home is, YOU CAN SHOW UP TO WORK LOOKING LIKE COMPLETE HECK!  PJ’s, robe, hair uncombed, you get the picture.  🙂

My very beautiful and sweet Grand Daughter, Hailie Jade was on my mind this morning.  I haven’t created a Valentine for her yet, so here it is.  Hailie is a girlie girl.  That means pink needs to be used in full force.

On a personal note, my oldest Son, Jesse turned 30 today!  Holy Smoke, I’m getting old, lol.    HAPPY BIRTHDAY JESSE!  YOU ARE AN AMAZING SON!

Now, let’s get started on that tutortial. . . . . .

Supplies:

Stamps: Stampin’ Up! Confetti and Something to Celebrate
Paper: Stampin’ Up! Whisper White, Melon Mambo and Always Artichoke
Ink: Stampin’ Up! Tempting Turquoise, Early Espresso, Melon Mambo, Not Quite Navy, Old Olive & Daffodil Delight
Accessories: Stampin’ Up! Sponges, Chantilly Lace, Always Artichoke and Rose Red Markers, Hearts & Bird Punches, Brayer, Mat pack & Piercing Tool, Button.

The Stampin’ Up USA Idea book and Catalog is here.   For your copy, please send a check for $9.95 to Michelle Zindorf, P.O. Box 116, West Alexandria, OH 45381 or send it via paypal to mzindorf@aim.com USA only.     My current customers will receive a new Occasions Mini Catalog automatically from me.   Not a current customer and want a free copy of the new Occasions Mini Catalog ?  E-mail your mailing address to mzindorf@aim.com and I will get one in the mail to you.  )  Are you getting inspiration from this blog?   One way you can help support it is to order your Stampin’ Up products through me.   Click HERE to place an order.    Want to become a Stampin’ Up Demonstrator , receive a 20% discount on product and earn instant income on orders?  Consider being part of my Stampin’ Up Team and start your own business or become a Hobby Demo just for the discount.  Click HERE for more information.

On a 4.5″ square piece of Whisper White card stock, brayered Daffodil Delight ink at an angle on one of the corners.

Brayered Tempting Turquoise ink at an angle on the opposite corner.

Brayered a bit of Not Quite Navy ink at an angle on the same corner, not covering the Tempting Turquoise ink entirely.

Punched a few hearts out of Pink Pierouette card stock.  Used the Large and small hearts.  Discarded the medium hearts.

Sponged Melon Mambo ink on the heart edges.  Left the centers un-inked.

Edged the hearts with a Rose Red Marker.  Added a bit of marker to the bottom of each of the large hearts.

Using the bird punch, punched two branches out of Old Olive card stock.

Cut the leaves off of one of them.  This will be the stem for the flower.

Sponged Old Olive ink at the bottom of the card stock and glued the large hearts and stem on the card stock.

Sponged Early Espresso ink at the very bottom of the card stock.

Stamped the tiny hearts from the Stampin’ Up Confetti set using Melon Mambo ink.

Glued small hearts and branch on.

Added Always Artichoke ink to the stem of the flower.

Stamped the “Sweet Valentine” sentiment from the Stampin’ Up Occassions Mini Catalog hostess set “Something to Celebrate” using Early Espresso ink.

Added a Melon Mambo and Always Artichoke panels.

Pierced holes on the top and to the right hand side of the main image panel using the Stampin’ Up Mat Pack and Piercing tool.

Added a button to the middle of the flower.

Added Chantilly Lace ribbon to the middle of the card.

Here is the finished card measuring 5.5″ Square.

May your day be totally SWEET!

Until my next post. . . . .  .

Hugs,

Michelle

   Get ready for Brayer Workshops!  I am coming to the following locations, click the location name for more information.  

Tucson, Arizona  

Virginia Beach, Virginia  

Houston, Texas  

Wichita, Kansas  

Syracuse (Bridgeport), New York  

St. Peters, Missouri  

La Porte, Indiana  

Orlando (Davenport), Florida  

St. Cloud, Minnesota  

Colorado Springs, Colorado  

Ottumwa, Iowa  

Owings Mills, Maryland (Baltimore Area) 

Cleveland (Euclid), Ohio  

Staley , North Carolina (South of Greensboro)  

Monroe, Connecticut  

Sturgis, South Dakota  

Leesburg, Florida  

Montreal, Wisconsin  

Savannah, Georgia  

Lincoln, Illinois  

Jefferson, Louisiana (New Orleans Area)  

Here is a link to my workshop calendar where you can see all of my travel schedule and to get info on beginner and advanced Brayer workshops:   http://zindorf.blogs.splitcoaststampers.com/workshop-calendar   

Don’t see a workshop in your State?  Interested in hosting the workshops in your area in 2012?   Click HERE to get hostess information.  

Link to my Stampin’ Up website where you can order all of your must have Stampin’ Up products from me 24-7:  http://michellezindorf.stampinup.net  

Frequently asked questions answers:  http://zindorf.blogs.splitcoaststampers.com/frequently-asked-questions/


Split Negative Valentine – Tutortial #389

Today’s tutorial is a little different than my usual creations.  This was made for my Stampin’ Up Down Line Team Technique Swap.  This month’s technique is Split Negative.  Since Valentine’s Day is approaching, why not a Valentine.  I also through a bit of reverse imaging in there for good measure.

Boy, these technique swaps sure take me out of my element and make me stretch, stretch, stretch!

Before I start today’s tutorial I wanted to give an update on my Dog, Abby.  Abby had surgery on Friday and she is doing great.  Really getting extra pampering and soaking every bit of it up.  Thanks to those of you that inquired about her and prayed for her. 

Now let’s get started on today’s tutorial. . . .  . . .

Supplies:

Stamps: Stampin’ Up! Elements of Style and I (heart) Hearts
Paper: Stampin’ Up! Cherry Cobbler and Basic Black
Ink: Stampin’ Up! Ultimate Metallic Silver and Gold
Accessories:Stampin’ Up Heart Punch, Stamp-a-ma-jig, Prismacolor Gold and Silver Paint Markers

The Stampin’ Up USA Idea book and Catalog is here.   For your copy, please send a check for $9.95 to Michelle Zindorf, P.O. Box 116, West Alexandria, OH 45381 or send it via paypal to mzindorf@aim.com USA only.     My current customers will receive a new Occasions Mini Catalog automatically from me.   Not a current customer and want a free copy of the new Occasions Mini Catalog ?  E-mail your mailing address to mzindorf@aim.com and I will get one in the mail to you.  )  Are you getting inspiration from this blog?   One way you can help support it is to order your Stampin’ Up products through me.   Click HERE to place an order.    Want to become a Stampin’ Up Demonstrator , receive a 20% discount on product and earn instant income on orders?  Consider being part of my Stampin’ Up Team and start your own business or become a Hobby Demo just for the discount.  Click HERE for more information.

Cut a piece of Basic Black card stock and a piece of Cherry Cobbler card stock to 3′ x 4″.

Stamped the humming bird onto my Stamp-a-ma-jig plastic sheet using Gold Metallic Ink and then flipped the plastic sheet over onto the Cherry Cobbler card stock and rubbed the back of the plastic Sheet to transfer the image onto the card stock.  This gives you a reverse image of the stamp.

Repeated teh same process for the Flourish.

Using my Stamp-a-ma-jig for placement and holding the two pieces of card stock together.  Stamped the Hummingbird and the flourish using Silver Metallic Ink on the Basic Black card stock.

Darkened the Gold images on the Cherry Cobbler card stock by coloring them in with a Gold Gel Pen.

Stamped the Heart using Gold Metallic ink on Cherry Cobbler card stock and the heart using Silver Metallic Ink on Basic Black card stock.

Punched the two hearts out using a heart punch.

Cut the two hearts in half.

Edged the Cherry Cobbler card stock using a Silver Paint Marker and the Basic Black card stock using a Gold Paint Marker.

Assembled the pieces and added a Cherry Cobbler Panel and a Basic Black panel.

Here is the finished card measuring 5″ x 6.5″.

May your day be filled with much love.

Until my next post. . . .  . .

Hugs,

Michelle

   Get ready for Brayer Workshops!  I am coming to the following locations, click the location name for more information.  

  Fayetteville, Tennessee near Nashville, TN & Huntsville, AL  

Tucson, Arizona  

Virginia Beach, Virginia  

Houston, Texas  

Wichita, Kansas  

Syracuse (Bridgeport), New York  

St. Peters, Missouri  

La Porte, Indiana  

Orlando (Davenport), Florida  

St. Cloud, Minnesota  

Colorado Springs, Colorado  

Ottumwa, Iowa  

Owings Mills, Maryland (Baltimore Area) 

Cleveland (Euclid), Ohio  

Staley , North Carolina (South of Greensboro)  

Monroe, Connecticut  

Sturgis, South Dakota  

Leesburg, Florida  

Montreal, Wisconsin  

Savannah, Georgia  

Lincoln, Illinois  

Jefferson, Louisiana (New Orleans Area)  

Here is a link to my workshop calendar where you can see all of my travel schedule and to get info on beginner and advanced Brayer workshops:   http://zindorf.blogs.splitcoaststampers.com/workshop-calendar   

Don’t see a workshop in your State?  Interested in hosting the workshops in your area in 2012?   Click HERE to get hostess information.  

Link to my Stampin’ Up website where you can order all of your must have Stampin’ Up products from me 24-7:  http://michellezindorf.stampinup.net  

Frequently asked questions answers:  http://zindorf.blogs.splitcoaststampers.com/frequently-asked-questions/


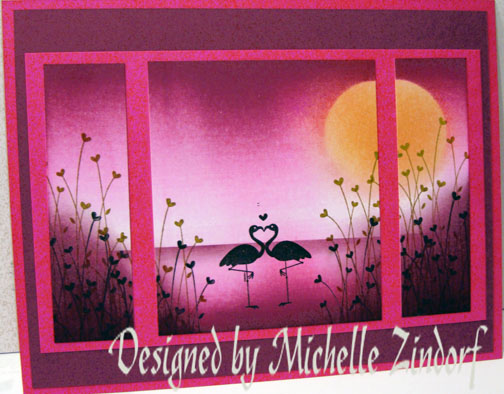
Flamingo Love – Tutorial #385

How about another sneak peek today.  The images I used today are from a new Stampin’ Up set “Valentine Defined” that will be in the Stampin’ Up Occasions Mini Catalog that will be in effect from January 4, 2011 to April 30, 2011.    This mini catalog, my friends, is jammed packed with yummy stamps.    My current Stampin’ Up customers will automatically receive the new mini catalog.   Please e-mail me your address it you would like for me to mail you one.   Sorry USA addresses only.

Do you believe we are quickly approaching 2011.   Where on earth does the time go.  Wasn’t we just dealing with Y2K?  LOL      Anyway, my wish is for you to have the most fun, love filled, prosperous 2011 ever!

This is a photo of my Husband, Russ (on far right) with his 5 brothers, taken last night at a family holiday dinner.    Love these guys.  🙂  But, I bet the girls in their neighborhood ran past there house when they were young, LOL.

Ready?  Let’s get started on today’s tutorial. . . . . .  .

Supplies:

Stamps: Stampin’ Up! Valentine Defined
Paper: Stampin’ Up! Whisper White, Melon Mambo and Rich Razzelberry
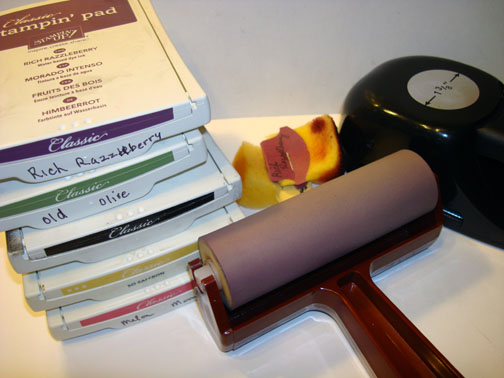
Ink: Stampin’ Up! Rich Razzelberry, Old Olive, Basic Black, So Saffron and Melon Mambo
Accessories: Stampin’ Up! Sponges, Brayer, 1 3/8″ circle punch and Post it notes

The Stampin’ Up USA Idea book and Catalog is here.   For your copy, please send a check for $9.95 to Michelle Zindorf, P.O. Box 116, West Alexandria, OH 45381 or send it via paypal to mzindorf@aim.com USA only.     My current customers will receive a new Occasions Mini Catalog automatically from me.   Not a current customer and want a free copy of the new Occasions Mini Catalog ?  E-mail your mailing address to mzindorf@aim.com and I will get one in the mail to you.  )  Are you getting inspiration from this blog?   One way you can help support it is to order your Stampin’ Up products through me.   Click HERE to place an order.    Want to become a Stampin’ Up Demonstrator , receive a 20% discount on product and earn instant income on orders?  Consider being part of my Stampin’ Up Team and start your own business or become a Hobby Demo just for the discount.  Click HERE for more information.


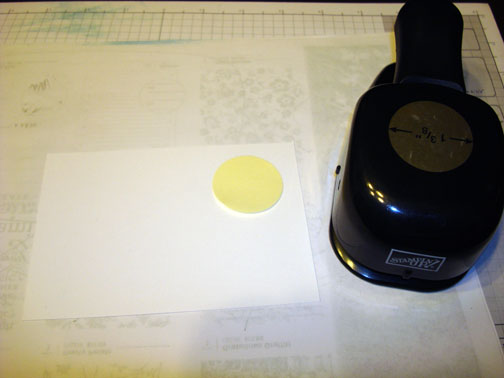
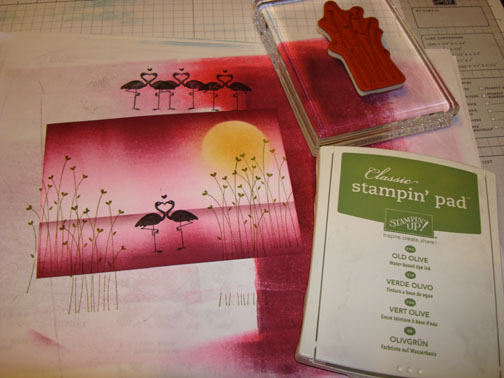
Put a 1 3/8″ circle punched from the sticky part of a post it note on a 3.5″ x 5″ piece of Whisper White card stock to mask for the moon.

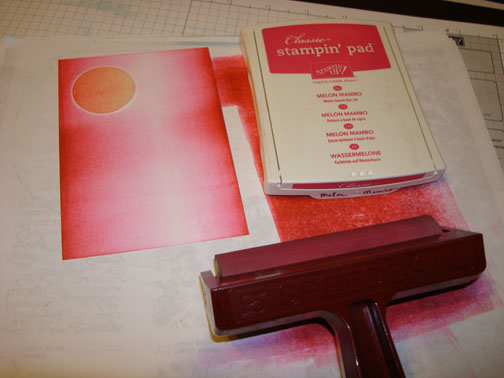
Brayered Melon Mambo ink on the top and bottom of the card stock.

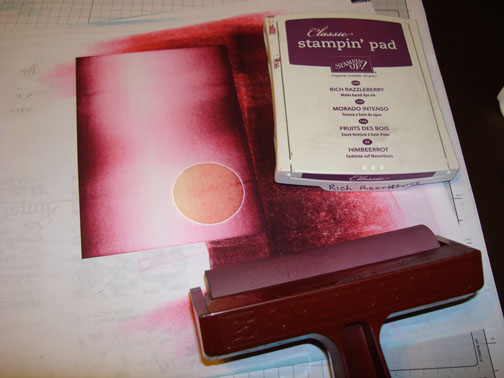
Brayered Rich Razzelberry ink at the top and bottom of the card stock, not covering the Melon Mambo ink entirely.

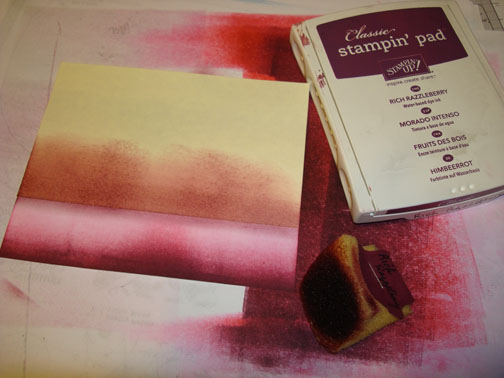
Masked the sky area with a Post it note and sponged Rich Razzelberry ink at the post it note edge to create a horizon line.

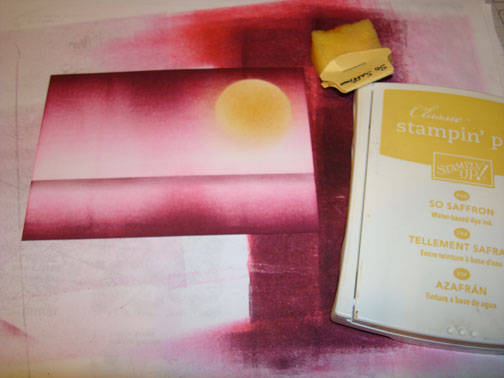
Took all the masks off and sponged So Saffron ink in the moon.

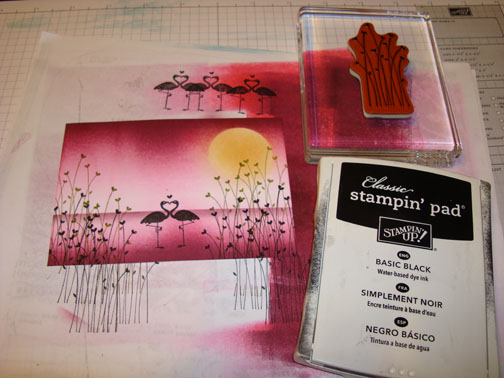
Stamped the Flamingos using Basic Black ink.

Stamped the heart plants using Old Olive ink.

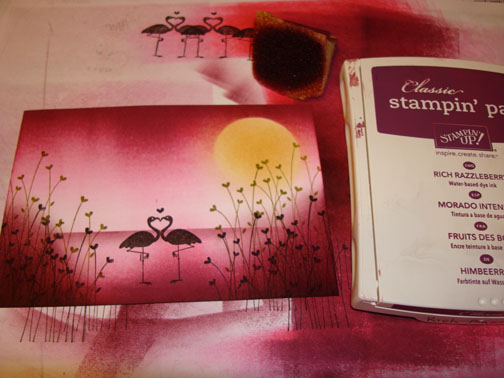
Stamp more heart plants using Basic Black ink.

Sponged Rich Razzelberry ink at the bottom corners of the card stock.

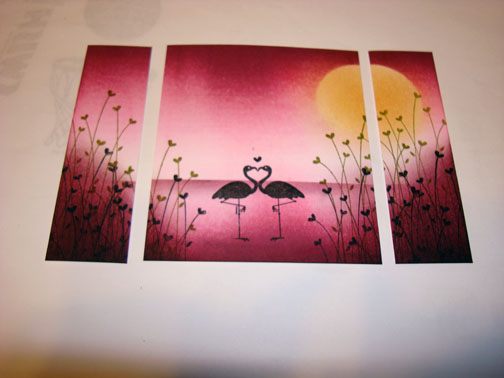
Cut 1″ off of each side of the main image panel.

Layered 2 Melon Mambo panels and 1 Rich Razzelberry panel.

Added the sections of the main image panel.  Here is the finished card measuring 5″ x 6.5″.

May you find joy in creating something new today.

Until my next post. . . .  . . . .

Michelle

   Get ready for Brayer Workshops!  I am coming to the following locations, click the location name for more information. 


Columbus, Ohio 

Fayetteville, Tennessee near Nashville, TN & Huntsville, AL 

Tucson, Arizona 

Virginia Beach, Virginia 

Houston, Texas 

Wichita, Kansas 

Syracuse (Bridgeport), New York 

St. Peters, Missouri 

La Porte, Indiana 

Orlando (Davenport), Florida 

St. Cloud, Minnesota 

Colorado Springs, Colorado 

Ottumwa, Iowa 

Owings Mills, Maryland (Baltimore Area)

Cleveland (Euclid), Ohio 

Staley , North Carolina (South of Greensboro) 

Monroe, Connecticut 

Sturgis, South Dakota 

Leesburg, Florida 

Montreal, Wisconsin 

Savannah, Georgia 

Lincoln, Illinois 

Jefferson, Louisiana (New Orleans Area) 

Here is a link to my workshop calendar where you can see all of my travel schedule and to get info on beginner and advanced Brayer workshops:   http://zindorf.blogs.splitcoaststampers.com/workshop-calendar  

Don’t see a workshop in your State?  Interested in hosting the workshops in your area in 2012?   Click HERE to get hostess information. 

Link to my Stampin’ Up website where you can order all of your must have Stampin’ Up products from me 24-7:  http://michellezindorf.stampinup.net 

Frequently asked questions answers:  http://zindorf.blogs.splitcoaststampers.com/frequently-asked-questions/ 

Tags: , , , , , , ,


Just Believe – Tutorial #375


Good Morning!  I’m currently in Soledad, California.  Traveled here yesterday and was greeted by my wonderful Hostess, Sherrie Ceja.  We spent the afternoon taking in the breath taking views of Monterey, Carmel and the fisherman’s Warf.   I took lots of pictures and will share them in a later post.

I tried really hard to get this card tutorial posted on Thursday before I left, but time just ran out.  So I am up early today, California time, lol, posting away.  Hang out a moment and check out this tutorial using a directional brayer technique that gives you a great lighting effect for those flower stamps you have.  I know you have a few flower stamps stashed away, all stampers do.  🙂

Now let’s get started. . . . . . .

Supplies:

Stamps: Stampin’ Up Just Believe
Paper: Stampin’ Up Cajun Craze, Old Olive and Whisper White
Ink: Stampin’ Up Daffodil Delight, Cajun Craze, Riding Hood Red, Always Artichoke, Old Olive and Basic Black
Accessories: Stampin’ Up Sponges, Brayer, Top Note Die, Corner Round Punch, silver brad, white gel pen, Always Artichoke, Certainly Celery and Basic Black markers and Piercing Tools


The brand new USA Idea book and Catalog is here.   For your copy, please send a check for $9.95 to Michelle Zindorf, P.O. Box 116, West Alexandria, OH 45381 or send it via paypal to mzindorf@aim.com USA only.     Want a free copy of the new Holiday Mini Catalog ?  E-mail your mailing address to mzindorf@aim.com and I will get one in the mail to you.  )  Are you getting inspiration from this blog?   One way you can help support it is to order your Stampin’ Up products through me.   Click HERE to place an order.    Want to become a Stampin’ Up Demonstrator , receive a 20% discount on product and earn instant income on orders?  Consider being part of my Stampin’ Up Team and start your own business or become a Hobby Demo just for the discount.  Click HERE for more information.

  Don’t forget, those who place a $50 Stampin’ Up merchandise order with me this month will receive a thank you card handmade by me.  Thank you to all my great customers.    You make this blog possible.  

If you have not order from me in the past it is very easy, Click HERE to place an order.  Your order will be shipped directly from Stampin’ Up to your front door. 

I will post the measurements on this card a bit later.  I do not have this card with me as I write this.

Brayered Daffodil Delight ink at an angle on the top right corner of a Whisper White card stock panel.

Brayered Cajun Craze ink on the same corner at an angle, not covering the Daffodil Delight ink entirely.

Brayered just a little Riding Hood Red ink at the top of the right hand corner.

Stamped the silhouette flower from the Stampin’ Up set Just Believe using Always Artichoke ink.

Colored the flower in with a Cajun Craze marker.

Added White Gel pen highlights to the flowers.

Colored over some of the leaves with a Certainly Celery Markers.

Added Always Artichoke marker to the undersides of the leaves to create a shadow.

Sponged Old Olive ink at the bottom of the card stock.

Sponged Basic Black ink at the very bottom of the card stock.

Added Basic Black marker to the left sides of the grasses at the bottom of the card stock.

Using the Top Note Die and Big Shot Machine, cut a top note from Cajun Craze card stock.

Used the corner rounder punch on the top and bottom right hand corners of the main image panel.

Cut the left hand side of the Top Note off, added Old Olive and Cajun Craze panels and a strip of Cajun Craze card stock.

Using Stampin’ Up Piercing tools, pierced holes down the middle of the Cajun Craze card stock strip.

Sponged Always Artichoke to the bottom left hand corner of the card front.  Added a Silver brad.

Here is the finished card measuring 4.25″ x 5.5″.

I will be back later today to announce the winner of the Christmas Punch Stamp set.

May your weekend be one of pure pleasure.

Until my next post.. . . .

Hugs,

Michelle

 dsc04164-2.jpg  Get ready for Brayer Workshops!  I am coming to the following locations, click the location name for more information.

Soledad, California

Columbus, Ohio

Fayetteville, Tennessee near Nashville, TN & Huntsville, AL

Tucson, Arizona

Virginia Beach, Virginia

Houston, Texas

Wichita, Kansas

Syracuse (Bridgeport), New York

St. Peters, Missouri

La Porte, Indiana

Orlando (Davenport), Florida

St. Cloud, Minnesota

Colorado Springs, Colorado

Ottumwa, Iowa

Cleveland (Euclid), Ohio

Staley , North Carolina (South of Greensboro)

Monroe, Connecticut

Sturgis, South Dakota

Leesburg, Florida

Montreal, Wisconsin

Savannah, Georgia

Here is a link to my workshop calendar where you can see all of my travel schedule and to get info on beginner and advanced Brayer workshops:   http://zindorf.blogs.splitcoaststampers.com/workshop-calendar 

Don’t see a workshop in your State?  Interested in hosting the workshops in your area?   Click HERE to get hostess information.

Link to my Stampin’ Up website where you can order all of your must have Stampin’ Up products from me 24-7:  http://michellezindorf.stampinup.net

Frequently asked questions answers:  http://zindorf.blogs.splitcoaststampers.com/frequently-asked-questions/


Fall Lone Tree – Tutorial #372

Ahhh, it’s a good morning when you can rise, make a cup of hot chocolate and then stamp your little heart out all while wearing your most comfy PJ’s.  🙂   Gotta love it!  But wait after the stamping, real life kicks in, lol.

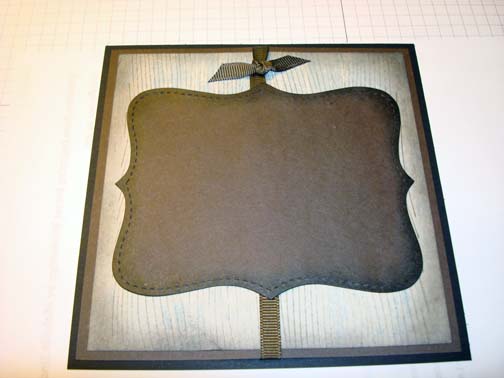
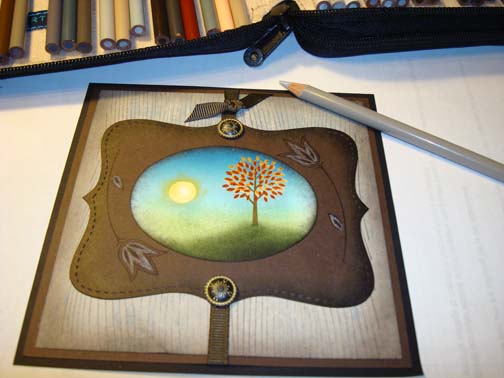
Any how, I have created a project for you today that shows how to make Stampin’ Up’s Early Espresso card stock look a bit like Tooled Leather.  Simple, simple thing to do.  Hang out a moment to check it out.

Let’s get started. . .  . . .  .

Supplies:

Stamps: Stampin’ Up Trendy Trees, Three Little Words and Woodgrain
Paper: Stampin’ Up Whisper White, Early Espresso, Basic Black and Blue Berry Crisp Designer Series Paper
Ink: Stampin’ Up More Mustard, Cajun Craze, Early Espresso, Basic Black, Pear Pizzazz and Always Artichoke
Accessories: Stampin’ Up Antique Brads, sponges, Brayer, Clear embossing powder, heat gun, Early Espresso Ribbon, Oval and Top Note Dies, Big Shot Machine, 3/8 circle punch, Versamark Pad


The brand new USA Idea book and Catalog is here.   For your copy, please send a check for $9.95 to Michelle Zindorf, P.O. Box 116, West Alexandria, OH 45381 or send it via paypal to mzindorf@aim.com USA only.     Want a free copy of the new Holiday Mini Catalog ?  E-mail your mailing address to mzindorf@aim.com and I will get one in the mail to you.  )  Are you getting inspiration from this blog?   One way you can help support it is to order your Stampin’ Up products through me.   Click HERE to place an order.    Want to become a Stampin’ Up Demonstrator , receive a 20% discount on product and earn instant income on orders?  Consider being part of my Stampin’ Up Team and start your own business or become a Hobby Demo just for the discount.  Click HERE for more information.

  Don’t forget, those who place a $50 Stampin’ Up merchandise order with me this month will receive a thank you card handmade by me.  Thank you to all my great customers.    You make this blog possible.  

If you have not order from me in the past it is very easy, Click HERE to place an order.  Your order will be shipped directly from Stampin’ Up to your front door. 

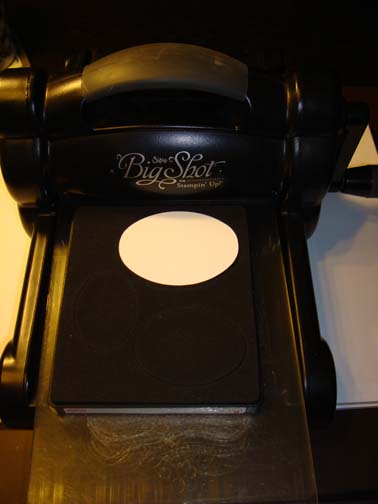
Die cut an oval using my Big shot machine and the Ovals Die using Whisper White card stock.

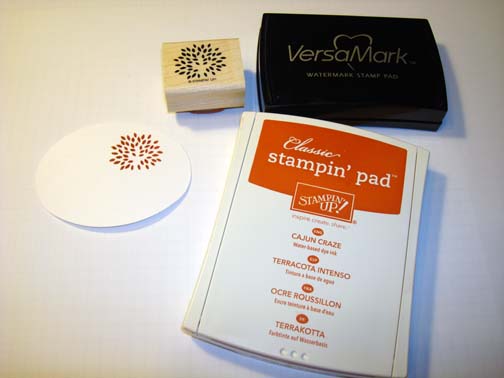
Stamp the leaves from the Stampin’ Up Trendy Trees set by first loading the stamp with Versamark and then with Cajun Craze ink before stamping it.

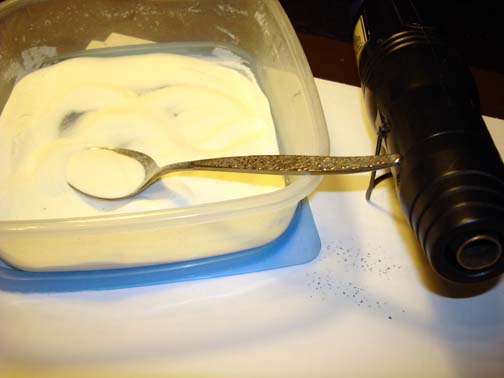
Heat embossed the image using clear embossing powder and a heat gun.

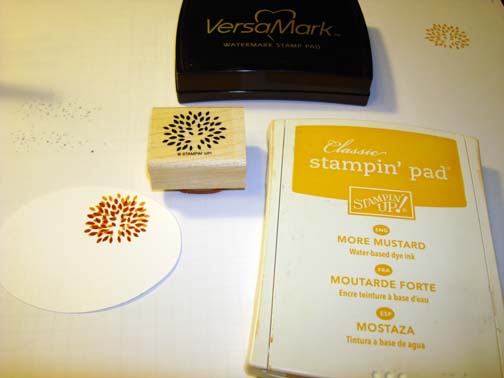
Over stamped the image by first loading the stamp with Versamark and then with More Mustard ink before stamping it.

Heat embossed the image using clear embossing powder and a heat gun.

Punch a 3/8 circle from the sticky part of a post it note and used it as a mask for my sun.

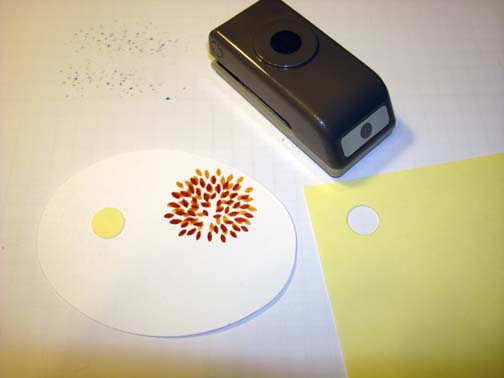
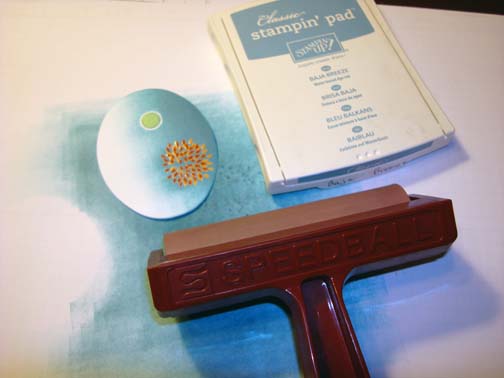
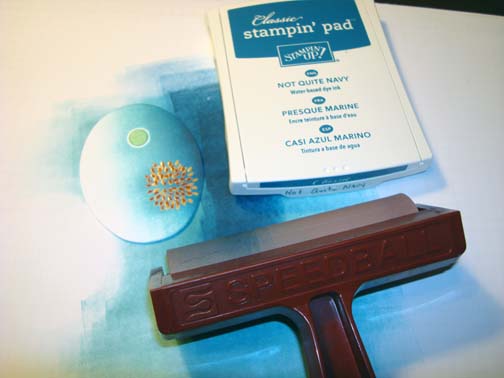
Brayered Baja Breeze ink at the top of the card stock.

Brayered Not Quite Navy at the very top of the card stock, not covering the Baja Breeze ink entirely.

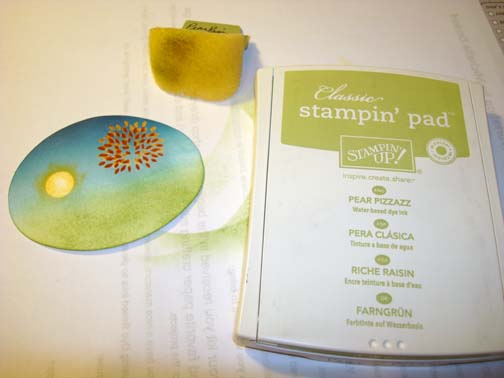
Removed the sun mask and rubbed some Daffodil Delight Stampin’ Pastel around the sun’s edge, leaving the middle light.

Sponged Pear Pizzazz ink at the bottom of the card stock.

Stamped the trunk of the tree using Soft Suede ink.

Sponged Always artichoke ink in a hill shape at the bottom of the card stock.

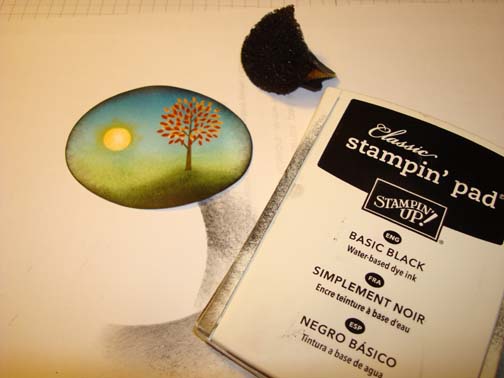
Sponge Basic Black ink around the oval’s edge.

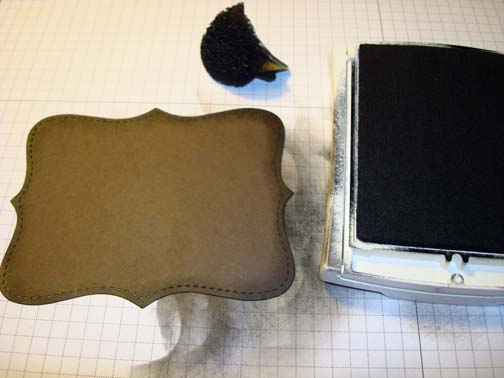
Die cut the Top Note Die out of Early Espresso card stock using my Big Shot Machine.

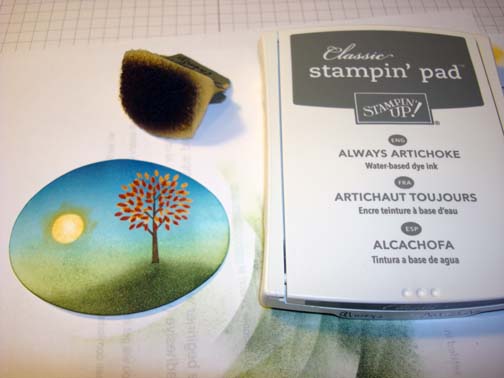
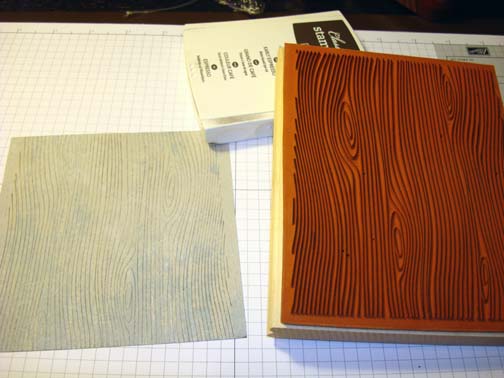
Cut a 5″ piece of Stampin’ Up’s Blue Berry Crisp Designer Series paper and stamped the Wood Grain Stamp using Early Espresso ink.

Sponged Early Espresso ink around the edge of the paper.

Sponged Basic Black ink around the edge of the top note Die Cut.

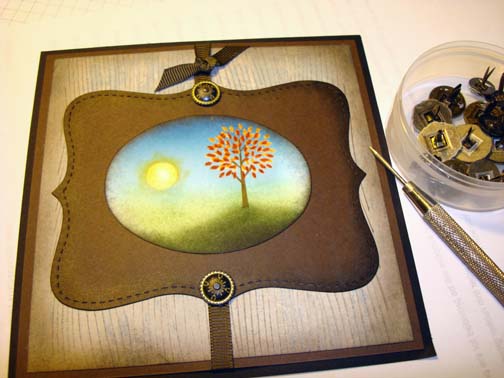
Added a 5.5″ square piece of Basic Black card stock, 5.25″ square piece of Early Espresso, the Designer Series paper, Early Espresso Ribbon and the top note die. 

Added the Main image Oval and 2 Stampin’ Up Antique Brads.

To get a tooled leather look I stamped the flower from the Stampin’ Up set Three Little Words using Basic Black ink.  Colored the flower and leaf in using a Warm Gray 20% Prisma Color Pencil.   Note any light gray or tan colored pencil will work for this look.

Here is the finished project measuring 5.5″ square.

May your day be filled with much happiness.

Until my next post. . . .  . . .

Hugs,

Michelle

 dsc04164-2.jpg  Get ready for Brayer Workshops!  I am coming to the following locations, click the location name for more information.

Milton, West Virginia

Soledad, California

Columbus, Ohio

Fayetteville, Tennessee near Nashville, TN & Huntsville, AL

Tucson, Arizona

Virginia Beach, Virginia

Houston, Texas

Wichita, Kansas

Syracuse (Bridgeport), New York

St. Peters, Missouri

La Porte, Indiana

Orlando (Davenport), Florida

St. Cloud, Minnesota

Colorado Springs, Colorado

Ottumwa, Iowa

Dundalk (Baltimore Area), Maryland

Cleveland (Euclid), Ohio

Staley , North Carolina (South of Greensboro)

Monroe, Connecticut

Sturgis, South Dakota

Leesburg, Florida

Montreal, Wisconsin

Savannah, Georgia

Here is a link to my workshop calendar where you can see all of my travel schedule and to get info on beginner and advanced Brayer workshops:   http://zindorf.blogs.splitcoaststampers.com/workshop-calendar 

Don’t see a workshop in your State?  Interested in hosting the workshops in your area?   Click HERE to get hostess information.

Link to my Stampin’ Up website where you can order all of your must have Stampin’ Up products from me 24-7:  http://michellezindorf.stampinup.net

Frequently asked questions answers:  http://zindorf.blogs.splitcoaststampers.com/frequently-asked-questions/


Spooky Night – Tutorial #371

Hey, I’m still visiting my Sis in Colorado, but I prepared this tutorial for you before I left.  Just so you don’t forget me, lol.

Let’s get started . . . .

Supplies: 

Stamps: Stampin’ Up! House of Haunts and Wicked Cool
Paper: Stampin’ Up! Basic Black, Peach Parfait and Whisper White
Ink: Stampin’ Up! Basic Black, Peach Parfait, Rich Razzelberry, Whisper White and Elegant Eggplant
Accessories: Brayer, White Gel Pen, sponge, Brads, 2 1/2″ circle Punch, Post it note


The brand new USA Idea book and Catalog is here.   For your copy, please send a check for $9.95 to Michelle Zindorf, P.O. Box 116, West Alexandria, OH 45381 or send it via paypal to mzindorf@aim.com USA only.     Want a free copy of the new Holiday Mini Catalog ?  E-mail your mailing address to mzindorf@aim.com and I will get one in the mail to you.  )  Are you getting inspiration from this blog?   One way you can help support it is to order your Stampin’ Up products through me.   Click HERE to place an order.    Want to become a Stampin’ Up Demonstrator , receive a 20% discount on product and earn instant income on orders?  Consider being part of my Stampin’ Up Team and start your own business or become a Hobby Demo just for the discount.  Click HERE for more information.

  Don’t forget, those who place a $50 Stampin’ Up merchandise order with me this month will receive a thank you card handmade by me.  Thank you to all my great customers.    You make this blog possible.  

If you have not order from me in the past it is very easy, Click HERE to place an order.  Your order will be shipped directly from Stampin’ Up to your front door. 

Brayered Peach Parfait ink at the bottom of a 3.25″ x 7″ piece of Whisper White card stock.

Brayered Rich Razzleberry ink at the top of the card stock.

Brayed Elegant Eggplant ink at the very top of the card stock.

Punched a 2.5″ circle out of the sticky part of a post it note and out of a piece of card stock.

Stuck the sticky note circle mask on the card stock.  Lined up the negative circle over the Sticky Note Circle so there is a crescent moon shape showing of the card stock.

Sponged Whisper White craft ink in the creasant shape.

Removed the mask and stamped the tree/owl stamp from the Stampin’ Up House of Haunts set using Basic Black ink.

Sponged Basic Black ink at the bottom of the card stock.

Stamped the Bats from the Stampin’ Up set Wicked Cool using Basic Black ink.

Colored over the bats that were stamped over the moon with a Basic Black marker to darken them.

Added White Gel Pen highlights on the tree and owl.

Added Basic Black and Peach Parfait card stock panels and Gold Brads.

Here is the finished card measuring 4″ x 9″.

Hope you are having a wonderful Halloween week.

Until my next post. . . .  . .

Hugs,

Michelle

 dsc04164-2.jpg  Get ready for Brayer Workshops!  I am coming to the following locations, click the location name for more information.

Milton, West Virginia

Soledad, California

Columbus, Ohio

Fayetteville, Tennessee near Nashville, TN & Huntsville, AL

Tucson, Arizona

Virginia Beach, Virginia

Houston, Texas

Wichita, Kansas

Syracuse (Bridgeport), New York

St. Peters, Missouri

La Porte, Indiana

Orlando (Davenport), Florida

St. Cloud, Minnesota

Colorado Springs, Colorado

Ottumwa, Iowa

Dundalk (Baltimore Area), Maryland

Cleveland (Euclid), Ohio

Staley , North Carolina (South of Greensboro)

Monroe, Connecticut

Sturgis, South Dakota

Leesburg, Florida

Montreal, Wisconsin

Savannah, Georgia

Here is a link to my workshop calendar where you can see all of my travel schedule and to get info on beginner and advanced Brayer workshops:   http://zindorf.blogs.splitcoaststampers.com/workshop-calendar 

Don’t see a workshop in your State?  Interested in hosting the workshops in your area?   Click HERE to get hostess information.

Link to my Stampin’ Up website where you can order all of your must have Stampin’ Up products from me 24-7:  http://michellezindorf.stampinup.net

Frequently asked questions answers:  http://zindorf.blogs.splitcoaststampers.com/frequently-asked-questions/