Tropical with Punches – Tutorial #356

dsc04966.JPG

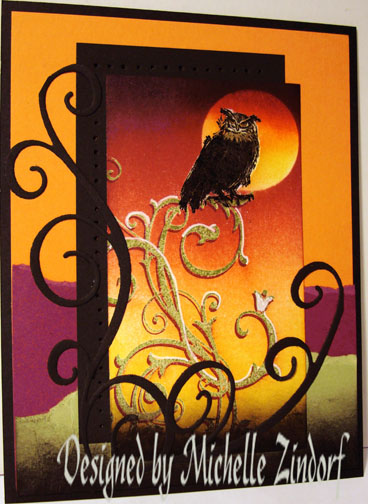
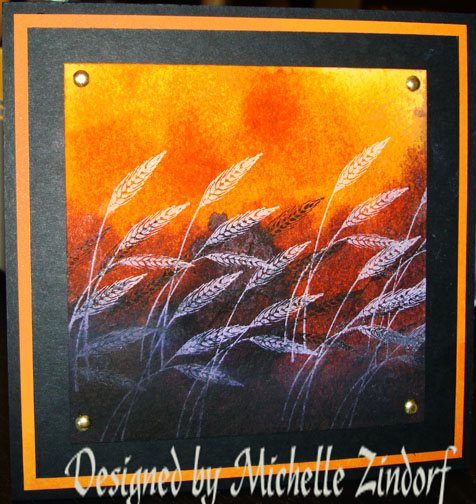
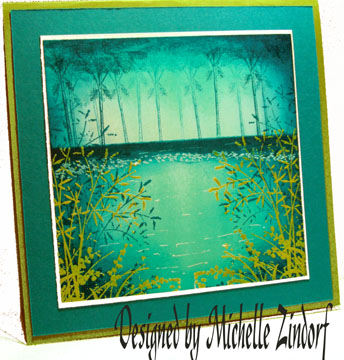
Well I am back from Venice, Florida and I came back very inspired.  The people, scenary and food were all wonderful.  🙂   Of course, today’s card was inspired by my trip.

I do have an announcement before starting the tutorial, I will be teaching my brayer workshops in St. Cloud, Minnesota click HERE to check out the details.

Now on with the tutorial. .. . .  . .
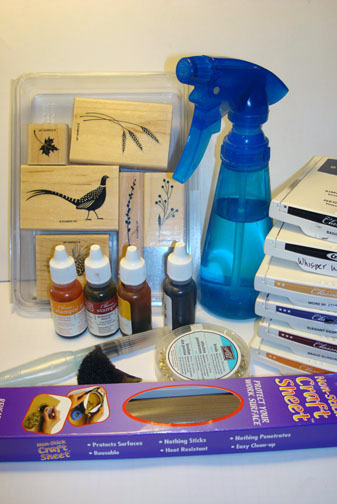
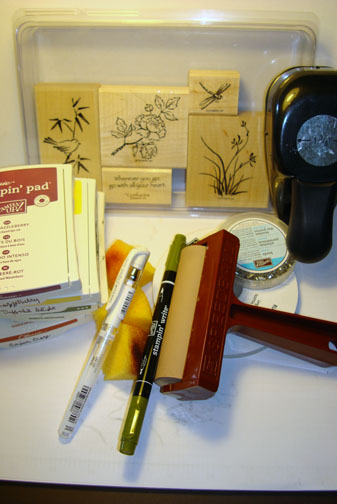
Supplies:

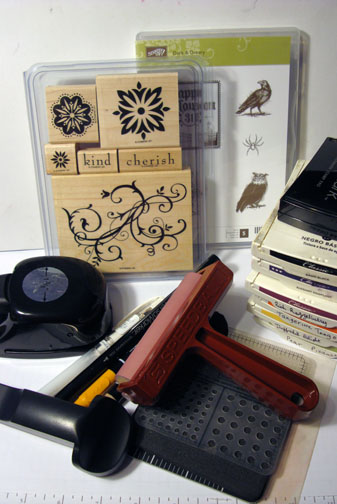
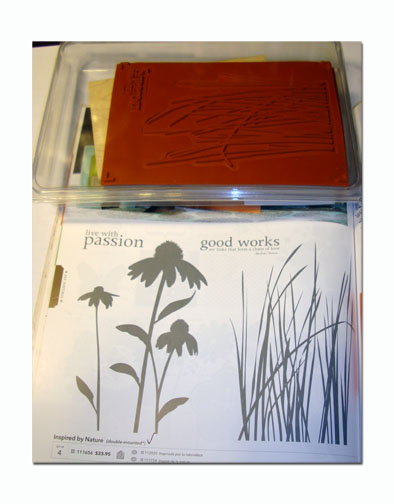
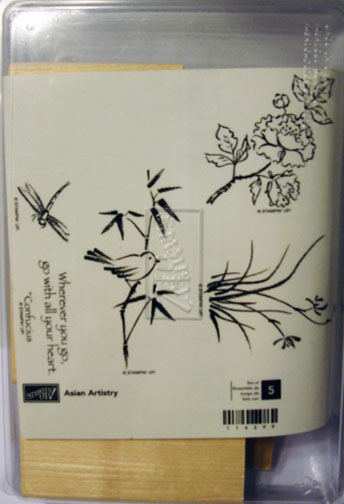
Stamps: Stampin’ Up! Plant Hope
Paper: Stampin’ Up! Basic Black, Whisper White, Baja Breeze, More Mustard and Old Olive
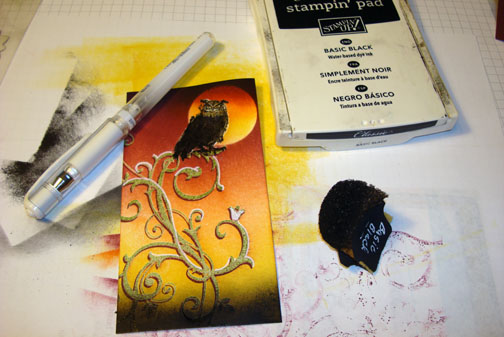
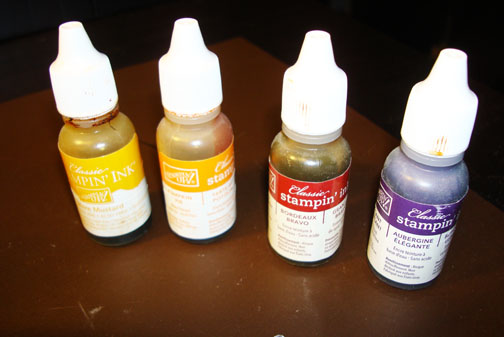
Ink: Stampin’ Up! Basic Black, More Mustard, Tangerine Tango and Cajun Craze
Accessories: Stampin’ Up! Sponges, White Gel Pen, Basic Black Marker, Brayer, Punches, Color Coach and Post it Notes

 The brand new USA Idea book and Catalog is here.   For your copy, please send a check for $9.95 to Michelle Zindorf, P.O. Box 116, West Alexandria, OH 45381 or send it via paypal to mzindorf@aim.com USA only.     Want a copy of the Summer Mini Catalog?  E-mail your mailing address to mzindorf@aim.com and I will get one in the mail to you.  )  Are you getting inspiration from this blog?   One way you can help support it is to order your Stampin’ Up products through me.   Click HERE to place an order.    Want to become a Stampin’ Up Demonstrator , receive a 20% discount on product and earn instant income on orders?  Consider being part of my Stampin’ Up Team and start your own business.  Click HERE for more information.

dsc04969.JPG

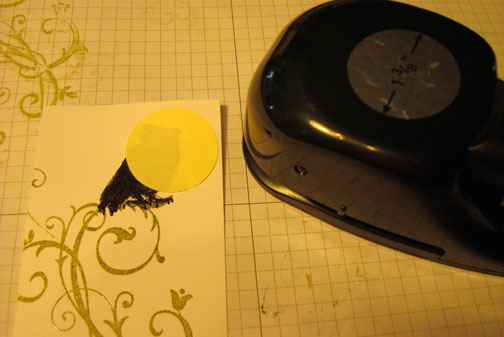
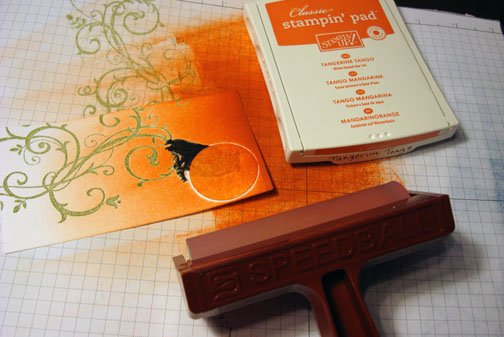
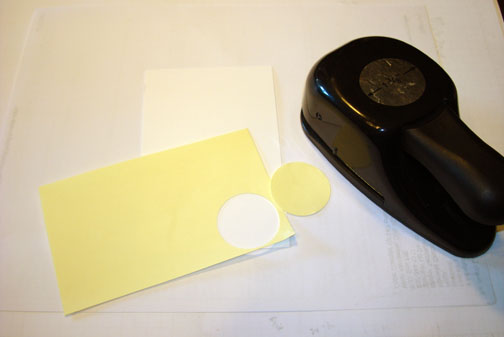
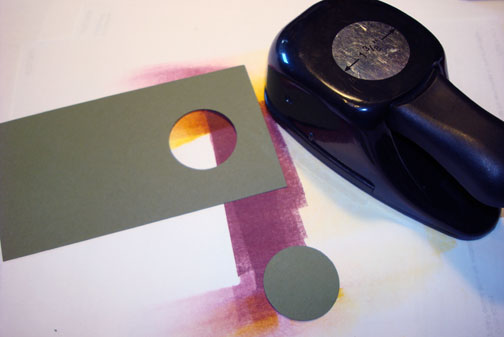
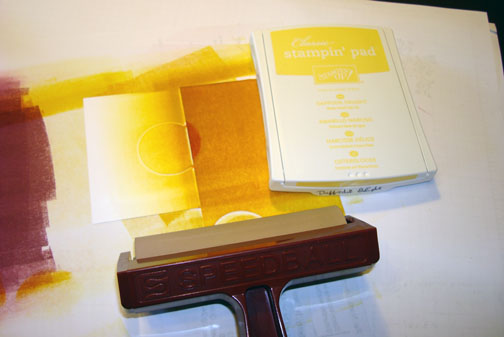
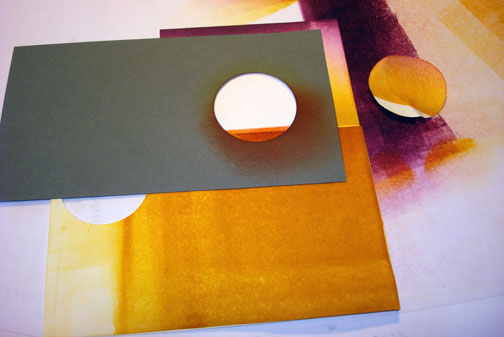
Punched a circle from the sticky edge of a post it note using a 2 1/2″ punch.

dsc04941.JPG

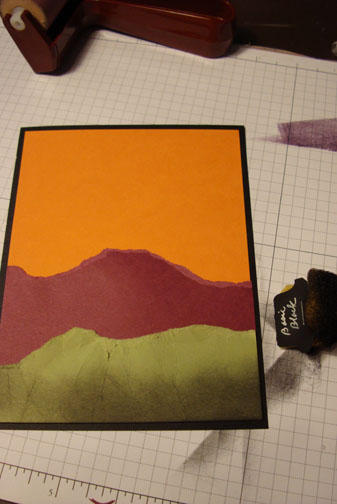
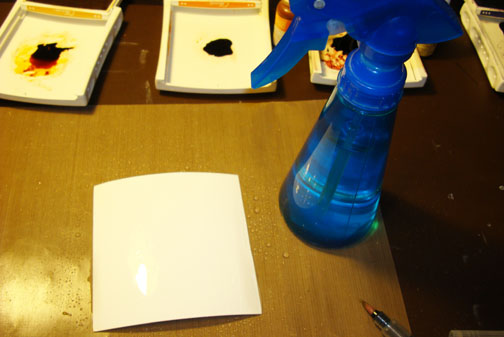
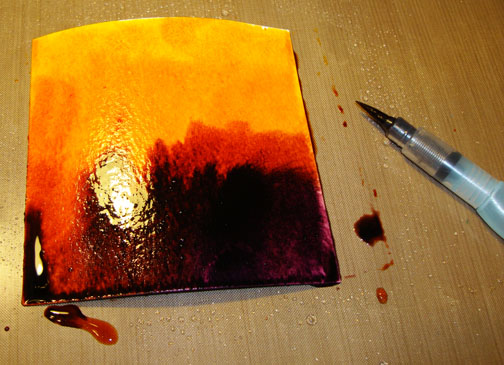
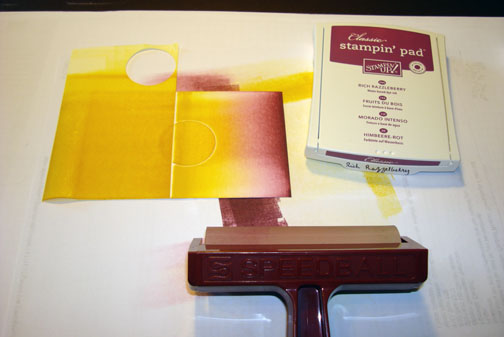
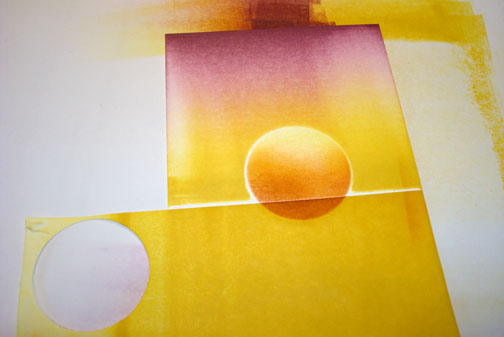
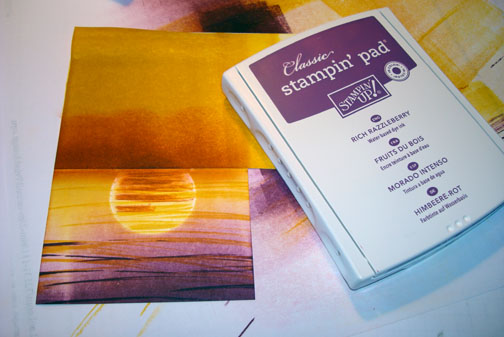
Used the post it note circle to mask the sun on a 3.5″ x 5″ piece of Whisper White card stock.  Brayered More Mustard ink on the right side of the card stock.

dsc04942.JPG

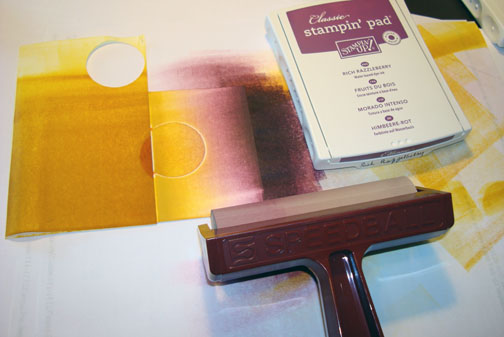
Brayered Tangerine Tango ink on both the right and left sides of the card stock.

dsc04943.JPG

dsc04944.JPG

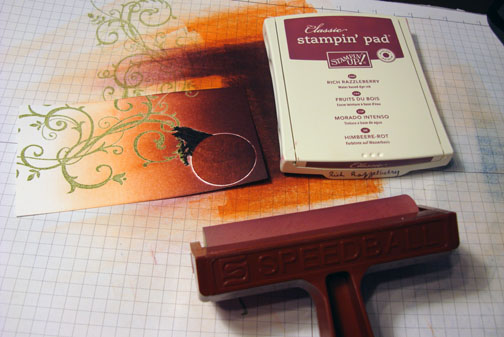
Brayered Cajun Craze ink on both the left and right sides of the card stock.

dsc04945.JPG

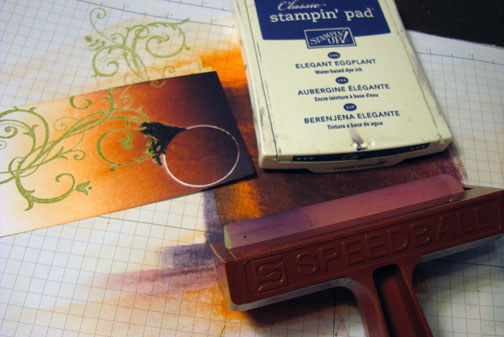
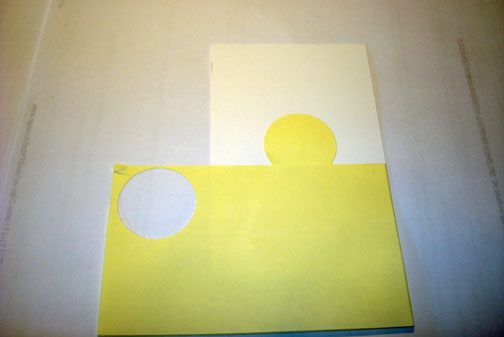
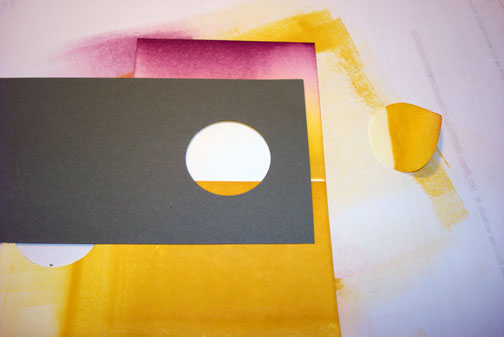
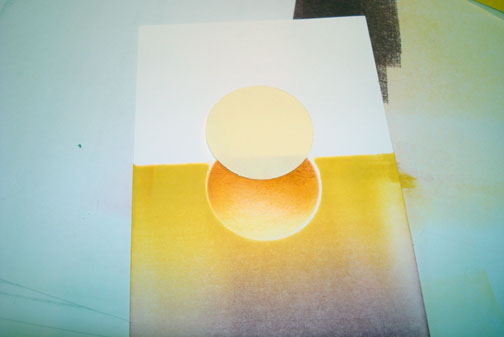
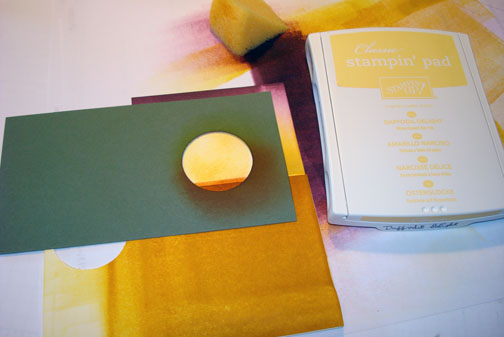
Removed the circle mask and placed the post it note with the circle cut out on the card stock, lining up the hole with the sun on the card stock.

dsc04946.JPG

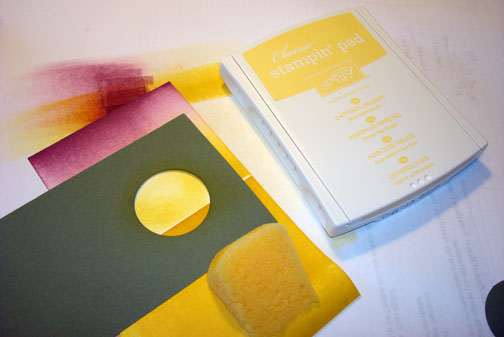
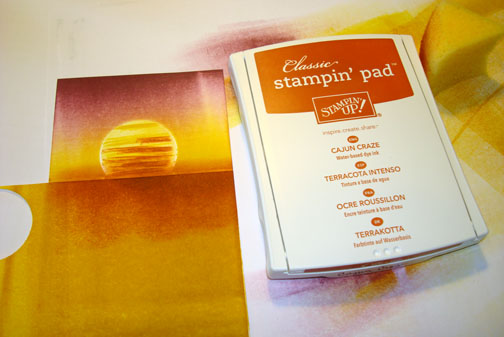
Sponged in the circle with More Mustard ink.

dsc04947.JPG

Sponged around the edge of the circle using Cajun Craze ink.

dsc04948.JPG

Removed the mask.

dsc04949.JPG

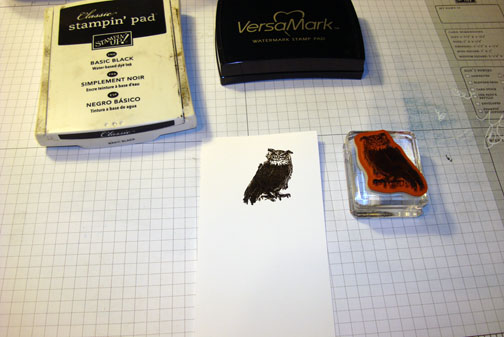
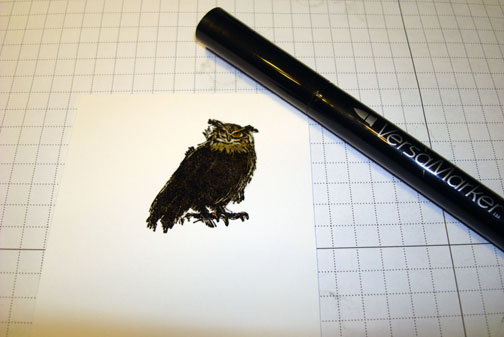
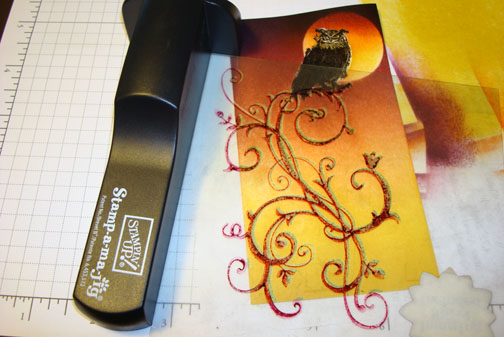
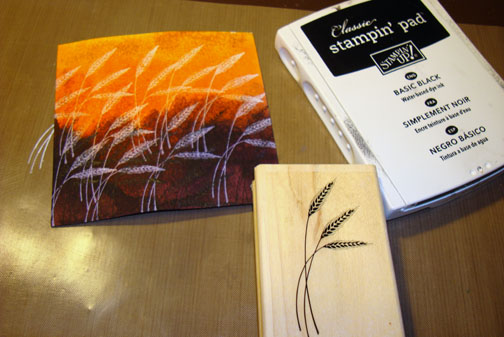
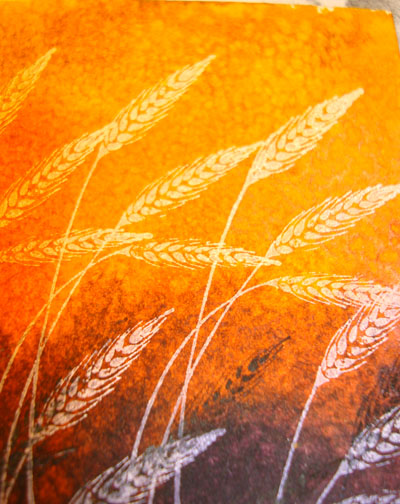
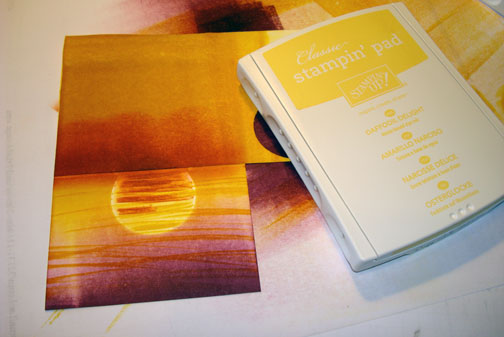
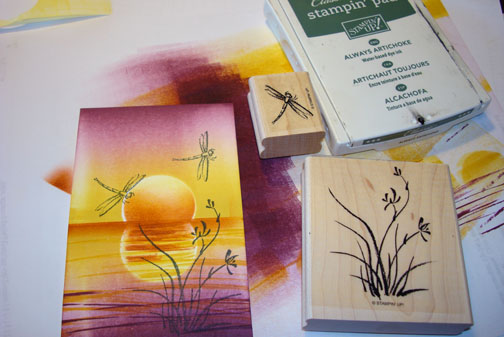
Stamped the Palm tree from the Stampin’ Up! set Plant Hope.

dsc04950.JPG

Ripped a post it note and put it on the bottom of the card stock and sponged in Basic Black ink to create a rock form.

dsc04951.JPG

dsc04952.JPG

Moved the post it note and sponged in Basic Black ink to create a second Rock form.

dsc04953.JPG

dsc04954.JPG

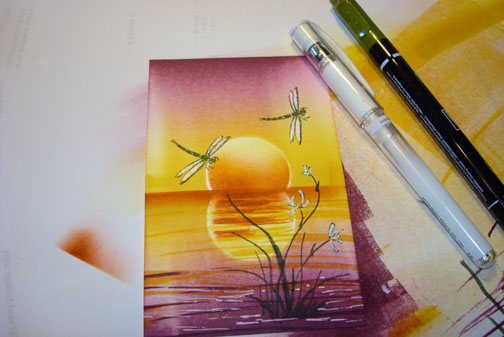
Added White Gel Pen highlight to the edge of the rock shape to define it.

dsc04955.JPG

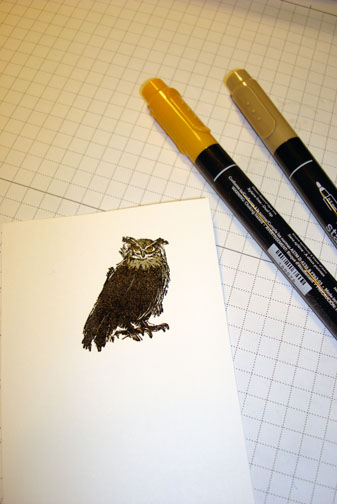
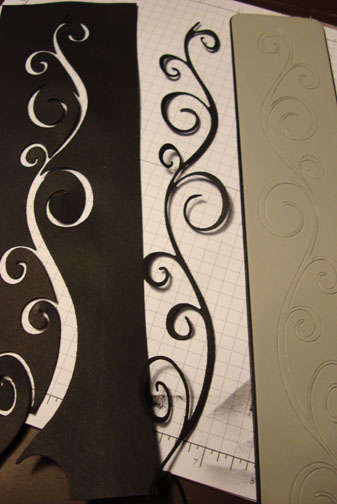
Removed the mask and colored in the trunk and vines of the leaves with a Basic Black marker.  Also added White Gel Pen highlights to the tree.

dsc04958.JPG

Punched some Flowers out of More Mustard card stock.

dsc04959.JPG

Sponged a bit of Cajun Craze ink on the flower punches.

dsc04960.JPG

Punched some leaves out of Old Olive card stock.

dsc04961.JPG

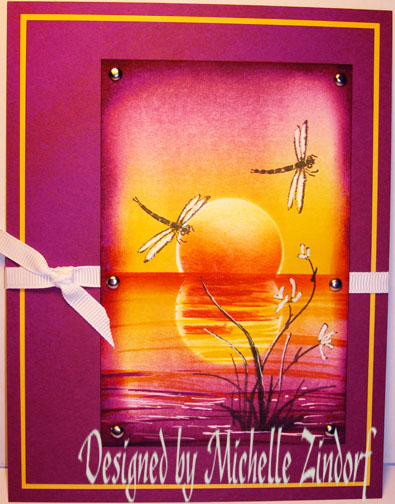
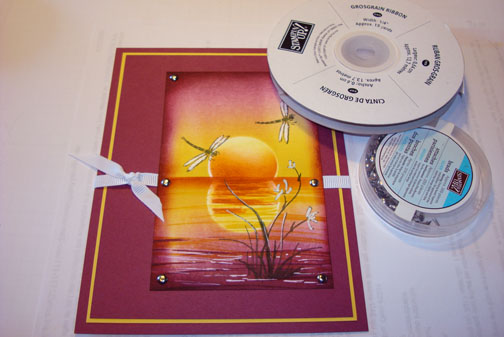
Added 2 Basic Black panels and a Baja Breeze panel to my Main image panel.  Glued some of the leaves on the lower right hand corner.

dsc04962.JPG

Glued the punched flowers together and added them to the card front. 

dsc04963.JPG

Added Basic Black brads to the flower centers.

dsc04964.JPG

I used my Stampin’ Up! Color Coach today for a quick color selection when choosing my card stock.  The color coach gives you 2 great color combos for every color.

dsc04965.JPG

Here is the finished card measuring 5″ x 6.5″. 

dsc04966.JPG

May your day be filled with the sights and sounds of the tropics.  Even if it is just a card you made.  🙂

Until my next post. . .  . . . . .

Hugs,

Michelle

 dsc04164-2.jpg  Get ready for Brayer Workshops!  I am coming to the following locations, click the location name for more information.

Venice, Florida

Grinnell, Iowa

Piedmont, Alabama (Near GA border close to Cedartown)

Auburn, Washington (near Seattle)

Elk Grove Village, Illinois

Savannah, Georgia

Atlanta, Georgia

Milton, West Virginia

Soledad, California

Fayette, Tennessee near Nashville, TN & Huntsville, AL

Tucson, Arizona

Virginia Beach, Virginia

Houston, Texas

Wichita, Kansas

Syracuse (Bridgeport), New York

St. Peters, Missouri

La Porte, Indiana

Orlando (Davenport), Florida

St. Cloud, Minnesota

Colorado Springs, Colorado

Cleveland (Euclid), Ohio

Here is a link to my workshop calendar where you can see all of my travel schedule and to get info on beginner and advanced Brayer workshops:   http://zindorf.blogs.splitcoaststampers.com/workshop-calendar 

Link to my Stampin’ Up website where you can order all of your must have Stampin’ Up products from me 24-7:  http://michellezindorf.stampinup.net

Frequently asked questions answers:  http://zindorf.blogs.splitcoaststampers.com/frequently-asked-questions/ 


Baroque Motifs Owl – Tutorial #355

dsc04936.JPG

I’m featuring this new Owl stamp from Stampin’ Up’s set “Dark & Dreary”.  This set will be in the up coming Holiday Mini Catalog that will be out September 1, 2010.   So this is really a sneak peek.   This is a great Halloween set, but I like using stamps in an unexpected way, grin.

If you are a Stampin’ Up Customer of mine, I will automatically mail you a Holiday Mini Catalog.   If you would like to be a customer of mine, please e-mail your address to me at mzindorf@aim.com and I will mail  you a Holiday Mini Catalog.  Sorry, this only applies to residence of the USA.

Let’s get started. . .

Supplies:

Stamps: Stampin’ Up! Dark & Dreary and Baroque Motifs
Paper: Stampin’ Up! Whisper White, Basic Black, Pear Pizzazz, Rich Razzelberry and Peach Parfait
Ink: Stampin’ Up Basic Black, Elegant Eggplant, Rich Razzelberry, Tangerine Tango, Daffodil Delight and Pear Pizzazz
Accessories: Stampin’ Up Sponges, White Gel Pen, More Mustard and Crumb Cake Markers, Versamark pad and Marker, Brayer, Clear embossing powder and heat gun, Piercing Tools, 1 3/8″ circle Punch, post it note, Big Shot Machine, Swirley Die Cut

The brand new USA Idea book and Catalog is here.   For your copy, please send a check for $9.95 to Michelle Zindorf, P.O. Box 116, West Alexandria, OH 45381 or send it via paypal to mzindorf@aim.com USA only.     Want a copy of the Summer Mini Catalog?  E-mail your mailing address to mzindorf@aim.com and I will get one in the mail to you.  )  Are you getting inspiration from this blog?   One way you can help support it is to order your Stampin’ Up products through me.   Click HERE to place an order.  Click HERE to check out the Stampin’ Up! catalogs.  Want to become a Stampin’ Up Demonstrator , receive a 20% discount on product and earn instant income on orders?  Consider being part of my Stampin’ Up Team and start your own business.  Click HERE for more information.

dsc04940.JPG

Stamped the Owl by first loading the stamp with Versamark and then with Basic Black ink before stamping it on a 2.75″ x 5″ piece of Whisper White card stock.

dsc04905.JPG

Colored the Owl’s eyes with a More Mustard marker and his neck and head with a Crumb Cake marker.

dsc04906.JPG

Colored over the Owl with a Versamark marker, being careful not to go out side of the image.  Heat embossed the Owl using clear embossing powder and a heat gun.

dsc04907.JPG

dsc04908.JPG

Stamped the Baroque Motifs Flourish by first loading the stamp with Versamark and then Pear Pizzazz ink before stamping it.  Heat embossed the flourish using clear embossing powder and a heat gun.

dsc04909.JPG

dsc04910.JPG

Punched a 1 3/8″ circle from a post it note to use as the sun mask.

dsc04911.JPG

Added the mask to my main image panel and brayered Tangerine Tango ink at the top of the card stock.

dsc04912.JPG

Brayered Rich Razzelberry ink at the top of the card stock, not covering the Tangerine Tango ink entirely.

dsc04913.JPG

Brayered Elegant Eggplant ink at the top of the card stock, not covering the Rich Razzelberry ink entirely.

dsc04914.JPG

Brayered Daffodil Delight ink at the bottom of the card stock.

dsc04915.JPG

Removed the Sun mask and Sponged Daffodil Delight ink in the sun area.

dsc04917.JPG

Sponged Tangerine Tango ink at the top of the sun.

dsc04918.JPG

Sponged just a bit of Rich Razzelberry ink at the very top of the sun.

dsc04919.JPG

Using a Stamp-a-ma-jig for placement, stamped the flourish again, just slightly to the left of the original stamped image using Rich Razzelberry ink.  This was done to create a bit of depth in the vine, giving it a shadowed underside.

dsc04920.JPG

Sponged Basic Black ink at the bottom of the card stock and added highlights to the top of some of the flourish.

dsc04921.JPG

Put together a Basic Black Layer, Peach Parfait layer, ripped Rich Razzelberry Layer and a Ripped Pear Pizzazz Layer.  Sponged Basic Black ink at the bottom of the Ripped Pear Pizzazz layer.

dsc04924.JPG

It’s hard to see, but I pierced holes in the Basic Black layer under the main image panel using piercing tools.

dsc04927.JPG

Added More Basic Black ink to the bottom of the card front.

dsc04929.JPG

Added a Swirley Die cut from Basic Black ink with the Big Shot Die Cutter.

dsc04930.JPG

Cut the Swirley die into 2 pieces and adhered them to the card front.

dsc04931.JPG

Here is the finished card measuring 5″ x 6.5″.

dsc04936.JPG

Well I am off tomorrow morning (Friday) to Venice, Florida where I will turn 30 ladies into Brayering Masters, OH YEA!

Have a super fun and safe weekend.  Catch ya on Tuesday. 

Until my next post. . . .  . . .

Hugs,

Michelle

 dsc04164-2.jpg  Get ready for Brayer Workshops!  I am coming to the following locations, click the location name for more information.

Venice, Florida

Grinnell, Iowa

Piedmont, Alabama (Near GA border close to Cedartown)

Auburn, Washington (near Seattle)

Elk Grove Village, Illinois

Savannah, Georgia

Atlanta, Georgia

Milton, West Virginia

Soledad, California

Fayette, Tennessee near Nashville, TN & Huntsville, AL

Tucson, Arizona

Virginia Beach, Virginia

Houston, Texas

Wichita, Kansas

Syracuse (Bridgeport), New York

St. Peters, Missouri

La Porte, Indiana

Orlando (Davenport), Florida

Colorado Springs, Colorado

Cleveland (Euclid), Ohio

Here is a link to my workshop calendar where you can see all of my travel schedule and to get info on beginner and advanced Brayer workshops:   http://zindorf.blogs.splitcoaststampers.com/workshop-calendar 

Link to my Stampin’ Up website where you can order all of your must have Stampin’ Up products from me 24-7:  http://michellezindorf.stampinup.net

Frequently asked questions answers:  http://zindorf.blogs.splitcoaststampers.com/frequently-asked-questions/ 


Big Moon Buck – Tutorial #353

dsc04842.JPG

I have a super quick tutorial for you today.  Russ is standing here with fishing pole in hand waiting on me.  So after this is posted I’m “GONE FISHING”.

Let’s get started. . . . . .  . .

Supplies:

Stamps: Stampin’ Up! Nature Silhouettes
Paper: Stampin’ Up! Marina Mist, Basic Black and Whisper White
Ink: Stampin’ Up! Marina Mist, Not Quite Navy and Basic Black
Accessories: Stampin’ Up Sponge, White Gel Pen, Silver Brads, Brayer, Piercing Tool

The brand new USA Idea book and Catalog is here.   For your copy, please send a check for $9.95 to Michelle Zindorf, P.O. Box 116, West Alexandria, OH 45381 or send it via paypal to mzindorf@aim.com USA only.     Want a copy of the Summer Mini Catalog?  E-mail your mailing address to mzindorf@aim.com and I will get one in the mail to you.  )  Are you getting inspiration from this blog?   One way you can help support it is to order your Stampin’ Up products through me.   Click HERE to place an order.  Click HERE to check out the Stampin’ Up! catalogs.  Want to become a Stampin’ Up Demonstrator , receive a 20% discount on product and earn instant income on orders?  Consider being part of my Stampin’ Up Team and start your own business.  Click HERE for more information.

dsc04844.JPG

Brayered Marina Mist ink at the top of a 4.5″ square piece of Whisper White card stock.

dsc04834.JPG

Used a 3.5″ die cut circle as a mask for the moon.

dsc04835.JPG

Holding the mask in place, brayered Not Quite Navy ink at the top of the card stock.

dsc04836.JPG

Stamped the Deer from the Stampin’ Up! set Nature Silhouettes using Basic Black ink.  Also Sponged the ground in using Basic Black ink.

dsc04837.JPG

Added White Gel Pen dots for the stars.

dsc04838.JPG

Added Marina Mist and Basic Black panels and Silver Brads in the corners of the main image panel.

dsc04839.JPG

That’s it folks, here it if finished measuring 5.5″ square.

dsc04842.JPG

May your Sunday be one of relaxation with the ones you love.

Until my next post. . . . . . . . .

Hugs,

Michelle

 dsc04164-2.jpg  Get ready for Brayer Workshops!  I am coming to the following locations, click the location name for more information.

Venice, Florida

Grinnell, Iowa

Piedmont, Alabama (Near GA border close to Cedartown)

Auburn, Washington (near Seattle)

Elk Grove Village, Illinois

Savannah, Georgia

Atlanta, Georgia

Milton, West Virginia

Soledad, California

Fayette, Tennessee near Nashville, TN & Huntsville, AL

Tucson, Arizona

Virginia Beach, Virginia

Houston, Texas

Wichita, Kansas

Syracuse (Bridgeport), New York

St. Peters, Missouri

La Porte, Indiana

Orlando (Davenport), Florida

Colorado Springs, Colorado

Cleveland (Euclid), Ohio

Here is a link to my workshop calendar where you can see all of my travel schedule and to get info on beginner and advanced Brayer workshops:   http://zindorf.blogs.splitcoaststampers.com/workshop-calendar 

Link to my Stampin’ Up website where you can order all of your must have Stampin’ Up products from me 24-7:  http://michellezindorf.stampinup.net

Frequently asked questions answers:  http://zindorf.blogs.splitcoaststampers.com/frequently-asked-questions/ 


Sentimental Journey in the Sky – Tutorial #351

dsc04763.JPG

Happy Monday Everyone!   I hope your weekend was relaxing and you were able to regenerate so you could start another week fully charged.   I taught in Middleburg Heights, Ohio on Saturday and traveled back home on Saturday evening.  It was so nice to sleep in my own bed for a change.  I was able to wake up, have breakfast with Russ and then see the new Twilight movie.  Love it!

If you haven’t noticed, I travel a great deal.   Traveling allot made this Stampin’ Up! set “Sentimental Journey” very appealing to me and I just had to have it.  My card today showcases how you can use sponged on Versamark that has been heat embossed with clear embossing powder to protect the white of the paper to create clouds and the plane’s exhaust.

Before we get going on the tutorial though I have two announcements to make. 

First, I have added the wonderful town of La Porte, Indiana to my Calendar of Cities I will be teaching my Brayer Workshops in.  Hope to see you there.  🙂

Second, I have a Lucky Blog Candy winner to announce.    

dsc04738.JPG  The winner of the Stampin’ Up! set “Inspired by Nature” is. . .. . . . .. . . . . …. .  .  . . . .

Bobbie in Montana, who wrote “This is my absolute, all time favorite stamp set!!! I would looove to win it! Your cards are spectacular; your talent and creativity amazing. Thanks for the inspiration!”

Bobbie, congratulations!   Please e-mail your address to mzindorf@aim.com within 30 days and I will pop this set into the mail to you.

Thank you to all who played along.  I hope you are the winner next week.  🙂

Now on with the tutorial. . . . .  .

Supplies:

Stamps: Stampin’ Up! Sentimental Journey
Paper: Stampin’ Up! Whisper White, Pumpkin Pie, Melon Mambo and Basic Black
Ink: Stampin’ Up! Tempting Turquoise, Pacific Point, Not Quite Navy and Basic Black
Accessories: Stampin’ Up! Mat Pack, Piercing Tool, Brayer, Sponge, Clear Embossing powder, Heat gun, Tulipe Die, Big Shot, Black Brads and Stamp-a-ma-jig

The brand new USA Idea book and Catalog is here.   For your copy, please send a check for $9.95 to Michelle Zindorf, P.O. Box 116, West Alexandria, OH 45381 or send it via paypal to mzindorf@aim.com USA only.     Want a copy of the Summer Mini Catalog?  E-mail your mailing address to mzindorf@aim.com and I will get one in the mail to you.  )  Are you getting inspiration from this blog?   One way you can help support it is to order your Stampin’ Up products through me.   Click HERE to place an order.  Click HERE to check out the Stampin’ Up! catalogs.  Want to become a Stampin’ Up Demonstrator , receive a 20% discount on product and earn instant income on orders?  Consider being part of my Stampin’ Up Team and start your own business.  Click HERE for more information.

dsc04764.JPG

Now in the first 4 photos you are not going to be able to see what I have actually done on the card stock.  You will need to look at photo 5 for placement.  🙂

On a 2.5″ x 4.75″ Piece of Whisper White card stock sponged Versamark on the top left and bottom right corners of the card stock.  Heat embossed the corners using clear embossing powder and a heat gun.

dsc04747.JPG

dsc04748.JPG

Added 2 post it notes and sponged Versamark in the unmasked area to create the exhaust and then heat embossed it using clear embossing powder and a heat gun.  Note:  leave the post it notes on the card stock until you are done heat embossing.

dsc04749.JPG

dsc04750.JPG

Removed the masks.  Brayered Tempting Turquoise ink on the card stock from the top down.  Now you can see the places I heat embossed.

dsc04751.JPG

Brayered Pacific Point ink at the top of the card stock, not covering the Tempting Turquoise ink entirely.

dsc04752.JPG

Wiped the excess ink off of the embossed images using a paper towel. 

dsc04753.JPG

Using a Stamp-a-ma-jig for placement, stamped the plane using Basic Black ink.

dsc04754.JPG

Stamped the sentiment using Pacific Point ink.

dsc04755.JPG

Sponged Not Quite Navy ink around the edges of the card stock.

dsc04756.JPG

Added Pumpkin Pie, Basic Black and Melon Mambo card stock panels.

Also added part of a Tulipe die, die cut from Basic Black card stock, Basic Black brads and pierced to lines of wholes using a piercing tool and  the mat pack for placement.

dsc04757.JPG

Here is the finished card measuring 5″ x 6.5″.

dsc04763.JPG

May your personal journey be life fulfilling.

Until my next post. . . . . .. .

Hugs,

Michelle

 dsc04164-2.jpg  Get ready for Brayer Workshops!  I am coming to the following locations, click the location name for more information.

Venice, Florida

Grinnell, Iowa

Piedmont, Alabama (Near GA border close to Cedartown)

Auburn, Washington (near Seattle)

Elk Grove Village, Illinois

Savannah, Georgia

Atlanta, Georgia

Soledad, California

Fayette, Tennessee near Nashville, TN & Huntsville, AL

Tucson, Arizona

Virginia Beach, Virginia

Houston, Texas

Wichita, Kansas

Syracuse (Bridgeport), New York

St. Peters, Missouri

La Porte, Indiana

Orlando (Davenport), Florida

Colorado Springs, Colorado

Here is a link to my workshop calendar where you can see all of my travel schedule and to get info on beginner and advanced Brayer workshops:   http://zindorf.blogs.splitcoaststampers.com/workshop-calendar 

Link to my Stampin’ Up website where you can order all of your must have Stampin’ Up products from me 24-7:  http://michellezindorf.stampinup.net

Frequently asked questions answers:  http://zindorf.blogs.splitcoaststampers.com/frequently-asked-questions/ 


Blog Candy Friday!!!

dsc04738.JPG

Happy Friday!!!

I have a real treat for you today.  But first I have a new Zindorf Brayer Workshop location to announce.  I will be returning to teach in Colorado Springs, CO, woohoo!  Remember to register early.  🙂

Sorry, no tutorial today.  I’m busy packing for my trip to Middleburg Heights, Ohio tomorrow morning where I will be teaching some fun and exciting projects to some brand new Brayer Masters.  Well at least they will be Brayer Masters when they have finished the workshop.  🙂

So in the mean time, how about I put up a Stampin’ Up! set “Inspired by Nature” as blog candy this week?    I used this set in my tutorial yesterday and it’s a must have for your collection.

If you would like to toss your hat in the ring to try to win this set, all you need to do is leave a comment at the bottom of this blog post telling me to enter you.  If you are receiving this blog update via e-mail please click HERE and then leave a comment at the bottom.  Please no e-mail entries.

I will select the winner using a random number generator on Monday, August 2nd.

Remember you can’t win if you don’t play.  Good luck!

May your day be filled with fun surprises.

Until my next post. . .  . . . . .

  dsc04164-2.jpg  Get ready for Brayer Workshops!  I am coming to the following locations, click the location name for more information.

Middleburg Heights, Ohio 

Venice, Florida

Grinnell, Iowa

Piedmont, Alabama (Near GA border close to Cedartown)

Auburn, Washington (near Seattle)

Elk Grove Village, Illinois

Savannah, Georgia

Atlanta, Georgia

Soledad, California

Fayette, Tennessee near Nashville, TN & Huntsville, AL

Tucson, Arizona

Virginia Beach, Virginia

Houston, Texas

Wichita, Kansas

St. Peters, Missouri

Syracuse (Bridgeport), New York

Orlando (Davenport), Florida

Colorado Springs, Colorado

Here is a link to my workshop calendar where you can see all of my travel schedule and to get info on beginner and advanced Brayer workshops:   http://zindorf.blogs.splitcoaststampers.com/workshop-calendar 

Link to my Stampin’ Up website where you can order all of your must have Stampin’ Up products from me 24-7:  http://michellezindorf.stampinup.net

Frequently asked questions answers:  http://zindorf.blogs.splitcoaststampers.com/frequently-asked-questions/ 


Turtle at Sunset – Tutorial #350

dsc04735.JPG

Woohoooo!  I have reached tutorial #350.  Sorry, but I just have to celebrate each milestone and give myself a pat on the back.  We often are our own worst critics.  How about being our own biggest fan instead.  🙂

Today’s tutorial uses the emboss resist technique along with brayering, masking etc. etc.  I need to use my clear embossing powder at the very least, once a week or I will go into withdrawal.  That could get ugly folks, lol.

Sometimes I find myself extremely layout challenged.  Tip, if this happens to you, just open up those Stampin’ Up! Idea Books and catalogs and be very inspired.  This layout comes from the Stampin’ Up! Summer Mini on page 19.  Now my card looks nothing like the card in the mini, but the layout so inspired me.  You get the picture, good.

Be sure to stop back to my blog tomorrow, hint, hint, I will be giving the Inspired by Nature stamp set away as blog candy.  You won’t want to miss signing up for that.  🙂

Now on with the tutorial. . . .  .

Supplies:

Stamps: Stampin’ Up! Inspired by Nature and Nature’s Nest
Paper: Stampin’ Up! Whisper White, Basic Black, Peach Parfait and Old Olive
Ink: Stampin’ Up! Basic Black, Always Artichoke, Old Olive, Cajun Craze, Daffodil Delight and Peach Parfait
Accessories: Stampin’ Up! Sponges, Versamark Pad and Marker, Markers River Rock and More Mustard, White Gel Pen, Crop-a-dile, Jumbo Brads, Brayer, Clear embossing Powder, Heat Gun and Twine

The brand new USA Idea book and Catalog is here.   For your copy, please send a check for $9.95 to Michelle Zindorf, P.O. Box 116, West Alexandria, OH 45381 or send it via paypal to mzindorf@aim.com USA only.     Want a copy of the Summer Mini Catalog?  E-mail your mailing address to mzindorf@aim.com and I will get one in the mail to you.  )  Are you getting inspiration from this blog?   One way you can help support it is to order your Stampin’ Up products through me.   Click HERE to place an order.  Click HERE to check out the Stampin’ Up! catalogs.  Want to become a Stampin’ Up Demonstrator , receive a 20% discount on product and earn instant income on orders?  Consider being part of my Stampin’ Up Team and start your own business.  Click HERE for more information.

dsc04737.JPG

On a 3.5″ x 6″ piece of Whisper White card stock, stamped the grasses from the Stampin’ Up! set “Inspired by Nature” by first loading the stamp with Versamark, then Old Olive ink and then patted some Always Artichoke at the bottom part of the grasses before stamping it.  Had to stamp this twice to get the grasses all the way across the card stock.

dsc04710.JPG

Heat embossed the images using clear embossing powder and a heat gun.

dsc04711.JPG

Stamped the Turtle from the Stampin’ Up! set “Nature’s Nest” by first loading my stamp with Versamark and then Basic Black ink before stamping it.

dsc04712.JPG

Heat embossed the turtle with clear embossing powder and a heat gun.

dsc04713.JPG

Colored the turtle in with a River Rock marker.

dsc04714.JPG

Added a bit of More Mustard marker.

dsc04715.JPG

Colored over the turtle again to blend things with the River Rock marker.

dsc04716.JPG

Colored the turtle with a Versamark marker and then heat embossed the image using clear embossing powder and a heat gun.  Now my embossed images will resist the brayered ink in the next steps.

dsc04717.JPG

Brayered Daffodil Delight ink at the top of the card stock.

dsc04718.JPG

Die cut the 3.5″ circle using my Big Shot and the Circles die.  Used the die cut as a mask for the sun.  I held the mask in place as I brayered Peach Parfait ink at the top of the card stock.

dsc04720.JPG

Held the mask in place as I brayered Cajun Craze ink at the very top of the card stock, not covering the Peach Parfait ink entirely.

dsc04721.JPG

Removed the sun mask and sponged Old Olive ink at the bottom of the card stock.

dsc04722.JPG

Sponged Basic Black ink at the bottom of the card stock, not covering the Old Olive sponging entirely.

dsc04723.JPG

Added White Gel Pen highlights to the grasses and the turtle.

dsc04725.JPG

Layered the main image panel with a Basic Black panel and then a 7″ x 4″ Peach Parfait Panel.

dsc04726.JPG

Cut a 4″ x 8″ panel from Old Olive.  Folded the end at the 7″ mark.  Ripped a tiny bit of the card stock off at one end.

dsc04727.JPG

Sponged Cajun Craze ink at the end of the card stock.

dsc04728.JPG

Sponged a bit of Basic Black ink at the very edge of the card stock.

dsc04729.JPG

Added Stampin’ Up! Jumbo Brads using a crop-a-dile to create the holes and to set the brads.

dsc04730.JPG

Added some twine.

dsc04731.JPG

Adhered the card front to the flap of Old Olive to finish off the card.

Here it is finished measuring 4″ x 7″.

dsc04735.JPG

I hope this tutorial has inspired you to get your embossing powder fix.

May your day be full of adventure.

Until my next post. .. .  . . . . . . .

Hugs,

Michelle

  dsc04164-2.jpg  Get ready for Brayer Workshops!  I am coming to the following locations, click the location name for more information.

Middleburg Heights, Ohio 

Venice, Florida

Grinnell, Iowa

Piedmont, Alabama (Near GA border close to Cedartown)

Auburn, Washington (near Seattle)

Elk Grove Village, Illinois

Savannah, Georgia

Atlanta, Georgia

Soledad, California

Fayette, Tennessee near Nashville, TN & Huntsville, AL

Tucson, Arizona

Virginia Beach, Virginia

Houston, Texas

Wichita, Kansas

St. Peters, Missouri

Syracuse (Bridgeport), New York

Orlando (Davenport), Florida

Here is a link to my workshop calendar where you can see all of my travel schedule and to get info on beginner and advanced Brayer workshops:   http://zindorf.blogs.splitcoaststampers.com/workshop-calendar 

Link to my Stampin’ Up website where you can order all of your must have Stampin’ Up products from me 24-7:  http://michellezindorf.stampinup.net

Frequently asked questions answers:  http://zindorf.blogs.splitcoaststampers.com/frequently-asked-questions/ 


Radish Field – Tutorial #348

dsc04511.JPG

Well in yesterday’s post I showed everyone how much loot I ordered from Stampin’ Up! with the coming out of the new catalog.  There is really only one problem with placing a large order.  What do you use first, lol.  It is so very easy to over whelm my little creative brain.   Anyway, I am posting today later than usual because I just needed to step back from all of my goodies and just let it all sink in for the morning hours. 

I went and had lunch with a friend, visited my youngest son’s new bachelor pad and then came back, took out my binder that has all of my stamps listed, opened it up to a random page and used the set it opened up to.    So today I used the brand new set “Homegrown.”  It seems totally appropriate to create a vegetable garden this time of year and this card would certainly be suitable for that home gardener.   Or better yet, give it to someone along with some of your home grown veggies.   Hint, hint. . . . , lol

I do have an announcement, I have added new locations to my Brayer Workshop Calendar.  I will be teaching in Syracuse (Bridgeport), New York and St. Peters, Missouri.   My workshops tend to fill up very quickly so register early.

Now let’s dive into today’s tutorial. . . . . .

Supplies:

Stamps: Stampin’ Up! Homegrown and Always
Paper: Stampin’ Up! Whisper White, Old Olive and Rose Red
Ink: Stampin’ Up! Soft Suede, More Mustard, Not Quite Navy, Tempting Turquoise, Early Espresso and Basic Black
Accessories: Stampin’ Up! Sponges, Color Spritze Tool, Versamark Pad and Marker, Markers Pear Pizzazz, Old Olive, Pink Pirouette, Rose Red and Soft Suede, Brayer, Clear embossing powder and heat gun

The brand new USA Idea book and Catalog is here.   For your copy, please send a check for $9.95 to Michelle Zindorf, P.O. Box 116, West Alexandria, OH 45381 or send it via paypal to mzindorf@aim.com USA only.     Want a copy of the Summer Mini Catalog?  E-mail your mailing address to mzindorf@aim.com and I will get one in the mail to you.  )  Are you getting inspiration from this blog?   One way you can help support it is to order your Stampin’ Up products through me.   Click HERE to place an order.  Click HERE to check out the Stampin’ Up! catalogs.  Want to become a Stampin’ Up Demonstrator , receive a 20% discount on product and earn instant income on orders?  Consider being part of my Stampin’ Up Team and start your own business.  Click HERE for more information.

dsc04512.JPG

Started out with a 4″ x 5.5″ piece of Whisper White card stock.

I stamped each image by loading my stamp with Versamark and then Basic Black ink before stamping it.  I then heat embossed the image using clear embossing powder before stamping the next image.

dsc04485.JPG

dsc04486.JPG

Colored the leaves with a Pear Pizzazz marker.  Added Old Olive marker to the dark areas of the leaves.

dsc04487.JPG

dsc04488.JPG

Colored the Radishes in with a Pink Pirouette marker.  Added Rose Red marker to the darker parts of the radishes.  The colored over the radishes again with the Pink Pirouette marker to blend.  Make sure your Rose Red marker has dried a bit so it doesn’t smear into the light areas of your radish when doing the blending step.

dsc04490.JPG

dsc04491.JPG

Colorer over the radishes and the bird with a Versamark marker and heat embossing the images using clear embossing powder and a heat gun.  Now the images are protected and will resist the ink in the next steps.

dsc04493.JPG

Rip a little bit of the sticky edge off a a couple of post it notes and mask the bottom of the main image panel.

dsc04494.JPG

Brayer Tempting Turquoise ink in the sky area.

dsc04495.JPG

Brayer Not Quite Navy ink at the very top of the card stock.

dsc04496.JPG

Take the post it notes off and turned them around to mask the sky area of the main image panel.

dsc04497.JPG

Brayer More Mustard ink at the bottom of the card stock.

dsc04498.JPG

Sponged Soft Suede along the top of the unmasked area.

dsc04499.JPG

Sponged Early Espresso ink right at the post it note edge.

dsc04500.JPG

Moved the mask down to the bottom of the leaves.  Sponged Soft Suede ink on.

dsc04501.JPG

Sponged a bit of Early Espresso ink at the post it notes edge.

dsc04502.JPG

Removed the mask and sponged Early Espresso ink around the edges of the card stock.

dsc04504.JPG

Put the Soft Suede marker in my Color Spritzer Tool and sprayed the bottom.  Love this tool for that speckled look.

dsc04505.JPG

dsc04506.JPG

Ripped the top right corner of the main image panel off and added an Old Olive Panel.  Sponged a bit of Early Espresso ink on the top right corner of the Old Olive panel.

dsc04507.JPG

Added a Rose Red and Old Olive panels.  Here is the finished card measuring 5″ x 6.5″. 

dsc04511.JPG

I hope this tutorial has inspired you to make a scene today.  🙂

May your evening be filled with stars and soft breezes.

Until my next post. . . . . .  .

Hugs,

Michelle

  dsc04164-2.jpg  Get ready for Brayer Workshops!  I am coming to the following locations, click the location name for more information.

Kenova (Huntington), West Virginia

Middleburg Heights, Ohio 

Venice, Florida

Grinnell, Iowa

Piedmont, Alabama (Near GA border close to Cedartown)

Auburn, Washington (near Seattle)

Elk Grove Village, Illinois

Savannah, Georgia

Atlanta, Georgia

Soledad, California

Fayette, Tennessee

Tucson, Arizona

Virginia Beach, Virginia

Houston, Texas

Wichita, Kansas

St. Peters, Missouri

Syracuse (Bridgeport), New York

Orlando (Davenport), Florida

Here is a link to my workshop calendar where you can see all of my travel schedule and to get info on beginner and advanced Brayer workshops:   http://zindorf.blogs.splitcoaststampers.com/workshop-calendar 

Link to my Stampin’ Up website where you can order all of your must have Stampin’ Up products from me 24-7:  http://michellezindorf.stampinup.net

Frequently asked questions answers:  http://zindorf.blogs.splitcoaststampers.com/frequently-asked-questions/ 


Salted Wheat – Tutorial #345

dsc04418.JPG

Let’s try a little Salted Background effect today.  I created this project for my Stampin’ Up! Team Technique Swap.  I don’t know why, but I was a bit scared to try this technique at first.   Now that I have and see the wonderful results you can get, I love it.

I do have to warn you to have all of the supplies needed for this card at arms length because you have to work pretty fast.

Also, no two will look the same.  I made 7, and tried to make them alike, but they are all quite different.  This one is my favorite.  It has a dark spot in the field and it makes me think someone is sneaking around out there.  Probably the children of the corn, I mean wheat, LOL.  I crack myself up!

Let’s get started. . . . .

Supplies:

Stamps: Stampin’ Up! Autumn Days
Paper: Watercolor Paper, Stampin’ Up! Basic Black and Pumpkin Pie
Ink: Stampin’ Up! More Mustard, Pumpkin Pie, Bravo Burgundy, Basic Black and White Craft ink.
Accessories: Non Stick Craft sheet, Aqua Painter, Gold Brads, Sponge, Sea Salt and a heat gun

The brand new USA Idea book and Catalog is here.   For your copy, please send a check for $9.95 to Michelle Zindorf, P.O. Box 116, West Alexandria, OH 45381 or send it via paypal to mzindorf@aim.com USA only.     Want a copy of the Summer Mini Catalog?  E-mail your mailing address to mzindorf@aim.com and I will get one in the mail to you.  )  Are you getting inspiration from this blog?   One way you can help support it is to order your Stampin’ Up products through me.   Click HERE to place an order.  Click HERE to check out the Stampin’ Up! catalogs.  Want to become a Stampin’ Up Demonstrator , receive a 20% discount on product and earn instant income on orders?  Consider being part of my Stampin’ Up Team and start your own business.  Click HERE for more information.

dsc04416.JPG

You will need something to work on, non stick craft sheet, plastic tray etc.   Also, water color paper cut to 4″ square and a spray bottle full of water.

dsc04400.JPG

Reinkers in More Mustard, Pumpkin Pie, Bravo Burgundy and Elegant Eggplant.

dsc04401.JPG

Put some of each color reinker in the coordinating ink pad lid.

dsc04402.JPG

Spray your watercolor paper to get it wet.  Let it dry a bit so there are no puddles on the paper.

dsc04403.JPG

Start by putting More Mustard ink heavy on the top of the paper using an Aqua Painter and dipping it in the ink.

Continue with Pumpkin pie right below the More Mustard.  

Continue with Bravo Burgundy ink, right below the Pumpkin pie.

Contine with Elegant Eggplant ink, right below the Bravo Burgundy.

Make sure you are saturating the paper with ink.  Over lap the colors a bit.

dsc04404.JPG

While the paper is still wet, sprinkle Sea Salt on the paper.  The more you use the more texture you will get.

dsc04405.JPG

Dried the paper with a heat gun, flattening it as it dried.

Stamped the Wheat using Whisper White craft ink and then stamp some in Basic Black at the bottom of the paper.

Also sponged Basic Black ink at the bottom of the card stock to blend in bottom of Wheat Stems.

dsc04408.JPG

This is a close up of the dried background.  See how the salt left little dots all over.

dsc04410.JPG

Finished the card with Basic Black, Pumpkin Pie Panels and Gold Brads.

Here it is finished measuring 5.25″ square.

dsc04418.JPG

I hope you enjoyed this unusual tutorial from me.  Give it a try!

May your day be filled with warm gentle breezes.

Until my next post.. . .  . . . .

Hugs,

Michelle

 dsc03326-2.jpg   Get ready for Brayer Workshops!  I am coming to the following locations, click the location name for more information.

Kenova (Huntington), West Virginia

Middleburg Heights, Ohio 

Venice, Florida

Grinnell, Iowa

Piedmont, Alabama (Near GA border close to Cedartown)

Auburn, Washington (near Seattle)

Elk Grove Village, Illinois

Savannah, Georgia

Atlanta, Georgia

Soledad, California

Tucson, Arizona

Virginia Beach, Virginia

Houston, Texas

Wichita, Kansas

Orlando (Davenport), Florida

Here is a link to my workshop calendar where you can see all of my travel schedule and to get info on beginner and advanced Brayer workshops:   http://zindorf.blogs.splitcoaststampers.com/workshop-calendar 

Link to my Stampin’ Up website where you can order all of your must have Stampin’ Up products from me 24-7:  http://michellezindorf.stampinup.net

Frequently asked questions answers:  http://zindorf.blogs.splitcoaststampers.com/frequently-asked-questions/ 


A Little Crabby – Tutorial #344

dsc04393.JPG

Well I am back from taking a little holiday to spend some quality time with my Grand Daughter, Hailie Jade.   We have been having a blast.  I hope you have been having as much fun as we have been having.   Here are few pics of what I have been up to.  🙂

FISHING!  Hailie Jade was the Queen Fisher Woman, for catching two fish.

dsc04372.JPG   dsc04376.JPG

Hailie Jade also taught her Dad, Mitch how to bake a cake and the proper way to clean the beater, LOL.  I want to be almost seven again.  🙂

dsc04364.JPG

Now don’t laugh but Russ and I are both sporting sparkly tattoos on our arms today.  🙂

Enough about my fun.

How about a tutorial. .. . . . .. . . .  .

Today’s tutorial highlights the Stampin’ Up! Level 1 hostess set, It’s the Thought from the Summer Mini Catalog.  I love this little crab, he just makes me happy.

Let’s get started. . . . .

Supplies:

Stamps: Stampin’ Up! It’s The Thought
Paper: Stampin’ Up! Whisper White, Tempting Turquoise, Pumpkin Pie and So Saffron
Ink: Stampin’ Up! Tempting Turquoise, So Saffron and Cherry Cobbler
Accessories: Stampin’ Up! Pumpkin Pie Ribbon, Pumpkin Pie marker, Cherry Cobbler marker, Pumpkin Pie Brads, Brayer, Sponges, Scalloped Edge Punch and Post it notes.

The brand new USA Idea book and Catalog is here.   For your copy, please send a check for $9.95 to Michelle Zindorf, P.O. Box 116, West Alexandria, OH 45381 or send it via paypal to mzindorf@aim.com USA only.     Want a copy of the Summer Mini Catalog?  E-mail your mailing address to mzindorf@aim.com and I will get one in the mail to you.  )  Are you getting inspiration from this blog?   One way you can help support it is to order your Stampin’ Up products through me.   Click HERE to place an order.  Click HERE to check out the Stampin’ Up! catalogs.  Want to become a Stampin’ Up Demonstrator , receive a 20% discount on product and earn instant income on orders?  Consider being part of my Stampin’ Up Team and start your own business.  Click HERE for more information.

dsc04397.JPG

Brayered So Saffron ink at an angle on a 3.5″ square piece of Whisper White card stock.

dsc04378.JPG

Brayered Tempting Turquoise ink at an angle on the opposite corner.

dsc04379.JPG

Ripped a post it note and sponged Tempting Turquoise ink at the post it note edge to create ripples in the water.   Moved the post it note and repeated two times.

dsc04380.JPG

dsc04381.JPG

dsc04382.JPG

dsc04383.JPG

dsc04384.JPG

Stamped the crab in Cherry Cobbler ink.

dsc04385.JPG

Colored the crab in with a Pumpkin Pie marker.

dsc04386.JPG

Added a bit of Cherry Cobbler ink to the underside of the crabs body, legs and arms.  Softened the shadow of the Cherry Cobbler marker by added a bit of Pumpkin Pie marker.  Now he looks a little more 3 D.

dsc04387.JPG

Using a straight Post it Note, sponged So Saffron ink at the post it notes edge to create a shadow under the crab.

dsc04388.JPG

Ripped the post it note in a hill shape and sponged So Saffron ink at the post it notes torn edge to create a couple of hills in the sand for interest.

dsc04389.JPG

Cut a 3.5″ x 5″ piece of Pumpkin Pie card stock and punched the two edges using the Scalloped edge punch.

dsc04390.JPG

Used my brand new Color Coach today to figure out my layers.  Love this new Color Coach Design.

dsc04391.JPG

Assembled my card and added brads and ribbon. 

Tip:  cut a slit in the edge of your ribbon spool and tuck the ribbon end into it to keep it from unwinding.  🙂

dsc04392.JPG

Here is the finished card measuring 5″ x 6.5″.

dsc04393.JPG

I hope this tutorial has inspired you to create a beach scene.

May your day be filled with warmth and happiness.

I am off to go biking with Hailie Jade.

Until my next post. . . .

Hugs,

Michelle

 dsc03326-2.jpg   Get ready for Brayer Workshops!  I am coming to the following locations, click the location name for more information.

Kenova (Huntington), West Virginia

Middleburg Heights, Ohio 

Venice, Florida

Grinnell, Iowa

Piedmont, Alabama (Near GA border close to Cedartown)

Auburn, Washington (near Seattle)

Elk Grove Village, Illinois

Savannah, Georgia

Atlanta, Georgia

Soledad, California

Tucson, Arizona

Virginia Beach, Virginia

Houston, Texas

Orlando (Davenport), Florida

Here is a link to my workshop calendar where you can see all of my travel schedule and to get info on beginner and advanced Brayer workshops:   http://zindorf.blogs.splitcoaststampers.com/workshop-calendar 

Link to my Stampin’ Up website where you can order all of your must have Stampin’ Up products from me 24-7:  http://michellezindorf.stampinup.net

Frequently asked questions answers:  http://zindorf.blogs.splitcoaststampers.com/frequently-asked-questions/ 


Farewell Asian Artistry – Tutorial #343

dsc043592.jpg

Good Afternoon!  

How about a farewell tutorial for the Stampin’ Up! Level 2 hostess set, Asian Artistry.  I have loved using this set and will be sad to see it retire, but happy to see new and exciting hostess sets in the brand new Idea Book and Catalog that starts July 1, 2010.  So Farewell to all of the 2009-2010 Hostess sets.  I will miss you just like old friends.     Contact me at mzindorf@aim.com if you wish to purchase a new 2010-2011 Idea Book & Catalog for $9.95.

I have a couple things to report before starting today’s tutorial.  

I’m so very happy to announce that I have added Orlando (Davenport), Florida to my Brayer Workshop calendar.  Click HERE for more details. 

Now it is Blog Candy Winner Time!!!! Yeah!!!  I have a winner and it is   . . . . . . . . . .  .. . . .  . . . .

dsc04226.JPG 

linda zaworski who wrote “Unbelievably gorgeous!!! I can not wait for you to come to Baltimore next year. I need to learn from you Obi-wan with-the-brayer! You are amazing!”

Linda you crack me up, lol.     Congratulations!  Please e-mail your address to mzindorf@aim.com within 30 days and I will get this set of Asian Artistry right out to you.

Thank you to all who played along.  Keep trying it may be you that wins next week.  🙂

Now it is tutorial time. . . . . .

Supplies:

Stamps: Stampin’ Up Asian Artistry
Paper: Stampin’ Up Whisper White, Rich Razzleberry and Daffodil Delight
Ink: Stampin’ Up Always Artichoke, Daffodil Delight and Cajun Craze
Accessories: Stampin’ Up White Gel Pen, Brayer, Always Artichoke Marker, Silver Brads, Sponges, Whisper White Ribbon

Live in the USA and need a copy of the Summer Mini Catalog?  E-mail your mailing address to mzindorf@aim.com and I will get one in the mail to you.  )  Are you getting inspiration from this blog?   One way you can help support it is to order your Stampin’ Up products through me.   Click HERE to place an order.  Click HERE to check out the Stampin’ Up! catalogs.  Want to become a Stampin’ Up Demonstrator , receive a 20% discount on product and earn instant income on orders?  Consider being part of my Stampin’ Up Team and start your own business.  Click HERE for more information.

dsc04363.JPG

Punched a 1 3/8″ circle from a double layer of post it notes.

dsc04335.JPG

Put 1 layer of the circle punch on a 3.25″ x 5″ piece of Whisper White card stock.   Used the post it notes that I punched the circles from to mask the bottom of the card stock, covering a bit of the circle.

dsc04336.JPG

Brayered Daffodil Delight ink on the card stock, starting at the post it note and working upward.

dsc04337.JPG

Brayered Rich Razzleberry ink at the top of the card stock.

dsc04338.JPG

Punched the 1 3/8″ circle punch out of a scrap piece of card stock.

dsc04339.JPG

Removed the circle mask and left the post it notes in place.  Placed the card stock with the circle punched out over my main image panel, lining the circle up with the circle on the card stock.

dsc04340.JPG

Sponged Daffodil Delight ink in the circle.

dsc04341.JPG

Sponged Cajun Craze ink at the bottom of the circle.

dsc04342.JPG

Removed the scrap card stock with the circle punched out.  This is what the sun looks like after sponging.

dsc04343.JPG

Removed all the masks. 

Put the remaining post it note circle on the card stock to create the reflection of the sun.

dsc04344.JPG

Masked the sky area of the card stock with the post it notes.  Brayered Daffodil Delight at the top of the water area.

dsc04345.JPG

Brayered Rich Razzleberry ink at the bottom of the water area.

dsc04346.JPG

Removed just the sun mask and put the scrap card stock mask back on.  This time over the reflection of the sun.

dsc04347.JPG

Sponged Daffodil Delight ink in the circle.

dsc04348.JPG

Using the edge of the Daffodil Delight ink pad, swiped it over the circle.

dsc04349.JPG

Using the edge of the Cajan Craze ink pad, swiped the ink over the circle.

dsc04350.JPG

Removed the scrap card stock and sponged Cajun Craze at the post it note edge to darken the horizon line.

dsc04351.JPG

Using the edge of the Daffodil Delight and Rich Razzleberry ink pads, swiped in water lines.

dsc04352.JPG

dsc04353.JPG

Stamped the plant and Dragonfly images using Always Artichoke ink.

dsc04354.JPG

Colored in the dragonfly bodies with an Always Artichoke marker and colored the Dragonfly’s wings, the blossoms on the plant in with a White Gel Pen.  Also added a few water lines using the white gel pen.

dsc04355.JPG

Sponge Rich Razzleberry ink around the edges of the card-stock.

dsc04356.JPG

Added Rich Razzleberry and Daffodil Delight card stock panels, Silver Brads and Whisper White Ribbon.

dsc04357.JPG

Here is the finished card measuring 5″ x 6.5″.

dsc043592.jpg

I hope you have found inspiration in this tutorial.

May your day be delightful in every way.

Until my next post. . . . . . .

Hugs,

Michelle

dsc03326-2.jpg   Get ready for Brayer Workshops!  I am coming to the following locations, click the location name for more information.

Kenova (Huntington), West Virginia

Middleburg Heights, Ohio 

Venice, Florida

Grinnell, Iowa

Piedmont, Alabama (Near GA border close to Cedartown)

Auburn, Washington (near Seattle)

Elk Grove Village, Illinois

Savannah, Georgia

Atlanta, Georgia

Soledad, California

Tucson, Arizona

Virginia Beach, Virginia

Houston, Texas

Orlando (Davenport), Florida

Here is a link to my workshop calendar where you can see all of my travel schedule and to get info on beginner and advanced Brayer workshops:   http://zindorf.blogs.splitcoaststampers.com/workshop-calendar 

Link to my Stampin’ Up website where you can order all of your must have Stampin’ Up products from me 24-7:  http://michellezindorf.stampinup.net

Frequently asked questions answers:  http://zindorf.blogs.splitcoaststampers.com/frequently-asked-questions/