ISC Sketch of Nature Tree – Tutorial #206

dsc08998.JPG

This is going to be one long post today.  I have a tutorial for you and Savannah photos to follow.  🙂

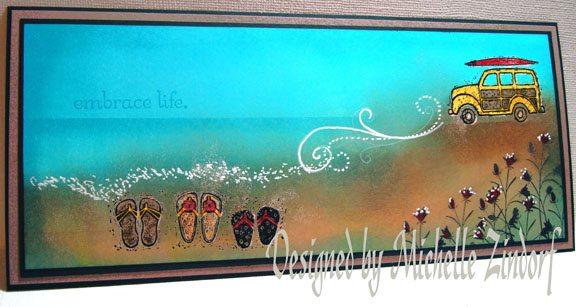
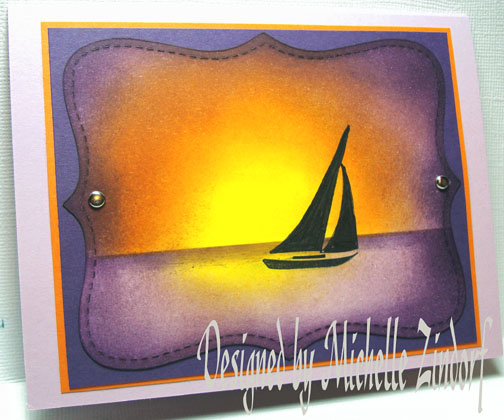
I am using the Innovative Stamp Creations stamps, Sketch of Nature I in today’s tutorial.  I thought I would show these stamps in a summer scene since I have already used them in a winter scene in another tutorial.

If you wish to check out all of Innovative Stamp Creations stamps, here is their online store link:  http://www.innovativestampcreations.com/ischomepage.html

Let’s get started on the tutorial.  🙂
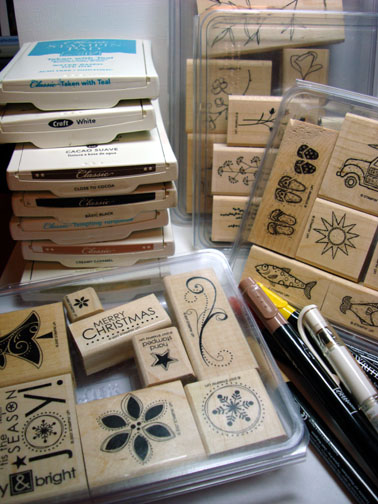
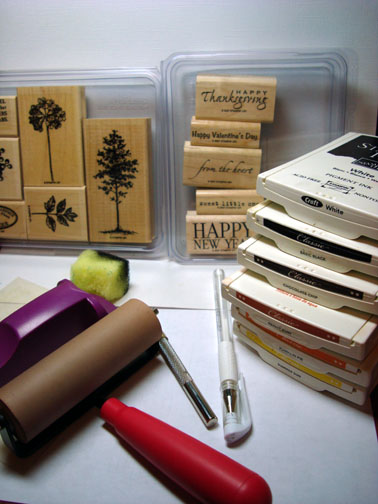
Supplies:

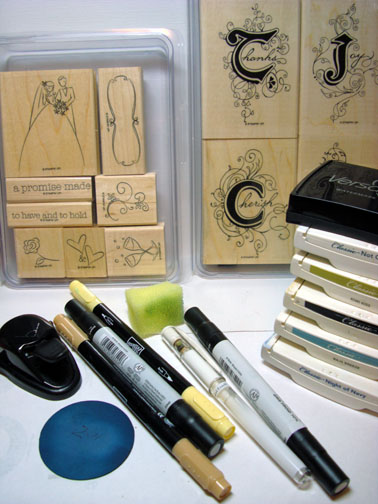
Stamps: Innovative Stamp Creations, Sketch of Nature and Assemblage
Paper: Stampin’ Up Whisper White and Bravo Burgundy
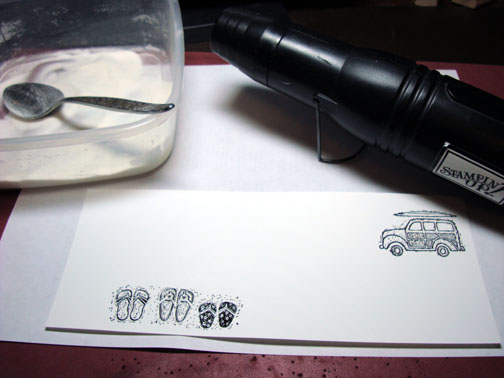
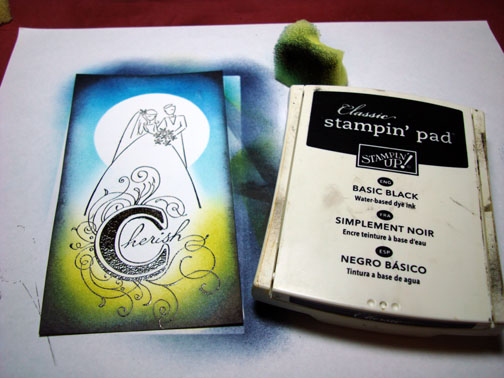
Ink: Distress inks – Old Paper, Aged Mahogany, Brushed Corduroy, Black Soot, Walnut Stain, Frayed Burlap, Peeled Paint
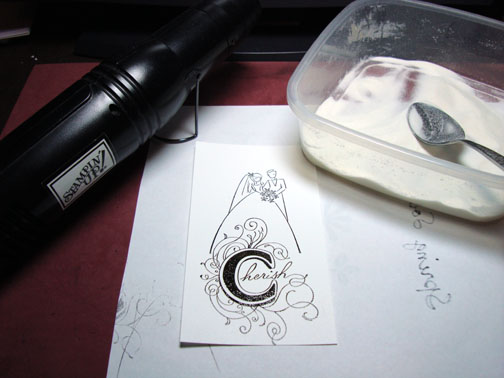
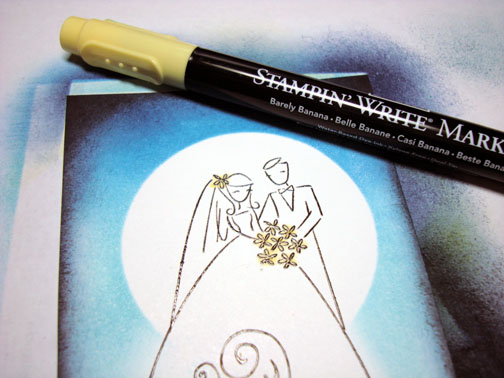
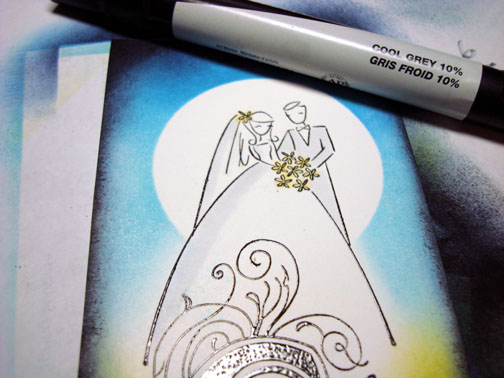
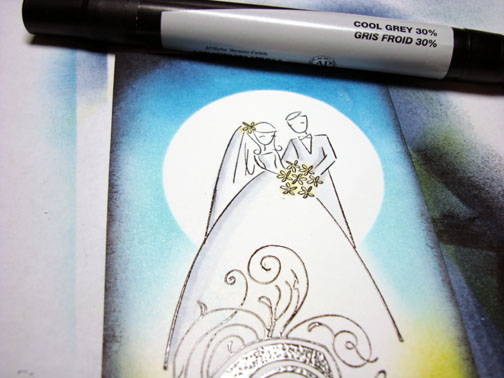
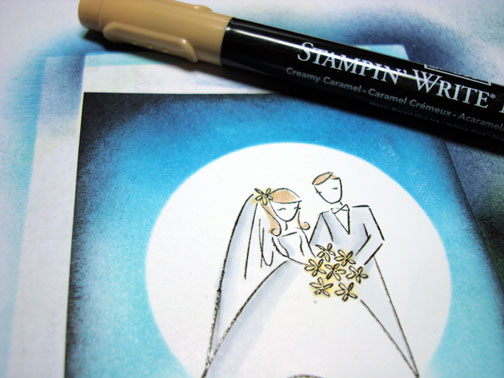
Accessories: White Gel Pen, Black marker, Prismacolor pencils, post it note, sponge

Are you inspired by this Blog?  One way for you can help support this blog is by ordering your Stampin’ Up products through me.   You can order from me 24-7 from this link:  http://michellezindorf.stampinup.net or e-mail me at mzindorf@aim.com if you are within the United States.  Want to become a Stampin’ Up Demonstrator and earn instant income?  Consider being part of my Stampin’ Up Team.  My Upline, Karen Barber and I have valuable monthly meetings in Miamisburg, Ohio.

dsc09000.JPG

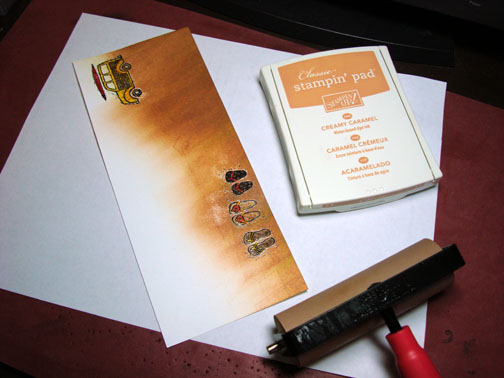
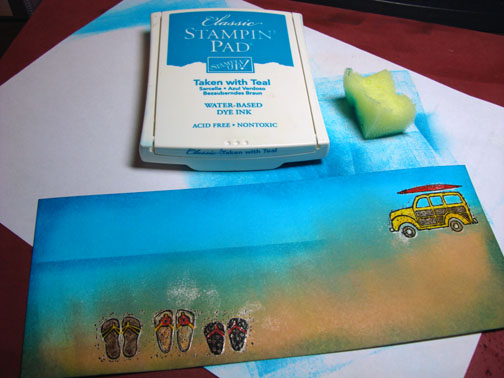
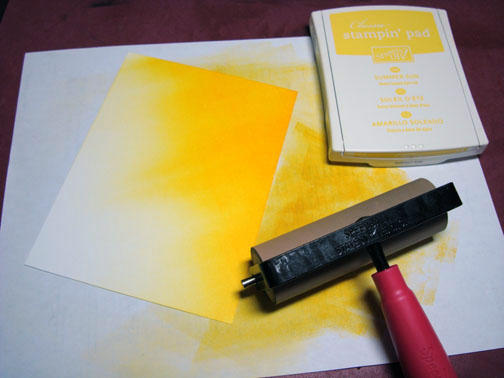
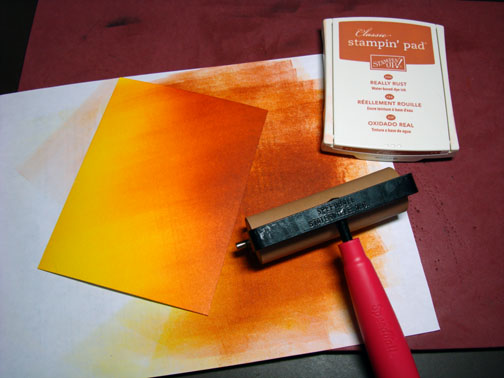
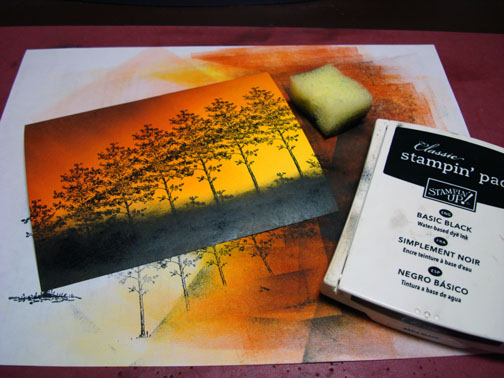
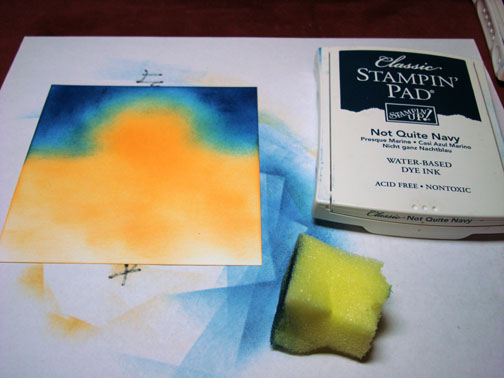
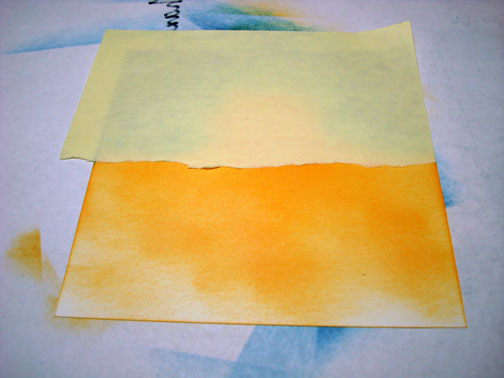
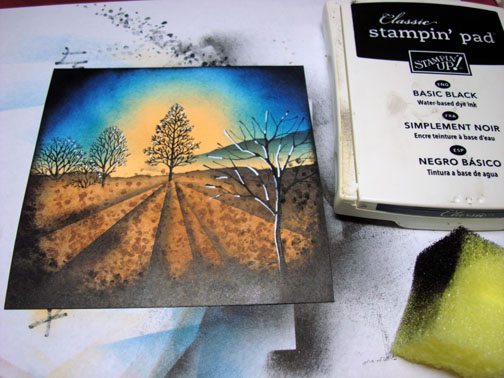
Smeared Old Paper Distress ink on a 5″ square piece of Whisper White card stock leaving a little of the white showing through.

dsc08971.JPG

Smeared Frayed Burlap ink at the bottom and the top of the card stock.

dsc08972.JPG

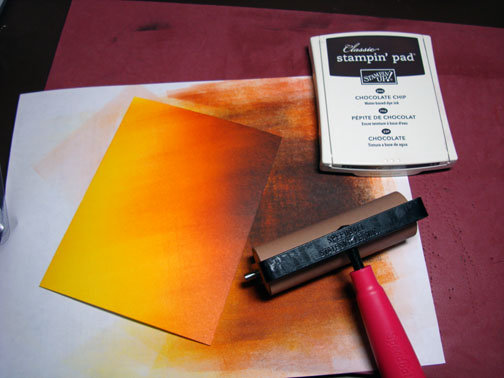
Smeared Brushed Corduroy ink at the top and bottom of the card stock.

dsc08973.JPG

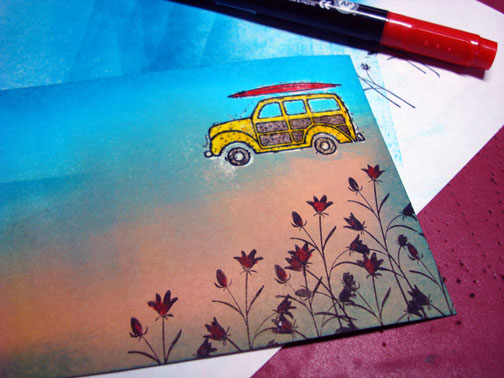
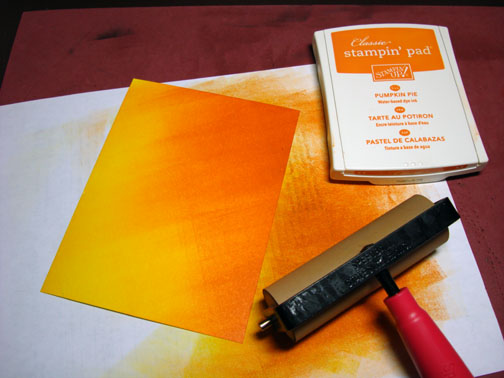
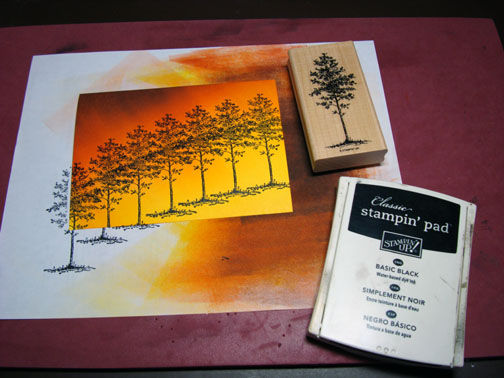
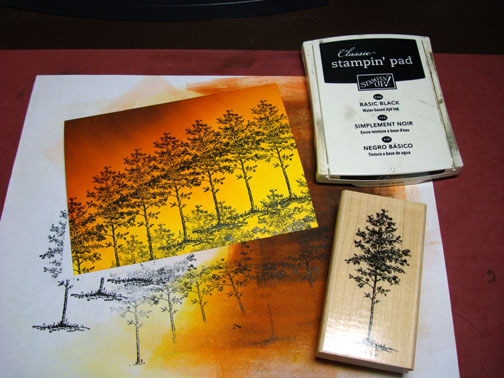
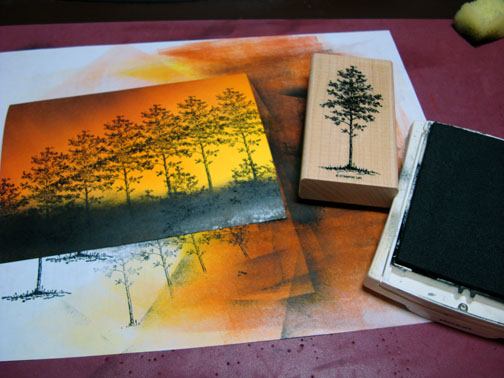
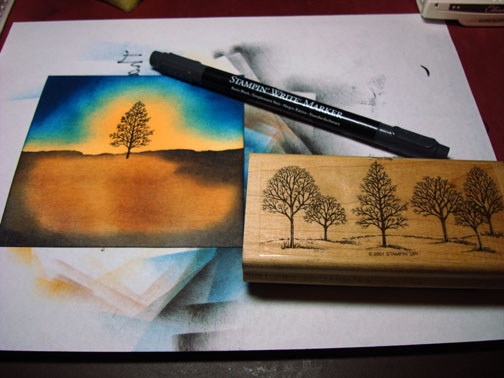
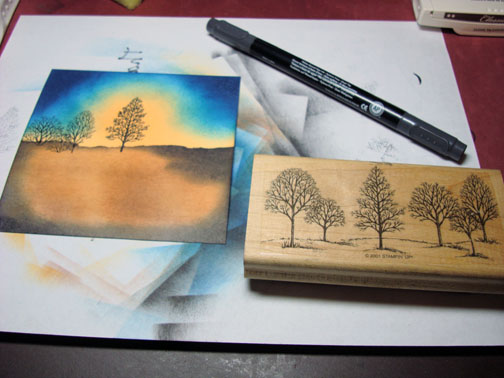
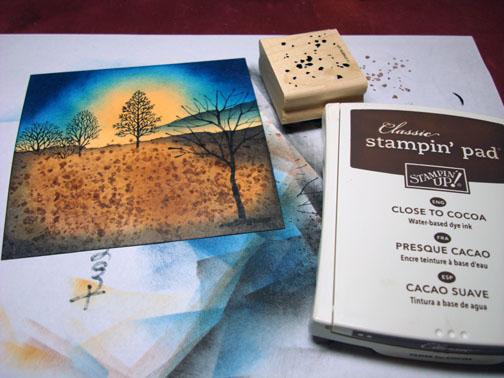
Loaded Peeled Paint ink on the tree stamp, then loaded Walnut Stain ink on the trucks of the trees before stamping it. 

dsc08974.JPG

dsc08975.JPG

Stamped the trees on the left side of the card stock.

dsc08976.JPG

Colored the leaf area of the trees with a Vert Lime Prismacolor pencil.

dsc08977.JPG

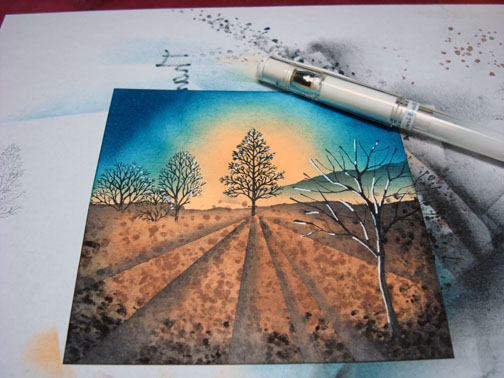
Added some White Gel pen to the tops of the leaf area.

dsc08978.JPG

Colored in the trunks of the trees with a Black Prismacolor pencil.

dsc08979.JPG

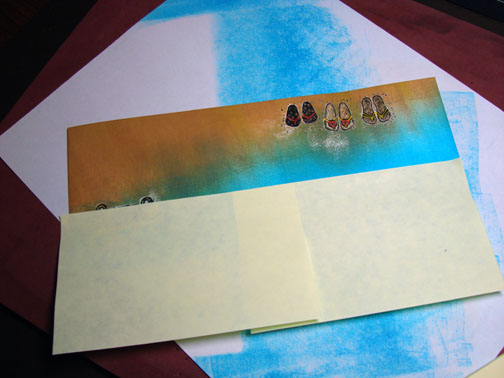
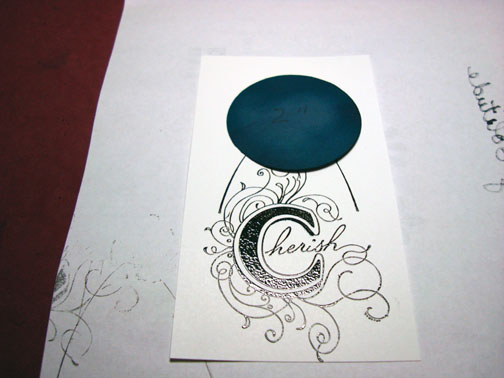
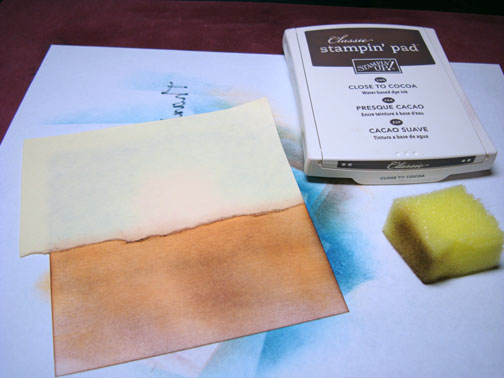
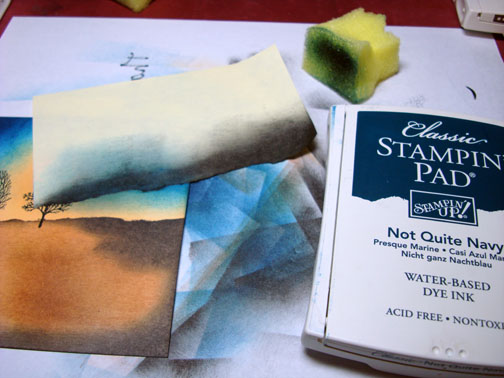
Ripped a hill shape in a post it note and used it to create a hill.

dsc08980.JPG

Streaked Frayed Burlap at the post it note edge and then on to the card stock.

dsc08981.JPG

Smeared Brushed Corduroy ink at the post it note edge and then on to the card stock.

dsc08982.JPG

Smeared a bit of Aged Mahogany ink at the post it note edge and then on to the card stock.

dsc08983.JPG

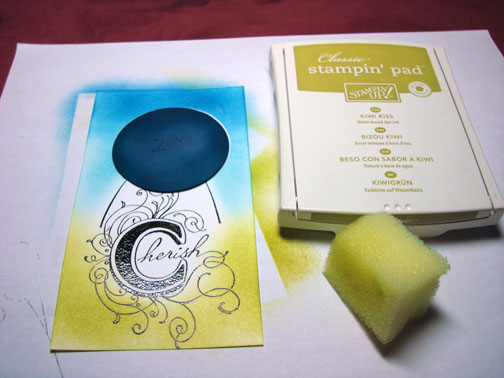
Removed post it note mask and smeared Aged Mahogany at the top and bottom of the card stock.

dsc08985.JPG

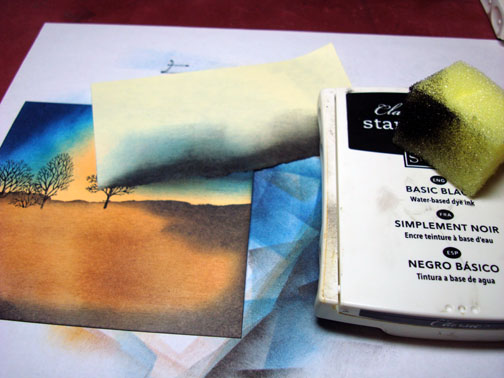
Added a bit of Kelp Green Prismacolor pencil to the bottom of the leaf areas to create a bit of shadow in the tree.

dsc08986.JPG

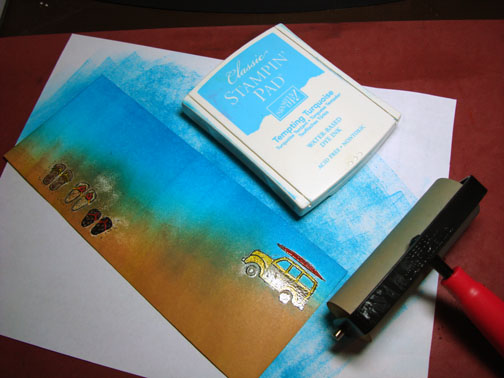
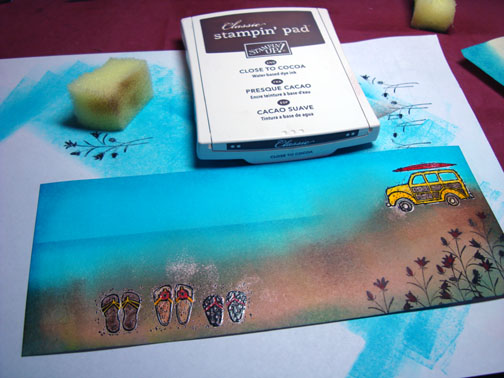
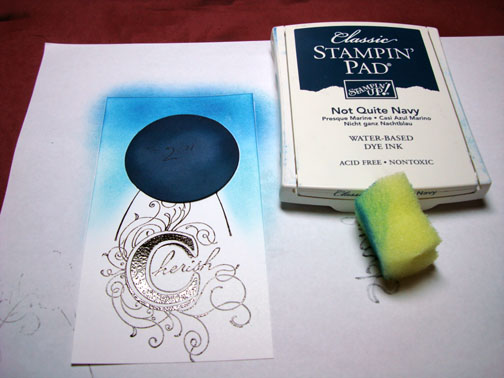
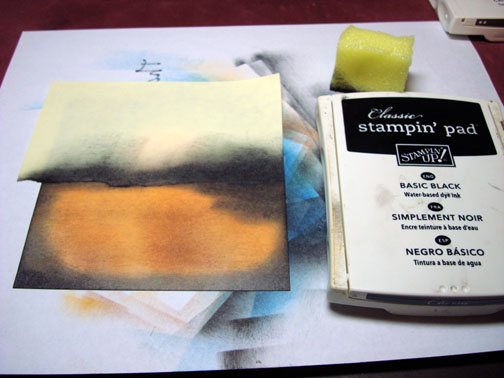
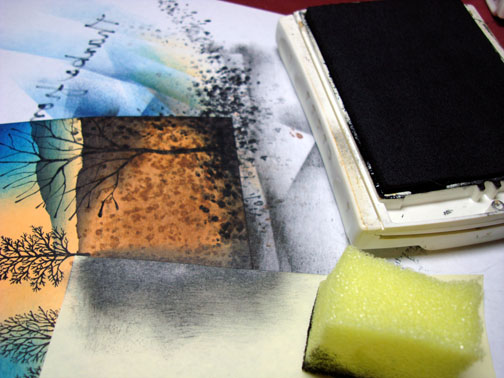
Smeared a bit of Black Soot ink at the top of the ground area.

dsc08987.JPG

Smeared Black Soot ink at the top and bottom of the card stock.

dsc08988.JPG

Added more Frayed Burlap ink in the sky area on the right side to balance it out a bit more.

dsc08989.JPG

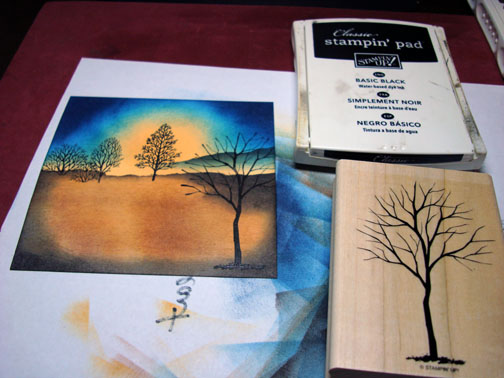
Darkened some of the trunks and limbs on the left side with a black fine tip marker.

dsc08990.JPG

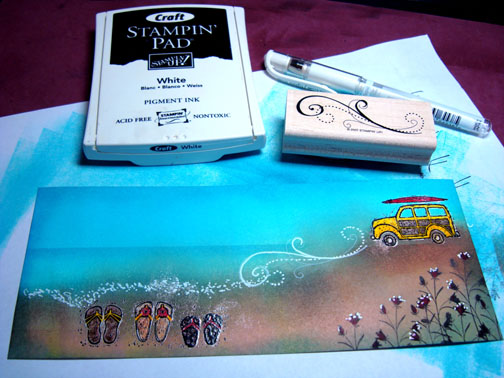
Added more white gel pen highlights to the top of the leaf areas.

dsc08992.JPG

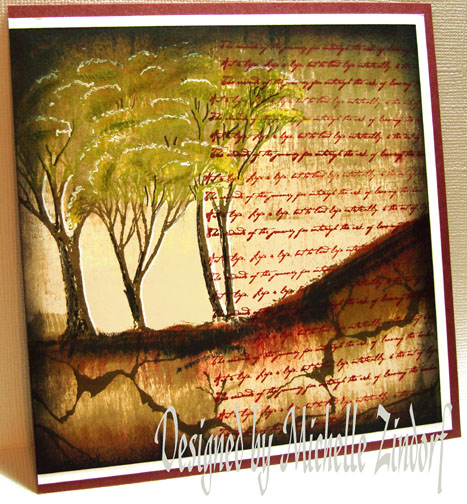
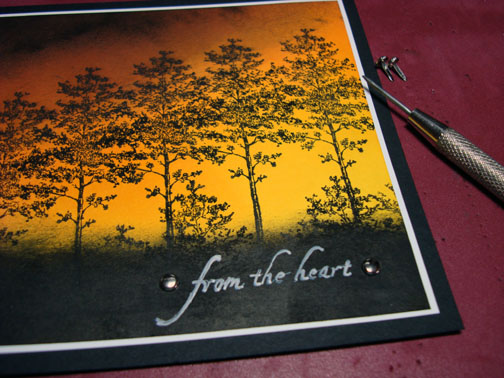
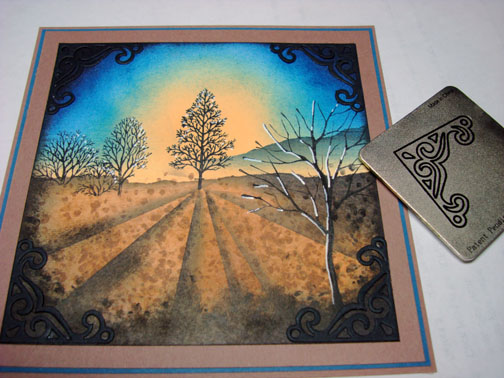
Stamped the writing stamp from the Innovative Stamp Creation Sheet, Assemblage with Aged Mahogany ink all down the right side of the card stock.

dsc08993.JPG

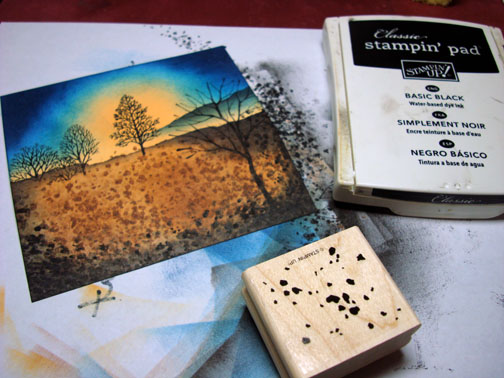
Stamped the cracks/marble looking stamp from Innovative Stamp creations sheet, Assemblage at the bottom of the card stock in the ground area with Walnut Stain ink.

dsc08994.JPG

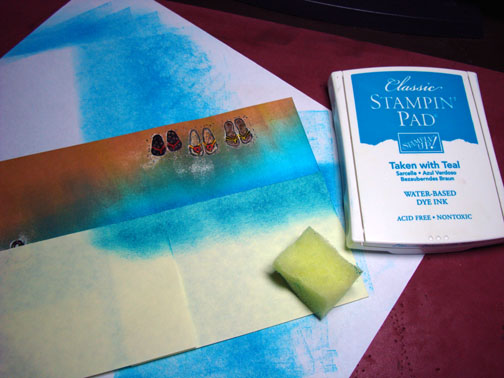
Sponged Black Soot ink all around the outside edge of the card stock.

dsc08995.JPG

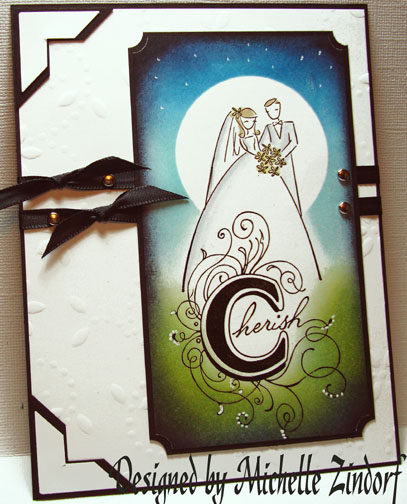
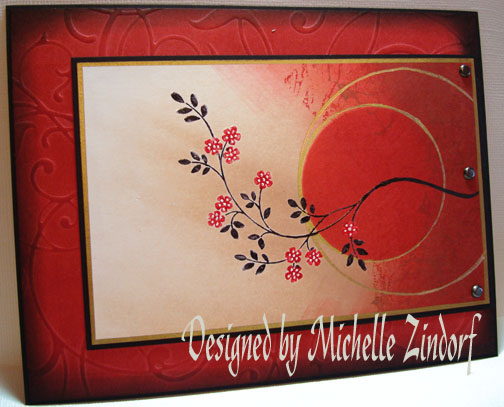
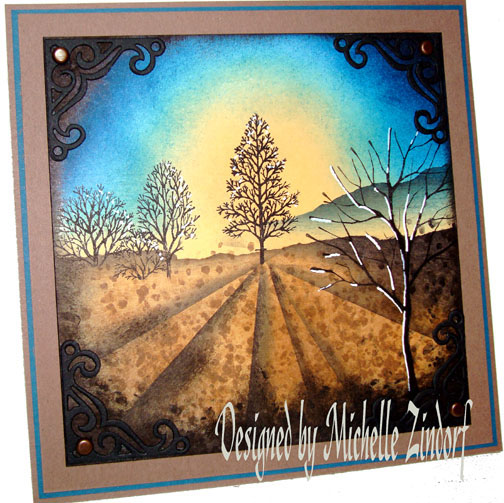
Assembled the card and here it is finished measuring 5.25″ x 5.5″.

dsc08998.JPG

This concludes the tutorial portion of my post. 

Now on with some Savannah, Georgia photos, starting with my workshops.

This is me and Lilann, my super wonderful hostess, who by the way kept me up way past my bed time stamping.  The next photo is a shot of one of the workshops in progress.  See how small I like my workshops.  🙂

savannah-3jpg.jpg   top-viewjpg.jpg

Some of the very lovely ladies that attended.  I love you all!

savannah-1jpg.jpg   savannah4jpg.jpg

savannah-2jpg.jpg  

The lodge on Lilann’s property where we had the workshops and some of the surrounding pond and decking that wound around it.  It’s stunning!

dsc08819.JPG   dsc08813.JPG   dsc08816.JPG

Russ traveled with me on this trip and we took an extra day to see Old Town in Savannah.  Here are some of the sights along the way.

dsc08833.JPG   dsc08838.JPG

Note this is a down spout on one of the houses.  It is said to be good luck to stroke the fish’s head when it is rain, but bad luck to stroke it’s head when it is lightening out, lol.  I really want some of these now.

dsc08842.JPG  

Back to the Savannah scenes.

dsc08867.JPG   dsc08863.JPG

This is a lighthouse we checked out on one of the near by islands.

dsc08969.JPG  

My husband Russ was playing photographer in the car.  He really cracks me up.  He was suppose to be taking pictures of the sights as we drove through, Ohio, Kentucky, Tennessee, North and then South Carolina before we made it to Georgia, but as you see he had other pictures in mind, lol.

He will kill me if he knew I posted this, but we don’t need to tell him do we.  🙂

 dsc08800.JPG

How could I not love this man when me makes me laugh so.

Well that is quite enough for today.

May your family bring laughter to your heart.

Until my next post. . . . . . . . . . . . .  . .

Hugs,

Michelle

Get ready for Brayer Workshops!  I am coming to:

dsc07666supersmall.jpg

Dayton, Ohio

Savannah, Georgia

Covington, Indiana

Buffalo, Minnesota

Webster, New York

New Johnsonville, Tennessee

Stoughton, Wisconsin

Castro Valley, California

Yardley, Pennsylvania (near Philadelphia)

Knox, Maine

Broomfield, Colorado

Lynchburg, Virginia

Columbia, Missouri

Portland, Michigan

Here is a link to my workshop calendar where you can see all of my travel schedule and to get info on beginner and advanced Brayer workshops:  http://zindorf.blogs.splitcoaststampers.com/workshop-calendar

Link to my Stampin’ Up website were you can order all of your must have Stampin’ Up products from me 24-7:  http://michellezindorf.stampinup.net

Here is a link to all of my tutorials:  http://zindorf.blogs.splitcoaststampers.com/tutorials-ive-written/

Frequently asked questions answers:  http://zindorf.blogs.splitcoaststampers.com/frequently-asked-questions/


Tree & Vines – Tutorial #204

dsc08736.JPG

I am so addicted to stamping!  Are you?  Are you constantly thinking about your next creation?  I am so addicted that I dream about stamping my next projects.  This card was first created in my dream last night, sick huh.  🙂   Since I did this in my dream already, when I actually put it on paper this morning it was like I was doing for the second time.

Please tell me I am not the only one that dreams about stamping.   Maybe I need to go to Stamper Anonymous.  I could see it now, we would all be swapping cards and stamps in the parking lot before and after the session, lol.  No wait, I think that is called convention!   ROTFLMAO!!!  I crack myself up sometimes, lol.   Just humor me this morning.  I haven’t had my whole pot of coffee yet. 

Before you think I have completely lost it, let’s get start on the tutorial. . . . .

Supplies:

Stamps: Stampin’ Up Branch Out
Paper: Stampin’ Up Whisper White, Baja Breeze & Creamy Caramel
Ink: Stampin’ Up Baja Breeze, Close to Cocoa & Always Artichoke, Distress Inks Old Paper, Milled Lavender, Weathered Wood, Walnut Stain, Brushed Corduroy, Frayed Burlap
Accessories: Stampin’ Up Basic Black Marker, Signo White Gel Pen, Sponges, Clear embossing powder and Heat gun

Are you inspired by this Blog?  One way for you can help support this blog is by ordering your Stampin’ Up products through me.   You can order from me 24-7 from this link:  http://michellezindorf.stampinup.net or e-mail me at mzindorf@aim.com if you are within the United States.  Want to become a Stampin’ Up Demonstrator and earn instant income?  Consider being part of my Stampin’ Up Team.  My Upline, Karen Barber and I have valuable monthly meetings in Miamisburg, Ohio.dsc08737.JPG

Stamped the, I’m going to call it the leaf stamp, but it is just a stamp with splotches on it, on a 4″ x 4″ piece of Whisper White card stock by first loading the stamp with Versamark and then Baja Breeze ink before stamping it.   I had to envision (guess, lol) where the leaves would be on the tree.  I reloaded my stamp with Versamark and Baja Breeze ink and stamped it quite a few times here.

dsc08716.JPG

Heat embossed the leaves using clear embossing powder and a heat gun.

dsc08717.JPG

Using the same method I stamped Always artichoke leaves by first loading my stamp with Versamark and then with Always Artichoke ink before stamping it repeatedly.  Heat embossed the leaves using clear embossing powder and a heat gun.

dsc08718.JPG

Stamped the tree by first loading the stamp with Versamark and then Close to Cocoa ink before stamping it over the leaves.  Heat embossed the tree with clear embossing powder and a heat gun.

dsc08719.JPG

dsc08720.JPG

Sponged on a bit of Milled Lavender Distress ink.

dsc08721.JPG

Sponged on a bit of Weathered Wood Distress ink.

dsc08722.JPG

Swiped the edge of the Old Paper Distress ink pad from top to bottom on the card stock.

dsc08723.JPG

Sponged Frayed Burlap Distress ink at the top and bottom of the card stock.

dsc08724.JPG

Sponged Brushed Corduroy Distress ink at the top and bottom of the card stock, not covering the Frayed Burlap ink entirely.

dsc08725.JPG

Ooops, missed a picture.  Sponged Walnut Stain Distress ink all around the edge of the card stock.

Adhered the main image panel to a 4 1/8″ x 5 1/8 piece of Whisper White card stock.

Stamped the leaf stamp with Always Artichoke ink at the bottom of the two panels to simulate vines.

dsc08726.JPG

Sponged Baja Breeze ink over the vines.

dsc08727.JPG

Stamped the few leaves with Walnut Stain Distress ink over the vines.

dsc08728.JPG

Added a White Gel pen highlight down the left side of the tree and a few white gel pen dots in the vines.

dsc08729.JPG

Added a Basic Black marker line down the left side of the tree and a few Basic Black dots in the vines.

dsc08730.JPG

Sponged Walnut Stain Distress ink around the outside edge of a Creamy Caramel card stock panel.

dsc08731.JPG

Assembled my card and here it is finished measuring 5″ x 6.5″.

dsc08736.JPG

May your day be one of utter joy!

Until my next post. . . . . . . . . . . . .

Hugs,

Michelle

Get ready for Brayer Workshops!  I am coming to:

dsc07666supersmall.jpg

Dayton, Ohio

Savannah, Georgia

Covington, Indiana

Buffalo, Minnesota

Webster, New York

New Johnsonville, Tennessee

Stoughton, Wisconsin

Castro Valley, California

Yardley, Pennsylvania (near Philadelphia)

Knox, Maine

Broomfield, Colorado

Lynchburg, Virginia

Columbia, Missouri

Portland, Michigan

Here is a link to my workshop calendar where you can see all of my travel schedule and to get info on beginner and advanced Brayer workshops:  http://zindorf.blogs.splitcoaststampers.com/workshop-calendar

Link to my Stampin’ Up website were you can order all of your must have Stampin’ Up products from me 24-7:  http://michellezindorf.stampinup.net

Here is a link to all of my tutorials:  http://zindorf.blogs.splitcoaststampers.com/tutorials-ive-written/

Frequently asked questions answers:  http://zindorf.blogs.splitcoaststampers.com/frequently-asked-questions/


Mellow Beach Scene – Tutorial #203

dsc08714.JPG

Here in Ohio the sun is shining really bright and the sky is blue.  Makes me think of summer.  I rushed through this project today so I can hurry up and head out to my perennial gardens to get dirty and feel the sun on my face.  I hope you are in a position today to soak up the sun as well.

I used one of the new Stampin’ Up Stamp Sets “Just Beachy” that is in the new Occasions Mini Catalog.   If you are in the USA and don’t have this new mini catalog and would like a copy, e-mail me at mzindorf@aim.comand I will get one out to you or I will send you the Internet link to view it if I run out of catalogs.

Let’s get started 🙂

Supplies:

Stamps: Stampin’ Up Just Beachy, Poscket Silhouettes, Season of Joy, Embrace Life
Paper: Stampin’ Up Whisper White, Basic Black & Close to Cocoa
Ink: Stampin’ Up Taken with Teal, Craft White, Close to Cocoa, Basic Black, Tempting Turquoise, Creamy Caramel
Accessories: Versamark pad and marker, Sponges, White Gel pen, Stampin’ Up markers, Post it note, Clear embossing powder, heat gun, Brayer

Please don’t forget you can order your Stampin’ Up products from me 24-7 from this link:  http://michellezindorf.stampinup.net or e-mail me at mzindorf@aim.com if you are within the United States.  Also, please consider being part of my Stampin’ Up Team.  We have valuable monthly meetings in Miamisburg, Ohio.

dsc08715.JPG

Stamped the car by first loading the stamp with Versamark and then loading it with Black ink before stamping it on a 3.5″ x 8.5″ piece of Whisper White card stock.

dsc08688.JPG

Stamped the flip flops by first loading the stamp with Versamark and then with Basic Black ink before stamping them.

dsc08689.JPG

Heat embossed both images using clear embossing powder and a heat gun.

dsc08690.JPG

Colored in the surf board and parts of the flip flops with a Real Red marker.

Colored the wood on the car and parts of the flip flops with a Close to Cocoa marker.

dsc08692.JPG

Colored the car and parts of the flip flops with a Summer Sun marker.

dsc08693.JPG

Colored cars tires and parts of the flip flops with a Creamy Caramel marker.

dsc08694.JPG

Colored over the car and the flip flops with a Versamark marker and heat embossed the image using clear embossing powder and a heat gun.

dsc08695.JPG

Brayered on Creamy Caramel ink at an angle over the bottom of the card stock.

dsc08697.JPG

Flipped over the card stock and brayered Tempting Turquoise ink at an angle.

dsc08698.JPG

Masked the sky area with a couple of post it notes.

dsc08699.JPG

Sponged Taken with Teal ink right at the post it note edge to create my horizon line.

dsc08700.JPG

Sponged Taken with Teal at the top of the card stock.

dsc08701.JPG

Stamped the flowers a few times with Basic Black ink at the right hand bottom corner of the card stock.

dsc08702.JPG

Colored over the flowers with a Real Red marker.

dsc08704.JPG

Sponged Close to Cocoa at the top of the ground area.

dsc08705.JPG

Sponged Taken with Teal ink on and above the Close to Cocoa ink I just sponged on.

dsc08706.JPG

Stamped the flourish with White Craft ink then used a White Gel pen and traced over part of the flourish to make it brighter.   Added White gel pen Highlights to the flowers.  Added White dots to create foam at the waters edge.

dsc08710.JPG

Stamped the Sentiment with Taken with Teal ink.

dsc08711.JPG

Assembled card and here it is finished measuring 4″ x 9″.

dsc08714.JPG

Have some fun in the sun today!

Until my next post. . . . . . . . . . . . .

Hugs,

Michelle

Get ready for Brayer Workshops!  I am coming to:

3-small.jpg

Dayton, Ohio

Savannah, Georgia

Covington, Indiana

Buffalo, Minnesota

Webster, New York

New Johnsonville, Tennessee

Stoughton, Wisconsin

Castro Valley, California

Yardley, Pennsylvania (near Philadelphia)

Knox, Maine

Broomfield, Colorado

Lynchburg, Virginia

Columbia, Missouri

Portland, Michigan

Here is a link to my workshop calendar where you can see all of my travel schedule and to get info on beginner and advanced Brayer workshops:  http://zindorf.blogs.splitcoaststampers.com/workshop-calendar

Link to my Stampin’ Up website were you can order all of your must have Stampin’ Up products from me 24-7:  http://michellezindorf.stampinup.net

Here is a link to all of my tutorials:  http://zindorf.blogs.splitcoaststampers.com/tutorials-ive-written/

Frequently asked questions answers:  http://zindorf.blogs.splitcoaststampers.com/frequently-asked-questions/


Sunrise Silhouette Trees – Tutorial #202

dsc08685.JPG

I was in the mood for a silhouette scene today.  It was a bonus to be able to create this scene using just the one tree stamp from the Stampin’ Up set LeJardin Botanique.

Let’s get started.  🙂

Supplies:

Stamps: Stampin’ Up Le Jardin Botanique & Holidays & Wishes
Paper: Stampin’ Up Whisper White & Basic Black
Ink: Stampin’ Up Basic Black, Chocolate Chip, Really Rust, Pumpkin Pie, Summer Sun, White
Accessories: White Gel Pen, Piercing tool, Stamp-a-ma-jig, Brayer, Sponge

Please don’t forget you can order your Stampin’ Up products from me 24-7 from this link:  http://michellezindorf.stampinup.net or e-mail me at mzindorf@aim.com if you are within the United States.  Also, please consider being part of my Stampin’ Up Team.  We have valuable monthly meetings in Miamisburg, Ohio.

dsc08687.JPG

Brayered Summer Sun ink at an angle on a 4.5″ x 6″ piece of Whisper White card stock.

dsc08672.JPG

Flip the card around and brayered Pumpkin Pie ink at an angle.

dsc08673.JPG

Brayered on Really Rust ink not covering the Pumpkin Pie ink entirely.

dsc08674.JPG

Brayered on Chocolate Chip ink not covering the Really Rust ink entirely.

dsc08675.JPG

Stamped the tree 7 times using Basic Black ink.

dsc08676.JPG

Stamped the tree 6 times at the bottom of the card stock with Basic Black ink.

dsc08677.JPG

Sponged Basic Black ink at the bottom of the card stock to create the ground area.

dsc08679.JPG

Stamped the tree stamp a couple of more times at the bottom of the card stock to create more brush in the scene.

dsc08680.JPG

Sponged some Basic Black ink in the top left hand corner of the card stock to create more drama in the sky.

dsc08681.JPG

Using my Stamp-a-ma-jig for place, stamped the sentiment using White ink.

dsc08682.JPG

Let the sentiment ink dry a moment and decided to go over it with a White Gel pen to make it brighter.

dsc08683.JPG

Added a silver brad at each side of the sentiment after assembling my card front.

dsc08684.JPG

Here is the completed card measuring 5″ x 6.5″.

dsc08685.JPG

May your skies be filled with color today.

Until my next post. . . . . . . . . . . . .

Hugs,

Michelle

Get ready for Brayer Workshops!  I am coming to:

3-small.jpg

Dayton, Ohio

Savannah, Georgia

Covington, Indiana

Buffalo, Minnesota

Webster, New York

New Johnsonville, Tennessee

Stoughton, Wisconsin

Castro Valley, California

Yardley, Pennsylvania (near Philadelphia)

Knox, Maine

Broomfield, Colorado

Lynchburg, Virginia

Columbia, Missouri

Portland, Michigan

Here is a link to my workshop calendar where you can see all of my travel schedule and to get info on beginner and advanced Brayer workshops:  http://zindorf.blogs.splitcoaststampers.com/workshop-calendar

Link to my Stampin’ Up website were you can order all of your must have Stampin’ Up products from me 24-7:  http://michellezindorf.stampinup.net

Here is a link to all of my tutorials:  http://zindorf.blogs.splitcoaststampers.com/tutorials-ive-written/

Frequently asked questions answers:  http://zindorf.blogs.splitcoaststampers.com/frequently-asked-questions/


Bird on a Branch for Mom – Tutorial #200

dsc08567.JPG

Is this really tutorial number 200!  Wow, it seems like yesterday when I started this little blog of mine, but here it is 14 months, 200 tutorials later.  I have enjoyed every moment of blogging.   My readers have gown in huge numbers too.  Around 6,000 people view this blog daily, either by visiting this site or receiving it by e-mail.  I am stunned that so many of you enjoy my ramblings and projects.  Thanks for hanging out with me and encouraging me by way of comments and e-mails.  I read and savor every one of them.  I have also met so very many of you at my workshops the past few months.  What an honor that is!

Here is a link to all 200 tutorials:  http://zindorf.blogs.splitcoaststampers.com/tutorials-ive-written/  or you can click the tab at the top of my blog.  Enjoy!

Without further ado, here is tutorial number 200!  This card was created for my Mother for Mother’s Day.

Supplies:

Stamps: Stampin’ Up Bird on a Branch & Pocket Silhouettes
Paper: Stampin’ Up Bashful Blue and Whisper White
Ink: Stampin’ Up Brilliant Blue, Garden Green, Apricot Appeal & Bashful Blue
Accessories: Stampin’ Up markers Brilliant Blue and Garden Green, White Gel Pen, Versmark marker and pad, Brayer, Clear embossing powder & Heat gun, Photo Corner Punch, Sponge, Big Shot Top Note Die Cut, Brilliant Blue Ribbon, Blue Button

Please don’t forget you can order your Stampin’ Up products from me 24-7 from this link:  http://michellezindorf.stampinup.net or e-mail me at mzindorf@aim.com if you are within the United States.  Also, please consider being part of my Stampin’ Up Team.  We have valuable monthly meetings in Miamisburg, Ohio.

dsc08571.JPG

Stamped the bird by first loading the stamp with Versamark and then Garden Green ink before stamping it on a 3″ x 5″ piece of Whisper White card stock. 

Although in my photos my Bird looks Black it is actually Garden Green.  Please envision the bird being Garden Green through out this project, lol.

dsc08546.JPG

Heat embossed the bird with clear embossing powder and a heat gun.

dsc08547.JPG

Stamped the branch twice by first loading the stamp with Versamark and then Brilliant Blue ink before stamping it.

Heat embossed the branches with clear embossing powder and a heat gun.

dsc08548.JPG

Stamped the Flowers by first loading the stamp with Versamark and then with Bashful blue ink before stamping them.  Heat embossed the flowers with clear embossing powder and a heat gun.

Note:  Learn from my mistake and stamp the flowers first and then the branches if you try this tutorial.  It would look much better.  🙂

dsc08549.JPG

dsc08550.JPG

Colored over the white centers of the flowers with a Versamark marker and then heat embossed them with clear embossing powder.  I did this to retain the white in the flowers.

dsc08551.JPG

Brayered Bashful Blue ink at an angle onto the top of the card stock.

dsc08552.JPG

Brayered Apricot Appeal ink at an angle at the bottom of the card stock.

dsc08553.JPG

Stamped flowers from the Pocket Silhouettes set with both Garden Green ink and Brilliant Blue ink.

dsc08554.JPG

Colored over the Garden Green flower heads with a Garden Green marker.

Colored over the Brilliant Blue Flower heads with a Brilliant Blue marker.

Highlighted the flower heads and the bird with a White Gel pen.

dsc08556.JPG

Cut out a Whisper White Top Note with my Big Shot Die Cutting Machine.  The cut the top note in half.

dsc08557.JPG

dsc08558.JPG

Sponged Brilliant Blue all around the main image panel and at the top and bottom of a Whisper White panel.

dsc08559.JPG

dsc08560.JPG

Assembled the card front and added Whisper White Photo Corner Punches to the left side corners.

dsc08561.JPG

Used a Brilliant Blue marker to go over the die cut holes around the edge of the top note die cut.  Very easy way to simulate sewing.  🙂 

Added a blue button and put White Gel pen in the center of the button to make it look like it has white thread in the center.

dsc08562.JPG

Here is my assembled Mother’s Day card measuring 5″ x 6.5″.

dsc08567.JPG

Well I hope this project has inspired you to stamp today.

Here is to tutorial number 200 and many, many more.

Have a awesome day! 

Until my next post. . . . . . . . . . . . .

Hugs,

Michelle

Get ready for Brayer Workshops!  I am coming to:

3-small.jpg

Fort Smith, Arkansas

Dayton, Ohio

Savannah, Georgia

Covington, Indiana

Buffalo, Minnesota

Webster, New York

New Johnsonville, Tennessee

Stoughton, Wisconsin

Castro Valley, California

Yardley, Pennsylvania (near Philadelphia)

Knox, Maine

Broomfield, Colorado

Lynchburg, Virginia

Columbia, Missouri

Portland, Michigan

Here is a link to my workshop calendar where you can see all of my travel schedule and to get info on beginner and advanced Brayer workshops:  http://zindorf.blogs.splitcoaststampers.com/workshop-calendar

Link to my Stampin’ Up website were you can order all of your must have Stampin’ Up products from me 24-7:  http://michellezindorf.stampinup.net

Here is a link to all of my tutorials:  http://zindorf.blogs.splitcoaststampers.com/tutorials-ive-written/

Frequently asked questions answers:  http://zindorf.blogs.splitcoaststampers.com/frequently-asked-questions/


Wedding Day Cherish – Tutorial #199

dsc08544.JPG

Hello out there . . . .  .. .   I hope your Easter Holiday was super special yesterday.  I cooked the traditional ham and spent the day with my husband, Russ.  The Easter Bunny no longer visits my house since we have no little ones at home.  I miss working my way through a chocolate bunny with some Peeps on the side, lol.  Anyway, I got some much needed down time and feel really refreshed today.

For some odd reason I no longer have a card stash of my own to give to people, Gasp!  I know, you would think I would have tons of cards lying about, but no.  My friends and family are the most neglected people when it comes to cards.  It is like the Mechanic that has two broken down cars or the CPA that had to file an extension for his tax returns.

Well today I am going to try to start putting some cards back for personal use for special occasions.  I thought I would start with a wedding card.  It is Spring and we are invited to a wedding that is taking place next month.

Let’s get started.  🙂

Supplies:

Stamps: Stampin’ Up To Have & To Hold, Illuminations
Paper: Stampin’ Up Whisper White & Basic Black
Ink: Stampin’ Up Not Quite Navy, Kiwi Kiss, Basic Black, Baja Breeze, Night of Navy
Accessories: White Gel Pen, Versamark Pad, Clear embossing powder, Heat gun, Prismacolor Markers, Stampin’ Up Markers, Sponge, Silver Brads, Photo Corner and Ticket Corner Punches, Black Ribbon, Curvy Cutter, Big Shot Die Cut Machine, Texture Embossing Plate

Please don’t forget you can order your Stampin’ Up products from me 24-7 from this link:  http://michellezindorf.stampinup.net or e-mail me at mzindorf@aim.com if you are within the United States.  Also, please consider being part of my Stampin’ Up Team.  We have valuable monthly meetings in Miamisburg, Ohio.

dsc08542.JPG

I stamped the Cherish stamp on a 3″ x 5.5″ piece of Whisper White Card-stock by first loading my stamp with Versamark and then loading it with Basic Black ink before stamping.  I heat embossed the image using clear embossing powder and a heat gun.

dsc08518.JPG

dsc08519.JPG

Stamped the Bride and Groom by first loading the stamp with Versamark and then loading it with Basic Black ink before stamping it.  Heat embossed it using clear embossing powder and a heat gun.

dsc08520.JPG

dsc08521.JPG

Cut a 2″ circle with my Curvy Cutter out of scrap card stock and used it as a mask for my moon. 

dsc08522.JPG

Holding the moon mask in place I sponged Baja Breeze around it making sure not to get it on the Bride and groom.

dsc08523.JPG

Sponged Not Quite Navy ink at the top of the card stock still holding the mask in place.

dsc08524.JPG

Sponged Kiwi Kiss ink at the bottom of the card stock around the Cherish image.

dsc08525.JPG

Sponged Night of Navy ink all around the outside edge of the card stock.

dsc08526.JPG

Sponge Basic Black ink all around edge of the card stock not covering the Night of Navy ink entirely.

dsc08527.JPG

Colored in the brides flowers with a Barely Banana marker.

dsc08529.JPG

Colored the grooms suit and created shadows on the bride’s veil and gown with a Cool Grey 10% Prismacolor marker.

dsc08530.JPG

Deepened the shadows on the bride and groom with a Cool Grey 30% marker. 

dsc08531.JPG

Colored the images hair in with a Creamy Caramel marker.

dsc08532.JPG

Decided the Kiwi Kiss ink was too yellow and bright so I sponged Baja Breeze ink over it.  Remember Yellow and Blue make green.  This is one of those times where that rule worked in my favor.

dsc08533.JPG

Used a ticket corner punch on my main image panel and the black card stock panel beneath it.   Added white dots to the sky area for stars and a few dots on the flourish at the bottom of the card stock to simulate flowers.

dsc08534.JPG

Used my Big Shot die cut machine and a texture plate to emboss the white panel.

dsc08535.JPG

Assembled card and added black ribbons and silver brads.

dsc08536.JPG

Added photo corners in black and white on the left side of the card to balance it out a bit.

dsc08543.JPG

Here is the finished card measuring 5″ x 6.5″.  This card is much more elegant in real life, where you can see the embossed white panel better.

dsc08544.JPG

I hope this tutorial has inspired you to expand your occasions card stash.

Until my next post. . . . . . . . . . . . .

Hugs,

Michelle

Get ready for Brayer Workshops!  I am coming to:

3-small.jpg

Fort Smith, Arkansas

Dayton, Ohio

Savannah, Georgia

Covington, Indiana

Buffalo, Minnesota

Webster, New York

New Johnsonville, Tennessee

Stoughton, Wisconsin

Castro Valley, California

Yardley, Pennsylvania (near Philadelphia)

Knox, Maine

Broomfield, Colorado

Lynchburg, Virginia

Columbia, Missouri

Portland, Michigan

Here is a link to my workshop calendar where you can see all of my travel schedule and to get info on beginner and advanced Brayer workshops:  http://zindorf.blogs.splitcoaststampers.com/workshop-calendar

Link to my Stampin’ Up website were you can order all of your must have Stampin’ Up products from me 24-7:  http://michellezindorf.stampinup.net

Here is a link to all of my tutorials:  http://zindorf.blogs.splitcoaststampers.com/tutorials-ive-written/

Frequently asked questions answers:  http://zindorf.blogs.splitcoaststampers.com/frequently-asked-questions/


Red Moon Floral – Tutorial #198

dsc08512.JPG

I had a little fun with Circles this morning.  I also used a lot of red in this creation, which I never do.  It gave it a bit of Oriental feel, don’t you think?

 Let’s get right into the tutorial  🙂

Supplies:

Stamps:Stampin’ Up Thoughts & Prayers, Stampendous Marble Texture Cube
Paper: Stampin’ Up Riding Hood Red, Whisper White, Basic Black
Ink: Stampin’ Up Creamy Caramel, Basic Black, Riding Hood Red, Close to Cocoa
Accessories:Versamark Pad, Sharpie Gold Paint Marker, Gold Gel Pen, Black Marker, Brayer, Sponge, White Gel Pen, Stampin Up Markers 

Please don’t forget you can order your Stampin’ Up products from me 24-7 from this link:  http://michellezindorf.stampinup.net or e-mail me at mzindorf@aim.com if you are within the United States.  Also, please consider being part of my Stampin’ Up Team.  We have valuable monthly meetings in Miamisburg, Ohio.

dsc08513.JPG

Stamped Floral image by first loading the stamp with Versamark and then colored colored the flowers with a Real Red Marker and the leaves and branch with a Basic Black marker an then huffed on it and stamped it on a 3.5″ x 5.5″ piece of Whisper White card stock.

dsc08488.JPG

Heat embossed the image using clear embossing powder and a heat gun.

dsc08489.JPG

Now that my image is heat embossed it will resist ink put over it. 

Brayered Creamy Caramel ink at an angle on the card stock.

dsc08490.JPG

Cut a circle from with my Curvy Cutter out of a scrap piece of card stock. 

dsc08491.JPG

Used the Negative piece as a mask and sponged on Riding Hood Red ink inside the masked area.

dsc08492.JPG

dsc08493.JPG

Brayered Riding Hood Ink at an angle on the card stock.

dsc08494.JPG

Stamped Side “A” of the Marble Texture Cube using Riding Hood Red Ink.

dsc08496.JPG

Stamped side “C” of the Marble Texture Cube using Close to Cocoa Ink.

dsc08497.JPG

Sponged Close to Cocoa ink on the right side of the card stock.

dsc08498.JPG

Used the cut out circle and put it over the sponged circle on the card stock and then traced around it with a Gold Gel Pen.

dsc08499.JPG

Used a Larger Negative Circle and traced around it to create the second gold circle.

dsc08500.JPG

Used a Gold Sharpie Paint Marker and went around the outside edge of the card stock.

dsc08501.JPG

Used a Big Shot Texture Plate on a Riding Hood Red panel and then Brayered Riding Hood Ink on it to bring out the design more on the card stock.

dsc08503.JPG

dsc08504.JPG

Extended the branch to go over to the edge of the main image panel.  Also used a white gel pen to make the dots on the flowers more predominate.

dsc08505.JPG

Sponged Basic Black ink around the edge of the Riding Hood Red panel.

dsc08506.JPG

Assembled the card and here it is finished measuring 5″ x 6.5″.

dsc08512.JPG

May your Saturday be super fun!  I am off to play. 🙂

Until my next post. . . . . . . . . . . . .

Hugs,

Michelle

Get ready for Brayer Workshops!  I am coming to:

3-small.jpg

Fort Smith, Arkansas

Dayton, Ohio

Savannah, Georgia

Covington, Indiana

Buffalo, Minnesota

Webster, New York

New Johnsonville, Tennessee

Stoughton, Wisconsin

Castro Valley, California

Yardley, Pennsylvania (near Philadelphia)

Knox, Maine

Broomfield, Colorado

Lynchburg, Virginia

Columbia, Missouri

Portland, Michigan

Here is a link to my workshop calendar where you can see all of my travel schedule and to get info on beginner and advanced Brayer workshops:  http://zindorf.blogs.splitcoaststampers.com/workshop-calendar

Link to my Stampin’ Up website were you can order all of your must have Stampin’ Up products from me 24-7:  http://michellezindorf.stampinup.net

Here is a link to all of my tutorials:  http://zindorf.blogs.splitcoaststampers.com/tutorials-ive-written/

Frequently asked questions answers:  http://zindorf.blogs.splitcoaststampers.com/frequently-asked-questions/


Sailing Away – Tutorial #197

dsc08482.JPG

This card I created this morning comes together pretty fast.  For you people who like to sponge, you will like this project. 

Without further ado . . . . . . . Let’s get started.  🙂

Supplies:

Stamps: Coastal/Maritime by Inkadinkado
Paper: Stampin’ Up Whisper White, Perfect Plum, Elegant Eggplant, Pumpkin Pie
Ink: Stampin’ Up Pumpkin Pie, Basic Black, Elegant Eggplant, Perfect Plum, Summer Sun
Accessories: Black marker, Sponges, Silver Brads, Post it Notes, Big Shot Die Cut “Top Note”

Please don’t forget you can order your Stampin’ Up products from me 24-7 from this link:  http://michellezindorf.stampinup.net or e-mail me at mzindorf@aim.com if you are within the United States.  Also, please consider being part of my Stampin’ Up Team.  We have valuable monthly meetings in Miamisburg, Ohio.

dsc08483.JPG

Using the Big Shot Die Cut machine, cut the Top Note Die out of Whisper White card stock.

dsc08467.JPG

Sponged a spot of Summer Sun ink on the card stock.

dsc08468.JPG

Masked the sky are with a Post It Note.  Sponged Perfect Plum ink around the Summer Sun ink showing.

dsc08469.JPG

Sponged Elegant Eggplant ink around the edge of the card stock showing and a bit right at the Post It Note edge to create the horizon line.

dsc08470.JPG

Removed the mask.

dsc08471.JPG

Masked the water with a new Post it Note.

dsc08472.JPG

Sponged Pumpkin Pie ink around the Summer Sun ink in the sky area.

dsc08473.JPG

Sponged Perfect Plum ink around the Pumpkin Pie Ink.

dsc08474.JPG

Sponged Elegant Eggplant ink around the entire edge of the card stock.

dsc08475.JPG

Stamped the Inkadinkado sailboat with Basic Black ink.

dsc08476.JPG

Colored in the sails with a black marker.

dsc08477.JPG

Added a few simple layers and two silver brads.  Here is the finished card measuring 4.25″ x 5.5″.

dsc08482.JPG

May your day be smooth sailing.

Until my next post. . . . . . . . . . . . .

Hugs,

Michelle

Get ready for Brayer Workshops!  I am coming to:

3-small.jpg

Fort Smith, Arkansas

Dayton, Ohio

Savannah, Georgia

Covington, Indiana

Buffalo, Minnesota

Webster, New York

New Johnsonville, Tennessee

Stoughton, Wisconsin

Castro Valley, California

Yardley, Pennsylvania (near Philadelphia)

Knox, Maine

Broomfield, Colorado

Lynchburg, Virginia

Columbia, Missouri

Portland, Michigan

Here is a link to my workshop calendar where you can see all of my travel schedule and to get info on beginner and advanced Brayer workshops:  http://zindorf.blogs.splitcoaststampers.com/workshop-calendar

Link to my Stampin’ Up website were you can order all of your must have Stampin’ Up products from me 24-7:  http://michellezindorf.stampinup.net

Here is a link to all of my tutorials:  http://zindorf.blogs.splitcoaststampers.com/tutorials-ive-written/

Frequently asked questions answers:  http://zindorf.blogs.splitcoaststampers.com/frequently-asked-questions/


Colorful Pots in a Row – Tutorial # 196 and Blog Candy Winner is. . . . .

dsc08428.JPG

Before I get into today’s tutorial it is my pleasure to announce the winner of the Stampin’ Up Yummy Stamp set.   The winner was selected using a Random number generator and the winner is. . . . . . .  . . . ..

dsc08378.JPG 

Barbara Taylor, who wrote “Would love to win this. Grandchildren are great. I have 13 and 9 great grandchildren.”

Congrats Barbara, please e-mail your address to mzindorf@aim.com and I will pop these in the mail to you.

A big thanks to everyone for playing along!

Now on with the tutorial 🙂

Supplies:

Stamps: Stampin’ Up Blooming With Love
Paper: Stampin’ Up Whisper White, More Mustard, Baja Breeze & Not Quite Navy
Ink: Stampin’ Up More Mustard, Close to Cocoa, Creamy Caramel, Not Quite Navy, Baja Breeze & Basic Black
Accessories: Stampin’ Up Markers, Versamark Marker, Clear embossing powder, heat gun, sponges, brayer, white ribbon and silver brads, Tombo Mono Multi Glue, White Gel Pen

Please don’t forget you can order your Stampin’ Up products from me 24-7 from this link:  http://michellezindorf.stampinup.net or e-mail me at mzindorf@aim.com if you are within the United States.  Also, please consider being part of my Stampin’ Up Team.  We have valuable monthly meetings in Miamisburg, Ohio.

dsc08431.JPG

On a 2.75″ x 3″ piece of Whisper White card stock stamped the flower post with Basic Black ink.

dsc08412.JPG

Colored the end pot with a Lavender Lace Marker.  Colored the flowers in the pot and the shadow down the right side of the post with an Almost Amethyst marker.

dsc08413.JPG

Colored the next post and flowers with with an More Mustard marker.  Added Pumpkin Pie marker to the middle petals of the flowers and to create the shadow on the pot.

dsc08414.JPG

Colored the next pot and the tulip with a Ruby Red marker.  Added Bravo Burgundy marker to both the tulip and the pot to create a shadow on the right side of them.

dsc08415.JPG

Colored the leaves of the flowers with an Old Olive marker.   Colored the last pot with a Certainly Celery marker and then added Old Olive for the shadow on the pot’s right side.

dsc08416.JPG

Decided I wanted a darker shadow on the More Mustard pot so I added Really Rust marker to the right side of it.

dsc08417.JPG

Colored over all of the pots and flowers with a Versamark marker and heat embossed the images using clear embossing powder and a heat gun.

dsc08418.JPG

dsc08419.JPG

Masked the top of the card stock with a post it note and sponged Baja Breeze ink on the unmasked card stock.

dsc08420.JPG

Sponged Not Quite Navy ink right at the post it note edge to create a shadow for the pots.

dsc08421.JPG

Took the post it note mask off and put a new one on to mask the bottom of the card stock.  I masked a bit of the white above the Not Quite Navy to create a  white border behind the pots.  Sponged Creamy Carmel ink on the unmasked area of the card stock.

dsc08422.JPG

Sponged Close to Cocoa ink at the right side of the card stock.

dsc08423.JPG

Removed the mask and added White gel pen to the buds on the 3rd pot and the center of the flowers on the fourth pot.

dsc08425.JPG

Used my Big Shot die cut machine and the Dot texture plate emboss two More Mustard panels. 

dsc08426.JPG

Brayered More Mustard over both panels to make the embossing pop more.

dsc08427.JPG

Assembled my card and added ribbon and silver brads.  Here you have the finished card that measures 5.25″ square.

dsc08428.JPG

May your day be filled with blooms!

Until my next post. . . . . . . . . . . . .

Hugs,

Michelle

Get ready for Brayer Workshops!  I am coming to:

3-small.jpg

Fort Smith, Arkansas

Dayton, Ohio

Savannah, Georgia

Covington, Indiana

Buffalo, Minnesota

Webster, New York

New Johnsonville, Tennessee

Stoughton, Wisconsin

Castro Valley, California

Yardley, Pennsylvania (near Philadelphia)

Knox, Maine

Broomfield, Colorado

Lynchburg, Virginia

Columbia, Missouri

Portland, Michigan

Here is a link to my workshop calendar where you can see all of my travel schedule and to get info on beginner and advanced Brayer workshops:  http://zindorf.blogs.splitcoaststampers.com/workshop-calendar

Link to my Stampin’ Up website were you can order all of your must have Stampin’ Up products from me 24-7:  http://michellezindorf.stampinup.net

Here is a link to all of my tutorials:  http://zindorf.blogs.splitcoaststampers.com/tutorials-ive-written/

Frequently asked questions answers:  http://zindorf.blogs.splitcoaststampers.com/frequently-asked-questions/


Sunrise Field – Tutorial #195

dsc08410-finished.jpg

HAPPY FRIDAY!!!

This time of year, in my neck of the woods you see a lot of fields being turned over in preparation for planting.  I think there is nothing more beautiful than farm land during sunrise.  That was the inspiration for this tutorial today.

Stampin’ Up came out with some terrific tree stamps this year.  I used one of the new sets Branch Out and then an old time favorite of mine, Lovely As a Tree to create this scene.

For you people that love to sponge on ink, this tutorial is for you.

Let’s get started. 🙂

Supplies:

Stamps:  Stampin’ Up Branch Out and Lovely as a Tree

Cardstock:  Stampin’ Up Whisper White, Close to Cocoa and Not Quite Navy

Ink:  Stampin’ Up Close to Cocoa, Basic Black, Apricot Appeal, Not Quite Navy and Night of Navy

Accessories:  White Gel Pen, Piercing Tool, Cuttlebug Die, Sponges

Please don’t forget you can order your Stampin’ Up products from me 24-7 from this link:  http://michellezindorf.stampinup.net or e-mail me at mzindorf@aim.com if you are within the United States.  Also, please consider being part of my Stampin’ Up Team.  We have valuable monthly meetings in Miamisburg, Ohio.

dsc08406.JPG

Sponged Apricot Appeal ink on a 4.5″ square piece of Whisper White Card stock.

dsc08379.JPG

Sponged Not Quite Navy At the top of the card stock, getting darker towards the outside of the card stock.

dsc08380.JPG

Sponged Night of Navy ink in each of the top corners.

dsc08381.JPG

Tore a Post it note through the stick edge and used it as a mask to mask my sky area.  I was sure to mask some of the Apricot area under the Not Quite Navy ink so the Apricot Appeal ink would show all across the card stock in the finished piece.

dsc08382.JPG

Sponged on Close to Cocoa ink, using a back and forth motion across the card-stock, letting some of the Apricot Appeal ink show through.

dsc08383.JPG

Sponged Black all around the unmasked area.

dsc08384.JPG

Colored directly on the stamp with a Black marker, just the center tree.  Huffed on the stamp and stamped it on the card stock. 

dsc08385.JPG

Colored directly on the stamp again, just the three left trees, huffed on the stamp and stamped it on the card stock.

Remember, you don’t always have to use the entire stamped image.  🙂

dsc08386.JPG

Used the tore Post it Note Mask again to create a hill in the distance.

dsc08387.JPG

Sponged Not Quite Navy ink along the torn post it note edge.

dsc08388.JPG

Added a bit of Basic Black ink with a sponge, right at the post it note edge, not covering the Not Quite Navy ink entirely.

dsc08389.JPG

Removed mask.

dsc08390.JPG

Stamped Branched Out Tree in the foreground with Basic Black ink.

dsc08391.JPG

Stamped the leaf stamp from the Branched out set on the ground area with Close to Cocoa ink.

dsc08392.JPG

Stamped the same stamp again only with Basic Black ink at the bottom of the card stock.

dsc08393.JPG

Used a post it note to create the shadows on the ground.

dsc08394.JPG

Sponged Basic Black ink lightly at the post it note edge and repeated over and over by moving the post it note to create all of the shadows I wanted.

dsc08395.JPG

dsc08396.JPG

Highlighted the left side of the large tree with a White Gel pen.  I also added a few dots in the small trees for highlights.

dsc08397.JPG

Sponged Black ink all the way around the card stock edge.

dsc08398.JPG

Although you cannot see the Cuttlebug Die cut corners in the photos they are there, lol.  I put one in each corner of the main image panel.

dsc08399.JPG

I also put a copper brad on each Cuttlebug corner.

dsc08400.JPG

Here is a not so good photo of the finished card.  I am in my PJ’s and it is raining outside so I will try later to take a decent photo.  🙂

dsc08410-finished.jpg

May you catch a glimpse of a beautiful sunrise in your neck of the woods.

Until my next post. . . . . . . . . . . . .

Hugs,

Michelle

Get ready for Brayer Workshops!  I am coming to:

3-small.jpg

Fort Smith, Arkansas

Dayton, Ohio

Savannah, Georgia

Covington, Indiana

Buffalo, Minnesota

Webster, New York

New Johnsonville, Tennessee

Stoughton, Wisconsin

Castro Valley, California

Yardley, Pennsylvania (near Philadelphia)

Knox, Maine

Broomfield, Colorado

Lynchburg, Virginia

Columbia, Missouri

Portland, Michigan

Here is a link to my workshop calendar where you can see all of my travel schedule and to get info on beginner and advanced Brayer workshops:  http://zindorf.blogs.splitcoaststampers.com/workshop-calendar

Link to my Stampin’ Up website were you can order all of your must have Stampin’ Up products from me 24-7:  http://michellezindorf.stampinup.net

Here is a link to all of my tutorials:  http://zindorf.blogs.splitcoaststampers.com/tutorials-ive-written/

Frequently asked questions answers:  http://zindorf.blogs.splitcoaststampers.com/frequently-asked-questions/