Two Hearts Forever – Tutorial #560

Hello There,

Happy Friday!   Gotta love getting to the weekend, right?

Well I am loving the new Stampin’ Up! Spring catalog.  I have to say, I over indulged when placing my order from it, but I could not pass up all the yummy things in the it.  You know where I’m coming from. . . . . .so no further explanation is need, lol.

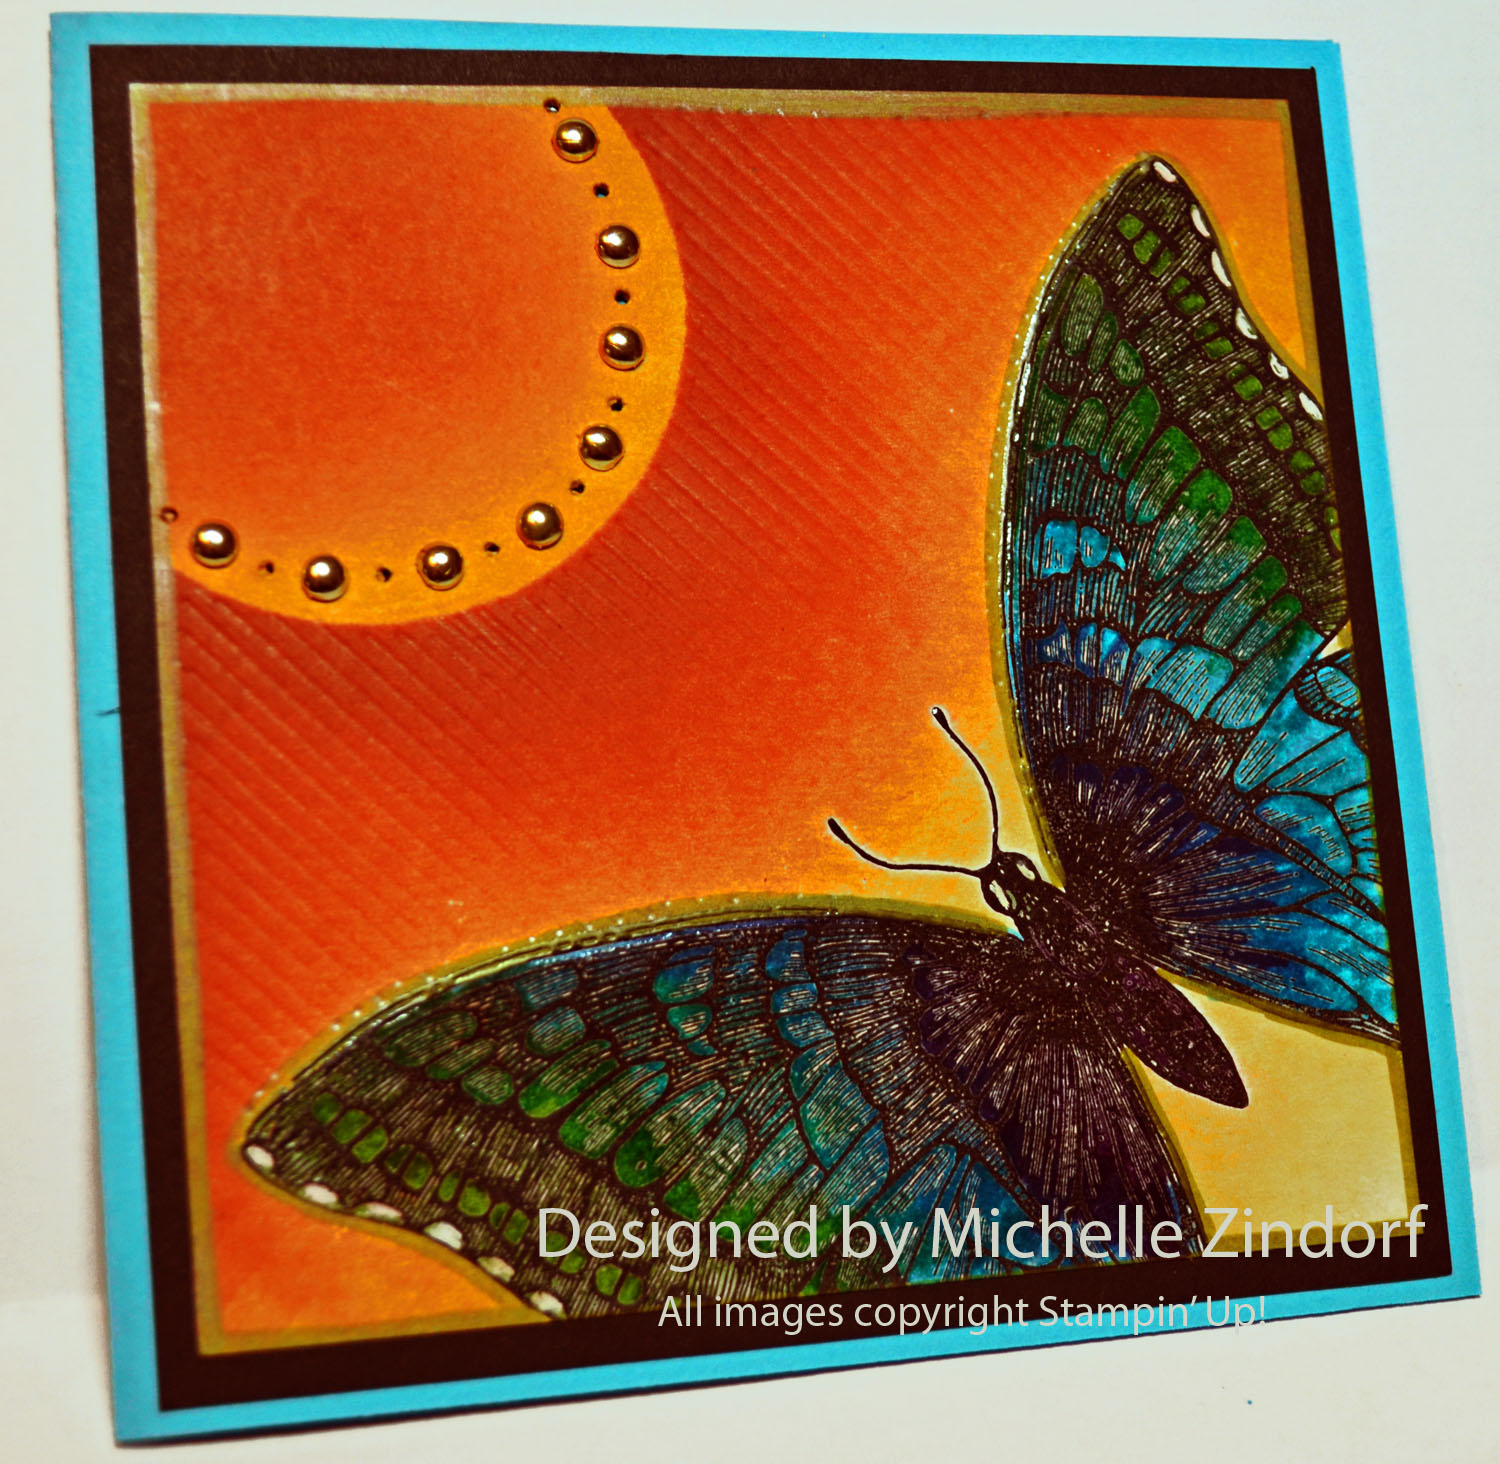
Today I have a Valentine for you. Check it out, I used three things from the Spring catalog in the project, Hearts a Flutter Stamp Set (item number 129252), Itty Bitties Stamp Set (item number 128939), and a new roller, Amazing Accent (item number 130106).  I also added the set Forever with You (item number 126727) from the Stampin’ Up! Annual Catalog.   These sets work so well together with this collage technique. Add a bit of the direct to paper technique and you have a striking card.

Spring Catalog

****************************************

Now on with today’s tutorial. . . . .  . .

Project Supplies:

Stampin’ Up! Stamps: Hearts a Flutter Stamp Set (item number 129252), Itty Bitties Stamp Set (item number 128939), and a new roller, Amazing Accent (item number 130106), Forever with You (item number 126727)

Card Stock: Stampin’ Up! Whisper White, Basic Black and Cherry Cobbler

Ink: Stampin’ Up! Basic Black, Whisper White, Cherry Cobbler, Soft Suede, Real Red, Baja Breeze, Calypso Coral and Summer Starfruit

Accessories: Stampin’ Up! Sponge, Cherry Cobbler Quilted Satin Ribbon, Basic Black marker, White Gel Pen

Started by smearing my Summer Starfruit ink pad across the a 3.5″ piece of Whisper White card stock.

Smeared Calypso Coral ink over that.

Smeared Baja Breeze ink over the top part of the card stock to cool the warm colors underneath a bit.

Smeared Real Red ink across the bottom of the card stock.


Since I have a short piece of card stock I was able to just roll my Amazing Accent roller stamp over my Soft Suede ink pad a few times and then roll it on the card stock.  I did this twice, butting the two images up against each other.

Stamped my sentiment from the Forever With You stamp set across the bottom using Basic Black ink.

Stamped the two hearts by loading my stamp with Cherry Cobbler ink and then tapping the side of the Basic Black brush tip along the edge before stamping it.

Over stamp the hearts with the heart outline stamp using Whisper White ink.

Darkened the dots from the roller stamp where the cross over the heart using a Basic Black marker.

Sponged Basic Black ink on the card stock edges.

Stamped the little heart from the Itty Bitties stamp set along the left side of the card stock and on the right heart using Basic Black ink.

Added a 4″square and 5″ square Basic Black panels and a 4 1/8″ square and a 5.25″ Cherry Cobbler card base.   Also added Cherry Cobbler quilted satin ribbon.

Darkened the White Outline of the hearts and put dots on the small Basic Black panel using a White Gel pen.

Here is the finished Valentine measuring 5.25″ square.

May your day be filled with love.

Check out the great deals at Stampin’ Up! below.

Until my next post. . . . . .

Hugs,

*************************************************

CLICK HERE TO SEE THE LATEST STAMPIN’ UP! PROMOTION AND TO SHOP NOW!


************************************************************

Check out the brand new Spring Catalog and get all those supplies you need for you up coming projects.

CLICK HERE TO SHOP!

**********************************************************

Have you checked out the great clearance rack at Stampin’ Up!  CLICK HERE

New items added!

***********************************************************

Michelle’s Free Stamp Program

Don’t miss out on my Customer free stamp set program. Check it out!  Along with a handmade thank you card from me for your order you will receive a token for each $50 in product you ordered using me as your demonstrator.  After you have collected 10 tokens you will receive a free current stamp set of your choosing, a value of $39 or less.   Here is a link to my online shopping page that you can shop at 24/7 (from the comfort of your home, even in your pj’s) and the products will be shipped directly to your door step from Stampin’ Up:   CLICK HERE TO SHOP.   My free stamp set program will be an on going program.  :)

***************************************************

CHECK OUT MY STAMPING EVENTS Click here to see my event calendar


Attracted by the Sun – Tutorial #559

Hello There,

Well I am so happy today, because I get to share the new Stampin’ Up! Spring Catalog with you and all it contains. This is the first day you get to order from it!  Click here to check it out!

You won’t be disappointed.

My project today features the brand new stamp “Swallowtail” item number 129216.   This stamp is big and bold and a blast to color.   I love this stamp so much I wish I could get a tatoo of it on my body somewhere.   But since I’m currently dropping weight it is probably not the best time to get a tat.  Maybe I’ll get one as a reward when I meet my weight loss goal.  Do you have a tatoo?  Are you happy you did it, any regrets?  I would love to hear from you.

Back to the Swallowtail stamp, I can see this stamp being used in a great Spring mobile or butterflies to put on my Spring Wreaths, hummmm, I feel a project coming on, lol.

****************************************

Now on with today’s tutorial. . . . .  . .

Project Supplies:

Stampin’ Up! Stamps: Swallowtail (item number 129216)

Card Stock: Stampin’ Up! Whisper White, Basic Black and Tempting Turquoise

Ink: Stampin’ Up! Cajun Craze, More Mustard and Basic Black

Accessories: Stampin’ Up! Sponge, gold brads, piercing tools, white gel pen, Stampin’ Up Gold marker, Versamarker, clear embossing powder, heat gun, Gumball Green, Tempting Turquoise and Elegant Eggplant markers, Simply Scored and Diagonal plate, brayer

Stamped the Butterfly using Craft Basic Black ink on a 3.75″ square piece of Whisper White card stock.

Heat embossed the image using clear embossing powder and a heat gun.


Colored the body of the butterfly and the inside of the wings using an Elegant Eggplant marker.

Added Tempting Turquoise marker over lapping the Elegant Eggplant area in order to blend the colors.

Added Gumball Green marker to the rest of the wings, blending with the Tempting Turquoise.

Repeated for the other side.

Colored over the entire butterfly with a Versamarker and then heat embossed the image.  It is now totally embossed.

Brayered More Mustard ink at an angle.

Added a 2″ circle mask punched from Post it Note to the corner of the card stock.  Brayered Cajun Craze ink on at an angle, not covering the More Mustard ink entirely.

Removed the mask and sponged Cajun Craze ink in the middle of the sun using a circular motion.

Edge the wings and card stock edges using a Stamping Up Gold Marker.

Added texture between the sun and the butterfly by using the Diagonal Simply Scored plate and scoring ever line.  Also colored the dots on the edge of the wings with a White gel pen to give it some pop.


Added a 5″ square basic black card stock panel.  Pierced holes in the edge of the sun and added gold brads in every other hole.

Added a 5.25″ square Tempting Turquoise card base.

Here is the finished card measuring 5.25″ square.  This card has been added to my sale page – click here to check it out.

May your day be filled with beauty and wonder.

Check out the great deals at Stampin’ Up! below.

Until my next post. . . . . .

Hugs,

*************************************************

CLICK HERE TO SEE THE LATEST STAMPIN’ UP! PROMOTION AND TO SHOP NOW!


************************************************************

Check out the brand new Spring Catalog and get all those supplies you need for you up coming projects.

CLICK HERE TO SHOP!

**********************************************************

Have you checked out the great clearance rack at Stampin’ Up!  CLICK HERE

New items added!

***********************************************************

Michelle’s Free Stamp Program

Don’t miss out on my Customer free stamp set program. Check it out!  Along with a handmade thank you card from me for your order you will receive a token for each $50 in product you ordered using me as your demonstrator.  After you have collected 10 tokens you will receive a free current stamp set of your choosing, a value of $39 or less.   Here is a link to my online shopping page that you can shop at 24/7 (from the comfort of your home, even in your pj’s) and the products will be shipped directly to your door step from Stampin’ Up:   CLICK HERE TO SHOP.   My free stamp set program will be an on going program.  :)

***************************************************

CHECK OUT MY STAMPING EVENTS Click here to see my event calendar

*****************************************************

Let’s Create Together!

Host a private card class.  I’ll come to you and teach you and your friends the fun of stamping.  No prior stamping experience needed.  This is a super fun night/afternoon out for the ladies.  You as hostess will earn some great Stampin’ Up! products.  CLICK HERE TO SEE THE HOSTESS BENEFITS.

I have some wonderful projects to create.  Please contact me at 937-344-1312 or via e-mail at mzindorf@aim.com and we will set it up.  I’m currently filling my calendar now (it fills fast) for those of you who live in the following Ohio and Indiana Counties:

Ohio:  Montgomery, Preble, Greene, Clark, Miami, Darke, Butler, Warren, Clinton, Hamilton, Shelby

Indiana:  Wayne, Fayette, Union, Franklin, Randolph

****************************************

Joining Stampin’ Up!

You can join my Stampin’ Up! team and become a Stampin’ Up! Demonstrator now for the great new price of $99, and you can create your own kit, CLICK HERE TO CHECK IT OUT.  Contact me whether you want to start your own business or just enjoy the 20% discount on products.

****************************************

Want an annual catalog shipped to you?     I will be happy to send you one.  The catalog is free, but there is a $5 shipping charge.   Note, I will only sell or ship within the United States do to Stampin’ Up! policies.  Please contact me at mzindorf@aim.com.  Payment can be sent via Paypal or check.

****************************************


Two Seahorses – Tutorial #558

Hello There and Happy New Year!

I’m refreshed after having a week of down time.  My holidays were wonderful since I got to spend them with loved ones.  That’s the very best kind of holiday in my opinion.

During my week of serenity my Stampin’ Up! Spring Mini Catalog pre-order arrived, so I spent some time just cooking up in my mind some projects.  Now it is time to put them on paper.   Take note of the stamp set I used today, By The Tide (item number 129120).   This will be available starting tomorrow January 3, 2013 through May 31, 2013.   Awesome stamp set!

My project was done using the Direct to Paper technique.  Hang out a while and check it out.

****************************************

Now on with today’s tutorial. . . . .  . .

Project Supplies:

Stampin’ Up! Stamps: By the Tide (item number 129120)

Card Stock: Stampin’ Up! Whisper White, Calypso Coral and River Rock

Ink: Stampin’ Up! Soft Suede, Calypso Coral, River Rock and Pool Party

Accessories: Stampin’ Up! Sponge, Pool Party Ribbon, Color Spritzer, Soft Suede, Calypso Coral and Blush Blossom Markers, Stampin’ Dimensionals

*******************************************

Start with a 3.25″ square piece of Whisper White Card Stock.  Smear Pool Party ink left to right over the top portion of the card stock using the ink pad.

Smear River Rock ink from left to right using the ink pad on the bottom portion of the card stock.

Stamped the plant using River Rock ink.  I used a light color so this plant would appear to be in the background.

Stamped two seahorses using Soft Suede ink.

Added ink to the very end of my River Rock ink pad and then smeared the ink pad across the bottom of the card stock to create another level of sand.

Using the Color Spritzer Tool and a Soft Suede marker, spritzed dots over the sand area.

Put a Calypso Coral line down the seahorses backs and then colored the whole seahorses in using a Blush Blossom marker.  This blended the Calypso Coral some.

Added a bit more Calypso Coral marker to the very back of the seahorses and to their gil on their head.

Stamped another plant using Calypso Coral ink.

Cut a 5″ square piece of River Rock card stock and stamped the writing stamp using Calypso Coral ink down the left side of the card stock.  Not sure why the color is off on this photo, sorry.

Sponged Soft Suede ink around the edges of the main image panel and River Rock panel.

Added a 5.25″ Calypso Coral Card base and a 3.5″ square Calypso Coral panel underneith the main image panel.  Also added a Pool Party ribbon.

Here is the finished card measuring 5.25″ square.


May your day be sunshine and friends.

Check out the great deals at Stampin’ Up! below.

Until my next post. . . . . .

Hugs,

*****************************************************

Let’s Create Together!

Host a private card class.  I’ll come to you and teach you and your friends the fun of stamping.  No prior stamping experience needed.  This is a super fun night/afternoon out for the ladies.  You as hostess will earn some great Stampin’ Up! products.  CLICK HERE TO SEE THE HOSTESS BENEFITS.

I have some wonderful projects to create.  Please contact me at 937-344-1312 or via e-mail at mzindorf@aim.com and we will set it up.  I’m currently filling my calendar now (it fills fast) for those of you who live in the following Ohio and Indiana Counties:

Ohio:  Montgomery, Preble, Greene, Clark, Miami, Darke, Butler, Warren, Clinton, Hamilton, Shelby

Indiana:  Wayne, Fayette, Union, Franklin, Randolph

*************************************************

CHECK OUT MY STAMPING EVENTS Click here to see my event calendar

*************************************************

CLICK HERE TO SEE THE LATEST STAMPIN’ UP! PROMOTION AND TO SHOP NOW!

**********************************************************

Joining Stampin’ Up!

You can join my Stampin’ Up! team and become a Stampin’ Up! Demonstrator now for the great new price of $99, and you can create your own kit, CLICK HERE TO CHECK IT OUT.  Contact me whether you want to start your own business or just enjoy the 20% discount on products.

*************************************************************

Have you checked out the great clearance rack at Stampin’ Up!  CLICK HERE

***********************************************************

Get Free Stamps

Don’t miss out on my Customer free stamp set program. Check it out!  Along with a handmade thank you card from me for your order you will receive a token for each $50 in product you ordered using me as your demonstrator.  After you have collected 10 tokens you will receive a free current stamp set of your choosing, a value of $39 or less.   Here is a link to my online shopping page that you can shop at 24/7 (from the comfort of your home, even in your pj’s) and the products will be shipped directly to your door step from Stampin’ Up:   CLICK HERE TO SHOP.   My free stamp set program will be an on going program.  :)

************************************************************

Last Day to order from the Holiday Catalog!

(CLICK HERE TO VIEW THE HOLIDAY CATALOG).  I especially love the coordinating products that you can get as a bundle at a discount.    Gotta love a discount, right?  Especially for those products to make your holiday gifts and cards.

***************************************

Want an annual catalog shipped to you?     I will be happy to send you one.  The catalog is free, but there is a $5 shipping charge.   Note, I will only sell or ship within the United States do to Stampin’ Up! policies.  Please contact me at mzindorf@aim.com.  Payment can be sent via Paypal or check.

****************************************


Lost Mittens – Tutorial #556

Hey There,

I have a mitten card for you today.   This one goes together a bit quicker than most of my creations so it’s a great one to mass produce.  Check out the tutorial below.

This card brought to mind my oldest son, Jesse.  When he was 13 he had a problem with losing his gloves (many, many pairs) so my husband, Russ bet Jess $100 that he would not still have his gloves at the end of the winter.   Well Jesse, being the smart boy that he was, put his gloves in a safe place and didn’t wear them all Winter so he could produce them when asked just to win the bet, lol.

***************************************************

CLICK HERE TO SEE THE LATEST STAMPIN’ UP! PROMOTION AND TO SHOP NOW!

**********************************************************

Joining Stampin’ Up!

You can join my Stampin’ Up! team and become a Stampin’ Up! Demonstrator now for the great new price of $99, and you can create your own kit, CLICK HERE TO CHECK IT OUT.  Contact me whether you want to start your own business or just enjoy the 20% discount on products.

*************************************************************

Have you checked out the great clearance rack at Stampin’ Up!  CLICK HERE

***********************************************************

Get Free Stamps

Don’t miss out on my Customer free stamp set program. Check it out!  Along with a handmade thank you card from me for your order you will receive a token for each $50 in product you ordered using me as your demonstrator.  After you have collected 10 tokens you will receive a free current stamp set of your choosing, a value of $39 or less.   Here is a link to my online shopping page that you can shop at 24/7 (from the comfort of your home, even in your pj’s) and the products will be shipped directly to your door step from Stampin’ Up:   CLICK HERE TO SHOP.   My free stamp set program will be an on going program.  :)

************************************************************

The Stampin’ Up! Holiday Catalog is now in effect.  I love all of Stampin’ Up’s products, but the new catalog just blew me away (CLICK HERE TO VIEW THE HOLIDAY CATALOG).  I especially love the coordinating products that you can get as a bundle at a discount.    Gotta love a discount, right?  Especially for those products to make your holiday gifts and cards.

Want a new annual catalog shipped to you?     I will be happy to send you one.  The catalog is free, but there is a $5 shipping charge.   Note, I will only sell or ship within the United States do to Stampin’ Up! policies.  Please contact me at mzindorf@aim.com.  Payment can be sent via Paypal or check.

****************************************

Now on with today’s tutorial. . . . .  . .

Project Supplies:

Stampin’ Up! Stamps: Make a Mitten (127943), Watercolor Winter (129727) and Teeny Tiny Wishes

Card Stock: Stampin’ Up! Whisper White, Old Olive, Cherry Cobbler and Baja Breeze

Ink: Stampin’ Up! Cherry Cobbler, Old Olive and Baja Breeze

Accessories: Stampin’ Up! Cherry Cobbler ribbon, Cherry Cobbler marker, White Gel Pen, Clear Circle Die and Big Shot Machine

Stamped mittens on scrap Whisper White card stock using Cherry Cobbler ink.  Cut the mittens out.

Added shadows to the mittens using a Cherry Cobbler marker under the ribbing, under the thumb and at the very bottom of the mitten.

Die cut a circle out of Whisper White card stock using the Big Shot Machine and the Clear Circle Die.

Used the direct to paper technique and dragged the Baja Breeze ink pad across the top 2/3rds of the card stock.


Stamped the pine branch stamp using Old Olive a few times at the top of the card stock.

Adhered the mittens to the main image panel and added a string using a white gel pen.   Added a 4″ Old Olive panel, 4.25″ Cherry Cobbler panel, 5″ Whisper White panel and a 5.25″ x 10.5″ Baja Breeze card stock base.    Also stamped the sentiment using Cherry Cobbler ink.

Here is the finished card measuring 5.25″ square.

May you be snug and warm today.

Until my next post. . . . . .

Hugs,


Direct to Paper Leaf – Tutorial #543

Hey There,

Well I spent the last four days traveling to and teaching in Sacramento, California.  Met some super, super stampers and had a blast teaching as usual.  Now I’m back in my stamp room and I feel the Autumn season pulling at me creatively.  So today’s tutorial makes use of a beautiful leaf stamp image from from the Stampin’ Up! set French Foliage.   Also, images from the Stampin’ Up! sets Everything Eleanor and Affection Collection.

The background is done with the Direct to Paper technique.  I love to smear ink!

The full tutorial is below for this project.  Grab your favorite beverage sit back and give it a look and then give it a try.

*********************************************************************************

CLICK HERE TO SEE THE LATEST STAMPIN’ UP! PROMOTION AND TO SHOP NOW!

Stampin’ Up! is selling single stamps from 3 stamp sets on a trial bases until January 2, 2013.  Check out the flyers at the links below.

WORD PLAY

PERFECTLY PENNED

SEASONAL SAYINGS

*********************************************************************************

Have you checked out the great clearance rack at Stampin’ Up!  CLICK HERE

************************************************************************

Also, Merry Christmas from Stampin’ Up!

******************************************************************************

Get Free Stamps

Don’t miss out on my Customer free stamp set program. Check it out!  Along with a handmade thank you card from me for your order you will receive a token for each $50 in product you ordered using me as your demonstrator.  After you have collected 10 tokens you will receive a free current stamp set of your choosing, a value of $39 or less.   Here is a link to my online shopping page that you can shop at 24/7 (from the comfort of your home, even in your pj’s) and the products will be shipped directly to your door step from Stampin’ Up:   CLICK HERE TO SHOP.   My free stamp set program will be an on going program.  :)

*******************************************************************************

The new Stampin’ Up! Holiday Catalog is now in effect.  I love all of Stampin’ Up’s products, but the new catalog just blew me away (CLICK HERE TO VIEW THE HOLIDAY CATALOG).  I especially love the coordinating products that you can get as a bundle at a discount.    Gotta love a discount, right?  Especially for those products to make your holiday gifts and cards.

Want a new annual catalog shipped to you?     I will be happy to send you one.  The catalog is free, but there is a $5 shipping charge.   Note, I will only sell or ship within the United States do to Stampin’ Up! policies.  Please contact me at mzindorf@aim.com.  Payment can be sent via Paypal or check.

********************************************************************

Joining Stampin’ Up!

You can join my Stampin’ Up! team and become a Stampin’ Up! Demonstrator now for the great new price of $99, and you can create your own kit, CLICK HERE TO CHECK IT OUT.  Contact me whether you want to start your own business or just enjoy the 20% discount on products.

*****************************************************************************

Now on with today’s tutorial. . . . .  . .

Project Supplies:

Stampin’ Up! Stamps: French Foliage (item number 121166), Affection Collection (item number 127949), Everything Eleanor (item number 124164)

Card Stock: Stampin’ Up! Very Vanilla, River Rock, Early Espresso, Soft Suede

Ink: Stampin’ Up! Crum Cake, Soft Suede, Early Espresso, Crumb Cake

Accessories: Stampin’ Up! Sponges, River Rock and Summer Starfruit Markers, White Gel pen, piercing tools, gold brads

Are you getting inspiration from this blog?   One way you can help support it is to order your Stampin’ Up products through me.   Click HERE to place an order and have your order delivered directly to your door step from Stampin’ Up!

Started with a 4.5″ square piece of Very Vanilla card stock.  Smeared Crumb Cake ink on the card stock and then smeared Soft Suede ink on the paper.

Used the long edge of an Early Espresso ink pad and and pressed it down onto the right and bottom of the main image panel to create two lines.

Stamped the flourish at the top left and bottom right corners from the Everything Eleanor set and the leaf from the French Foliage set using Early Espresso ink.

Stamped the dots stamp from the French Foliage set using Crumb Cake ink at the top right and bottom left corners.

Colored the leaf in with a River Rock marker and then added a bit of Summer Starfruit marker to the tips of the leaf and the sides of flourish.

Added White Gel pen to the flourishes to bring them forward in the scene.

Sponged Early Espresso ink around the edges of the main image panel.

Stamped the Sentiment from the Affection Collection set using Early Espresso ink.

Cut a 5.25″ square piece of Early Espresso card stock and sponged Basic Black ink around the edge.

Added a 5.5″ square panel of Soft Suede, the Early Espresso panel, a 4.5″ square panel of River Rock and the main image panel.  Also added 4 gold brads in the main image panel corners and a 5.5″ Very Vanilla card base.   Here is the finished card measuring 5.5″ square.

**************************************************************

Before I went on my last trip I cleared out my tomato vegatable bed before the frost got to the tomatoes that were left on the plants.

Now I have a large table covered in newspaper that has many, many green tomatoes on it rippening in front of a bright window.  As they rippen I will pop them in a freezer bag and into the freezer to make sauce out of when I get the time.  Anyone else do this or is it just me?

Also, while I was away we were blessed with the first two eggs from our hens.  Wooohoooo!

*******************************************************************************************

May your day be filled with smiles.

Until my next post.. . . . .

Hugs,


Get ready for Brayer and Direct to Paper Workshops!  I am coming to the following locations, click the location name for more information.

Stamp the Day Away – West Alexandria, Ohio – Non-Brayering Event

Staley, North Carolina

St. Petersburg, Florida

Newburge, Indiana

I hope you can make it to one of my workshops in 2012.  I have decided not to travel after this year, so be sure to catch one now!

Link to my Stampin’ Up website where you can order all of your must have Stampin’ Up products from me 24-7: http://michellezindorf.stampinup.net


Ghostly Cat – Tutorial 540 and Freezing Twice Baked Potatoes

Hey There,

I’ve got a little Halloween number for you today.  I just love stamping in the Fall.   The colors are fabulous!

Hang out a moment and check out this card tutorial below and then after the stamping portion of this post I have a recipe and freezing instructions for putting up twice baked potatoes.  🙂   Stamping and cooking, my kind of day!

*********************************************************************************

CLICK HERE TO SEE THE LATEST STAMPIN’ UP! PROMOTION AND TO SHOP NOW!

Stampin’ Up! is selling single stamps from 3 stamp sets on a trial bases until January 2, 2012.  Check out the flyers at the links below.

WORD PLAY

PERFECTLY PENNED

SEASONAL SAYINGS

Also, Merry Christmas from Stampin’ Up!

Don’t miss out on my Customer free stamp set program. Check it out!  Along with a handmade thank you card from me for your order you will receive a token for each $50 in product you ordered using me as your demonstrator.  After you have collected 10 tokens you will receive a free current stamp set of your choosing, a value of $39 or less.   Here is a link to my online shopping page that you can shop at 24/7 (from the comfort of your home, even in your pj’s) and the products will be shipped directly to your door step from Stampin’ Up:   CLICK HERE TO SHOP.   My free stamp set program will be an on going program.  :)

The new Stampin’ Up! Holiday Catalog is now in effect.  I love all of Stampin’ Up’s products, but the new catalog just blew me away (CLICK HERE TO VIEW THE HOLIDAY CATALOG).  I especially love the coordinating products that you can get as a bundle at a discount.    Gotta love a discount, right?  Especially for those products to make your holiday gifts and cards.

Want a new annual catalog shipped to you?     I will be happy to send you one.  The catalog is free, but there is a $5 shipping charge.   Note, I will only sell or ship within the United States do to Stampin’ Up! policies.  Please contact me at mzindorf@aim.com.  Payment can be sent via Paypal or check.

You can join my Stampin’ Up! team and become a Stampin’ Up! Demonstrator now for the great new price of $99, and you can create your own kit, CLICK HERE TO CHECK IT OUT.  Contact me whether you want to start your own business or just enjoy the 20% discount on products.

*****************************************************************************

Now on with today’s tutorial. . . . .  . .

Card Supplies:

Stampin’ Up! Stamps: Frightening Feline (item number 128105), Take Care (item number 126312), and Teeny Tiny Wishes

Card Stock: Stampin’ Up! Whisper White, Basic Black, Pumpkin Pie and Rich Razzelberry

Ink: Stampin’ Up! More Mustard, Rich Razzelberry, Elegant Eggplant, Sahara Sand and Basic Black

Accessories: Stampin’ Up! Sponges, Glitter Brads, Brayer, 2 1/2″ Circle Punch, Basic Black marker, Piercing tools, Stampin’ Demensionals, Post it Notes

Are you getting inspiration from this blog?   One way you can help support it is to order your Stampin’ Up products through me.   Click HERE to place an order and have your order delivered directly to your door step from Stampin’ Up!

Punched a 2 1/2′ circle from the sticky part of a post it note (punch at least 2 layers or the punch will jam due to the paper being thin).


Put the circle mask on a 3 1/2″ x 5.25″ piece of Whisper White card stock.  Brayered More Mustard ink from the top of the card stock to the bottom.

Brayered Rich Razzelberry ink from the top of the card stock, not covering the More Mustard ink entirely.

Brayered Elegant Eggplant ink at the top of the card stock.

Ripped the edge of a post it note and sponged Sahara Sand ink in to create a couple of clouds.

Stamped the Limb and Cat using Basic Black ink.

Stamped the sentiment on a scrap piece of card stock with Basic Black ink.

Cut the sentiment out on a strip using a paper cutter.  Folded the strip to create a banner.  Cut a “v” in each end of the strip.

Added Basic Black, Pumpkin Pie and Rich Razzelberry panels.  Pierced the edges of the Rich Razzelberry Panel.

Sponged Sahara Sand ink on the sentiment banner.  Adhered it to the card using Stampin’ Dimensionals.   Added two Pumpkin Pie Glitter Brads.  Added 3 Basic Black marker dots on each side of the sentiment.

Here is the finished card measuring 5″ x 6.5″.


*********************************************************************************

Cooking Time. . . . . .

How about a side dish that you can pull out of the freeze, let thaw and bake on those busy days.

Making and Freezing Twice Baked Potatoes:

Ingredients:

13 Medium Potatoes

6 T. butter

Salt to taste

16 oz. cream cheese, softened

1 cup hot milk

2 t. onion powder

1 t. ground pepper

Paprika for garnish

******************************

Washed and brushed 2 T. of melted butter on potatoes and placed them on a baking sheet.  Baked 1 hour at 350.  Removed from over and let cool until you are able to handle them.

Cut them in half and used a melon baller to scoop out some of the potato, leaving about 1/4″ still in skin.     Put the scooped out potatoes in a mixing bowl.

Mixed in the cream cheese, 4 T. butter, salt, milk, onion powder and pepper.

Spooned the mixture back into the potato skins.  Wrapped each potato individually with plastic wrap and then put them into 3, 1 gallon freezer bags.  Labeled the bags with content, date and cooking instructions.    On serving day, thaw potatoes completely, bake at 350 degrees for 20 minutes (until heated through).

Enjoy!

*****************************************************************************

May your day be filled with sunshine and fun.

Until my next post.. . . . .

Hugs,


Get ready for Brayer and Direct to Paper Workshops!  I am coming to the following locations, click the location name for more information.

Sacramento, California

Stamp the Day Away – West Alexandria, Ohio – Non-Brayering Event

Staley, North Carolina

St. Petersburg, Florida

Newburge, Indiana

I hope you can make it to one of my workshops in 2012.  I have decided not to travel after this year, so be sure to catch one now!

Link to my Stampin’ Up website where you can order all of your must have Stampin’ Up products from me 24-7: http://michellezindorf.stampinup.net


Wax Resist Rose – Tutorial #538

Hey There,

I just came in from outside.  I’ve been letting these characters run around outside of their chicken run for about an hour a day.  We have about an acre for them to run around in and, of course, this is what they do.  They run up on the deck and look in the door.  I think they are looking for Russ, hoping he will come out with some tasty meal worms, lol.

You can try to shoo them off of the deck, but they all just run to the opposite side, lol.

Then you get this look from Bunny!  What do you imagine she is thinking?  Maybe she should have those funny symbol characters in  a bubble above her head.  Really, she is super sweet.  Before you ask, we have not had an egg sighting yet, sigh.

***********************************************************************************************

Now let’s get down to business. . . . .

I have a Waxed Paper Resist card tutorial for you today.  Check it out below.

************************************************************************************

CLICK HERE TO SEE THE LATEST STAMPIN’ UP! PROMOTION AND TO SHOP NOW!

Don’t miss out on my Customer free stamp set program. Check it out!  Along with a handmade thank you card from me for your order you will receive a token for each $50 in product you ordered using me as your demonstrator.  After you have collected 10 tokens you will receive a free current stamp set of your choosing, a value of $39 or less.   Here is a link to my online shopping page that you can shop at 24/7 (from the comfort of your home, even in your pj’s) and the products will be shipped directly to your door step from Stampin’ Up:   CLICK HERE TO SHOP.   My free stamp set program will be an on going program.  :)

The new Stampin’ Up! Holiday Catalog is now in effect.  I love all of Stampin’ Up’s products, but the new catalog just blew me away (CLICK HERE TO VIEW THE HOLIDAY CATALOG).  I especially love the coordinating products that you can get as a bundle at a discount.    Gotta love a discount, right?  Especially for those products to make your holiday gifts and cards.

Want a new annual catalog shipped to you?     I will be happy to send you one.  The catalog is free, but there is a $5 shipping charge.   Note, I will only sell or ship within the United States do to Stampin’ Up! policies.  Please contact me at mzindorf@aim.com.  Payment can be sent via Paypal or check.

You can join my Stampin’ Up! team and become a Stampin’ Up! Demonstrator now for the great new price of $99, and you can create your own kit, CLICK HERE TO CHECK IT OUT.  Contact me whether you want to start your own business or just enjoy the 20% discount on products.

*****************************************************************************

Now on with today’s tutorial. . . . .  . .

Card Supplies:

Card Stock: Stampin’ Up! Glossy White, Lucky Limeade, Basic Black, Daffodil Delight and Rose Red

Ink: Stampin’ Up! Daffodil Delight, Rose Red, Bravo Burgundy, Basic Black and Elegant Eggplant

Accessories: Stampin’ Up! Sponge, brayer, Stampin’ Dimensionals, Mini Silver Brads, Old Olive Ribbon, Elegant Butterfly Punch, Manhattan Flower Embossing Folder, Big Shot Machine, Stampin’ Dimensionals, Blender Pen, Old Olive, Rose Red and Pink Pirouette Markers

Are you getting inspiration from this blog?   One way you can help support it is to order your Stampin’ Up products through me.   Click HERE to place an order and have your order delivered directly to your door step from Stampin’ Up!

Cut a piece of Waxed Paper the size of the embossing folder and then embossed it using the Manhattan Flower Embossing Folder and Big Shot Machine.

Cut a 11 x 4.25 piece of glossy card stock and folded it in half, shiny sides facing each other.  Put the waxed paper inside and iron the card stock with a piece of copy paper over it.  Have your iron on the cotton setting with no steam.  Keep your iron moving the entire time you are ironing.  It will only take a moment.


Cut the glossy paper in half.

Sponged Daffodil Delight ink, Rose Red ink and then Bravo Burgundy ink on the card stock.

It was at this point that I decided to not use the card stock as my background, but in stead put the rose up front and center.  🙂

Cut out the large flower and sponged Elegant Eggplant on the edges of the rose.

Cut a 3 7/8″ x 5 1/8″ piece of Lucky Limeade card stock.  Embossed it using the Manhattan Flower Embossing folder.

Brayered Lucky Limeade ink over the top of the card stock to make the embossing pop.

Punched a butterfly using the Elegant Butterfly punch.

Sponged Basic Black ink around the edges and put Basic Black marker dots on the wing edges and a Basic Black marker line for the body.

Added a Rose Red panel, Basic Black Panel, Old Olive Ribbon.  Also added Old Olive marker on some of the petals on the Old Olive panel and blended them with a Blender Pen.  Added Rose Red marker to the small flower petals and blended them in with a Pink Pirouette Marker.

Popped the Rose and Butterfly up using Stampin’ Dimensionals.  Added mini silver brads at the Old Olive panel corners and down the Butterfly’s body.

Lastly, added a Whisper White card base.

Here is the finished card measuring 4.25″ x 5.5″.


May your day be filled with all the things that bring you joy.

Until my next post.. . . . .

Hugs,


Get ready for Brayer and Direct to Paper Workshops!  I am coming to the following locations, click the location name for more information.

Scottsdale, Arizona

Sacramento, California

Staley, North Carolina

St. Petersburg, Florida

Newburge, Indiana

I hope you can make it to one of my workshops in 2012.  I have decided not to travel after this year, so be sure to catch one now!

Link to my Stampin’ Up website where you can order all of your must have Stampin’ Up products from me 24-7: http://michellezindorf.stampinup.net


Snow Angel – Tutorial #537


Hey There,

Whew, what a busy past 3 weeks.   I’ve been home exactly 6 days this month.  3 trips back to back.   It was all fun, but now it’s time to play catch up.  But first, how about a project.  I Broke out the brand new Stampin’ Up! stamp set Wonderful Winterland.   This image made me reminisce about my own childhood.  I loved making snow angels and my mother would dress me just like the kid in this image before she would let me out to play in the snow.

Check out the tutorial for this card below.

*****************************************************************

Here is a picture I took of my buddy, Lucas.  Lucas has been on my heels since I arrived home.  I do believe me missed me as much as I missed him.  Just look at that face, what’s not to love.  Lucas is our German Short Haired Pointer/Great Dane mix.  He only weighs 110 lbs.   Big old bundle of fur this one is.

************************************************************************

Here are a few Stampin’ Up Reminders before I start the project:

The new Stampin’ Up! Holiday Catalog is now in effect.  I love all of Stampin’ Up’s products, but the new catalog just blew me away (CLICK HERE TO VIEW THE HOLIDAY CATALOG).  I especially love the coordinating products that you can get as a bundle at a discount.    Gotta love a discount, right?  Especially for those products to make your holiday gifts and cards.

Don’t miss out on my Customer free stamp set program. Check it out!  Along with a handmade thank you card from me for your order you will receive a token for each $50 in product you ordered using me as your demonstrator.  After you have collected 10 tokens you will receive a free current stamp set of your choosing, a value of $39 or less.   Here is a link to my online shopping page that you can shop at 24/7 (from the comfort of your home, even in your pj’s) and the products will be shipped directly to your door step from Stampin’ Up:   CLICK HERE TO SHOP.   My free stamp set program will be an on going program.  :)

Want a new annual catalog shipped to you?     I will be happy to send you one.  The catalog is free, but there is a $5 shipping charge.   Note, I will only sell or ship within the United States do to Stampin’ Up! policies.  Please contact me at mzindorf@aim.com.  Payment can be sent via Paypal or check.

You can join my Stampin’ Up! team and become a Stampin’ Up! Demonstrator now for the great new price of $99, and you can create your own kit, CLICK HERE TO CHECK IT OUT.  Contact me whether you want to start your own business or just enjoy the 20% discount on products.

*****************************************************************************

Now on with today’s tutorial. . . . .  . .

Card Supplies:

Stamps: Stampin’ Up! Wonderful Winterland

Card Stock: Stampin’ Up! Whisper White, Not Quite Navy and Glitter Paper

Ink: Stampin’ Up! Sahara Sand, Not Quite Navy and Stazon Jet Black

Accessories: Stampin’ Up! Sponge, brayer, post it note, Stampin’ Dimensionals, Not Quite Navy Marker, Real Red Marker, Blush Blossom Marker, Sahara Sand Marker, Snowflake Die, Real Red Ribbon, Crystal Bling, 2.5″ Circle Punch, 1″ Circle Punch, Dazzeling Details.

Are you getting inspiration from this blog?   One way you can help support it is to order your Stampin’ Up products through me.   Click HERE to place an order and have your order delivered directly to your door step from Stampin’ Up!

Started out with a 4″ x 5.25″ piece of Whisper White card stock.  Stamped the image using Stazon Jet Black ink.

Ripped a jagged edge in the sticky part of a post it note and used it to mask the snow.  Brayered Sahara Sand ink on the unmasked area of the card stock.

Brayered Not Quite Navy ink at the top of the card stock.

Sponged Sahara Sand ink at the post it note edge to darken the horizon line.

Die cut the two smallest snowflakes using Whisper White card stock and a Big Shot Machine.

Punched part of the 2.5″ circle from the side of the card stock.

Put a line of Not Quite Navy marker at the sides of the image and blended the marker using a Blender Pen.   Also, made a line of Not Quite Navy ink on the hat and blended it with the Blender pen.

Colored in the boots and mittens using a Real Red Marker.

Added a Shadow under the arms and legs of the image using a Sahara Sand marker.

Added a dot of Blush Blossom marker to the cheeks of the image.

Added Real Red Ribbon.

Attached the main image panel to a 11″ x 4.25″ Not Quite Navy panel folded in half to make the card base.  Added the Glitter paper 1″ circle punch, two snow flakes and crystal bling.   Also used Dazzling Details to the top of the snow area to create some sparkle.

Here is the finished card measuring  4.25 X 5.5.


May your day be extra special.

Until my next post.. . . . .

Hugs,


Get ready for Brayer and Direct to Paper Workshops!  I am coming to the following locations, click the location name for more information.

Scottsdale, Arizona

Sacramento, California

Staley, North Carolina

St. Petersburg, Florida

Newburge, Indiana

I hope you can make it to one of my workshops in 2012.  I have decided not to travel after this year, so be sure to catch one now!

Link to my Stampin’ Up website where you can order all of your must have Stampin’ Up products from me 24-7: http://michellezindorf.stampinup.net


Grave Yard – Tutorial #536

Hey There,

I’m back from St. George, Utah and the Stampin’ Up! Founder’s Circle Retreat.   Just want to say “I had an awesome time”!

Founder’s Circle Retreat is a get away for the top Stampin’ Up! Demonstrators in the company.  They fly us out to Utah and treat us to the most wonderful decorations, food, activities, gifts on our pillow every night and good times spent together with each other.   Fabulous!

Did I mention we had the entire hotel to ourselves.  Breakfast could be had in our PJ’s, grin.

This year’s retreat had a nautical theme.  Check out the decorations that I found on my hotel room door and at the dinner table.

I got to spend some time shopping, laughing and having a good time.

Diana Gibbs, Sherri Thiessen Peters and myself in the back of the hotel shuttle van.

I got to tour the Stampin’ Up! Manufacturing site.  Watch the stamps and other products being made, packaged etc.  Even got free stuff right off the press, woohoo!

Here I am with Shelli Gardner in her private quarters where she stays when at the Manufacturing site.

Stampin’ Up! then put us in the buses and took us for a surprise trip down the Colorado River in Rafts.   The scenery was breathtakingly beautiful.

Myself and Judy Garza.   Also here I am with Lorri Heiling and Sherri Thiessen Peters on the raft.

Well I could go on an on about the fun I had over the past week, but I have a project for you today.

Today’s project highlights the Stampin’ Up! stamp set Toxic Treats (item number 127901).  I pulled some images out of the stamps to give you an idea on how to get more use out of them.   I can’t get enough of this set.  It’s super cute.

Check out the tutorial below.

Here are a few Stampin’ Up Reminders before I start the project:

The new Stampin’ Up! Holiday Mini catalog is now in effect.  I love all of Stampin’ Up’s products, but the new mini catalog just blew me away (CLICK HERE TO VIEW THE HOLIDAY MINI CATALOG).  I especially love the coordinating products that you can get as a bundle at a discount.    Gotta love a discount, right?  Especially for those products to make your holiday gifts and cards.

Don’t miss out on my Customer free stamp set program. Check it out!  Along with a handmade thank you card from me for your order you will receive a token for each $50 in product you ordered using me as your demonstrator.  After you have collected 10 tokens you will receive a free current stamp set of your choosing, a value of $39 or less.   Here is a link to my online shopping page that you can shop at 24/7 (from the comfort of your home, even in your pj’s) and the products will be shipped directly to your door step from Stampin’ Up:   CLICK HERE TO SHOP.   My free stamp set program will be an on going program.  :)

Want a new annual catalog shipped to you?     I will be happy to send you one.  The catalog is free, but there is a $5 shipping charge.   Note, I will only sell or ship within the United States do to Stampin’ Up! policies.  Please contact me at mzindorf@aim.com.  Payment can be sent via Paypal or check.

You can join my Stampin’ Up! team and become a Stampin’ Up! Demonstrator now for the great new price of $99, CLICK HERE TO CHECK IT OUT.  Contact me whether you want to start your own business or just enjoy the 20% discount on products.

Want to purchase one of my original cards or some Stampin’ Up! retired sets CLICK HERE.

*****************************************************************************

Now on with today’s tutorial. . . . .  . .

Card Supplies:

Stamps: Stampin’ Up! Toxic Treats (item number 127901)

Card Stock: Stampin’ Up! Whisper White, Basic Black and Pumpkin Pie

Ink: Stampin’ Up! Rich Razzelberry, Elegant Eggplant, Daffodil Delight, Basic Black, Old Olive and Basic Gray

Accessories: Stampin’ Up! Sponges, brayer, post it note, Stampin’ Dimensionals, Basic Black marker, Punches (1 3/4 Circle, Scallop Circle, 1 3/8″ Square, corner round) and antique brad.

Are you getting inspiration from this blog?   One way you can help support it is to order your Stampin’ Up products through me.   Click HERE to place an order and have your order delivered directly to your door step from Stampin’ Up!


Started with a piece of Whisper White card stock.  Punched a 1 3/4″ circle from the sticky part of a post it note to use as my sun mask.   Brayered Daffodil Delight, Rich Razzelberry and then Elegant Eggplant at the top of the card stock.


Removed the sun mask.

Colored the witch in on the stamp using a Basic Black marker, huffed my breath on the stamp to moisten and then stamped it over the sun.  My image came out a bit lighter than I wanted so I colored over it using the Basic Black marker.

Ripped a jagged edge in a post it note and used it to create my black clouds using a sponge and Basic Black ink.


Sponged Old Olive ink at the bottom of the card stock.

Sponged Basic Black ink at the very bottom of the card stock.

Stamped the tombstone stamp twice on Whisper white card stock using Basic Gray ink.

Cut the tombstones out and sponged Basic Black ink on the bottom and right sides of the them.

Adhered the tombstones to the main image panel and then stamped the fence using Basic Black ink.

Sponged Basic Black ink around the card stock edges.

Used the corner round punch on the top corners.

Stamped the sentiment on a piece of Pumpkin Pie card stock using Basic Black ink.

Cut the card stock into a strip and then used the square punch to snip out the triangle in both ends of the piece.


Sponged Basic Black ink around the edges and then curled the ends using a bone folder.

Punched a scallop circle out of Basic Black card stock and then cut a piece of it off.  I used the smaller piece on my card front.

Added a 5″ x 6.5″ Basic Black panel and a 4.75″ x 6.25″ Whisper White panel.    Adhered the banner to the front of the card stock using Stampin’ Dimensionals and glue in the middle.

Added a 10″ x 6.5″ piece of Whisper White folded in half as my card base.

Here is the finished card measuring 5″ x 6.5″

May your day be one of pure delight.

Until my next post. . . . .

Hugs,


Get ready for Brayer and Direct to Paper Workshops!  I am coming to the following locations, click the location name for more information.

Orange, Massachusetts

Scottsdale, Arizona

Sacramento, California

Staley, North Carolina

St. Petersburg, Florida

Newburge, Indiana

I hope you can make it to one of my workshops in 2012.  I have decided not to travel after this year, so be sure to catch one now!

Link to my Stampin’ Up website where you can order all of your must have Stampin’ Up products from me 24-7: http://michellezindorf.stampinup.net


Pumpkin Witch – Tutorial #535

Hey There,

Last night I arrived home safe and sound from Purcellville, Virginia where I had a lovely, lovely time teaching and meeting some terrific stampers who are now brayer maniacs.

My time at home is short lived however, I leave very early tomorrow morning for St. George, Utah where I will be pampered with the other Stampin’ Up! Founder Circle Achievers at the Founder’s Circle Retreat.  I’m  soooo looking forward to this trip!  Please know I will be available for product or workshop questions, please e-mail or call.  🙂

I didn’t want to leave you without a project, so here is a cute quarter card (4.25″ x 5.5″).  This card features two Stampin’ Up Halloween stamp sets, Wicked Cool and Jack of all Trades.  I love to co-mingle stamp sets.

Check out the tutorial below.

Here are a few Stampin’ Up Reminders before I start the project:

The new Stampin’ Up! Holiday Mini catalog is now in effect.  I love all of Stampin’ Up’s products, but the new mini catalog just blew me away (CLICK HERE TO VIEW THE HOLIDAY MINI CATALOG).  I especially love the coordinating products that you can get as a bundle at a discount.    Gotta love a discount, right?  Especially for those products to make your holiday gifts and cards.

Don’t miss out on my Customer free stamp set program. Check it out!  Along with a handmade thank you card from me for your order you will receive a token for each $50 in product you ordered using me as your demonstrator.  After you have collected 10 tokens you will receive a free current stamp set of your choosing, a value of $39 or less.   Here is a link to my online shopping page that you can shop at 24/7 (from the comfort of your home, even in your pj’s) and the products will be shipped directly to your door step from Stampin’ Up:   CLICK HERE TO SHOP.   My free stamp set program will be an on going program.  :)

Want a new annual catalog shipped to you?     I will be happy to send you one.  The catalog is free, but there is a $5 shipping charge.   Note, I will only sell or ship within the United States do to Stampin’ Up! policies.  Please contact me at mzindorf@aim.com.  Payment can be sent via Paypal or check.

You can join my Stampin’ Up! team and become a Stampin’ Up! Demonstrator now for the great new price of $99, CLICK HERE TO CHECK IT OUT.  Contact me whether you want to start your own business or just enjoy the 20% discount on products.

Want to purchase one of my original cards or some Stampin’ Up! retired sets CLICK HERE.

*****************************************************************************

Now on with today’s tutorial. . . . .  . .

Card Supplies:

Stamps: Stampin’ Up! Jack of all Trades and Wicked Cool

Card Stock: Stampin’ Up! Old Olive, Basic Black, So Saffron and Whisper White

Ink: Stampin’ Up! Pumpkin Pie, Basic Black, Tempting Turquoise, Rich Razzelberry, Elegant Eggplant, Old Olive

Accessories: Stampin’ Up! Sponge, brayer, 2.5″ circle punch, post it note, Elegant Eggplant brads, Pumpkin Pie ribbon, White Gel pen, Markers (Basic Black, Old Olive, Pumpkin Pie and Cajun Craze), Stampin’ Dimensionals.

Are you getting inspiration from this blog?   One way you can help support it is to order your Stampin’ Up products through me.   Click HERE to place an order and have your order delivered directly to your door step from Stampin’ Up!


Punched a 2.5″ circle from the sticky part of the post it note.  Used the circle to mask the moon on a 4″ x 5″ piece of Whisper White Card stock.

Brayered Tempting Turquoise, Rich Razzelberry and then Elegant Eggplant ink at the top of the card stock.


Sponged Old Olive ink at the bottom of the card stock.

Stamped the pumpkin on So Saffron card stock using Pumpkin Pie ink.

Added Pumpkin Pie marker.

Added a bit of Cajun Craze marker and blended it in with the Pumpkin Pie marker.

Stamped the hat on the So Saffron card stock using Basic Black ink.

Added Basic Black marker for the shadows.

Stamped the face on the pumpkin using Basic Black ink.

Stamped the feet on the card stock using Basic Black ink.

Colored the stripes in on the socks using a White Gel Pen.

Added a shadow underneath using an Old Olive Marker.

Stamped the sentiment using Basic Black ink.

Cut out the pumpkin and hat and adhered them to the card stock using Stampin’ Dimensionals.

Added Pumpkin Pie Ribbon and Elegant Eggplant brads.

Added a Basic Black panel and Old Olive card base.

Here is the finished card measuring 4.25″ x 5.5″.

May your week be unforgettable!

I’m off to Utah!

Until my next post. . . . .

Hugs,


Get ready for Brayer and Direct to Paper Workshops!  I am coming to the following locations, click the location name for more information.

Purcellville, Virginia

Orange, Massachusetts

Scottsdale, Arizona

Sacramento, California (Sold Out)

Staley, North Carolina

St. Petersburg, Florida

Newburge, Indiana

I hope you can make it to one of my workshops in 2012.  I have decided not to travel after this year, so be sure to catch one now!

Link to my Stampin’ Up website where you can order all of your must have Stampin’ Up products from me 24-7: http://michellezindorf.stampinup.net