Fenced View – Tutorial & Convention Shopping

dsc05405.JPG

Happy Sunday Everyone! 

I didn’t get a chance to post on Saturday due to the Stamp Away USA, Stamp Convention that was held in Sharonville, OH at the Convention Center.  This was my first time attending one of these stamp conventions and man oh man, can a Gal get into lots of trouble at one of these things. 

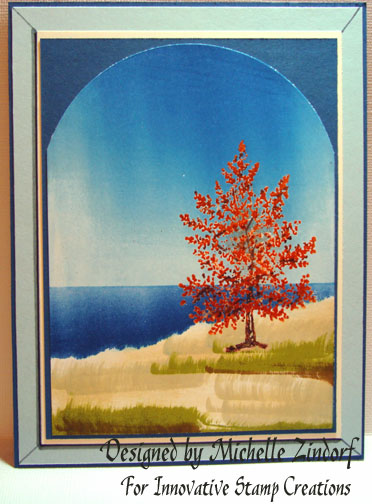
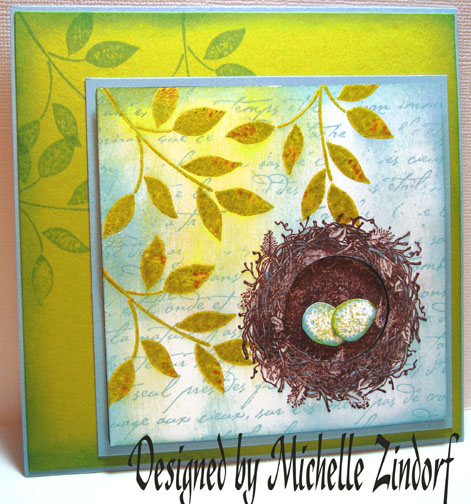
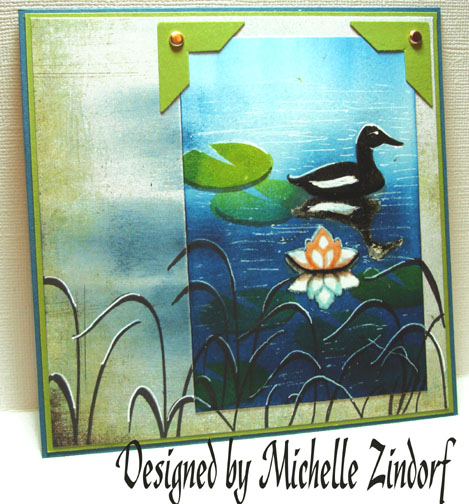
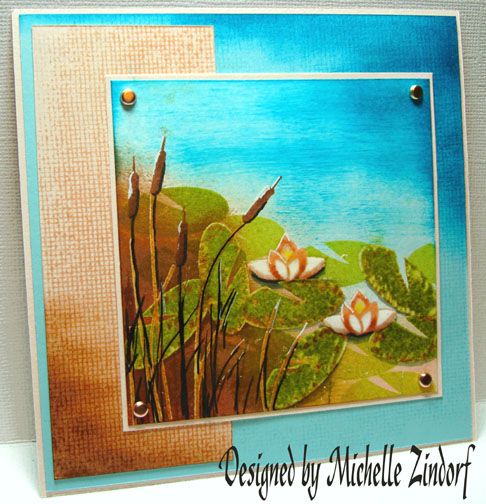
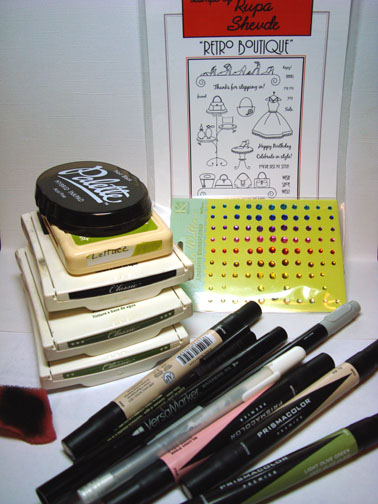
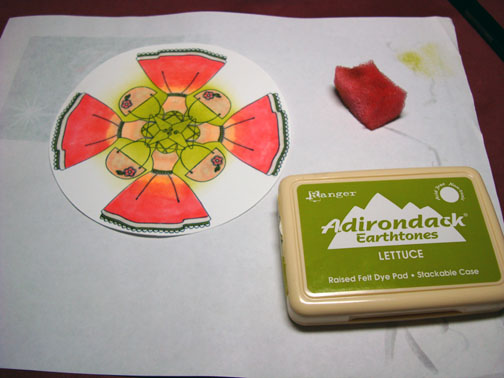
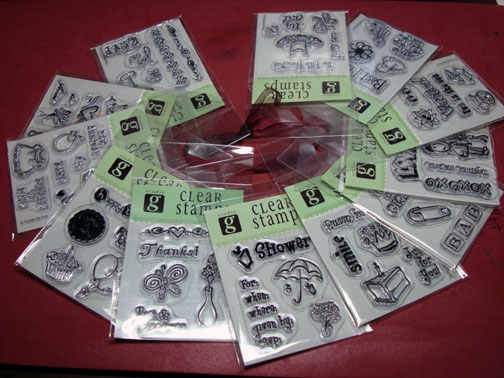
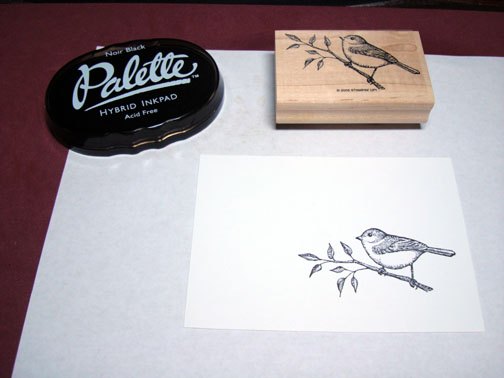
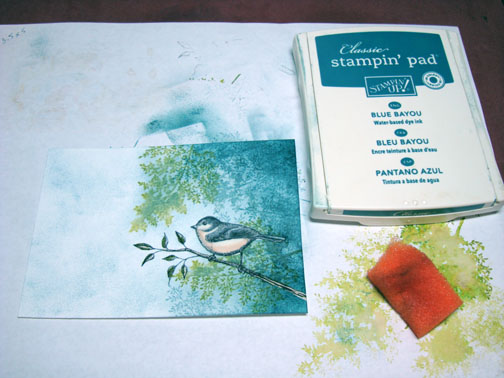
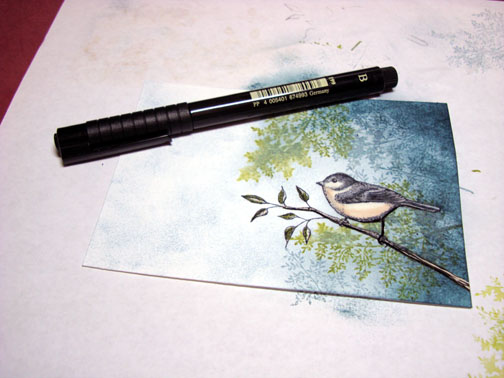
Below is a picture of my purchases and believe me I wanted just about everything, but I set a limit for myself before I went and only took that much in cash with me and left my credit cards at home.  That turned out to be a smart move on my part, lol.  I think I made wiser choices too.

The day was so enjoyable, Karen Barber let me drag her along on the road trip and I also met a few of you blog readers 🙂  A big hello to Colleen and her friends and to Priscilla.

dsc05386.JPG

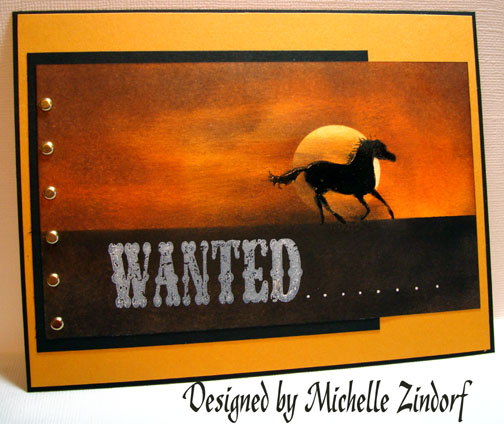
Today’s tutorial was created with one of the stamps I purchased.  By the way this is tutorial number 99.  If you would like to see the other 98 tutorials check out the tab at the top of my blog that reads “all my tutorials”.

So let’s get started.  🙂
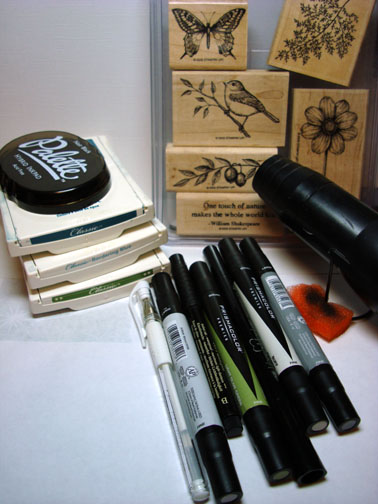
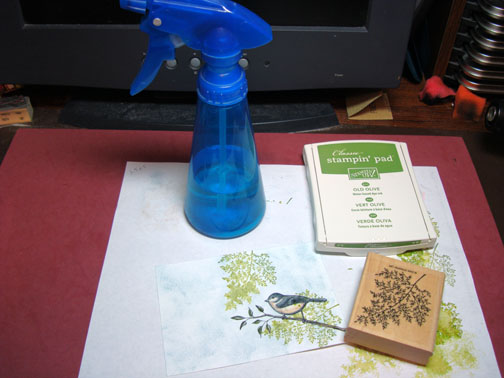
Supplies:

Stamps: Stamp by Judith T-40
Paper: Stampin’ Up Whisper White, Not Quite Navy, Kiwi Kiss
Ink: Stampin’ Up Baja Breeze, Not Quite Navy, Old Olive, Basic Black & Kiwi Kiss
Accessories: Post it Notes, Brayer, Markers, White Gel Pen, Sponges, ribbon, Brads

dsc05407.JPG

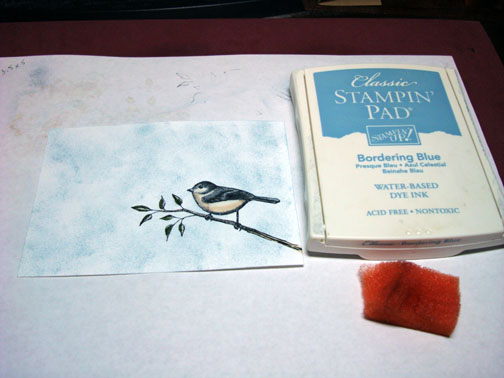
Brayered Baja Breeze ink at the top of a 5.5″ x 4.2″ piece of Whisper White Card stock.

dsc05388.JPG

Brayered Kiwi Kiss ink at the bottom half of the card stock.

dsc05389.JPG

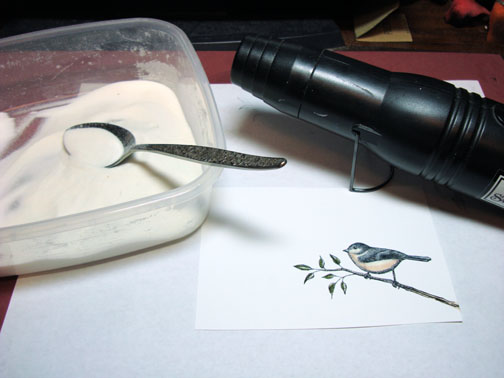
Tore through the sticky part of two post it notes and used them to mask the ground portion of the card stock.

dsc05390.JPG

Sponged Baja Breeze ink at the torn edge of the card stock to create a horizon line and to put in a couple of mountain shapes.

dsc05391.JPG

Right at the torn edge of the post it notes sponged in Not Quite Navy to darken the horizon line so it would really stand out.

dsc05392.JPG

Removed post it note masks and sponged Not Quite Navy ink at the top of the card stock to create a more dramatic sky.

dsc05393.JPG

Sponged Old Olive ink at the bottom of the card stock to create some depth in the foreground.

dsc05394.JPG

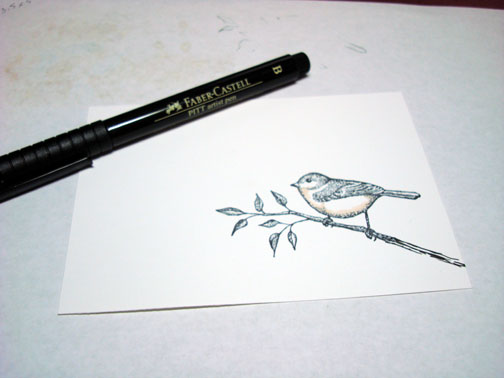
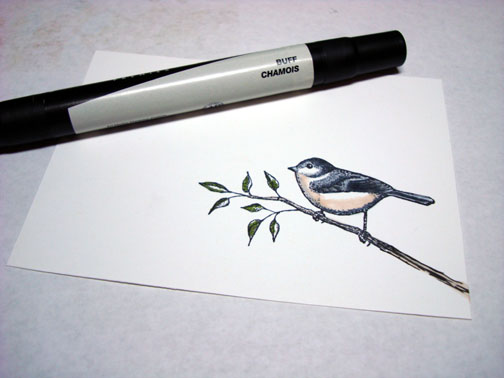
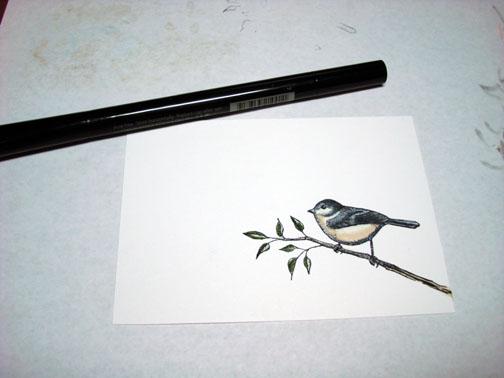
Stamp my new “Stamp by Judith T-40” with Basic Black ink.

dsc05395.JPG

Colored the rocks with a Going Gray maker.

dsc05396.JPG

Colored the tree trunk with a Chocolate Chip marker.

dsc05397.JPG

Colored the fence posts with a Close to Cocoa marker.

dsc05398.JPG

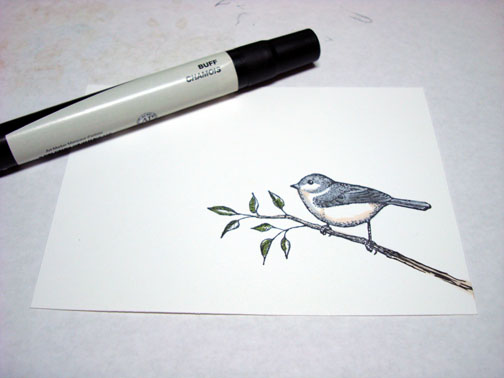
Colored the tops of the fence posts with a Creamy Caramel marker.  Also created a shadows for the tree and fence post with the Creamy Caramel marker.

dsc05399.JPG

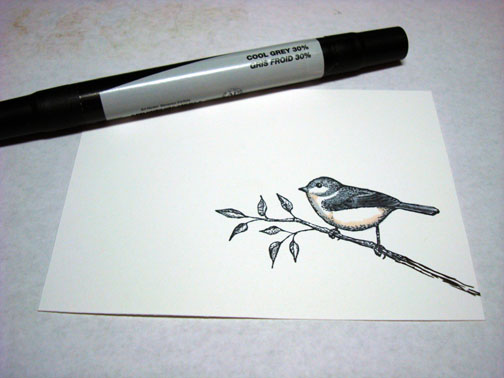
Colored the flowers in with a white gel pen.

dsc05400.JPG

Colored the flower stems with an Old Olive maker.

dsc05401.JPG

Added some Close to Cocoa to the center of my tree and fence post shadows.

dsc05402.JPG

Sponged Note Quite Navy ink on the edge of my Kiwi Kiss card stock panel.

dsc05403.JPG

Assembled card and here it is finished measuring 5″ x 6.5″.

dsc05405.JPG

Hope you enjoyed this country scene and will give it a try.

May your day be filled with soft scenery and daisies!

Until my next post. . . . . . . . .

Hugs,

Michelle


Blog Candy Winner and Thinking of Fall-Tutorial

dsc05327.JPG

I’m getting back into the swing of things today after my week off line. 

First things first, we have a blog candy winner!!!

dsc05257.JPG  

The winner is comment number 133 out of 234.   Congratulations to Linda Patti who wrote “please enter me for the blog candy.. LOVE the framed art work!”  Linda, please e-mail me your address so I can get this out to you.

Thanks everyone for playing along.  🙂

Now for today’s tutorial.  I used the stamp sheet from Innovative Stamp Creations “Marvels of Nature” that can be purchased from their online store found here:  http://www.innovativestampcreations.com/ischomepage.html

Supplies:

Stamps: Innovative Stamp Creations “Marvels of Nature”
Paper: Stampin’ Up Whisper White, Very Vanilla, Soft Sky & Not Quite Navy
Ink: Stampin’ Up Really Rust, Not Quite Navy, Soft Sky, Distress inks Old Paper, Antique Linen, Brushed Corduroy & Peeled Paint
Accessories: Brayer, Clear embossing powder, heat gun, Coluzzle Circle Template, Chocolate Chip, Going Gray & Black markers, Post it notes, Ruler

dsc05328.JPG

Loaded tree stamp with Versamark, then Really Rust ink, tapped the brush end of a Chocolate Chip marker on the leaf area of the stamp and colored in the trunk before stamping it on a 4″ x 5.5″ of Whisper White card stock.

dsc05304.JPG

Heat embossed it using clear embossing powder and a heat gun.

dsc05305.JPG

Cover 1/3rd of the bottom of the card stock with a Post it Note to mask it.

dsc05306.JPG

Brayer on Soft Sky ink over the sky area.  Then brayered on Not Quite Navy ink at the top of the card stock, not covering the Soft Sky ink entirely.

dsc05307.JPG

Tore the top of the Post it note to reveal a bit of the white card stock.

dsc05308.JPG

Masked the sky with another Post it note.

dsc05309.JPG

Brayered on Not Quite Navy ink in the unmasked area.   This created the water and horizon line.

dsc05310.JPG

Removed masks.

dsc05311.JPG

Sponged on Antique Linen Distress ink on the ground area using a sideways streaking motion.

dsc05312.JPG

The distress pads are great for direct to paper techniques since the pad is raised up from the plastic case.

dsc05313.JPG

Streaked one edge of the Old Paper ink pad in an upward motion to create grasses.

dsc05314.JPG

Added some Peeled paint grasses in the same manner as the last step.

dsc05315.JPG

Added a few Chocolate Chip marker branches to the center of the tree.

dsc05316.JPG

Added a couple of strokes of the Brushed Corduroy ink pad at the bottom of the Peeled paint grasses.

dsc05317.JPG

Rounded the top of the card stock using a circle Coluzzle template.

dsc05318.JPG

dsc05319.JPG

Assembled card front and added fine lines of Going Gray marker to the corners using a ruler to keep them straight.

dsc05320.JPG

dsc05321.JPG

Using the brush end of the Going Gray marker, added a thick line to the left and bottom of the Very Vanilla panel to create a shadow.

dsc05322.JPG

Added a fine line of black marker to the left and bottom of the Very Vanilla panel to enhance the shadow.

dsc05323.JPG

Here you have it the completed card measuring 5″ x 6.5″.

dsc05327.JPG

Hope your day is filled with cool ocean breezes and sunshine.  🙂

Until my next post. . . . . . .

Hugs,

Michelle


Framed Scene – Tutorial and More Blog Candy

dsc05257.JPG

I’m feeling generous today.  It is my last day at work before my vacation starts.  YIPEEEE!  So today I have a tutorial for you and the finished piece is being given away as blog candy.

So to enter for a chance to win this framed piece, please leave me a comment on this post telling me to enter you.  If you are getting this blog update by e-mail you will need to click this link to leave a comment on this blog post:   http://zindorf.blogs.splitcoaststampers.com/2008/07/25/framed-scene-tutorial-and-more-blog-candy/

I will use a random number generator to pick the winner on the morning of Tuesday, August 5th, which by the way is the next time I will be posting a stamping project.  I will be posting the winner of yesterdays blog candy tomorrow morning before I leave. 🙂

A little about the frame.  I don’t buy new frames for anything.  I like to poke around at thrift stores, flea markets and garage/barn sales for them.  When looking at framed pictures for sale, I’m really looking at the frame.  What is inside of the frame doesn’t matter, because I’m going to throw it away.   The little frame I used today is solid wood and has a nice easel back to it and I paid 25 cents for it.  I also buy really large wood framed pictures, generally not paying more than $2 for them and use them for my pastel paintings.  New they run from $50 to $75.  I found I can pick the frame before I do a painting and then paint it using the dimension I need so it will fit in the frame (cart before the horse I guess, lol).  I also cut my own mats, big savings also.

Ok, enough about that, on with the tutorial.  🙂

Supplies:

Stamps: Stampin’ Up Spring Solitude & Lovely as a Tree
Paper: Stampin Up Whisper White & Basic Black
Ink: Stampin’ Up Blue Bayou, Perfect Plum, Close to Cocoa, More Mustard, Basic Black, Soft Sky & Pale Plum
Accessories: Brayer, Post it Notes, Sponges, White Gel Pen, Fine point Black marker, Frame

dsc05262.JPG

Brayered Soft Sky ink on the top 1/2 of a 6″ x 3″ piece of Whisper White card stock.

dsc05242.JPG

Tore Post it Notes (through the sticky part) to use as a mask for the sky while I put in the horizon line.

dsc05243.JPG

Sponged on More Mustard ink being darkest at the post it note edge.

dsc05244.JPG

Removed mask and stamped bird with Basic Black ink.

dsc05245.JPG

Tore a new piece of post it note to use to mask the sky and create a mountain in the distance.  Sponged Pale Plum ink in the open area.  Opps!  Missed the photo of this.

dsc05246.JPG

Used torn post it notes again for a mask to create another mountain in the distance and sponged on Perfect Plum ink so it is a little darker than the first mountain. 

dsc05247.JPG

Removed masks and used a White Gel pen to define the birds wing and eye.

dsc05249.JPG

Used a fine point marker to put dots on the ground at the birds feet to simulate bird feed.

dsc05250.JPG

Sponged a little Blue Bayou ink at the top of the sky to give it some drama.

dsc05251.JPG

Stamped two pine trees at the left of the piece with Basic Black ink.

dsc05252.JPG

Sponged More Mustard ink on to create a shadow for the trees and for the bird.

dsc05253.JPG

Sponged on a little Close to Cocoa ink in the middle of the tree shadows to give a little more depth.

dsc05254.JPG

Added a Black card stock panel and here it is finished.

dsc05257.JPG

Everyone be safe and have a super pleasant and sunny day! 

Until my next post. . . . . . .

Hugs,

Michelle


Birds on a Wire – Tutorial

dsc05209.JPG

The idea of birds sitting on a wire has been rattling around in my head for some time.  This morning it finally made it to paper. 

Here is the tutorial.  🙂

Supplies:

Stamps: Stampin’ Up Spring Solitude & Lovely as a Tree
Paper: Stampin’ Up Basic Black, Kiwi Kiss & Whisper White
Ink: Stampin’ Up Baja Breeze, Kiwi Kiss, Old Olive and Basic Black
Accessories: Ruler, Fine point black marker, Old Olive marker, White Gel Pen, Stampin’ Up Piercing Tools, Sponge & Brayer

dsc05215.JPG

Brayered Baja Breeze ink at the top 2/3rds of a 3.5″ x 8″ piece of Whisper White card stock.

dsc05198.JPG

Brayered Kiwi Kiss ink on the bottom 1/4th of the card stock.

dsc05199.JPG

Made a line across the card stock with a fine point black marker and a ruler.

dsc05200.JPG

Stamped birds with Basic Black ink.   I also extended their legs with a fine point black marker so they would reach the black line.

dsc05201.JPG

Inked only the trees, with Basic Black ink, on the tree stamp to omit the ground part of the stamp. Stamp it twice.

dsc05202.JPG

Used a white Gel pen to make the eye and wing of the birds more prominent.

dsc05203.JPG

Sponged Old Olive ink on the trees.

dsc05204.JPG

Made dots with a white gel pen on the left side of the trees to create highlights and show light direction.

dsc05205.JPG

Sponged a shadow under the trees with Old Olive ink that is slanting toward the right side.

dsc05206.JPG

Made dots on the right side of the trees with an Old Olive marker.

dsc05207.JPG

Assembled card front and pierced a line at the bottom of the card stock.

dsc05208.JPG

Added two silver brads and here is the completed card measuring 9″ x 4″.

dsc05209.JPG

On a personal note, I had a great time over the weekend playing, playing and playing some more with my beautiful Grand Daughter.  Here she is pictured with my Husband, Russ being silly.

dsc051971.jpg

Hope your day is filled with snack time and smiles!

Until my next post. . . . . . . .

Hugs,

Michelle


In The Nest Tutorial & BLOG CANDY!

dsc05167.JPG

As I said before, I love feeding and watching the birds.  I’m a city girl (spent my first 43 years in the city) and then I moved to a rural town and I’m pretty much surrounded by farm land.   Well being a city girl, I got a lesson at the feed store, yep my town has a feed store, lol.  I went in and asked for bird seed.  I was promptly told you can’t grow birds with seed, what I was looking for was bird feed.  Now how did I make it all these years not knowing the correct term for bird feed. 🙂  Lesson learned!

NOTE:  TIMES UP FOR THE BLOG CANDY! THANKS TO ALL WHO ENTERED. 

Anyway, I have blog candy for you all today!  A set of (16) sixteen, Series 7, Studio G, Clear Stamps.  All you have to do to enter to win these stamps is leave a comment on this post.  If you are getting this by e-mail, please click this link to be able to leave a comment on the post:  http://zindorf.blogs.splitcoaststampers.com/2008/07/16/in-the-nest-tutorial-blog-candy/

I will use a random number generator and will announce the winner on Friday morning, July 18th.  Good Luck everyone!

dsc05173.JPG

Below is a picture of the new Stampin’ Up in colors I just received in the mail.  These colors won’t be available until the new Catty comes out.  I just couldn’t resist playing with them, so I used a couple of them in today’s tutorial.  Please forgive me, I just had to, lol.

Supplies:

Stamps: Stampin’ Up Soft as a Feather, Best Blossoms & French Script
Paper: Stampin’ Up Baja Breeze, Kiwi Kiss & Whisper White
Ink: Stampin’ Up Baja Breeze, Kiwi Kiss & Chocolate Chip
Accessories:Stampin’ Up markers, Versamark pad, 1 1/4 circle punch, Sponges, Stampin’ Dimensionals, Clear embossing powder & heat gun

dsc05141.JPG

dsc05172.JPG

OK, so I was so excited about my new color options, I started this project and realized that I wasn’t taking pictures, lol.  So the first 3 pictures were staged after the fact.  Bare with me it is 4:00 a.m after all. 🙂

Stamped Nest by first loading the stamp with Versamark then with Chocolate Chip ink before stamping on a 4″ x 4″ piece of Whisper White card stock.

dsc05145.JPG

Heat embossed image with clear embossing powder and a heat gun.

dsc05146.JPG

Colored the sides of the nest with a Going Gray marker.

dsc05147.JPG

Stamped the leaves by first loading the stamp with Versamark, then Kiwi Kiss ink, then dabbed a few dots of More Mustard marker on the stamp before stamping.  I like a little texture in my leaves.  🙂

dsc05151.JPG

Heat embossed leaves with clear embossing powder and a heat gun.

dsc05152.JPG

Sponged some Kiwi Kiss ink on the top left side of the card stock.

dsc05153.JPG

Randomly sponged some Baja Breeze ink on the card stock.

dsc05154.JPG

Used a 1 1/4″ circle punch and punched the center out of the nest.

dsc05155.JPG

Flipped the card stock over and stuck on Stampin’ Dimensionals and stuck it to a 4″ x 4″ piece of Black card stock.

dsc05156.JPG

dsc05157.JPG

Glued the punched piece of nest on the black card stock.

dsc05158.JPG

Stamped the French Script Stamp on the card stock using Baja Breeze ink.

dsc05161.JPG

Stamped two eggs on Whisper White card stock using Baja Breeze ink.  Cut them out.

dsc05162.JPG

Lightly pressed eggs on to the Kiwi Kiss ink pad to give them a hint of green.

dsc05164.JPG

Stamped leaves with Baja Breeze ink on a Kiwi Kiss card stock panel.

dsc05165.JPG

Sponged Baja Breeze ink around the card stock edge.

dsc05166.JPG

Assembled card and here it is finished measuring 5.25″ x 5.25″.

dsc05167.JPG

Don’t forget to comment to enter to win the Blog Candy for today!

Hope you feel safe and secure in your own nest today.  🙂

Until my next post. . . . . .

Hugs to all,

Michelle


Pond Life II MZ – Tutorial

dsc05118.JPG

I still had this set by papertreyink.com “Pond Life” on my desk from Friday so I decided to give it another go. 

Here is the tutorial.  🙂

Supplies:

dsc05119.JPG

Stamped Lily with Salmon ink on Whisper White Card stock.  Turned stamp upside down and stamped lily again with Aqua ink.

dsc05087.JPG

Darkened bottom of Salmon lily with a Blush Blossom marker.

dsc05088.JPG

Darkened bottom of reflection lily with a Going Gray and Blush Blossom marker.

dsc05089.JPG

Put Going Gray marker under Salmon Lily to create a shadow.

dsc05090.JPG

Put a fine line of Black marker under the Salmon lily to define shadow.

dsc05091.JPG

Colored over both the lily images with a Versamark marker and heat embossed using clear embossing powder and a heat gun.

dsc05092.JPG

dsc05093.JPG

Using a Mirror Image Stamp (see frequently asked questions in regards to Mirror image stamp) stamp a loose mirror image of the duck with basic black ink. 

Note:  to use mirror image stamp, stamp image on mirror image stamp and the stamp mirror image stamp on card stock.

dsc05094.JPG

Defined mirror image of duck a little with a going gray marker.

dsc05095.JPG

Stamp duck image above mirror image with Basic Black ink.

dsc05096.JPG

Went over both duck images with a Versamark marker and heat embossed using clear embossing powder and a heat gun.

dsc05097.JPG

dsc05098.JPG

Brayer Cloudy Blue ink over card stock, leaving it lighter at the top.

dsc05099.JPG

Brayered Not Quite Navy at the bottom and just a little at the top of the card stock.

dsc05100.JPG

Stamped lily pads with Lettuce ink.

dsc05101.JPG

Stamped more lily pads, but stamped off once on my scrap paper before stamping image (Second generation stamping).  This makes the images lighter in color.

dsc05102.JPG

Sponged on more Not Quite Navy ink at the bottom of the card stock.

dsc05103.JPG

Added gray marker at the bottoms of the lily pads and the bottom of the main image duck.

dsc05104.JPG

Stamped Reeds with Basic Black ink.

dsc05105.JPG

Put white highlights on top lily pad, duck, lily and reeds with a white gel pen.

dsc05108.JPG

Glued main imgage panel to a piece of Basic Grey “Archaic” design paper and swiped some Not Quite Navy ink across the design paper and onto the main image panel.

dsc05110.JPG

Stamped more reeds with Basic Black ink.

dsc05111.JPG

Drew in some of the bottoms of the reeds from the main image panel to the design paper panel with a black marker.  Used a White Gel pen to put highlights on the reeds on the designer paper.

dsc05112.JPG

Assembled card front and added Old Olive Photo Corner punches and copper brads.

dsc05113.JPG

Here is the card finished measuring 5.25″ x 5.25″.

dsc05118.JPG

Hope your day is filled with peace and tranquility.

Until my next post. . . . ..

Michelle


Pond Life MZ Style – Tutorial

dsc05084.JPG

I use stamps from all different companies these days.  My piece today uses Papertreyink.com stamps “Pond Life”.

I use to be stickily a Stampin’ Up girl, but too many fabulous companies have popped up that need my money, lol.  Really, I just can’t resist a great stamp set when I see it.  This is one set I just had to have.  So we are going on a little trip to the pond today with this tutorial.  Grab a cup of your favorite coffee, tea or soda and follow along.

Let’s get started.  🙂

Supplies:

Stamps: Paper Trey Ink “Pond Life” , Stampin’ Up Canvas BG
Paper: Stampin’ Up Whisper White, Blush Blossom and Cool Caribbean
Ink: Stampin’ Up More Mustard, Adirondack Terra Cotta, Peach Bellini, Salmon, Aqua, Lettuce, Ginger, Stream
Accessories: Stampin’ Up Markers Blush Blossom, Going Gray, Barely Banana, More Mustard, Faber Castell Black fine tip marker, White Gel pen, Sponges, Versamark pad and marker, Clear embossing powder, heat gun, Copper Brads

dsc05086.JPG

Stamped Water lily with Salmon ink on a 3.75″ x 3.75″ piece of Whisper White Card stock.

dsc05052.JPG

Add some Blush Blossom marker to the bottom of the images.

dsc05054.JPG

Added Barely Banana marker to the center tip of the images.

dsc05055.JPG

Colored over the images with a Versamark Marker.

dsc05056.JPG

Heat embossed the images with clear embossing powder and a heat gun.

dsc05057.JPG

This set has these great stems in them.  Since these stamps are unmounted you can take this stem and bend it when you stick it on the mount.  Nice to make different shaped stems and grasses.  It looks funny to have straight grasses. 🙂

Stamped stems by first loading stamp with Versamark and then More Mustard ink before stamping.

dsc05058.JPG

Heat embossed stems with clear embossing powder and a heat gun.

dsc05059.JPG

Stamped lily pads, by first loading the stamp with Versamark, then Lettuce ink and then added some More Mustard marker to the edges of the stamp before stamping.

dsc05060.JPG

Heat embossed with clear embossing powder and a heat gun.

dsc05061.JPG

Sponged on Peach Bellini ink.

dsc05062.JPG

Sponged on Aqua Ink.

dsc05063.JPG

Sponged on Terra Cotta ink.

dsc05064.JPG

Sponged on Stream ink.

dsc05065.JPG

Added some more lily pads with Lettuce ink, but stamped off once on my scrap paper before stamping on the card stock (also known as a second generation stamping).

dsc05066.JPG

Added some more stems with Lettuce ink.

dsc05067.JPG

Stamp the Cat tail head stamp with Ginger ink.

dsc05068.JPG

Added a shadow under some of the lily pads and lilies with a Going Grey marker.

dsc05069.JPG

Added a fine line of black marker under the lilies to really give them dimension.

dsc05070.JPG

Added Ginger ink to the bottom left corner of the card stock.

dsc05071.JPG

Stamp some more lily pads with Lettuce ink.

dsc05072.JPG

Added some hand drawn grasses with a black marker and put a fine line of black marker down the right side of the cattails.

dsc05073.JPG

Added White Gel pen highlights to a few of the grasses, tops of the lilies and tops of the cattails.

dsc05074.JPG

Stamped Canvas background stamp on a 5 1/8″ x 5 1/8″ piece of Cool Caribbean card stock with Aqua ink.

Stamped Canvas background stamp on a 4.75″ x 2″ piece of Blush Blossom card stock with Salmon ink.

dsc05075.JPG

Sponged Stream ink on the top right corner of the Cool Caribbean card stock panel.

dsc05076.JPG

Sponged Ginger ink on the bottom left corner of the Blush Blossom panel.

dsc05077.JPG

Assembled card and added Copper Brads.

Here it is finished measuring 5.25″ x 5.25″.

dsc05084.JPG

Hope your day if filled with the wonderful sounds of lapping water and frogs croaking.  🙂

Until my next post. . . . . . .

Michelle


Party Dresses – Tutorial

dsc04943.JPG

Happy Fourth of July Everyone!

This morning I decided to make my Granddaughter’s Birthday card.  She is a girlie, girl for sure.  Loves, loves, loves pink!   So what do you put on a Girlie Girl’s card, pink dresses, of course. 

These images are from Rupa Shevde’s set “Retro Boutique” that can be purchased from Gina K. Design’s online store found here:  http://www.ginakdesigns.com/

Let’s get started on the tutorial.  🙂

Supplies:

Stamps: Rupa Shevde’s “Retro Boutique” from Gina K. Designs
Paper: Stampin’ Up Whisper White, Basic Black, Old Olive Cameo Coral
Ink: Stampin’ Up Basic Black, Old Olive & Always Artichoke, Palette Noir Black, Adirondack Lettuce
Accessories: Prismacolor Markers, White Gel Pen, Versamark marker, clear embossing powder, heat gun, Going Grey marker, Black marker, Sponge, Adhesive Rhinestones

dsc04951.JPG

Stamped the dresses on a 6″x 6″ piece of Whisper White Card stock with Palette Noir Black ink.

dsc04923.JPG

Stamped the four purses using Palette Noir Black ink.

dsc04924.JPG

Used my Curvy Cutter and cut it out into a 5″ circle.

dsc04925.JPG

dsc04926.JPG

Colored the dresses on at a time using these 3 colors of Prismacolor Markers in this order, Light Peach, Deco Peach, Blush Pink.  With solvent based markers, you want to work fast to try to avoid hard lines.  If you do get a hard line, try going over the hard line with the lightest color to blend it some.

dsc04927.JPG

I blended my hard lines between the Blush Pink & Deco Peach by going over it with Deco Peach again.

dsc04928.JPG

Colored the purses with Light Peach.

dsc04929.JPG

Added Blush pink to the purse flowers.

dsc04930.JPG

Colored the leaves on the purse with Light Olive Green.

dsc04931.JPG

Colored all the images with Versamark marker and heat embossed the using clear embossing powder and a heat gun.  I found it is easiest to work one image at a time, coloring with Versamark and then heat embossing before going to the next image.

dsc04933.JPG

dsc04934.JPG

Now that your images are heat embossed they will resist ink.

Sponged in a circular motion, Lettuce ink in the center of the card stock.

dsc04935.JPG

Sponged in a circular motion, Old Olive ink, not covering the Lettuce ink entirely. 

dsc04936.JPG

Sponged in a circular motion, Always Artichoke ink at the edge of the card stock.

dsc04937.JPG

Wanted the edge to be very dark, so I sponged Black ink at the edge.  Be careful when you are using black ink over embossed images, it will turn your light colors gray, yuck!  If you do get it on the light colors, wipe it off immediately.

dsc04938.JPG

Now my image looks flat and I want to give it some life.  Using the brush point of a Stampin’ Up Going Grey marker, I traced a thick line at both sides of the dresses and under the purses creating a shadow.

dsc04939.JPG

To bring the images forward more, I traced a line down the sides of the dresses and under the purses.  Now that added some more life.

dsc04940.JPG

Can’t forget the bling, assembled the card and added some Brenda Walton Adhesive olive colored Rhinestones that I got from GinaKDesigns.com.

dsc04941.JPG

Put dotes in the corners of the card with a white gel pen.

dsc04942.JPG

Here is the card all finished measuring 5.25″ x 5.25″

dsc04943.JPG

Hope you will try this emboss resist tutorial.

May your day be filled with fireworks and party dresses.

Until my next post. . . . . .

Michelle


Chickadee in the Woods – Tutorial

dsc04915.JPG

Here it is Thursday already!  Wow, the older I get the faster time flies.  Am I the only one that feels this way?

Anyway, today I got back to nature with the Stampin’ Up’s Set “Touch of Nature”.  I love this little Chickadee.  Isn’t he the cutest little bird?  I have Chickadees all over my yard.  They are such happy little souls.  I can’t help but smile when I see and hear them.

Also, today I’m giving BLOG CANDY!  Anyone miss out on the Studio G Series 8 stamps?  I have 12 packs here just waiting for some lucky stamper.

Well here is your chance to get them.  All you need to do to enter is leave me a comment here on this post.  If you are getting this blog update by e-mail and you wish to comment, please click this link that will take you to my blog so you can comment for a chance to win these stamps:  http://zindorf.blogs.splitcoaststampers.com/2008/07/03/chickadee-in-the-woods-tutorial/

I’ll use a random number generator to pick a number on Saturday morning, July 5th.

dsc04921.JPG

Ready for the tutorial?  Let’s get started 🙂

Supplies:

Stamps: Stampin’ Up Touch of Nature
Paper: Stampin’ Up Whisper White, Basic Black, Old Olive & Bordering Blue
Ink: Stampin’ Up Bordering Blue, Old Olive & Blue Bayou, Palette Noir Black
Accessories: Prismacolor Markers, White Gel Pen, Versamark Marker, Clear embossing Powder, Sponge, heat tool, Black maker

dsc04920.JPG

Stamped the bird with Palette Noir Black ink on a piece of 3.5″ x 5″ Whisper White card stock.  I’m using the Palette ink because it doesn’t smear with the Solvent based Prismacolor markers.

dsc04895.JPG

Colored the bottom of the birds belly with a Buff marker.

dsc04896.JPG

Extended the limb to the edge of the card stock with a Fabe Castell black marker.

dsc04897.JPG

Colored the birds head, very bottom of the belly and back with a Cool Grey 30% marker.

dsc04898.JPG

Colored the dark parts of the leaves with a Light Olive Green marker.

dsc04899.JPG

Colored the Branch with a Buff colored marker.

dsc04900.JPG

Added some Cool Grey 80% colored marker to the dark parts of the birds head and back.

dsc04901.JPG

Added a bit more Buff marker to the birds belly.

dsc04902.JPG

Colored over the bird with a Versamark marker, being very careful to stay within the lines.

dsc04903.JPG

Heat embossed using clear embossing powder and a heat gun.

dsc04904.JPG

Sponged Bordering Blue ink in a pouncing motion all over the card stock.  I want it to look splotchy.

dsc04905.JPG

Stamped leaves by first loading my stamp with Old Olive ink and then misting the stamp a tiny bit so it would look a bit out of focus when I stamp it.  Note:  I tried this out on scrap paper first to see how much misting to do for the effect I wanted.

dsc04906.JPG

dsc04907.JPG

Stamped some Bordering Blue Leaves, some I misted, some I didn’t.

dsc04908.JPG

Sponged Bordering Blue ink at the right side of the card stock using a circular motion for good coverage.

dsc04909.JPG

Stamped a few leaves using Blue Bayou ink at the right side of the card stock.

dsc04910.JPG

Sponged Blue Bayou ink at the right side of the card stock, not covering all of the Bordering Blue ink. 

dsc04911.JPG

Traced the underside of the Bird and the branch with a Black marker.

dsc04912.JPG

Added White Gel pen highlights to the leaves on the branch and a dot on the birds eye.

dsc04913.JPG

Assembled card and here it is finished measuring 5″ x 6.5″.

dsc04915.JPG

Don’t forget to comment to enter to win the blog candy for today.  🙂

Hope your day is filled with the sights and sounds of birds singing their happy little tunes.

Until my next post. . . . . . .

Michelle


Wanted pony – Tutorial

dsc04889.JPG

I love the western style stamp sets from Stampin’ Up and I have them all, but I don’t use them nearly enough.  Drug this one out today, dusted it off and got down to business.  Fussed around with this card to long to post it this morning before work, hence the late post.  🙂

Ready for the tutorial?  Let’s get started.  🙂

Supplies:

Stamps:  Stampin’ Up “Wanted”

Paper:  Stampin’ Up Whisper White, Basic Black & More Mustard

Ink:  Stampin’ Up More Mustard, Craft White, Basic Black, Chocolate Chip, Really Rust, Apricot Appeal

Accessories:  Brads, Stamp-a-ma-jig, Black marker, Versamark marker, White Gel pen, Piercing Tools, 1 1/4 circle punch, post it note, Brayer, clear embossing powder & heat gun, sponges

dsc04893.JPG

Punched a circle from the sticky part of a post it note and put in on a piece of Whisper White Card stock as a mask for the sun.

dsc04866.JPG

Brayered Apricot Appeal ink over the entire card stock.

dsc04867.JPG

Removed sun mask.   Using my Stamp-a-ma-jig for placement, stamped the horse using Basic Black ink.

dsc04868.JPG

Colored the horse in with a black Faber Castell marker.

dsc04870.JPG

Be sure that your background ink is very dry before moving on to this step. 🙂  Otherwise the embossing powder will stick to the entire card stock.

Colored over the horse with a Versamark maker and heat embossed it with clear embossing powder and a heat gun.

dsc04871.JPG

dsc04872.JPG

Sponged More Mustard on ink, using a left to right motion, streaking the ink across the card stock.

dsc04875.JPG

Put a fresh post it note sun mask on.

dsc04876.JPG

Sponged on Really Rust ink using a streaking motion across the card stock.

dsc04877.JPG

Added some Chocolate Chip ink by sponging it on using the same streaking motion.

dsc04878.JPG

Covered the sky area with post it note masks.

dsc04879.JPG

Sponged Basic Black ink all over the un-masked area of the card stock.

dsc04880.JPG

Removed the masks and added some More Mustard streaks acoss the sun with a sponge.

dsc04881.JPG

Added some Really Rust ink streaks across the sun.

dsc04882.JPG

Sponged on just a little black ink around the horses legs in a pouncing motion to simulate dust being kicked up.

dsc04884.JPG

Assembled the card front and used my piercing tools to make holes for my brads so they would be in a straight line and well spaced.

dsc04885.JPG

Using a stamp-a-ma-jig for placement, stamped the “wanted” stamp with White Craft ink.

dsc04886.JPG

Added White dots behind the stamped “wanted” with a white gel pen.

dsc04887.JPG

Here you have it the completed card measuring 5″ x 6.5″.

dsc04889.JPG

Hope you enjoyed this tutorial.  Take a few moments and create a dramatic sky with some warm colors of ink.

May your day end with a fabulous sunset!

Until my next post. . . . . . . . . . .

Michelle