We have a winner!

  The winner of the terrific Stampin’ Up! set Friends Never Fade is . . . .. ..  .. . . .

Carla Suto

Who wrote: 


Please enter me to win, Michelle! This is such a beautiful set! Thanks for all your inspiration and safe travels to the workshops!

Carla Suto, Congratulations!!!  Please e-mail your shipping address to mzindorf@aim.com within the next 30 days and I will get this set in the mail to you.

Thank you everyone for playing along!

Hugs,

Michelle


Blog Candy!!!!

Let me say, I must really love this Stampin’ Up! set “Friends Never Fade” because I purchased it twice, lol.  Now come on, I’m sure I am not the only one out there that has did that with a stamp or two.  🙂   Does this mean that I possibly have too many stamps, Nah!  I don’t think so.

Now do to my error, I am giving one of these gorgeous sets away.  If you would like to enter to try to win this set, all you have to do is leave a comment on this post telling me to enter you.   If you are receiving this blog update via e-mail you will need to click HERE and then leave a comment at the bottom of the blog post.

Please no e-mail entries.

I will be using a random number generator on Monday, October 4, 2010 to select the winner.  So there is really no need to shower me with compliments to try to better your chances.  The random number generator does not read the comments, lol.  I do read every comment and appreciate the love you send me, but the random number generator could care less.

I hit the road again tomorrow, bright and early to make my way from Ohio to Elk Grove Village, Illinois where I will be teaching my brayer techniques to some of the best stampers in the world, I’m sure.   I have just a few spots avialable in the Friday workshop.  If you are interested in attending, please e-mail at mzindorf@aim.com.  The Saturday workshops are all sold out.  Any how, I will be spending the day packing and loading the van.

Catch you next Monday.  Have an out of this world weekend!

Until my next post. . . . .  .

Hugs,

Michelle

 dsc04164-2.jpg  Get ready for Brayer Workshops!  I am coming to the following locations, click the location name for more information.

Elk Grove Village, Illinois

Savannah, Georgia

Atlanta, Georgia

Milton, West Virginia

Soledad, California

Columbus, Ohio

Fayette, Tennessee near Nashville, TN & Huntsville, AL

Tucson, Arizona

Virginia Beach, Virginia

Houston, Texas

Wichita, Kansas

Syracuse (Bridgeport), New York

St. Peters, Missouri

La Porte, Indiana

Orlando (Davenport), Florida

St. Cloud, Minnesota

Colorado Springs, Colorado

Cleveland (Euclid), Ohio

Here is a link to my workshop calendar where you can see all of my travel schedule and to get info on beginner and advanced Brayer workshops:   http://zindorf.blogs.splitcoaststampers.com/workshop-calendar 

Don’t see a workshop in your State?  Interested in hosting the workshops in your area?   Click HERE to get hostess information.

Link to my Stampin’ Up website where you can order all of your must have Stampin’ Up products from me 24-7:  http://michellezindorf.stampinup.net

Frequently asked questions answers:  http://zindorf.blogs.splitcoaststampers.com/frequently-asked-questions/


Two Bucks – Tutorial #364

I have a winter scene for you today.  Just in case you want to start those Christmas cards.   What could be better than a couple of deer in the snow, right? 

Today’s tutorial shows how to create hills of snow and then a reverse image. 

I’m a bit slow at posting right now, the blog administrators upgraded my blog and now I have to learn how to post again.  It is all so very different behind the scenes, Yikes!   I do want to thank the people at Split Coast Stampers.  They do such a terrific job keeping my blog up and running when I have problems, they Rock!

Now on with tutorial #364.

Supplies:

Stamps: Stampin’ Up! Winter Post and Plant Hope
Paper: Stampin’ Up! Whisper White, Sahara Sand, Baja Breeze and Basic Black
Ink: Stampin’ Up! Basic Black, Not Quite Navy, Night of Navy and Baja Breeze
Accessories: Stampin’ Up! Sponge, White Gel Pen, Basic Black marker, Stamp-a-ma-jig, Brayer and ruler

 The brand new USA Idea book and Catalog is here.   For your copy, please send a check for $9.95 to Michelle Zindorf, P.O. Box 116, West Alexandria, OH 45381 or send it via paypal to mzindorf@aim.com USA only.     Want a copy of the new Holiday Mini Catalog ?  E-mail your mailing address to mzindorf@aim.com and I will get one in the mail to you.  )  Are you getting inspiration from this blog?   One way you can help support it is to order your Stampin’ Up products through me.   Click HERE to place an order.    Want to become a Stampin’ Up Demonstrator , receive a 20% discount on product and earn instant income on orders?  Consider being part of my Stampin’ Up Team and start your own business or become a Hobby Demo just for the discount.  Click HERE for more information.

Ripped a couple of post it notes and masked the bottom of  a 4″ x 5.5″ piece of Whisper White card stock (Snow area). 

Brayered Not Quite Navy ink in the sky area.  Also brayered Night of Navy at the top of the card stock.

Stamped the Pine trees from the Stampin’ Up set Plant Hope using Basic Black ink.

Repositioned the post it note mask to show some of the snow area above it.  Sponged Baja Breeze ink at the post it note edge.

Removed the post it note mask and sponged Baja Breeze ink at the bottom of the card stock.

Stamped the Deer from the Stampin’ Up set Winter post on the card stock using Basic Black ink.  Stamped the deer again on a Stamp-a-ma-jig plastic using Basic Black ink and flipped it over onto the card stock and rubbed the back of the plastic to transfer the image. 

The reverse image will come out faint. 

Colored in the reverse image using a Basic Black marker.

Added a star in the sky by making a cross and then an “x” over it using a ruler and a White gel pen.

Added random dots of White Gel pen in the sky area.

Added a panel of Sahara Sand so it showed only at the bottom and left side of the main image panel.

Added Whisper White, Baja Breeze and Basic Black panels.

Here is the finished card measuring 5″ x 6.5″.

I hope your day is much warmer than this scene.

Until my next post. . . . .  . .

Hugs,

Michelle

 dsc04164-2.jpg  Get ready for Brayer Workshops!  I am coming to the following locations, click the location name for more information.

Auburn, Washington (near Seattle)

Elk Grove Village, Illinois

Savannah, Georgia

Atlanta, Georgia

Milton, West Virginia

Soledad, California

Columbus, Ohio

Fayette, Tennessee near Nashville, TN & Huntsville, AL

Tucson, Arizona

Virginia Beach, Virginia

Houston, Texas

Wichita, Kansas

Syracuse (Bridgeport), New York

St. Peters, Missouri

La Porte, Indiana

Orlando (Davenport), Florida

St. Cloud, Minnesota

Colorado Springs, Colorado

Cleveland (Euclid), Ohio

Here is a link to my workshop calendar where you can see all of my travel schedule and to get info on beginner and advanced Brayer workshops:   http://zindorf.blogs.splitcoaststampers.com/workshop-calendar 

Don’t see a workshop in your State?  Interested in hosting the workshops in your area?   Click HERE to get hostess information.

Link to my Stampin’ Up website where you can order all of your must have Stampin’ Up products from me 24-7:  http://michellezindorf.stampinup.net

Frequently asked questions answers:  http://zindorf.blogs.splitcoaststampers.com/frequently-asked-questions/


Things are a little screwy, lol


Well, my blog was upgraded yesterday and you know what that means… . . . .  Things are all out of wack here on my little blog.  Bare with me, I will need to get things back in order a little at a time since I am flying out tomorrow morning to Auburn, WA where I will be teaching for the weekend.  I just wanted you to know that I am aware of things not being right on my blog and I will put it all back in order when I can.

I do want to announce that I will be mailing, as a thank you, one of the above cards, handmade by me, to each of my Stampin’ Up customers that places a merchandise order of $50 or more between 9/23/2010 and 10/31/2010.  I really do appreciate you, my customers.  Sorry, no tutorial for this card will be made.  This is strickly for my wonderful customers.   Here is a link to my Stampin’ Up web page where you can shop 24/7:  http://www.stampinup.net/esuite/home/michellezindorf/  just click shop now at the top right corner of the page.  🙂  or contact me at 937-344-1312 or via e-mail at mzindorf@aim.com.

Have a super weekend everyone!

Hugs,

Michelle


Golf Anyone – Tutorial #363

dsc05149.JPG

Any golf fans out there?   I took up golf years ago, not because I loved the game, but because I wanted to be out walking the pretty golf courses, lol.  Today’s tutorial teaches how to get depth in a round object with shading and how to create a shadow for a round object.   This card will more than likely go to one of the men in my life.  No, I don’t have more than one husband or a boyfriend on the side, lol.  I have one husband and two sons, lol.  Since I think this will be given to a man, I kept the layout super simple without any frills and let the scene be the main focus.   Hope you like it.

Supplies:

Paper: Stampin’ Up! Whisper White, Basic Black and River Rock
Ink: Stampin’ Up! Basic Black, Sahara Sand, Always Artichoke, Old Olive, Not Quite Navy and Tempting Turquoise
Accessories: Stampin’ Up! Sponges, 1 1/4″ circle punch, Oval Punch, Brayer, Post it Note, Small Dots Texture Plate and Big Shot Machine

 The brand new USA Idea book and Catalog is here.   For your copy, please send a check for $9.95 to Michelle Zindorf, P.O. Box 116, West Alexandria, OH 45381 or send it via paypal to mzindorf@aim.com USA only.     Want a copy of the new Holiday Mini Catalog ?  E-mail your mailing address to mzindorf@aim.com and I will get one in the mail to you.  )  Are you getting inspiration from this blog?   One way you can help support it is to order your Stampin’ Up products through me.   Click HERE to place an order.    Want to become a Stampin’ Up Demonstrator , receive a 20% discount on product and earn instant income on orders?  Consider being part of my Stampin’ Up Team and start your own business or become a Hobby Demo just for the discount.  Click HERE for more information.

dsc05150.JPG

Started out by running a piece of Whisper White card stock through my Big Shot Machine using the Small Dots Texture Plate.  

dsc05130.JPG

Punched a 1 1/4″ circle punch out of the now textured card stock.

dsc05131.JPG

I want the dots to be inverted so they are dimples on my golf ball.  You will want to make sure you are shading the right side of the golf ball.  🙂

Sponged Sahara Sand ink at the bottom of the golf ball and just a slight bit around the top edge.

dsc05142.JPG

Sponged just a Always Artichoke ink at the very bottom of the golf ball.

dsc05145.JPG

Masked the bottom half of a 3″ x 4″ piece of Whisper White Card stock with a post it note.

dsc05135.JPG

Brayered Tempting Turquoise ink at the top of the card stock.

dsc05136.JPG

Brayered Not Quite Navy ink at the very top of the card stock.

dsc05137.JPG

Took the post it note mask off and put it back on to mask the sky area of the card stock.

dsc05138.JPG

Brayered Old Olive ink at the bottom of the card stock.

dsc05139.JPG

Brayered Always Artichoke ink at the very bottom of the card stock.

dsc05140.JPG

Sponged Always Artichoke ink at the post it note edge.

dsc05141.JPG

Punched an Oval out of scrap card stock.

dsc05134.JPG

Used the Negative part of the punch as a mask and sponged Basic Black ink in the hole to create a hole in my scene.

dsc05143.JPG

Used the negative hole from the Golf ball punch as a mask and sponged Always Artichoke ink in the hole to create the golf ball shadow.

dsc05144.JPG

Removed the mask and adhered the golf ball on the card stock.  Added 2 Black panels and 1 River Rock panel. 

Here is my finished card measuring 5″ x 6.5″.

dsc05149.JPG

May your day be one of much pleasure.  I will be spending the rest of my day prepping and packing for my Auburn, Washington Brayer Workshops.   I can’t wait to get there!

Until my next post. . . .  . . . . . . . .  .

Hugs,

Michelle

 dsc04164-2.jpg  Get ready for Brayer Workshops!  I am coming to the following locations, click the location name for more information.

Auburn, Washington (near Seattle)

Elk Grove Village, Illinois

Savannah, Georgia

Atlanta, Georgia

Milton, West Virginia

Soledad, California

Columbus, Ohio

Fayette, Tennessee near Nashville, TN & Huntsville, AL

Tucson, Arizona

Virginia Beach, Virginia

Houston, Texas

Wichita, Kansas

Syracuse (Bridgeport), New York

St. Peters, Missouri

La Porte, Indiana

Orlando (Davenport), Florida

St. Cloud, Minnesota

Colorado Springs, Colorado

Cleveland (Euclid), Ohio

Here is a link to my workshop calendar where you can see all of my travel schedule and to get info on beginner and advanced Brayer workshops:   http://zindorf.blogs.splitcoaststampers.com/workshop-calendar 

Don’t see a workshop in your State?  Interested in hosting the workshops in your area?   Click HERE to get hostess information.

Link to my Stampin’ Up website where you can order all of your must have Stampin’ Up products from me 24-7:  http://michellezindorf.stampinup.net

Frequently asked questions answers:  http://zindorf.blogs.splitcoaststampers.com/frequently-asked-questions/ 


Pumpkin & Crows – Tutorial #362

dsc05124.JPG

Hey Everyone, thanks so much for all of your love and support you sent my way during the past couple of months.  I have read every comment, e-mail and card and it definitely help me get through, especially the last month and a half when I was spending every day at the hospital then Hospice with my Mother prior to her recent passing.  I cannot express how very much it meant to me.

Although I have not bounced back entirely, I know it will take a while to heal my aching heart, I am doing well and felt like getting back to work today.  You know I have the very best job in the world being a self employed workshop instructor and Stampin’ Up Demonstrator.  I was able to drop everything when I needed to and then pick up my business again today.     That is one of the most wonderful things about being a Stampin’ Up Demo, it is easy to fit it into your life.

I am also very fortunate to announce that I have added a new Zindorf Brayer Workshop location to my calendar.  I will be teaching in wonderful, Columbus, Ohio on January 8, 2011.  You will want to register early.  The workshops really do fill up extremely fast at a lot of locations.  Click here for more info on the Columbus, Ohio Workshops.

Now with all that being said, how about a much over due Stamped Art Tutorial.  I do call what I create Stamped Art because it is much more involved than traditional stamping and they are little pieces of art to me.   It is the creative process that gives me so much pleasure.  Believe me when I say I am not into mass producing 50 cards in an hour, lol.   I generally only make my original and then I’m off to create a whole new piece.   Most of my creations take me about 15 minutes to 1 hour to create.  That includes figuring out what I want to make.  It takes another 2 hours for me to take pictures, edit them, post them and write the tutorial for you all.    It is such a pleasure to do this.  I get way more in return for giving a bit of myself.

Today’s tutorial shows you how to make a hard wood floor using Stampin’ Up’s Woodgrain Background stamp, a marker and ruler.   Also a little spooky light effect.  Hang out a moment and check it out. 

Let’s get started. . . .  . . . .
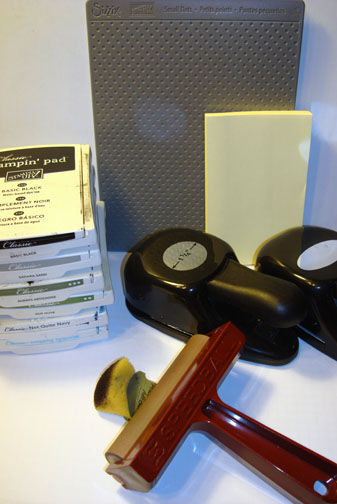
Supplies:

Stamps: Stampin’ Up! Woodgrain & Graveyard Gala
Paper: Stampin’ Up! Whisper White, Basic Black and Cajun Craze
Ink: Stampin’ Up! Cajun Craze, Pumpkin Pie, Basic Black & Early Espresso
Accessories: Stampin’ Up! Sponges, Markers (Pumpkin Pie, More Mustard, Early Espresso & Basic Black), Ruler, Brayer, Pumpkin Die #4, Pumpkin Faces Die, Big Shot Machine

 The brand new USA Idea book and Catalog is here.   For your copy, please send a check for $9.95 to Michelle Zindorf, P.O. Box 116, West Alexandria, OH 45381 or send it via paypal to mzindorf@aim.com USA only.     Want a copy of the new Holiday Mini Catalog ?  E-mail your mailing address to mzindorf@aim.com and I will get one in the mail to you.  )  Are you getting inspiration from this blog?   One way you can help support it is to order your Stampin’ Up products through me.   Click HERE to place an order.    Want to become a Stampin’ Up Demonstrator , receive a 20% discount on product and earn instant income on orders?  Consider being part of my Stampin’ Up Team and start your own business or become a Hobby Demo just for the discount.  Click HERE for more information.

dsc05129.JPG

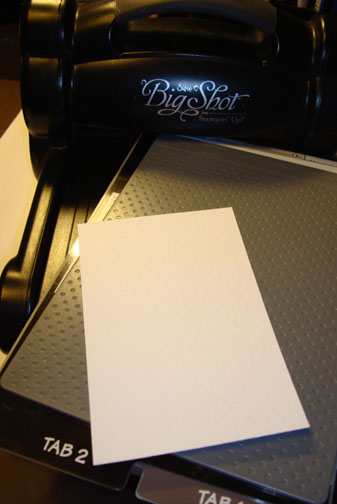
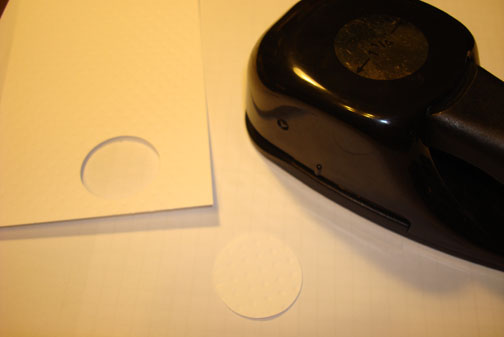
I started out by cutting my die cut pieces using the Pumpkin #4 & Pumpkin Faces dies, Daffodil Delight, Cajun Craze & Old Olive card stock and the Big Shot Die cut machine.

Check out the new Stampin’ Up! die cut boxes.  They are on page 204 of the Idea book & Catalog.  Let’s just say, they sure did wip my die cut collection into order.  The picture is of the Small Die Box.

dsc05104.JPG

dsc05105.JPG

Cut the stem of the Cajun Craze pumpkin off and layer the Cajun Craze pumpkin onto the top of the Old Olive pumpkin.

dsc05106.JPG

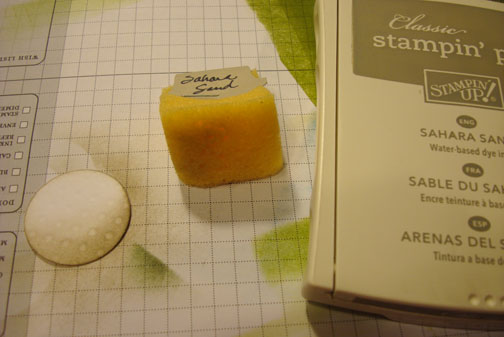
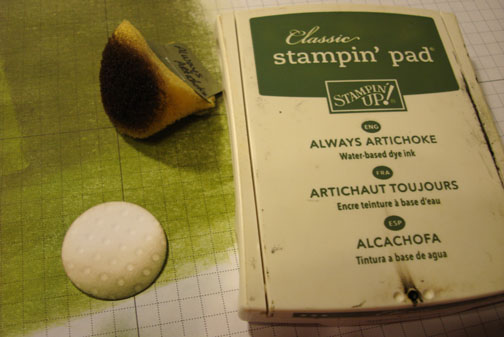
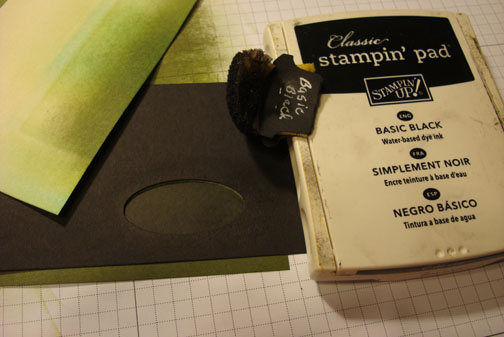
Sponged Early Espresso ink at the right side of the pumpkin.

dsc05107.JPG

Sponged Basic Black ink at the right edge of the pumpkin.

dsc05108.JPG

Glued the face onto the pumpkin and colored the pupils in with Basic Black marker and added More Mustard Marker to the bottom of the eyes and mouth to create some depth.

dsc05112.JPG

dsc05111.JPG

Added Cajun Craze Marker to the lines of the pumpkin.

dsc05113.JPG

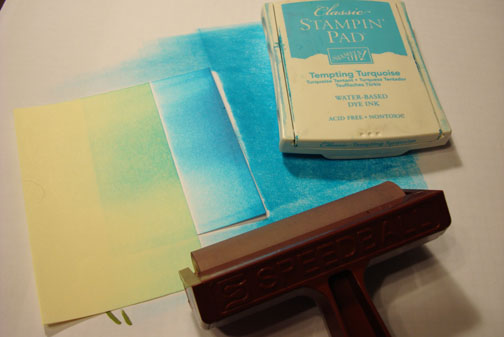
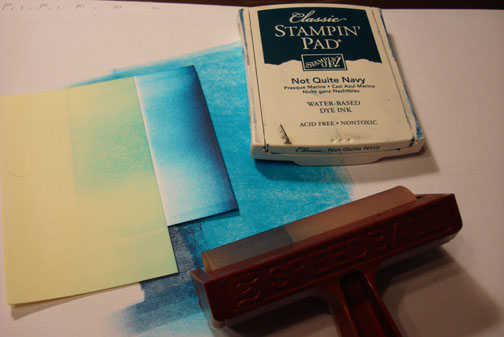
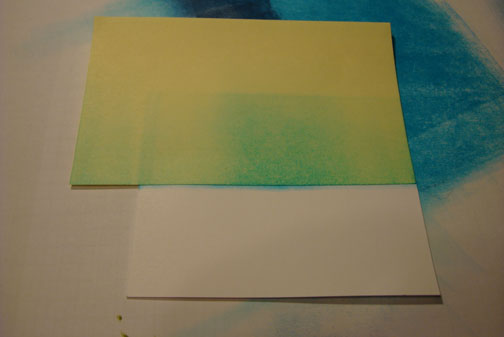
Brayered Pumpkin Pie ink at the bottom of a 4″ x 4.5″ piece of Whisper White card stock.

dsc05114.JPG

Brayered Cajun Craze ink at the very bottom of the card stock.

dsc05115.JPG

Brayered Early Espresso ink at the very bottom of the card stock, at the top right corner at an angle and then at the top left corner at an angle.

dsc05116.JPG

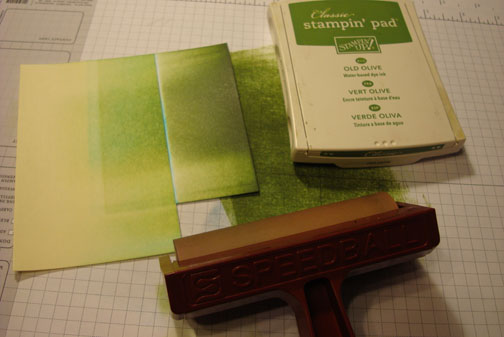
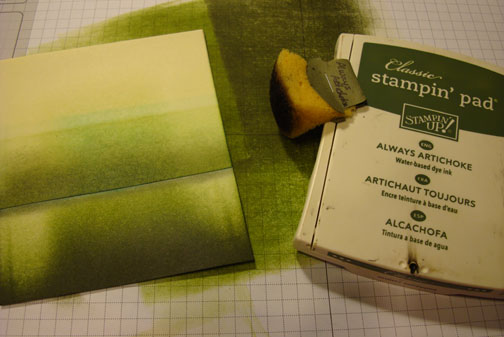
Stamped the Stampin’ Up! Woodgrain background stamp on the card stock using Early Espresso ink.

dsc05117.JPG

Using a ruler and Early Espresso marker, made board lines.   Note these were done at an angle creating the illusion of them being wider in front and more narrow toward the top of the card stock.

dsc05120.JPG

Added Basic Black marker to the bottom of the pumpkin for a shadow.

dsc05121.JPG

Added Pumpkin Pie marker lines to the middle of the pumpkin.

dsc05122.JPG

Glued the pumpkin to the card stock and stamped the two crows from the Stampin’ Up! Graveyard Gala set using Basic Black ink.  If you crows don’t stamp very dark, color them in with a Basic Black marker.

dsc05123.JPG

Added 2 Basic Black card stock panels and one Cajun Craze panel.

Here is the finished card measuring 5.5″ square. 

dsc05124.JPG

May your day be filled with fabulous friends and family.

Until my next post. . . . . . . .

Huge Hugs!

Michelle

 dsc04164-2.jpg  Get ready for Brayer Workshops!  I am coming to the following locations, click the location name for more information.

Auburn, Washington (near Seattle)

Elk Grove Village, Illinois

Savannah, Georgia

Atlanta, Georgia

Milton, West Virginia

Soledad, California

Columbus, Ohio

Fayette, Tennessee near Nashville, TN & Huntsville, AL

Tucson, Arizona

Virginia Beach, Virginia

Houston, Texas

Wichita, Kansas

Syracuse (Bridgeport), New York

St. Peters, Missouri

La Porte, Indiana

Orlando (Davenport), Florida

St. Cloud, Minnesota

Colorado Springs, Colorado

Cleveland (Euclid), Ohio

Here is a link to my workshop calendar where you can see all of my travel schedule and to get info on beginner and advanced Brayer workshops:   http://zindorf.blogs.splitcoaststampers.com/workshop-calendar 

Link to my Stampin’ Up website where you can order all of your must have Stampin’ Up products from me 24-7:  http://michellezindorf.stampinup.net

Frequently asked questions answers:  http://zindorf.blogs.splitcoaststampers.com/frequently-asked-questions/ 


My Mother’s Passing

Hi there, you are probably wondering why I have been absent from my blog for a while.  Well my Mother, Jeannette passed away at the very young age of 68.  I have been spending all of my time with her in her last days and now I will be taking care of her estate and making funeral arrangements.  

My mother passed from a smoking related illness, please, please if you smoke, STOP NOW!  If not for yourself then for your family.

Thanks to everyone who has been keeping my family in thier thoughts.  I will resume my blog posts when I get my life back to normal.  Hang in there, I have not forgotten you.  🙂

Huge Hugs,

Michelle 


Fright Night Collage – Tutorial #361

dsc05102.JPG

What’s Up!

For me it is time to do another Technique Swap card.  My Stampin’ Up Down-line Team and I do a technique swap every month and this months challenge was to do a Collage card.  So this is my submission.   Collage cards are fun.  As you will see I started out by bringing out all the things I have to use that would go together for this card.  I did not use it all, but it was a place to start.  🙂  The items in the new Stampin’ Up Holiday Mini sure made this task easy.

Hang out a moment and see how this piece comes together.

A personal Note and update before I get started:  Thank you  everyone for keeping my family in your thoughts.  My Mother still remains in the hospital struggling with Respitory and Heart troubles.  Russ’ heart condition remains the same at this point, no better, no worse.  He will be having a procedure in a week or so.  My Beautiful and Strong Sister just had her last Chemo treatment in her fight with Breast Cancer and now faces Surgery and Radiation treat.   Sis, you are the strongest person I know.  Continue to kick that Cancers butt!  

On another note:  Please do not think I will be canceling my workshops.   I have a strong family that gives lots of love and support to those mentioned above so I will continue to travel and teach my Brayer workshops.  The workshops give my students and myself so much joy I just can’t miss any of them.  🙂  My next stop will be this coming weekend in Piedmont, Alabama.  Wooohooo!

Supplies:

Stamps: Stampin’ Up! Midnight Raven, French Foliage & Midnight Musings Wheel
Paper: Stampin’ Up! Whisper White, More Mustard and Elegant Eggplant Card stock, Nite Owl Designer Series Paper
Ink: Stampin’ Up! More Mustard, Wild Wasabi, Always Artichoke, Elegant Eggplant, Pumpkin Pie and Basic Black
Accessories: Stampin’ Up! Sponges, Brayer, 2.5″ Circle Punch, Bat Punch, Basic Black Ribbon, Versamark Pad, Stamp-a-ma-jig Plastic Sheet, Clear Embossing Powder and Heat Gun

 The brand new USA Idea book and Catalog is here.   For your copy, please send a check for $9.95 to Michelle Zindorf, P.O. Box 116, West Alexandria, OH 45381 or send it via paypal to mzindorf@aim.com USA only.     Want a copy of the new Holiday Mini Catalog ?  E-mail your mailing address to mzindorf@aim.com and I will get one in the mail to you.  )  Are you getting inspiration from this blog?   One way you can help support it is to order your Stampin’ Up products through me.   Click HERE to place an order.    Want to become a Stampin’ Up Demonstrator , receive a 20% discount on product and earn instant income on orders?  Consider being part of my Stampin’ Up Team and start your own business or become a Hobby Demo just for the discount.  Click HERE for more information.

dsc05103.JPG

Below is the products that I pulled out to start.  As I stated above, I did not use all of these items, but it was a good starting point.  To me the object of collage is to layer items.

dsc05082.JPG

Stamped the unmounted Stampin’ Up Wheel Midnight Musings using Versamark only on a 3.5″ x 5.5″ piece of Whisper White Card stock.

Here is a link to a post I did regarding unmounting wheels:  http://zindorf.blogs.splitcoaststampers.com/2009/07/28/tool-time-unmounting-wheels/

dsc05083.JPG

Heat embossed the image using clear embossing powder and a heat gun. I embossed this image to protect the white of the paper.  The embossed image will resist ink put over it in later steps. 

dsc05084.JPG 

Punched a 2.5″ circle from the sticky part of a post it note.  I used this punch to mask the moon.

dsc05085.JPG

Brayered Pumpkin Pie ink at the top of the card stock.

dsc05086.JPG

Brayered Elegant Eggplant ink at the top of the card stock, not covering the Pumpkin Pie ink entirely.

dsc05087.JPG

Unmasked the moon and sponged More Mustard ink in the moon shape.

dsc05088.JPG

Sponged Wild Wasabi ink at the bottom of the card stock.

dsc05089.JPG

Sponged Elegant Eggplant ink at the bottom of the card stock, not covering the Wild Wasabi ink entirely.

dsc05090.JPG

Gently wiped the ink off the embossed images using a paper towel.

dsc05091.JPG

Stamped the script stamp from the Stampin’ Up set French Foliage using Elegant Eggplant ink.  Wiped off the embossed images again.

dsc05092.JPG

Stamped the Stampin’ Up stamp Midnight Raven using Basic Black ink.

dsc05093.JPG

Stamped the stamp again on the Stamp-a-ma-jig plastic sheet using Always Artichoke ink.  Quickly flip the plastic Sheet upside down and lined the image up so it would be a reverse image and look like a shadow.  Rubbed the back of the plastic sheet to transfer the image.

dsc05094.JPG

Sponged in an Elegant Eggplant ink cloud in the sky.

dsc05095.JPG

Adhered the main image panel to a panel of Stampin’ Up Night Owl Designer Paper.  Ripped one corner of the Designer paper off.  Added Basic Black ribbon.

dsc05097.JPG

Sponged Basic Black ink on the ripped corner of the Designer paper.

dsc05098.JPG

Punched 3 bats out using the Stampin’ Up Bat Punch and Basic Black card stock.

dsc05096.JPG

Added a More Mustard panel and an Elegant Eggplant panel.  Adhered the 3 bats to the card front.

dsc05099.JPG

Sponged Basic Black ink around the top, bottom and left side of the card front.

dsc05100.JPG

Here my finished Collage card measuring 5″ x 6.5″.

dsc05102.JPG

Until my next post. . . . . .  . .

May Labor Day Holiday be one filled with Family and Friends.

Hugs,

Michelle

 dsc04164-2.jpg  Get ready for Brayer Workshops!  I am coming to the following locations, click the location name for more information.

Piedmont, Alabama (Near GA border close to Cedartown)

Auburn, Washington (near Seattle)

Elk Grove Village, Illinois

Savannah, Georgia

Atlanta, Georgia

Milton, West Virginia

Soledad, California

Fayette, Tennessee near Nashville, TN & Huntsville, AL

Tucson, Arizona

Virginia Beach, Virginia

Houston, Texas

Wichita, Kansas

Syracuse (Bridgeport), New York

St. Peters, Missouri

La Porte, Indiana

Orlando (Davenport), Florida

St. Cloud, Minnesota

Colorado Springs, Colorado

Cleveland (Euclid), Ohio

Here is a link to my workshop calendar where you can see all of my travel schedule and to get info on beginner and advanced Brayer workshops:   http://zindorf.blogs.splitcoaststampers.com/workshop-calendar 

Link to my Stampin’ Up website where you can order all of your must have Stampin’ Up products from me 24-7:  http://michellezindorf.stampinup.net

Frequently asked questions answers:  http://zindorf.blogs.splitcoaststampers.com/frequently-asked-questions/ 


Fall Color – Tutorial #360

dsc05079.JPG

Today’s tutorial shows how to make the leaves on a tree really pop and bring them to the foreground by using the emboss resist technique.  With Autumn right around the corner I felt Fall colors were in order.

Let’s get started. .. .  . . . . . .

Supplies:

Stamps: Stampin’ Up! Season of Friendship and Style Beautiful
Paper: Stampin’ Up Whisper White, More Mustard and Cajun Craze
Ink: Stampin’ Up More Mustard, Cajun Craze, Tempting Turquoise, Not Quite Navy, Pear Pizzazz, Soft Suede and Basic Black
Accessories: Stampin’ Up sponges, White Gel Pen, Basic Black marker, Brayer, Clear embossing powder, heat gun and Versamark Pad

 The brand new USA Idea book and Catalog is here.   For your copy, please send a check for $9.95 to Michelle Zindorf, P.O. Box 116, West Alexandria, OH 45381 or send it via paypal to mzindorf@aim.com USA only.     Want a copy of the new Holiday Mini Catalog that will be out on September 1, 2010?  E-mail your mailing address to mzindorf@aim.com and I will get one in the mail to you.  )  Are you getting inspiration from this blog?   One way you can help support it is to order your Stampin’ Up products through me.   Click HERE to place an order.    Want to become a Stampin’ Up Demonstrator , receive a 20% discount on product and earn instant income on orders?  Consider being part of my Stampin’ Up Team and start your own business.  Click HERE for more information.

dsc05081.JPG

Started with a 3.5″ square piece of Whisper White card stock.

Stamped the leaves from the Stampin’ Up set Season of Friendship by first loading the stamp with Versamark and then with either More Mustard ink or Cajun Craze ink before stamping it.  Reloaded the stamp with Versamark and ink in between stampings. 

dsc05059.JPG

Heat embossed the leaves using clear embossing powder and a heat gun.

dsc05060.JPG

Now that the leaves are heat embossed they will resist ink.  

Brayered Tempting Turquoise ink at an angle.

dsc05061.JPG

Brayered Not Quite Navy ink at an angle not covering the Tempting Turquoise ink entirely.

dsc05063.JPG

Wiped the ink off of the embossed images using a paper towel.

dsc05064.JPG

Stamped the tree using Soft Suede ink.

dsc05065.JPG

Sponged Pear Pizzazz ink at the bottom corner of the card stock.

dsc05067.JPG

Sponged Basic Black ink at the very bottom of the corner.

dsc05068.JPG

Added a White Gel Pen high light to the right side of the tree and the tips of a few of the leaves.

dsc05069.JPG

Added a shadow to the underside of the branches and the left side of the tree using a Basic Black marker.

dsc05070.JPG

Cut a 5 3/8″ piece of More Mustard card stock.  Using a Stamp-a-ma-jig for placement, stamped the Flourish stamp from the Stampin’ Up set Style Beautiful using Cajun Craze ink in each corner.

dsc05071.JPG

Sponged Cajun Craze ink around the edges of the card stock.

dsc05072.JPG

Added a Whisper White and Cajun Craze panels.  Here is the finished card measuring 5.5″ square.

dsc05079.JPG

May your day be the best ever.

Until my next post. . . . . . .

Hugs,

Michelle

 dsc04164-2.jpg  Get ready for Brayer Workshops!  I am coming to the following locations, click the location name for more information.

Piedmont, Alabama (Near GA border close to Cedartown)

Auburn, Washington (near Seattle)

Elk Grove Village, Illinois

Savannah, Georgia

Atlanta, Georgia

Milton, West Virginia

Soledad, California

Fayette, Tennessee near Nashville, TN & Huntsville, AL

Tucson, Arizona

Virginia Beach, Virginia

Houston, Texas

Wichita, Kansas

Syracuse (Bridgeport), New York

St. Peters, Missouri

La Porte, Indiana

Orlando (Davenport), Florida

St. Cloud, Minnesota

Colorado Springs, Colorado

Cleveland (Euclid), Ohio

Here is a link to my workshop calendar where you can see all of my travel schedule and to get info on beginner and advanced Brayer workshops:   http://zindorf.blogs.splitcoaststampers.com/workshop-calendar 

Link to my Stampin’ Up website where you can order all of your must have Stampin’ Up products from me 24-7:  http://michellezindorf.stampinup.net

Frequently asked questions answers:  http://zindorf.blogs.splitcoaststampers.com/frequently-asked-questions/