I’m still working on sympathy cards. I realize it may be a bit depressing, but we need them just the same.
Supplies:
| Stamps: Stampin Up Long Stemmed |
| Paper: Stampin Up Whisper White, Soft Sky, Apricot Appeal |
| Ink: Stampin’ Up Re-inkers Soft Sky, Garden Green, Certainly Celery, Really Rust, Palette Noir Black |
| Accessories: Tim Holtz Alcohol ink applicator, felt, White Gel pen, Stampin’ Up Markers, Brads |

Let me talk for a moment about a couple of supplies. Below is the Tim Holtz Alcohol Ink Applicator. This tool was made to be used with Alcohol inks but I found I can use my Stampin’ Up Re-inkers with this applicator to make interesting backgrounds. You can purchase little pre-cut felt pads for around $4.99 to attached to the Ink Applicator. Remember I’m cheap so I spend .25 cents on a piece of white felt and cut it myself.

My Stampin’ Up Re-inker storage is not fancy at all. I bought these little baskets that will hold 18 re-inkers each for about a $1. I like them because they are portable and can be moved from a shelf to my work area easily.

I can also tilt a basket to the side to see what colors are in that row instead of picking through them.

On with the tutorial.
Dotted Applicator felt with Sky Blue re-inker and pounced it on Whisper White card stock. I also did some circular smearing to cover the entire piece of card stock. The pouncing motion gives you little dots, which I like. Dots in a background give the impression of dabble light to me.

On the same applicator felt I put dots of Certainly Celery re-inker and pounced it on the card stock, not covering the whole card stock so the blue can show through.
It’s hard to see in the photo, I apologize for the bad pic. I put a stripe of Garden Green re-inker on the same applicator felt and then made stripes of color from the top of the card stock down in varying lengths.

I changed the felt for this step because I was afraid the colors would start getting muddy. I dotted a fresh felt piece for the applicator with Really Rust re-inker and made stripes with it in varying lengths at the top of the card stock.

Put dots of Garden Green on the applicator felt and smeared it in a circular motion on the bottom of the card stock to create a shadow for the coming flowers.

Stamped flowers with Palette Nior Black ink.

You will want to learn from my mistake here. I did not wait until the card stock was completely dry before coloring in my flowers with a white gel pen. It did not do well and I have to repeat this step later to get whiter brighter flowers. My suggestion let it dry completely or use your heat gun to dry it before coloring in the flowers.

Outlined flower petals with a Tempting Turquoise marker.

Colored in the flower stems with an Old Olive marker.

I cropped a lot of this off to get a more interesting shape.

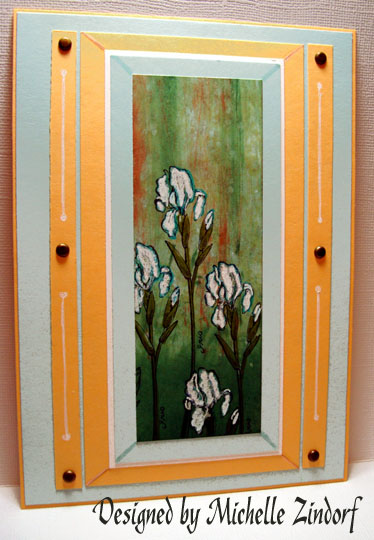
Assembled card and drew lines at the corners of the layers to create a window look. Also, went back over my flower petals with my white gel pen to make them stand out more.
Finished card.

Pingback: Elvis, James Dean, Marilyn Monroe and Inkers » Blog Archive » Fast Tuesday links
Pingback: Elvis, James Dean, Marilyn Monroe and Inkers » Blog Archive » 'inker' on the web