
I’m leaving on a Jet Plane. . . . . . .. . .
Folks, I’m flying out today to the West Coast, San Jose to be exact to teach a few Advanced and Beginner workshops. I will return on Sunday, but probably won’t be posting again until Monday.
I wanted to leave you with a tutorial and some blog candy. So here it is. The blog candy is this Sunset card that measures 4″ x 9″. To enter for a chance to win this card leave a comment on this post. If you are getting this blog update by e-mail you will need to click this link and leave a comment on this post: http://zindorf.blogs.splitcoaststampers.com/2008/10/23/california-sunset-blog-candy/
I will select a winner of this blog candy upon my return on Monday, October 27th using a random number generator. Good luck to you all!
The stamps I used today are by Innovative Stamp Creations. Here is a link to their online store:
http://www.innovativestampcreations.com/ischomepage.html
Now for the tutortial. 🙂
Supplies:
| Stamps: Innovative Stamp Creations “Marvels of Nature” |
| Paper: Stampin’ Up Whisper White, Basic Black & Pink Passion |
| Ink: Stampin’ Up Regal Rose, Summer Sun, Basic Black & Orchid Opulence |
| Accessories: Brayer, Post it Notes, Ribbon, Brads, Tim Holtz Medallion |

Brayered Summer Sun ink at the bottom a 3″ x 8″ piece of Whisper White card stock.
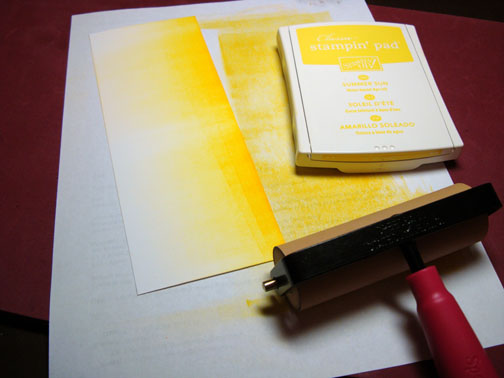
Brayered Regal Rose ink at the top of the card stock.
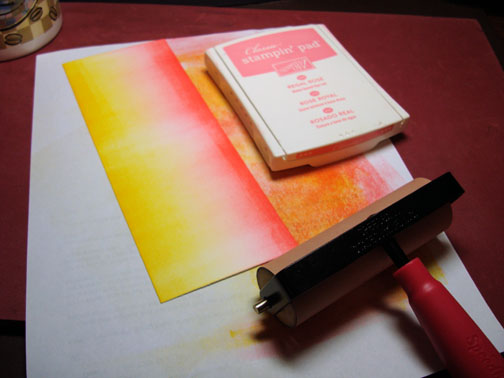
Brayered a bit of Orchid Opulence ink at the very top of the card stock, not covering the Real Rose ink entirely.

Masked the bottom 1/3 of the card stock with post it notes.

Sponged Regal Rose ink at the post it note edge and create a couple small hills.
Note: This shows what happens when you put pink on top of yellow. That’s right, you get Orange. 🙂
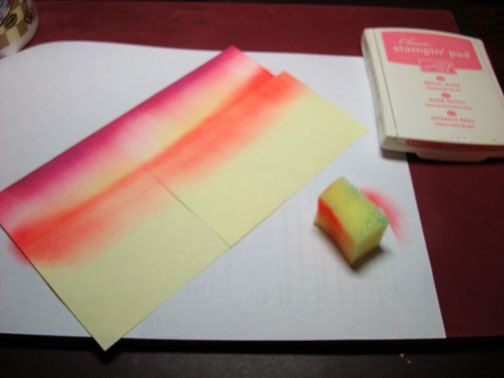
Sponged some Orchid Opulence right at the post it note edge.
Removed the post it note masks.
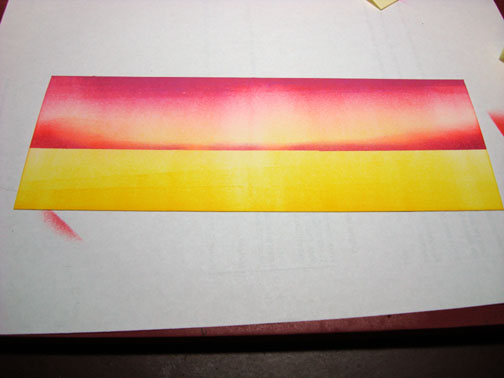
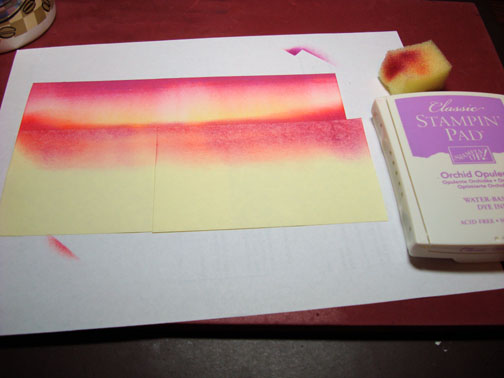
Sponged Regal Rose ink from the outside edge toward the middle, using a streaking motion with the sponge. I did not sponge any Regal Rose ink in the middle of the card stock.

Stamped three Palm trees using Basic Black ink.

Sponged heavily Basic Black ink at the very bottom of the card stock.
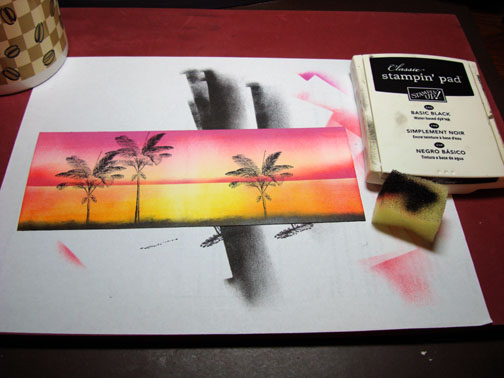
Added a hot pink ribbon, brads and a Tim Holtz Medallion that says “Journey” on it.
Here is the finished card measuring 4″ x 9″.

267 thoughts on “California Sunset & Blog Candy”