
Happy Hump Day! We made it to the middle of the week, grin.
I am scurrying around today packing for my adventure to Buffalo, Minnesota where I will be teaching Friday and Saturday to sold out groups. I will be leaving around 4:00 a.m. Thursday morning and will arrive around 8:00 p.m. or so that evening. I am one of those odd ducks that likes to drive. I make a day of my travels and stop at antique stores along my route where I find all kinds of treasures. Normally, I am on the lookout for Wooden Duck Decoys, which I collect. Don’t ask me why I collect them, I just do, lol.
This is my last post before leaving. I will return on Monday, June 8, 2009. If you need to e-mail me before Monday, please know I will return my e-mails as soon as I get back. I may or may not have internet access while on the road. 🙂
Buffalo, Minnesota here I come!
Okay, enough gibbering from me. How about I announce the “Sand Castle Kind of Day” Card and Stamp Blog Candy Winner. The winner is. . . . . . . . . . .. . .. . . . .

Misty Leach, who wrote “Hi Michelle, another gorgeous card! Thanks for the entry, have a wonderful weekend!”
Misty Congratulations! Please e-mail your address to mzindorf@aim.com and I put these in the mail to you.
Thank to all who played along!
Now on with today’s tutorial. Are these not the cutest little trees! You know me an tree stamps I have to have them all. These trees are from the Stampin’ Up set “Trendy Trees”.
Today’s tutorial gives you a taste of heat embossing over heat embossing. It is a fun technique. Check it out.
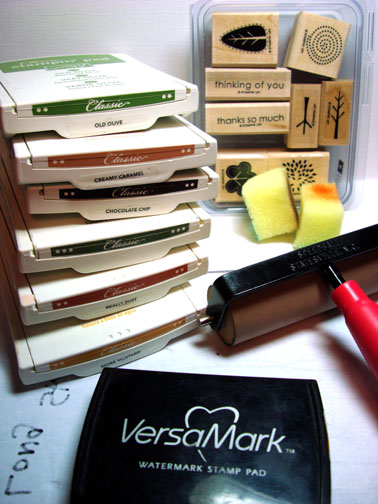
Supplies:
| Stamps: Stampin’ Up Trendy Trees |
| Paper: Stampin’ Up Whisper White, Creamy Caramel, Really Rust, Chocolate Chip |
| Ink: Stampin’ Up Old Olive, Creamy Caramel, Chocolate Chip, Always Artichoke, Really Rust, More Mustard |
| Accessories: Versamark Pad, Clear embossing powder, heat gun, Brayer, Sponge, Gold Brads, Ribbon |
Are you inspired by this Blog? One way you can help support this blog is by ordering your Stampin’ Up products through me. You can order from me 24-7 from this link: http://michellezindorf.stampinup.net or e-mail me at mzindorf@aim.com if you are within the United States. Want a copy of the current mini catalog, just e-mail me your address and I will pop one in the mail to you.
Want to become a Stampin’ Up Demonstrator and earn instant income? Consider being part of my Stampin’ Up Team.
Stamped the tree leaves stamp 4 times by first loading my stamp with Versamark and then loading it with More Mustard ink before stamping it. I loaded my stamp with Versamark and More Mustard ink for each stamping.
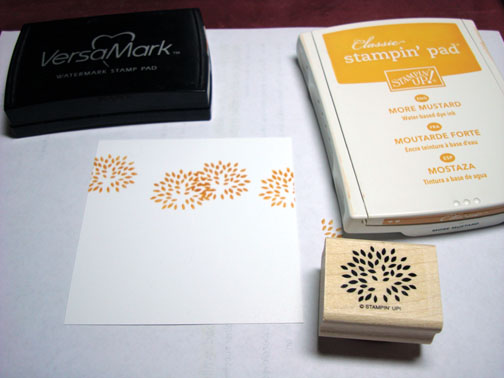
Heat embossed the images using clear embossing powder and a heat gun.

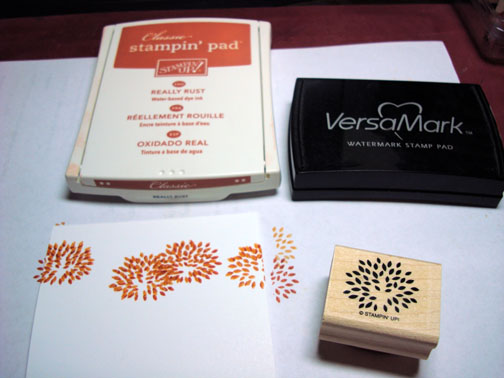
Over Stamped the Leaves by loading my stamp with Versamark and then Really Rust ink before stamping them. Heat embossed the Really Rust Leaves with clear embossing powder and a heat gun. It is like magic watching the Really Rust ink disappear off of the More Mustard images when you heat it.
Stamped the tree trunks by first loading my stamp with Versamark and then Chocolate Chip ink before stamping them.

Heat embossed the trunks using clear embossing powder and a heat gun.
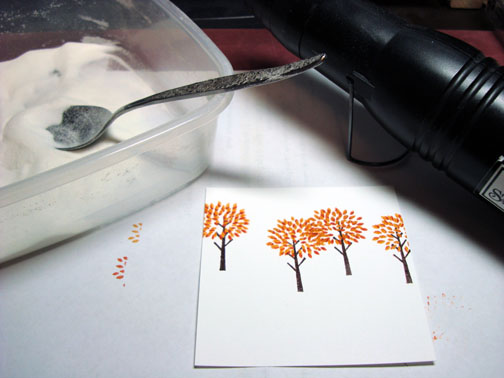
Now that I have my trees all heat embossed I can apply my background without the ink sticking to the embossing.
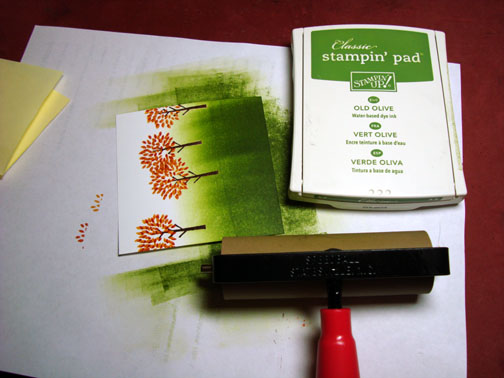
Brayered Old Olive ink at the bottom of the card stock.
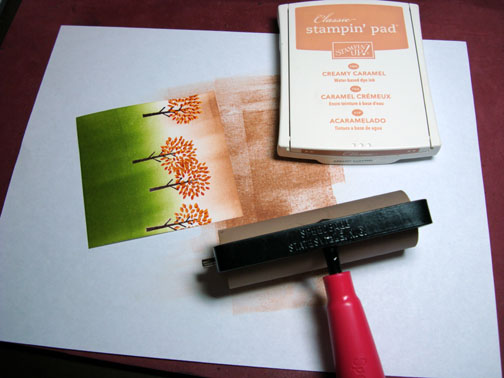
Brayered Creamy Caramel ink lightly at the top of the card stock.
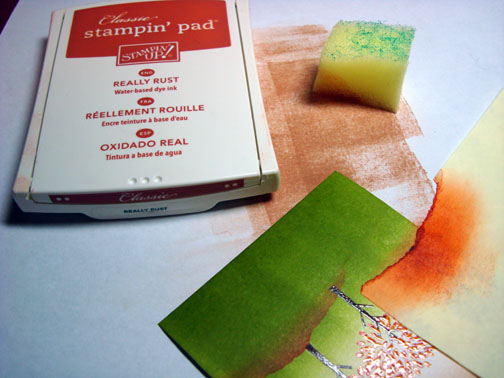
Ripped a hill shape into the sticky part of a post it note and used it as a mask. Sponged Really Rust ink at the post it note edge to create a hill shape.
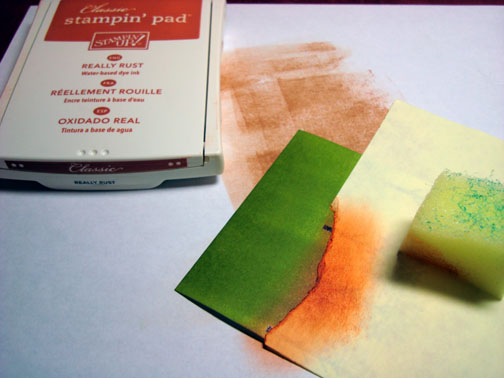
Moved the post it note and repeated the sponging of Really Rust ink at the post it note edge to make my second hill.
Sponged Always Artichoke ink in the center of my trees and at the bottom of the card stock.
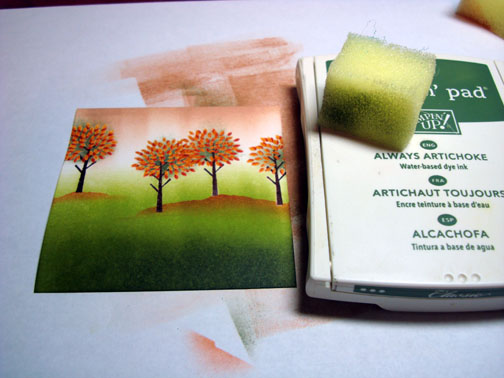
Sponged Chocolate Chip ink around the outside edges of the card stock.

Cut a 5″ circle out of Really Rust card stock and a 6″ circle out of Creamy Caramel card stock. Cut the circles in half.
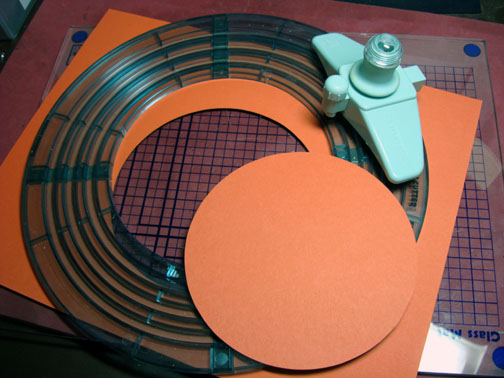
Dry embossed my Rust half of a circle and a Chocolate Chip panel using my Big Shot and the Dot Texture plate. Love those texture plates. They are a nice big size.

Brayered Really Rust ink over the Really Rust textured half of a circle. This helps bring out the pattern of the dry embossing.

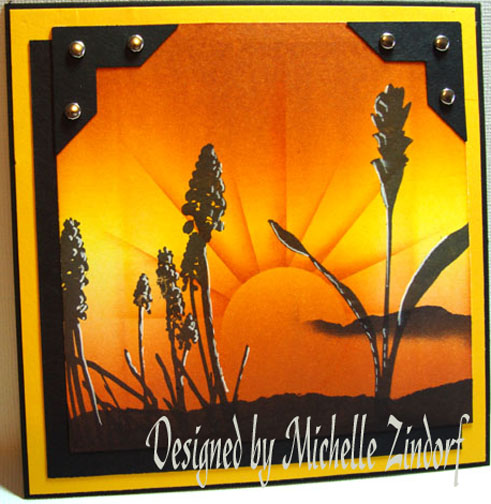
Assembled my card front and added gold brads and brown ribbon. Here it is finished measuring 5″ x 6.5″.
I hope this tutorial has inspired you to try heat embossing over heat embossing today.
Hang tight until my return and check out all 219 Past Tutorials at this link.
http://zindorf.blogs.splitcoaststampers.com/tutorials-ive-written/
Until my next post. . . . . . . . . . . . . . . . .
Huge Hugs,
Michelle
 Get ready for Brayer Workshops! I am coming to:
Dayton, Ohio
Webster, New York
New Johnsonville, Tennessee
Stoughton, Wisconsin
Columbia, Missouri
Lynchburg, Virginia
Greenwood, Indiana
Castro Valley, California
Yardley, Pennsylvania (near Philadelphia)
Knox, Maine
Broomfield, Colorado
Moore, Oklahoma
Nashville, Indiana
Portland, Michigan
2010
Phoenix, Arizona
Monroe, Louisiana
Jacksonville, Florida
Mechanicsville, Virginia
Salem, Oregon
Here is a link to my workshop calendar where you can see all of my travel schedule and to get info on beginner and advanced Brayer workshops: http://zindorf.blogs.splitcoaststampers.com/workshop-calendar
Link to my Stampin’ Up website were you can order all of your must have Stampin’ Up products from me 24-7: http://michellezindorf.stampinup.net
Frequently asked questions answers: http://zindorf.blogs.splitcoaststampers.com/frequently-asked-questions/

29 thoughts on “Trendy Trees Scene – Tutorial #219”