
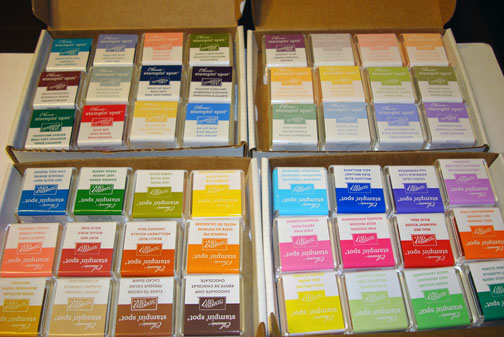
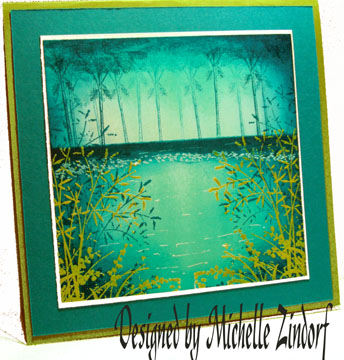
It is still raining at my house today, just like it has been the past couple of days. I decided to look on the sunny side of things though and created a beach scene using my new favorite tools, the ink spots. These little cuties are sold as sets. Each Stampin’ Up! color family has a set. Of course, I had to have them all. The little ink spot pads are a mere 1 inch and the pads are raised from the base of the ink pad holder so you can easily use them to apply ink directly to the paper. They are much easier to control then the larger pads when doing Direct to Paper Techniques.
Today’s project was also made for my Stampin’ Up! Down Line, Ink To Art Team’s Technique Swap. This month’s technique is, you guest it, Direct to Paper.
Let’s get started. . . . . . . . .
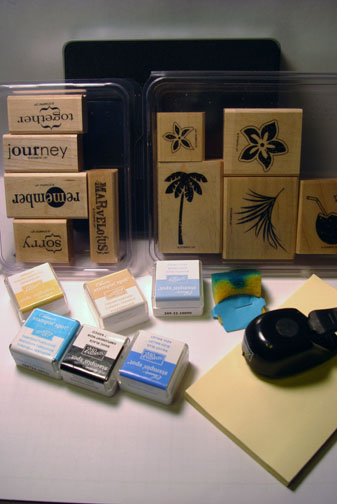
Supplies:
| Stamps: Stampin’ Up! Tropical Party and In a Word |
| Paper: Stampin’ Up! Whisper White, Basic Black, More Mustard and Tempting Turquoise |
| Ink: Stampin’ Up! Ink spots, Tempting Turquoise, Basic Black, Ballet Blue, Bashful Blue, So Saffron and Creamy Caramel |
| Accessories: Stampin’ Up! Top Note Die, Big Shot Machine, 1/2″ circle Punch, Sponge, Post it Notes |
Live in the USA and need a copy of the Summer Mini Catalog? E-mail your mailing address to mzindorf@aim.com and I will get one in the mail to you. ![]() Are you getting inspiration from this blog? One way you can help support it is to order your Stampin’ Up products through me. Click HERE to place an order. Want to become a Stampin’ Up Demonstrator , receive a 20% discount on product and earn instant income on orders? Consider being part of my Stampin’ Up Team and start your own business. Click HERE for more information.
Are you getting inspiration from this blog? One way you can help support it is to order your Stampin’ Up products through me. Click HERE to place an order. Want to become a Stampin’ Up Demonstrator , receive a 20% discount on product and earn instant income on orders? Consider being part of my Stampin’ Up Team and start your own business. Click HERE for more information.
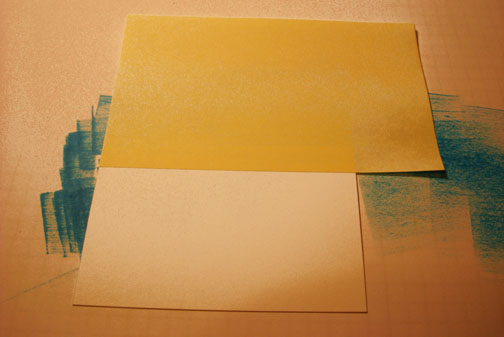
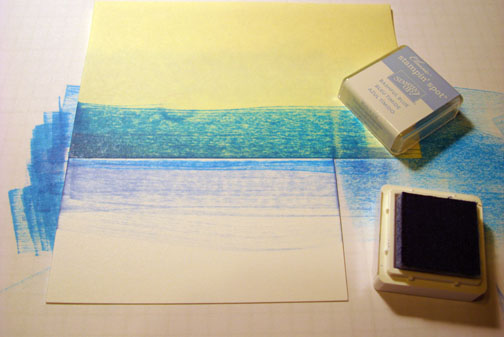
Masked the sun using a 1/2″ punch from the sticky part of a post it note. Put the mask on a 3.75″ x 4″ piece of Whisper White card stock.

Swiped the Tempting Turquoise ink spot across the top of the card stock.

Masked the top of the card stock using a post it note.
Swiped the Tempting Turquoise ink spot across the card stock right at the post it note edge.
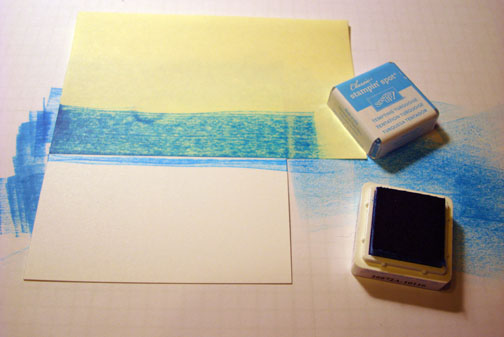
Swiped the Bashful Blue ink spot across the card stock.
Swiped the Ballet Blue ink spot onto the card stock using the edge of the pad.
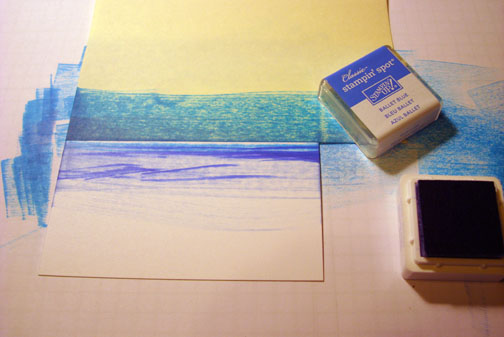
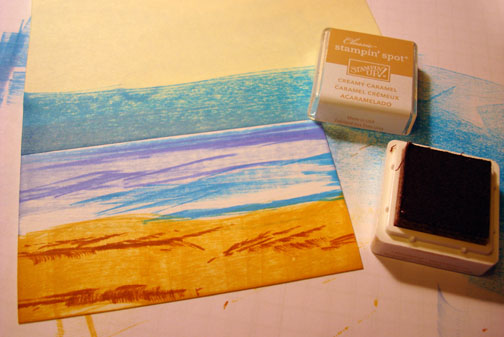
Swiped the Tempting Turquoise ink spot at the bottom of the water area.
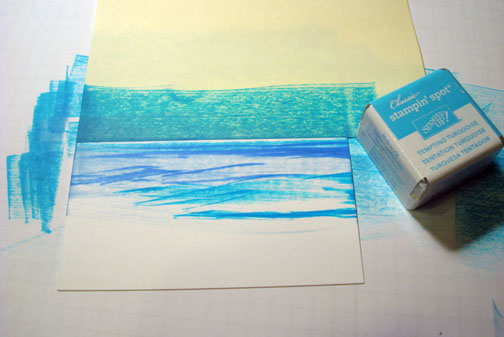
Swiped the So Saffron ink spot at the bottom of the card stock to create a sandy area.
Added a marks of Creamy Caramel using the edge of the Ink pad.
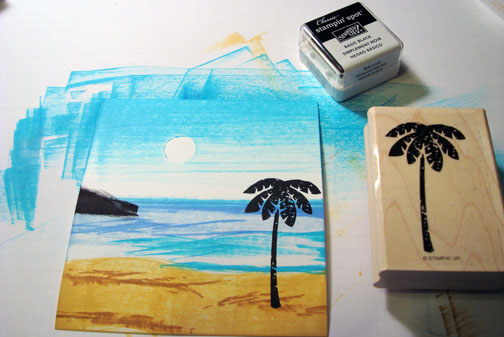
Removed all of the Post it Note Masks.

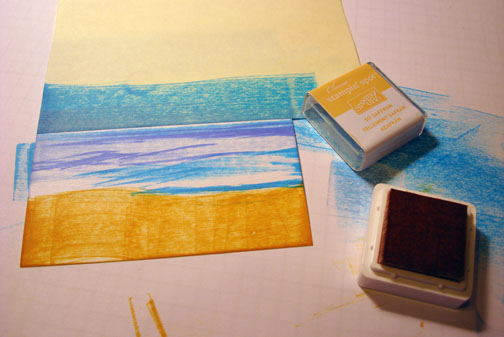
swiped in a piece of island using the edge of the Basic Black ink spot.

Stamped the Palm Tree from the New Stampin’ Up set Tropical Party using Basic Black ink.
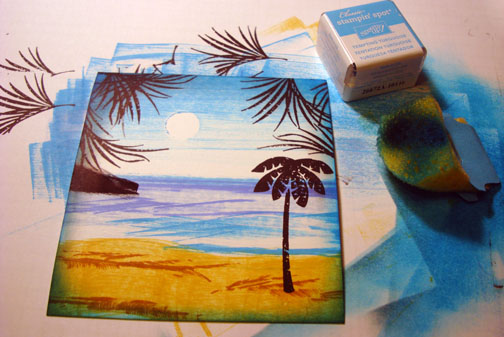
Stamped the Palm Fod using Basic Black ink.

Sponged around the egde of the main image panel using Tempting Turquoise ink.
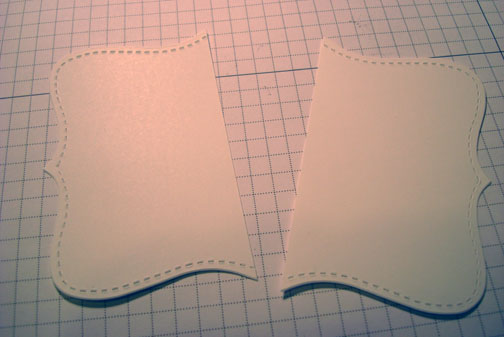
Die Cut a Top Note Die using my Big Shot Die Cut machine and Whisper White card stock.
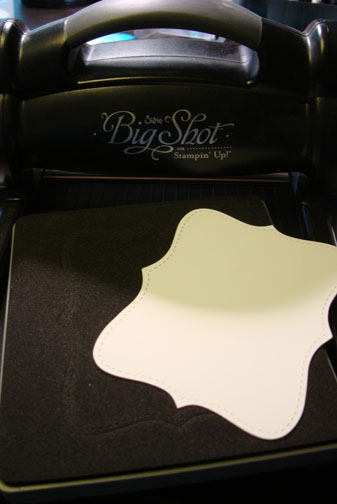
Cut the Top Note in half.
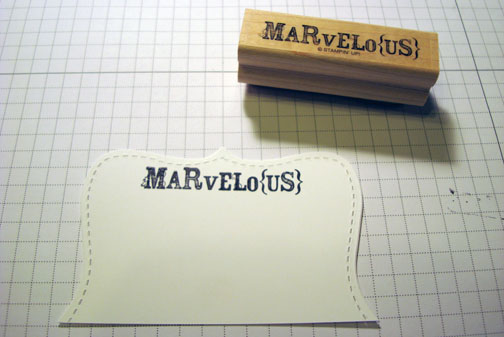
Stamped the word Marvelous on the top note half using Basic Black ink.
Assembled the card adding Basic-Black, More Mustard and Tempting Turquoise panels.
Here is the finished card measuring 5.5″ square.
Hey, I am taking off on a road trip to Illinois to teach my Brayer Workshops this weekend, woohoo! I love road trips, stamping and new friends. 🙂
I will be back on Monday.
May your weekend be filled with lots of fun and laughter.
Until my next post. . . . . .
Hugs,
Michelle
 Get ready for Brayer Workshops! I am coming to:
St. Cloud, Minnesota (2 spots available)
North Chili, New York (near Rochester)
Kenova (Huntington), West Virginia
Middleburg Heights, Ohio (Sold Out)
Piedmont, Alabama (Near GA border close to Cedartown)
Auburn, Washington (near Seattle)
Here is a link to my workshop calendar where you can see all of my travel schedule and to get info on beginner and advanced Brayer workshops: http://zindorf.blogs.splitcoaststampers.com/workshop-calendar
Link to my Stampin’ Up website where you can order all of your must have Stampin’ Up products from me 24-7: http://michellezindorf.stampinup.net
Frequently asked questions answers: http://zindorf.blogs.splitcoaststampers.com/frequently-asked-questions/

24 thoughts on “Just Beachy – Tutorial #333”