Happy Birthday to me

Happy Birthday to me, happy birthday to me, happy birthday dear Michelle.. . . . . . . . Happy Birthday to me…….. and many more, lol.

gallery-photo2_thumbnail.jpg

Hey everyone, I just wanted to explain why I’m taking this holiday weekend off.   One, today is my birthday, two tomorrow is a holiday and three I’m working on workshop projects that won’t be posted.  These projects are being especially made for my advanced workshops I’m doing in San Jose, California in October.  I say advanced workshops because you have to already have taken one of my workshops to be able to attend the advanced one.   Here is a link to my workshop calendar if you want to get info on beginner and advanced workshops:  http://zindorf.blogs.splitcoaststampers.com/workshop-calendar/

 May your weekend be filled with lots of love and joy!

Until my next post. . . . . . . . .

Hugs,

Michelle

Note:  Links to all my tutorials can be found here:  http://zindorf.blogs.splitcoaststampers.com/tutorials-ive-written/


Embossed Resist bird – Tutorial #111

dsc05760.JPG

Hello!  I have a tutorial for you on emboss resist, resist.  That is what I call it anyway.  🙂

I used the embossed resist technique, but did it in layers.   When creating a scene with this technique, you will want to keep in mind to work from the foreground to the background.  Meaning you will want to stamp the images in the foreground before you stamp the images in the background.

Let’s get started:

Supplies:

Stamps: Stampin’ Up Always, Stem Silhouettes, Brocade Basics
Paper: Stampin’ Up Whisper White, Bashful Blue & Basic Black
Ink: Adirondack ink Pitch Black, Lake Mist, Oregano, Pebble & Aqua
Accessories: Versamark pad and marker, Black Faber Castell marker, Coluzzle Circle Template, Brayer, Fine Detail Embossing Powder, Heat Gun, Ribbon, 2 brads, Sponge, Post it Notes

dsc05763.JPG

Stamped bird by first loading the stamp with Versamark and then Pebble ink before stamping it on a 5″ x 5″ piece of Whisper White card stock.  Heat embossed the image with clear embossing powder and a heat gun.

dsc05738.JPG

dsc05739.JPG

Colored over the design on the bird with a Versamark marker and then heat embossed the image again with clear embossing powder and a heat gun.

dsc05740.JPG

dsc05741.JPG

Stamped the Brocade flourish by first loading my stamp with versamark and then Pebble ink before stamping.  Heat embossed image with clear embossing powder and a heat gun.

dsc05742.JPG

dsc05743.JPG

Filled in the White spaces on the leaves with a Versamark marker and the heat embossed the image again with clear embossing powder and a heat gun.

dsc05744.JPG

dsc05745.JPG

Stamped the Brocade flourish again by loading the stamp with Versamark and then Pitch Black ink before stamping.  Heat embossed the image using clear embossing powder and a heat gun.  Filled in the white spaces of the leaves with a Versamark marker and then heat embossed the image again.

dsc05746.JPG

dsc05747.JPG

Stamped the Stem Silhouettes three times using just Versamark and heat embossed the stems with clear embossing powder and a heat gun.

dsc05748.JPG

dsc05749.JPG

Masked half of the panel with a Post it note.

dsc05750.JPG

Brayered Lake Mist ink over the uncovered half.

dsc05751.JPG

Removed the Post it Note make and put a fresh Post it note mask on, this time masking the Lake Mist half of the panel.   Brayered on Aqua ink on the unmasked side.

dsc05752.JPG

Removed the post it note mask.

dsc05753.JPG

Cut a circle with my Coluzzle to use as a mask and sponged Pebble ink around the outside of the mask.

dsc05754.JPG

dsc05755.JPG

Used a Faber Castell fine point marker and drew an outline around the circle mask.

Note:  If I were to do this again, I would not have drawn the black line across the embossed images.  We live and we learn.  🙂

dsc05756.JPG

dsc05757.JPG

I also used the same black marker to define the bottom sides of the Bird and Brocade Flourishes.

Sponged Oregano ink around outside edge of the panel.

dsc05759.JPG

Assembled card front and added a ribbon and two brads.   Here it is finished measuring 5.25″ x 5.25″.

dsc05760.JPG

Hope you enjoyed this tutorial on emboss resist, resist and will want to give it a try.

May your day be filled with the sweet sounds of sing birds and sunshine.

Until my next post. . . . . . . . .

Hugs,

Michelle

Note:  Links to all my tutorials and be found here:  http://zindorf.blogs.splitcoaststampers.com/tutorials-ive-written/


Willow Lake – Tutorial #110

dsc05734.JPG

Hello everyone and happy Thursday! 🙂

Just a quick note before we get into the tutorial.  I have scheduled a Brayer workshop on September 13th in Dayton, OH at Marco Paper to accommodate the people that wanted to get into the September 6th workshops but were unable to because they filled up so very fast.  There are a few spots left.  If you wish to sign up and have some fun while taking the mystery out of using your brayer, please contact Marco Paper at 937-433-7030 or 1-888-433-5239 or website at http://marcopaper.com/index.html  

Today’s tutorial features stamps by Fire Cracker Designs by Pamela.  Here is a link to their online store if you wish to check them out:  http://www.safesecurestore.com/stores/merchant.mvc?Screen=SFNT&Store_Code=firecrackerdesignsbypamela

I started this card brayering from an angle and really like the light effects it created. 

Let’s get started.  🙂

Supplies:

Stamps: Fire Cracker Designs by Pamela
Paper: Stampin’ Up Whisper White, Bliss Blue & Old Olive
Ink: Stampin’ Up Always Artichoke, Old Olive, Kiwi Kiss, Lovely Lilac & Bashful Blue
Accessories: Stampin’ UP markers, Faber Castel Grey marker, White Gel Pen, Brayer, Aqua Painter, Sponges

dsc05737.JPG

Brayered Bashful Blue ink at an angle, across one corner of a 4.5″ x 4.5″ piece of Whisper White card stock.

dsc05710.JPG

Flipped the card stock around and brayered a small amount of Bashful Blue ink on the opposite corner.

dsc05711.JPG

Colored the tree and ground below it with an Always Artichoke marker.

dsc05713.JPG

Colored the water lines on the stamp with a Bliss Blue marker.

dsc05714.JPG

Huffed on the stamp to moisten the color and then stamped it on my panel.

dsc05715.JPG

Stamped the Willow Branches with Old Olive ink.

dsc05716.JPG

Masked off the sky area with a Post it Note.

dsc05717.JPG

Sponged in a circular motion Bashful Blue ink at the edge of the Post it Note Mask.  This creates my Horizon Line.

dsc05718.JPG

Squeezed the Kiwi Kiss stamp pad while it was closed to create a pool of ink on the lid of the stamp pad.  Used the pool of ink to water color with an Aqua Painter the Willow Branches and the ground under the tree.

dsc05719.JPG

Added white Gel pen to the tops of the Willow Branches.

dsc05720.JPG

Used the fine point side of a Close to Cocoa marker and drew along the right sides of all of the Willow Branches to create some depth.  Also colored in the tree trunk and around the rocks  under the tree with the same marker.

dsc05723.JPG

Sponged Old Olive ink on the tree.

dsc05724.JPG

Used a gray marker to color in the rocks.

dsc05725.JPG

Colored the ground above the rocks with a Creamy Caramel marker, leaving some of the Kiwi Kiss ink showing at the top of the ground.

dsc05726.JPG

With a White gel pen, added some white dashes in the water area to create some highlights.

dsc05727.JPG

Sponged Lovely Lilac ink around the entire edge of the panel, being more heavy at the top left and bottom right corners.

dsc05728.JPG

Sponged Always Artichoke ink in the very center of the tree and sponged a bit under the tree in the water area to create a shadow for the tree.

dsc05729.JPG

Added more White Gel pen dashed so the water area over the Lovely Lilac ink.

dsc05730.JPG

Assembled card and here it is completed measuring 5.25″ x 5.25″. 

dsc05734.JPG

 You can fine a complete listing of all my tutorials at this link:

http://zindorf.blogs.splitcoaststampers.com/tutorials-ive-written/

I hope you have been inspired to try using your brayer at a different angle to see what fun light effects you will achieve.

May your day be filled with the peaceful sounds of nature.

Until my next post. . . . . . . . . . . . .

Hugs,

Michelle


Distant Pines – Tutorial #109

dsc05704.JPG

I have a little scene for you today.  Created it with a little brayering, a little sponging and just a tad of stamping.  Isn’t stamping wonderful?  You can take the most simplest of stamps and create a whole scene without doing any drawing.  Love it!  

Let’s get started on today’s tutorial.  🙂

Supplies:

Stamps: Stampin’ Up “Noble Deer”, “Carte Postale” & “Totally Tabs”
Paper: Stampin’ Up Whisper White, Old Olive and Not Quite Navy
Ink: Adirondack Oregano, Lettuce, Willow, Stonewashed & Aqua
Accessories: White Gel Pen, Adirondack Oregano marker, Tim Holtz Ruler, Push Pin, Sponges, Brayer, Post It Notes, Tab Punch & Brads

  dsc05709.JPG

Brayered Aqua ink on a piece of 3.25″ x 5.5″ piece of Whisper White card stock.

dsc05686.JPG

Tore through the sticky part of a couple of post it notes and used them as a mask for the sky and to create a hill.

dsc05687.JPG

Sponged on Stonewashed ink, in a circular motion, at the Post it Note edge, getting lighter with the ink at the Right side of the card stock.

dsc05688.JPG

Sponged on Willow ink at the Post it note edge with a circular motion and then using a swiping motion from right to left put in the foreground area.

dsc05689.JPG

Sponged on some Lettuce ink in the foreground area, not covering all of the Willow ink.

dsc05690.JPG

Sponged a bit of the Oregano ink at the lower right corner.

dsc05691.JPG

Removed Post it Note masks.

dsc05692.JPG

Colored just the trees on the stamp with an Oregano marker, huffed on it to moisten it and stamped it.  Remember, you don’t have to use the entire image on a stamp.  🙂  I didn’t want the clouds that are on the stamp, so I omitted them.

dsc05693.JPG

Put a new Post it Note on to mask the water area in the scene.   Sponged Willow ink at the Post It Note edge to create my Shore line.  Be care that your Post it Note is straight or you will have a crooked shore line and your water will look very un-natural.  Water doesn’t run up hill. I’ve learned this lesson the hard way, lol.

dsc05694.JPG

Remove Post it Note mask.

dsc05695.JPG

With a swiping motion from Left to Right with a sponge and Stonewashed ink added a bit of clouds to the sky area and the water area.

dsc05696.JPG

On a separate piece of Whisper White card stock, stamped Tab stamp with Stonewashed ink.

dsc05697.JPG

Punched tab out with a tab punch.

dsc05698.JPG

Stamped Sentiment with Lettuce ink.

dsc05700.JPG

Glued a Not Quite Navy card stock panel on an Old Olive one and used my Tim Holtz Ruler and a push pin to pierce the top and bottom of the panels.

Note:  The Tim Holtz Ruler has holes in it for piercing straight lines.  Very handy in deed!

dsc05701.JPG

Cropped my main image panel down to 3″ x 5″ and assembled card front and added brads.

dsc05702.JPG

Used a white gel pen to create faux stitching by drawing the white pen from pierced hole to pierced hole.

dsc05703.JPG

Here it is finished measuring 5.25″ x 5.25″.

dsc05704.JPG

Hope your day is filled with the peaceful images of mountain lakes and streams.

Until my next post. . . . . . . . . . . . . . .

Hugs,

Michelle

Note:  A page listing all of my tutorials can be found here:  http://zindorf.blogs.splitcoaststampers.com/tutorials-ive-written/


Madame Butterfly – Tutorial

dsc05682.JPG

Happy Monday!  Well I’m trying to start the week off with a good attitude, so I’ll say again, Happy Monday!  Hope everyone had a super wonderful weekend. 

Today’s tutorial features a stamp sheet by Innovative Stamp Creations “Friendship”.  Here is a link to their online store, check them out:  http://www.innovativestampcreations.com/ischomepage.html

Let’s get started.  🙂

Supplies:

Stamps: Innovative Stamp Creations “Friendship”
Paper: Stampin’ Up Cool Caribbean, Take with Teal & Chocolate Chip
Ink: Stampin’ Up Taken with Teal, Tempting Turquoise, Close to Cocoa & Creamy Caramel
Accessories: Stamp-a-ma-jig, Photo Corner Punch, Sponges, Sharpie Gold Paint Marker, Stampin Up markers, Versamark Marker, Fine Detail Clear embossing Powder, Heat Gun, Cuttlebug embossing folde

dsc05685.JPG

Stamped butterfly on Whisper White card stock using Close to Cocoa ink.

dsc05656.JPG

Colored the butterfly with a Creamy Caramel marker.

dsc05657.JPG

Added some darker touches with a Chocolate Chip marker.

dsc05658.JPG

Colored the inside of the wings with a Tempting Turquoise marker.

dsc05659.JPG

Colored over the image with a Versamark marker and heat embossed using fine detail clear embossing powder and a heat gun.

dsc05660.JPG

dsc05661.JPG

Stamped the face over the embossed image using a Stamp-a-ma-jig for placement and Close to Cocoa ink.

dsc05662.JPG

dsc05664.JPG

Cropped panel down to 2 3/8″ square.

dsc05665.JPG

Sponged on Creamy Caramel ink being darker toward the outside of the panel getting lighter toward the inside.

I used a circular motion with the sponge starting on the outside edge.

dsc05666.JPG

Colored the eyes with a Tempting Turquoise marker.

dsc05667.JPG

Used a black marker to define the eyelashes.

dsc05668.JPG

Sponged Close to Cocoa ink around the outside edge in the hair areas.

dsc05669.JPG

Added some streaks of Chocolate chip marker to the hair closest to the face.

dsc05670.JPG

Cut two panels 5″ x 2.5″ out of Cool Caribbean card stock.  Yep, I’m still using up my Cool Caribbean card stock although it is retired.  No sense wasting it.

Embossed the panels with a Cuttlebug folder.

dsc05671.JPG

Sponged Tempting Turquoise ink on one side of each panel.

dsc05672.JPG

Edged the main image panel with a Sharpie Gold Paint marker.

dsc05673.JPG

Adhered the Tempting Turquoise panels to a panel of Taken with Teal card stock.  Sponged Taken with Teal ink around the out side edge.

dsc05675.JPG

Punched for photo corners out of Chocolate Chip ink.

dsc05676.JPG

Embossed them with the Cuttlebug folder.

dsc05678.JPG

Assembled card and here it is finished measuring 5 3/8″ x 5 3/8″.

dsc05682.JPG

May your day be filled with wonderful things!

Until my next post. . . . . . . . . . .

Hugs,

Michelle

Follow this link to see all of my tutorials:  http://zindorf.blogs.splitcoaststampers.com/tutorials-ive-written/


The Blog Candy Winner IS. . . . . . . . . .. . .

 We have a blog candy winner!!!!  The Random Number generator picked number 193 out of 392 entries, from the post on August 19th, and that entry is:

Mary Strauser who left this comment “Great tutorial. I love trying your tutorials. Wish I could do my braying the way you do. I have tried different things and nothing works for me.  My favorite stamps is lovely as a tree or delight in life
thanks for giving me the chance to win that set.”                              dsc05584.JPG

Mary, please e-mail your address to mzindorf@aim.com so I can pop this in the mail to you.  Congratulations!!!

Thanks to everyone who played along.   I wish I had blog candy for each of you.

Until my next post. . . . . . . . . . . . . .

Hugs,

Michelle


Prismacolor Pencil Victorian – Tutorial #107

dsc05654.JPG

It’s FRIDAY!!!  On Fridays Split Coast Stampers.com has the limited supply challenge.  Today’s challenge is to use the supplies you have not used in quite a while, you know the ones that have all the dust on them, lol.  Well I went way back and dug this Stampin’ Up set “See with the Heart” out.  It’s a beautiful set that dates back to 2004 and has only seen ink once since I got it.  I also used my poor neglected Prismacolor pencils and Odorless Paint Thinner today.  This card is not my usual style, but that is why I like the challenges.  They make you stretch and when you stretch you grow.  🙂

FYI, my brayer workshops at Marco Paper in Dayton, OH on September 6th have sold out so we have add a Brayer workshop on September 13th.  So if you missed out on the 6th sign up for the 13th of September and we will take the mystery out of using that brayer.  To register, please contact Marco Paper at 937-433-7030 or 1-888-433-5239 or website at http://marcopaper.com/index.html 

Let’s get going on the tutorial.  🙂

Supplies:

Stamps: Stampin’ Up Seeing With the Heart
Paper: Stampin’ Up Whisper White, Soft Sky & Basic Black
Ink: Palette Noir Black, Distress inks Brushed Corduroy, Frayed Burlap & Antique Linen
Accessories: Prismacolor Pencils & Odorless Paint Thinner, Sponge, Cuttlebug Corner die, Faber Castell Fine Point Black Marker, Brads

dsc05655.JPG

I started out by stamping the main image on a 4.5″ x 4.5″ piece of Whisper White card stock with Palette Noir Black ink.  I used this ink because I will be coloring with a solvent based medium and this ink won’t smear with this technique. 

dsc05631.JPG

I say the coloring medium is solvent based because I dip the tip of my Prismacolor Pencil in Odorless paint Thinner before coloring so the color melts on the paper like butter and you can blend so well with this method.  I don’t use blending stumps, I just start with my lightest color and blend with the pencils as I go.

dsc05632.JPG

I picked a light blue (Sky Blue Light) and a Darker Blue (Slate Grey) to color her dress.  I colored her dress in completely with the Sky Blue Light an then colored the dark areas of her dress with Slate Grey.

dsc05633.JPG

dsc05634.JPG

For the Roses I pick a light Peach (Peach) and a dark Peach (Pumpkin Orange).  I colored the roses in with Peach and then the darker areas of the roses with Pumpkin Orange.

dsc05635.JPG

dsc05636.JPG

Colored her skin with Light Peach.

Note:  I left the small flowers uncolored so the white would draw the eye into the image by being such a contrast to the colored image.

dsc05637.JPG

Colored the leaves with Celadon Green.

dsc05638.JPG

Colored her hair with Dark Brown.

dsc05639.JPG

Colored the background area to the right of her with Cream.

dsc05640.JPG

Sponge Distress ink Antique Linen around the edge of the card stock, up to the image.

dsc05641.JPG

Randomly sponged Distress ink Frayed Burlap around the edge.

dsc05642.JPG

Got a bit darker by randomly sponging Distress ink Brushed Corduroy on the edge of the card stock.

dsc05643.JPG

Adhered the main image panel to a 5″ x 5″ panel of Soft Sky card stock.

dsc05644.JPG

Stamped the rose image around the edge of the card-stock.  Note:  when you stamp over multiple layers of card stock you will have gaps in your design where the card stocks meet.

dsc05645.JPG

Filled in the gaps with a Faber Castell Fine Point Black marker.  This marker is made of Indian ink and and works well (doesn’t smear) with solvent based coloring mediums.

dsc05646.JPG

Colored the Roses the exact same way I did on the main image panel by using the same colors.

dsc05647.JPG

dsc05648.JPG

dsc05649.JPG

Sponged Distress ink Brushed Corduroy right on the edge of the Soft Sky panel.

dsc05650.JPG

Cut out 4 corner pieces using my Cuttlebug.

dsc05651.JPG

Assembled card, added brads and here it is finished measuring 5.25″ x 5.25″.

dsc05654.JPG

I hope you enjoyed this coloring tutorial and will be inspired to get out those stamps you have been hording and not using.  They are just longing to see they light!

May your day be filled with the smell of a Victorian garden.

Until my next post. . . . . . . .. . . . . .

Hugs,

Michelle


Flourished Trees – Tutorial #106

dsc05628.JPG

I’m feeling a bit foggy today, not enough sleep, allergies kicking in.  That could be why I picked to do a foggy scene, lol.  In real life, this looks a bit more foggier (is that a word?).  🙂

Photographing cards in the wee hours of the morning, when it is pitch black out, is a little difficult, but that is when I do my stamping and posting to this blog, so the photos are what they are.  Thanks for understanding!

Well let’s get on with this foggy tutorial. 🙂

Supplies:

Stamps: Innovative Stamp Creations “Artsy Victorian” & Impression Obession “Branches of a Tree”
Paper: Stampin’ Up River Rock, Not Quite Navy & Whisper White
Ink: Stampin’ Up River Rock, Always Artichoke, Not Quite Navy & Bordering Blue, Adirondack Lake Mist
Accessories: Versamark Pad, Brayer, Fine Detail Clear embossing powder, Brads, Ribbon, Not quite Navy Marker, sponges

dsc05630.JPG

Stamped tree image by first loading my stamp with Versamark and then loading it with River Rock ink before stamping.  Stamped it on a 4.5″ x 6″ piece of Whisper White card stock.

dsc05611.JPG

Heat embossed it using fine detail clear embossing powder and a heat gun.

dsc05612.JPG

Stamp the tree again using Versamark only, no ink.

dsc05613.JPG

Heat embossed it using clear embossing powder and a heat gun.

dsc05614.JPG

Stamped the tree a third time by loading the stamp with Versamark and then Lake Mist ink before stamping.

dsc05615.JPG

Heat embossed it using clear embossing powder and a heat gun.

dsc05616.JPG

Brayered on River Rock ink at the bottom of the card stock.

dsc05617.JPG

Brayered on Bordering Blue at the top of the card stock, leaving a light area showing between the River Rock and the Bordering Blue ink.  This gives a foggy look to the piece.

dsc05618.JPG

Stamped Flourish with Bordering Blue ink at the right and bottom sides of the card stock.

dsc05619.JPG

Sponged Not Quite Navy ink at the top and right side of the card stock.

dsc05621.JPG

Sponged Always Artichoke ink at the bottom of the card stock.

dsc05622.JPG

Assembled card from and stamped the flourish again, only this time stamping it with Not Quite Navy ink.   Note:  When stamping over layers of card stock you will get gaps in your image.  Be sure to stamp in a color that you have a matching marker for so you can fill in those gaps.

dsc05623.JPG

Filled in the gaps in the flourish image with a Not Quite Navy Marker.

dsc05624.JPG

Assembled card and here it is finished measuring 6.5″ x 5″.

dsc05628.JPG

Hope your day is filled with sunshine to take away any fog that may be around.  🙂

Until my next post. . . . . . . . . . .

Hugs,

Michelle


Catching 47 – Tutorial #105

dsc05607.JPG

It’s time for the Split Coast Stamper’s Dirty Dozen Present & Alumni monthly challenge.  This months challenge was to make a birthday card using numbers in the design and not use the word Birthday. 

This is what I came up with for my husband Russ’ birthday in October. 🙂  Good thing he doesn’t read this blog, lol.

To see all of the Dirty Girl’s creations for this challenge check out this link:   http://www.splitcoaststampers.com/gallery/showgallery.php?si=DCB808&x=8&y=8

The Dirty Girls will be posting their creations throughout the day, so check back at that link often.

Here is the tutorial for mine:

Supplies:

Stamps: Stampin’ Up “on the Fly”
Paper: Stampin’ Up Whisper White, Baja Breeze, Apricot Appeal, Night of Navy
Ink: Stampin’ Up Baja Breeze, Apricot Appeal, Not Quite Navy, Night of Navy & Palette Noir Black
Accessories: Brayer, Versamark marker, Fine Detail Clear embossing powder, Heat Gun, Cuttlebug numbers, Prismacolor Markers, White gel Pen, Black fine tip marker, Sponge, Ticket corner punch, photo Corner punch, Post it notes

dsc05610.JPG

Stamped Fisherman on a 5″ x 5″ piece of Whisper White card stock with Palette Noir Black ink.

dsc05585.JPG

Colored his hat and pants with a Prismacolor Oatmeal marker.

dsc05587.JPG

Added Khaki to his jacket and the creases on his pants.

dsc05588.JPG

Colored his skin with an Eggshell marker.

dsc05589.JPG

Colored over the fisherman with a Versamark marker and heat embossed the image with fine detail clear embossing powder and a heat gun.

dsc05590.JPG

Put a post it note over the bottom of the card-stock to mask it and then Brayered on Apricot Appeal ink.

dsc05591.JPG

Brayered on Baja Breeze ink at the top of the sky.

dsc05592.JPG

Brayered on Not Quite Navy ink at the top of the card stock not covering the Baja Breeze ink entirely.

dsc05593.JPG

Removed post it note mask.

dsc05594.JPG

Put a clean Post it note mask on to cover the sky area of the card stock.  

Brayered on Baja Breeze ink at the bottom of the card stock.

dsc05595.JPG

Brayered on Not Quite Navy ink at the top of the water area, by rolling over the post it note.

dsc05596.JPG

Colored in just the hook of the lure stamp with a black marker.  Huffed on it to moisten the ink and stamped it.

dsc05597.JPG

Cut the numbers 47 from a piece of Kiwi Kiss card stock with my Cuttlebug.

dsc05586.JPG

Glued the numbers on so they look like they are on the hook.

dsc05598.JPG

Extended the fishing line to reach the hook with a fine point black marker.

dsc05599.JPG

Colored the trees with a Prismacolor light Olive Green marker.

dsc05600.JPG

Made dashes in the water with a white gel pen.

dsc05601.JPG

With the fine tip end of a Prismacolor Light Olive Green maker, made a shadow on the right sides of the “47”.  Did this to create depth.

dsc05602.JPG

Sponged Night of Navy ink around the outside edge of the panel.

dsc05603.JPG

Used a ticket corner punch on the main image panel and the Apricot Appeal panel.

dsc05604.JPG

Punched 4 corner punches from Baja Breeze card stock and adhered them to a 5.5″ x 5.5″ piece of Night of Navy card stock.

dsc05605.JPG

Assembled the rest of the card front.

dsc05606.JPG

Here is it finished measuring 5.5″ x 5.5″.

dsc05607.JPG

I challenge you to make a creation today using numbers.  If you accept this challenge, please leave a link to your card in the comment section of this post.   I would love to see them!

May your day be filled with cool lake breezes.  🙂

Until my next post. . . . . . . . .

Hugs,

Michelle


Marbled Dragonfly – Tutorial and BLOG CANDY!

dsc05581.JPG

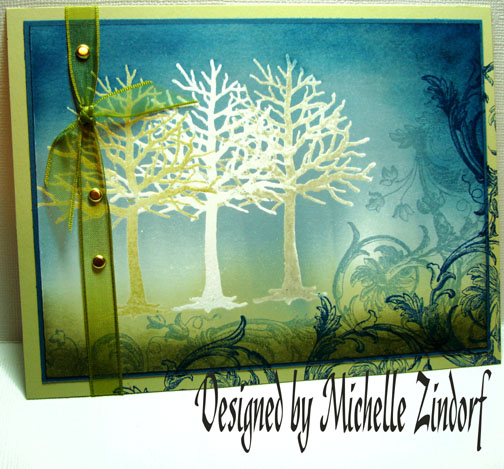
Before I start the tutorial today, let’s spice things up a bit with some Blog Candy.  The Blog Candy today is a brand new, current, set of Stampin’ Up Stamps “Frames with a Flourish”.

dsc05584.JPG

So to enter for a chance to win this great set of stamps, please leave me a comment on this post telling me your all time favorite stamp.  You know, the stamp you grab when you just don’t know what to make.   I have several dragonfly stamps, but that’s what I get out when I have a creative block. 🙂  If you are getting this blog update by e-mail you will need to click this link to leave a comment on this blog post:

 http://zindorf.blogs.splitcoaststampers.com/2008/08/19/marbled-dragonfly-tutorial-and-blog-candy/

I will use a random number generator to pick the winner on the morning of Saturday, August 23rd. 

A little about today’s tutorial:  I like to make my own interesting backgrounds by layering colors of ink.  I try to start my backgrounds with a bright light color and work darker as I go.  This creates a glow by the light color showing through. 

Let’s get started!  🙂
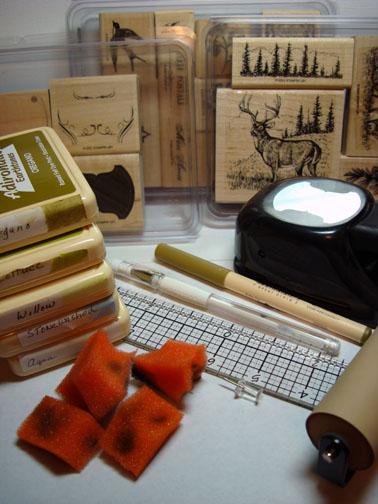
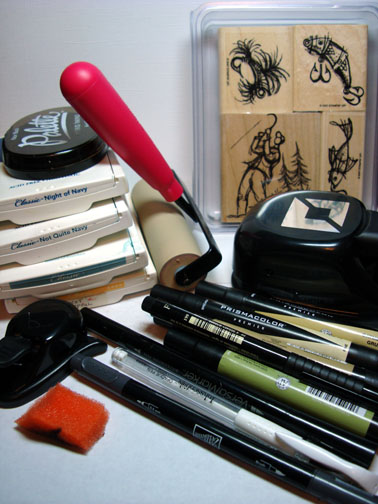
Supplies:

Stamps: Technique Tuesday “BoHo Buzz” & Stampendous “Marble Texture Cube”
Paper: Stampin’ Up Whisper White & Really Rust
Ink: Stampin’ Up Chocolate Chip, Really Rust, Basic Black & Close to Cocoa, Adirondack Willow & Lettuce
Accessories: Versamark pad & Marker, Aqua Painter, Lettuce marker, Sponges, fine detail clear embossing powder, heat gun

dsc05582.JPG

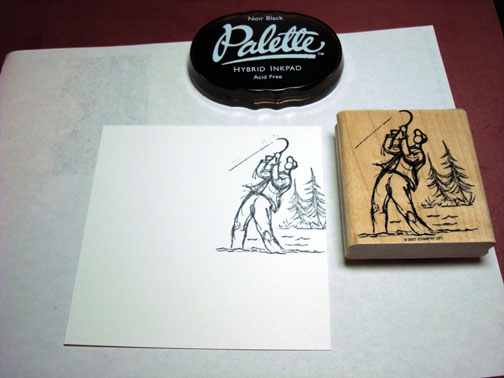
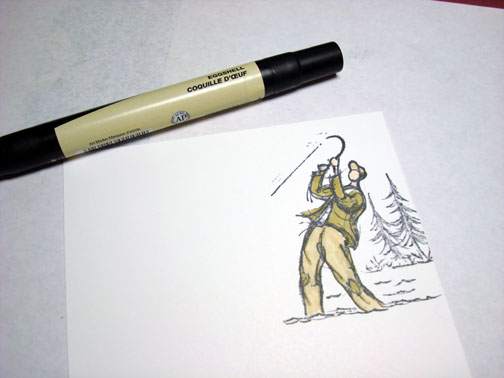
Stamped Dragonfly on a 3.25″ x 3.25″ piece of Whisper White card stock by first loading my stamp with Versamark and then loading it with Really Rust ink before stamping it.

dsc05552.JPG

Heat embossed image using fine detail clear embossing powder and a heat gun.

dsc05553.JPG

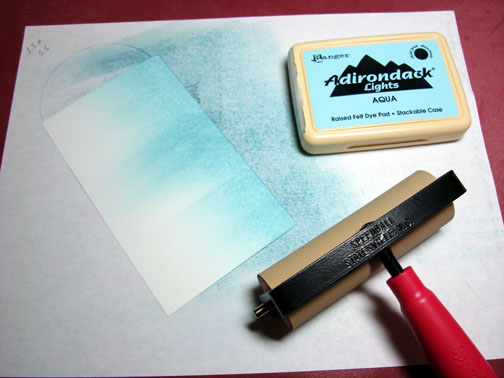
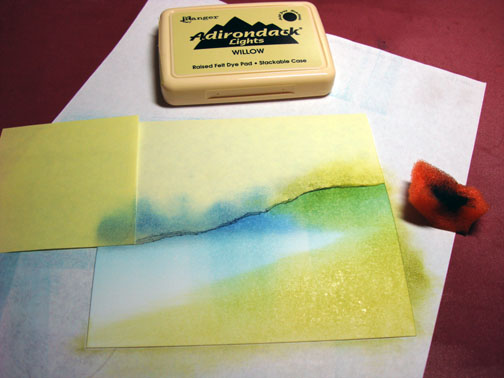
Readied my Adirondack Willow ink pad for watercoloring by squeezing the ink pad when it is closed to create a pool of ink on the inside of the ink pad lid.  This is what I will use to water color with.  🙂

dsc05554.JPG

Watercolored the wings and body of the dragonfly using an Aqua Painter and Willow ink.

dsc05555.JPG

Watercolored the edge of the wings with Lettuce ink.

dsc05556.JPG

Traced right on the inside edge of the wings with a Lettuce marker.

dsc05558.JPG

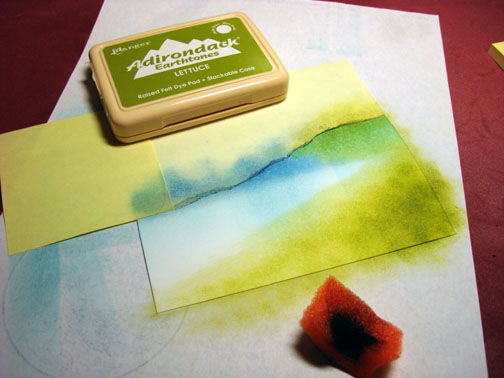
Colored over the entire dragonfly with a Versamark marker and heat embossed using clear embossing powder and a heat gun.

dsc05559.JPG

dsc05560.JPG

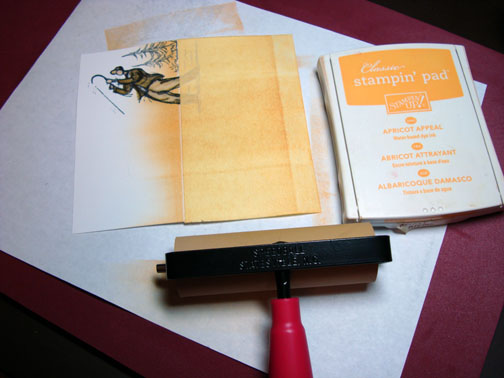
Used the Stampendous “TC01 Marble Texture Cube” with Willow ink and stamped all over the card stock with side “A” of the cube.

dsc05563.JPG

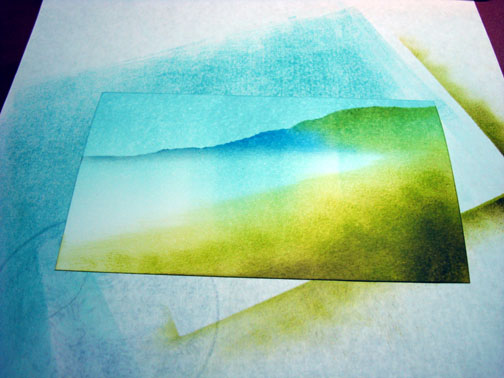
Stamped all over the card stock with side “B” of the Marble Texture cube with Close to Cocoa ink.

dsc05564.JPG

Using a circular motion, sponged Willow ink all of the card stock.

dsc05565.JPG

Sponged on some Close to Cocoa ink randomly around the card stock.

dsc05566.JPG

Stamped side “C” of the marble texture cube with Chocolate Chip ink in 3 places on the card stock.

dsc05567.JPG

Let the ink dry a moment and then wiped the embossed image off with an old rag to remove the ink from it.

dsc05568.JPG

Sponged Chocolate Chip ink around the outside edge of the card stock.

dsc05569.JPG

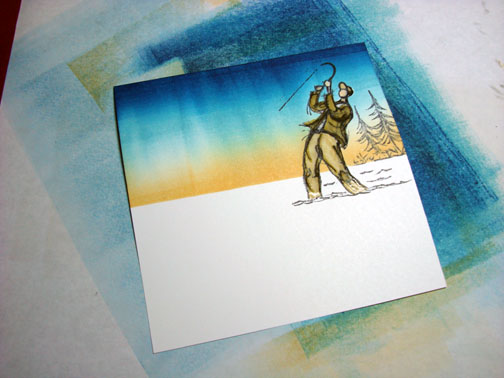
Starting a larger panel of Whisper White 5″ x 5″.

dsc05570.JPG

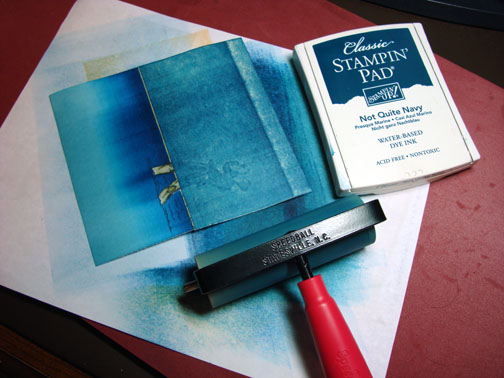
Rubbed the Willow ink pad directly on the White card stock in a circular motion almost covering it entirely.

dsc05571.JPG

Stamped side “A” of the Marble Texture cube around the sides of the card stock using Lettuce ink.  Then used side “B” and stamped Chocolate Chip ink around the edges, sorry missed the photo :(.

dsc05572.JPG

Sponged Lettuce ink around the sides of the card stock using a circular motion.

dsc05573.JPG

Sponged Chocolate Chip ink in a circular motion on the inside of the card stock work outward and then sponged some of the Chocolate Chip in around the edges of the card stock.

dsc05574.JPG

Sponged Basic Black ink on the very edge of both panels of card stock.

dsc05575.JPG

Assembled card front and toned down the bottom panel of Really Rust card stock by sponging on the very edges of it with Basic Black ink.

dsc05576.JPG

Here is the finished card measuring 5.25″ x 5.25″.

dsc05581.JPG

Why don’t you give a try at making your own background paper today?  I think you will be pleasantly surprised.  🙂

Hope your day today is pleasant in every way.

Until my next post. . . . . .. . .

Hugs,
Michelle