Happy Little Mushrooms – Tutorial #415

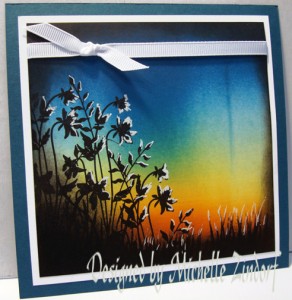
Yuck, allergy season.  Like everyone else I am struggling a bit with allergies.  Spring is officially here, lol.     Spent the day yesterday at the doc’s office, getting my presciptions filled and resting.   Today I am feeling a bit more human and I wanted to reflect that feeling by making this cheerful card using the Stampin’ Up! set Funky Four with my much loved Stampin’ Up set Baroque Motifs.   CLICK HERE TO ENTER FOR A CHANCE TO WIN THE FUNKY FOUR STAMP SET.

Let’s get started on today’s tutorial. . . .  . .
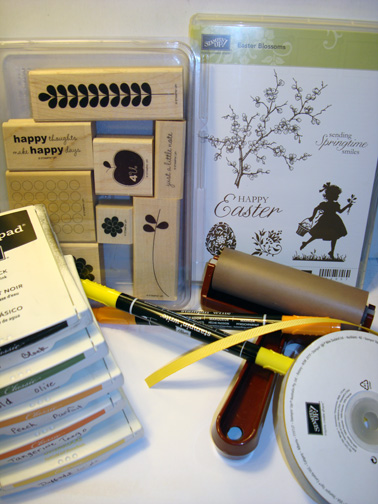
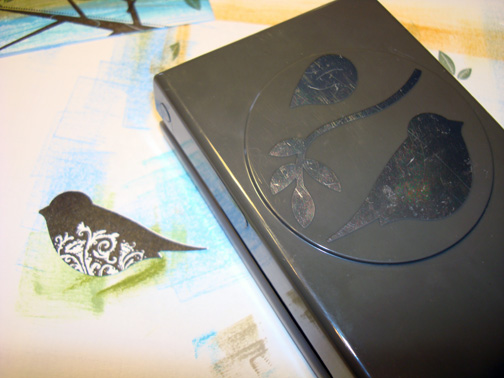
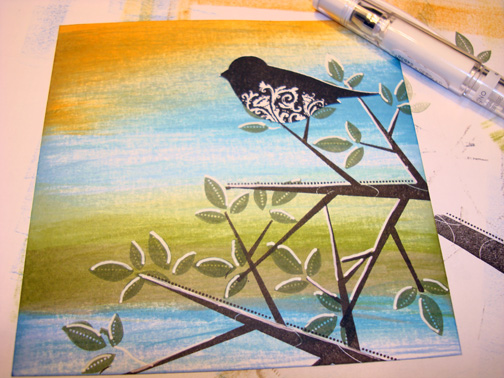
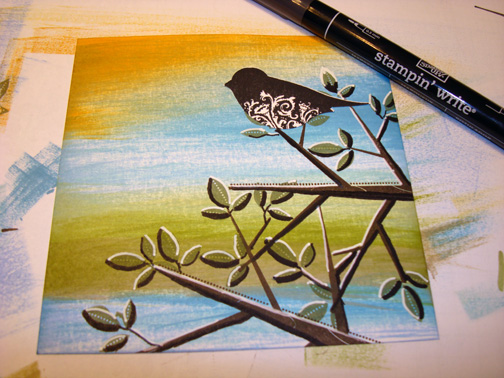
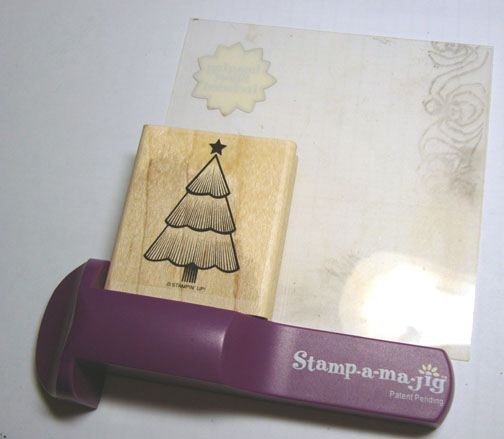
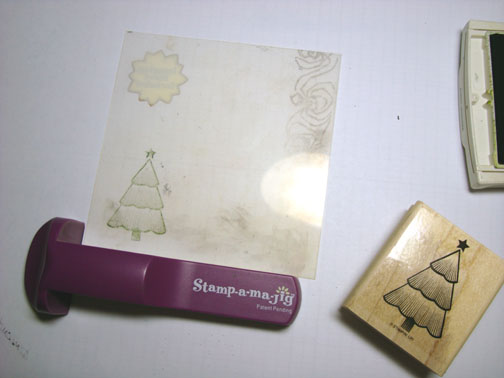
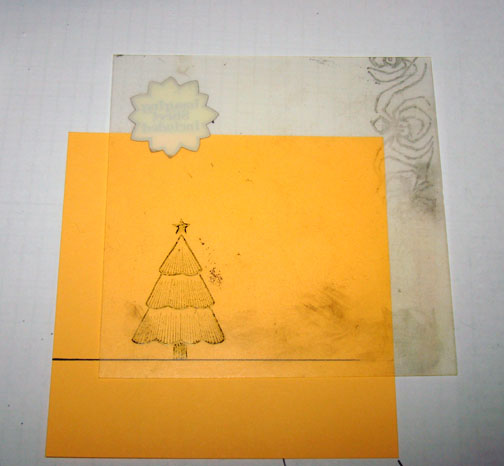
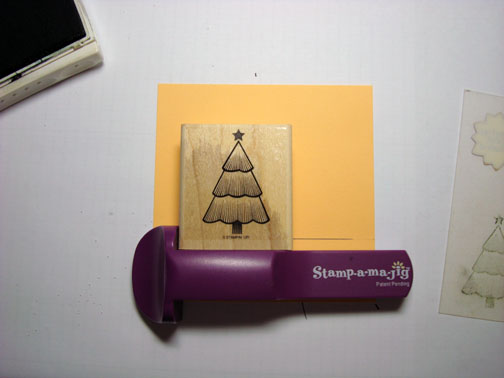
Supplies:

Stamps: Stampin’ Up! Funky Four and Baroque Motifs
Paper: Stampin’ Up! Whisper White, Tangerine Tango and Not Quite Navy
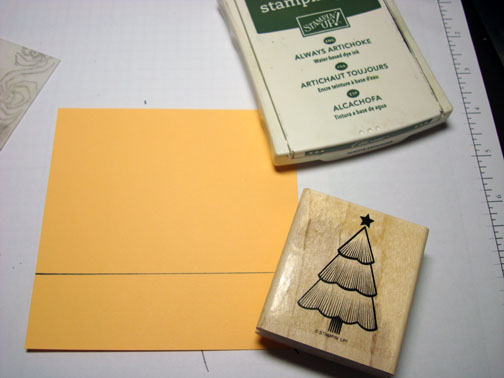
Ink: Stampin’ Up! Not Quite Navy, Old Olive, Tempting Turquoise, Tangerine Tango and Always Artichoke
Accessories: Stampin’ Up! Sponges, Brayer, Clear embossing powder, heat gun, White Gel Pen, Old Olive Seam Binding, Markers – Always Artichoke, So Saffron & More Mustard, Versamark pad and marker, post it note, So Saffron brads, color coach

The Stampin’ Up USA Idea book and Catalog is here.   For your copy, please send a check for $9.95 to Michelle Zindorf, P.O. Box 116, West Alexandria, OH 45381 or send it via paypal to mzindorf@aim.com USA only.     My current customers will receive a new Occasions Mini Catalog automatically from me.   Not a current customer and want a free copy of the new Occasions Mini Catalog ?  E-mail your mailing address to mzindorf@aim.com and I will get one in the mail to you.  )  Are you getting inspiration from this blog?   One way you can help support it is to order your Stampin’ Up products through me.   Click HERE to place an order.    Want to become a Stampin’ Up Demonstrator , receive a 20% discount on product and earn instant income on orders?  Consider being part of my Stampin’ Up Team and start your own business or become a Hobby Demo just for the discount.  Click HERE for more information.


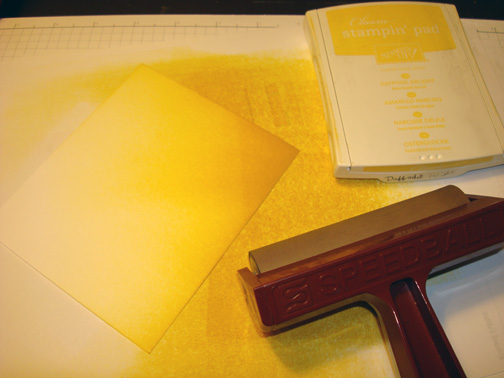
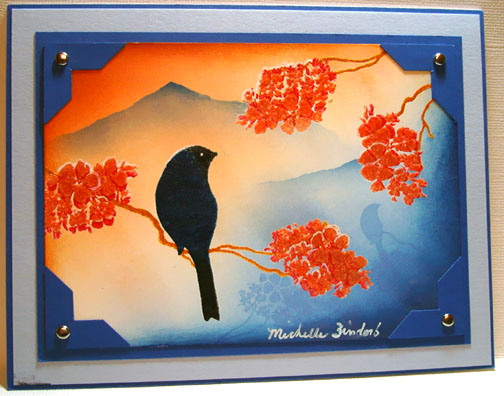
To get started today, I pulled out my Stampin’ Up! Color Coach  to be inspired by a color combo.   I found my starting color combo right on the Tangerine Tango card.   This color combo says “happy” to me and that is what I was looking for.

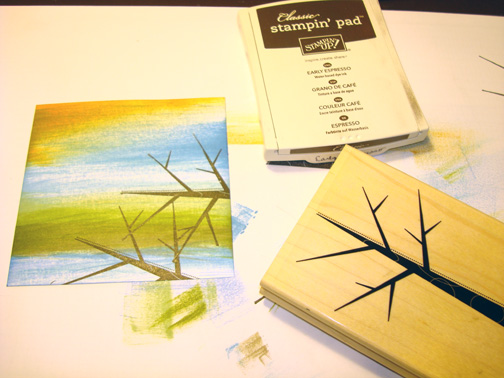
Stamped the mushrooms on a 3.5″ piece of Whisper White card stock by first loading my stamp with Versamark and then with Tangerine Tango ink before stamping it.  Heat embossed the image using clear embossing powder and a heat gun.

Colored the mushrooms in with a So Saffron Marker.  Added More Mustard marker to the dark areas of the mushrooms and then colored over the areas again with the So Saffron marker to blend.

Colored over the mushroom, staying within the embossed image, using a Versamark marker and then heat embossed the images using clear embossing powder and a heat gun.

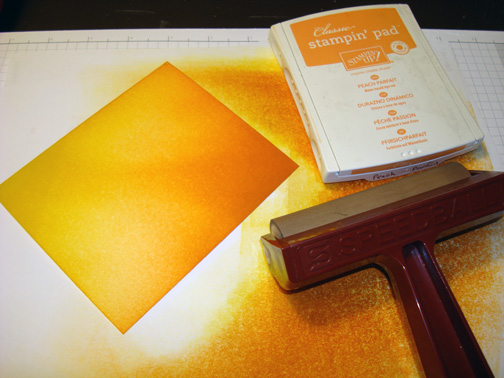
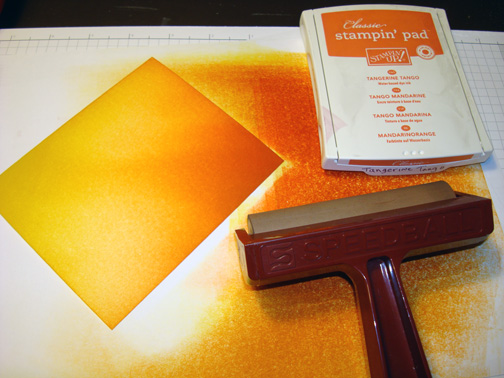
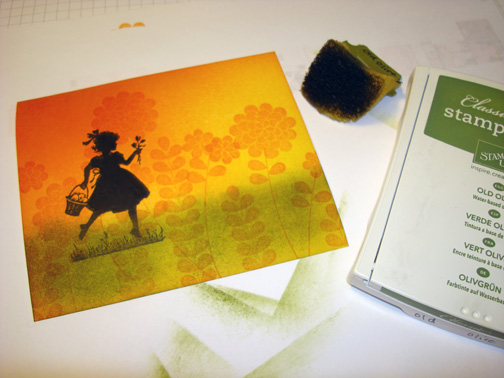
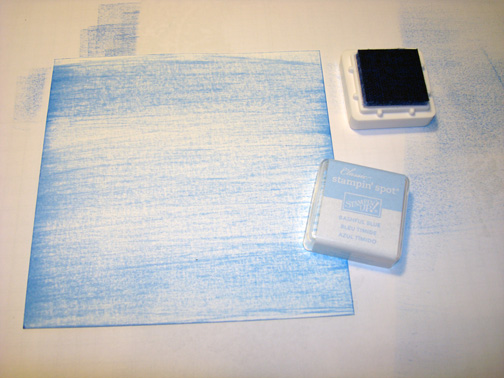
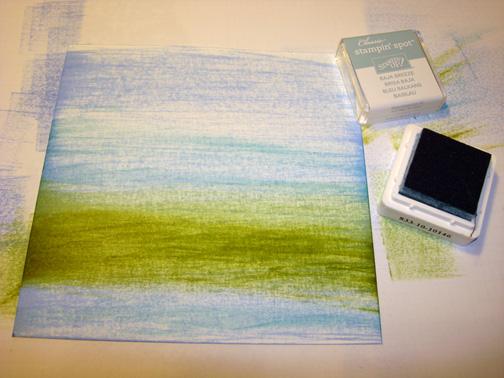
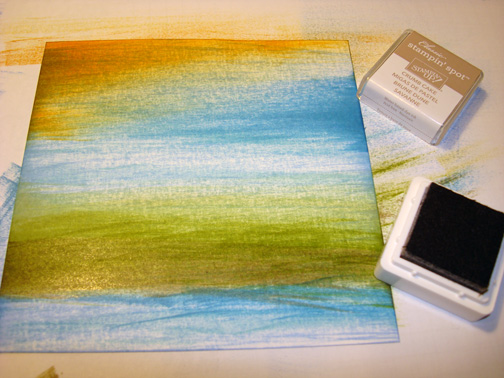
Brayered Tangerine Tango ink at the top right corner of the card stock.

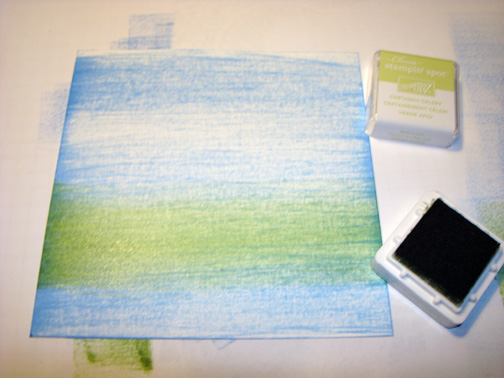
Ripped a fine edge off of a post it note and used it as a mask for the ground area of my scene.

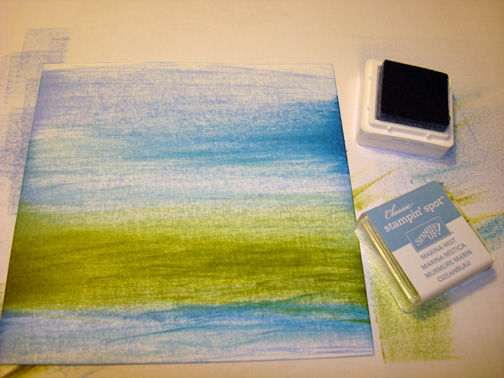
Brayered Tempting Turquoise ink at the bottom left corner of the sky area.

Removed the mask and wiped the ink off of my embossed images using a paper towel.

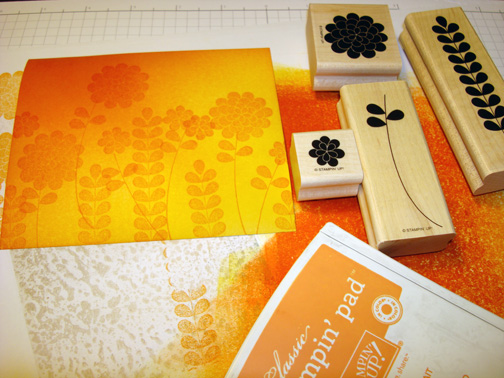
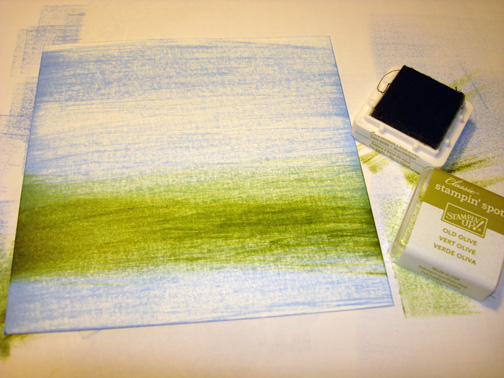
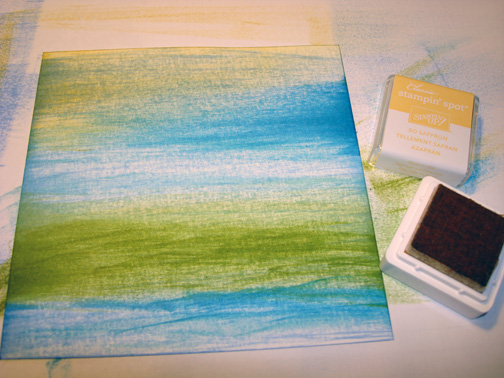
Sponged Old Olive ink in the ground area.

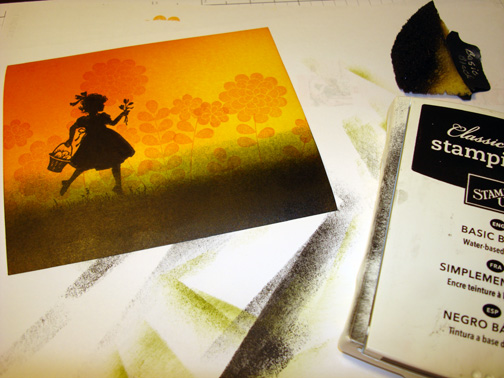
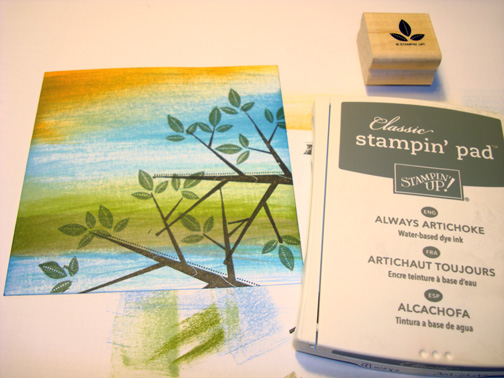
Stamped the Baroque Motifs Flourish using Always Artichoke ink and then wiped the ink off of my embossed images using a paper towel.

Stamped the Baroque Motifs flower twice using Tangerine Tango ink.

Sponged Not Quite navy ink at the bottom left corner of the card stock.

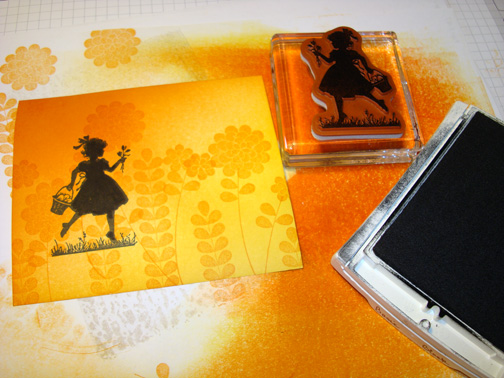
Added a little bit of a shadow at the base of the mushrooms using an Always Artichoke marker.

Added a few highlights to the flower with a white gel pen.

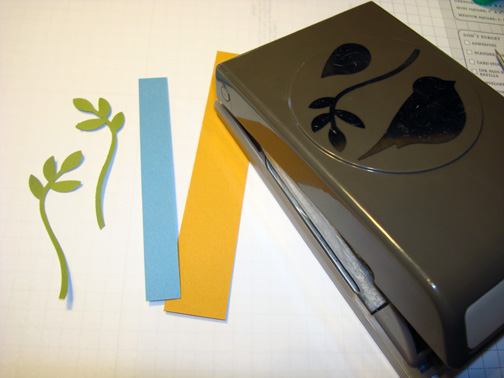
Cut a 4.75″ panel from Not Quite Navy card stock and dry embossed it using the Flourish Texture Plate and Big Shot Machine.

Brayered over the embossed card stock with Tempting Turquoise ink to bring out the embossing a bit.

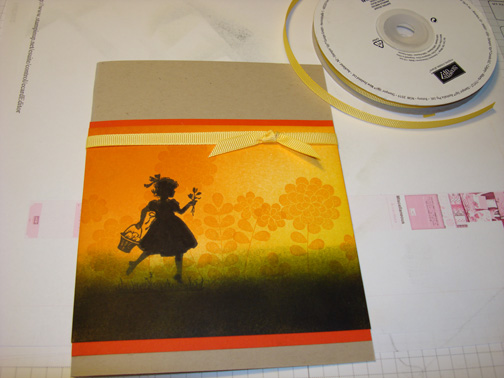
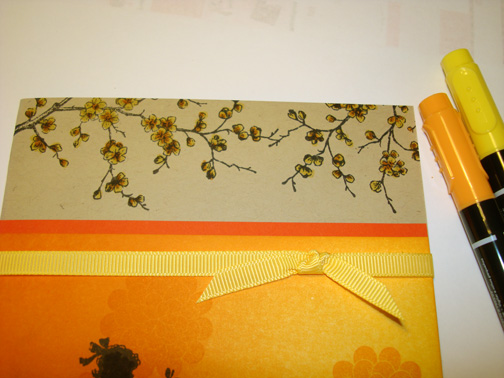
Added Whisper White and Tangerine Tango card stock panels, So Saffron Brads and Old Olive Seam Binding.

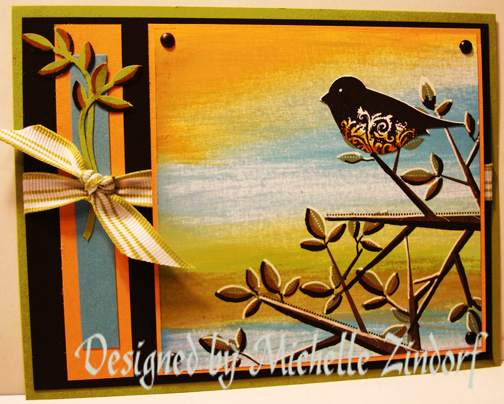
Here is my completed card measuring 5.25″ square.

A Little food for thought before I close today.

Imperfection
By Elizabeth Carlson
 
I am falling in love
with my imperfections
The way I never get the sink really clean,
forget to check my oil,
lose my car in parking lots,
miss appointments I have written down,
am just a little late.

I am learning to love the small bumps on my face
the big bump of my nose,
my hairless scalp,
chipped nail polish,
toes that overlap.
Learning to love
the open-ended mystery
of not knowing why

I am learning to fail
to make lists,
use my time wisely,
read the books I should.

Instead I practice inconsistency,
irrationality, forgetfulness.

Probably I should
hang my clothes neatly in the closet
all the shirts together, then the pants,
send Christmas cards, or better yet
a letter telling of
my perfect family.

But I’d rather waste time
listening to the rain,
or lying underneath my cat
learning to purr.

I used to fill every moment
with something I could
cross off later.

Perfect was
the laundry done and folded
all my papers graded
the whole truth and nothing

but

Now the empty mind is what I seek
the formless shape
the strange off center
sometimes fictional me.

May you have good health today and always.

Until my next post. . .  . . .

Hugs,

Michelle

   Get ready for Brayer Workshops!  I am coming to the following locations, click the location name for more information.       

La Porte, Indiana       

Orlando (Davenport), Florida       

St. Cloud, Minnesota       

Colorado Springs, Colorado       

Ottumwa, Iowa       

Owings Mills, Maryland (Baltimore Area)      

Cleveland (Euclid), Ohio       

Staley , North Carolina (South of Greensboro)       

Monroe, Connecticut       

Dayton, Ohio     

Leesburg, Florida       

Montreal, Wisconsin       

Savannah, Georgia       

Lincoln, Illinois       

Jefferson, Louisiana (New Orleans Area)       

Here is a link to my workshop calendar where you can see all of my travel schedule and to get info on beginner and advanced Brayer workshops:   http://zindorf.blogs.splitcoaststampers.com/workshop-calendar        

Don’t see a workshop in your State?  Interested in hosting the workshops in your area in 2012?   Click HERE to get hostess information.       

Link to my Stampin’ Up website where you can order all of your must have Stampin’ Up products from me 24-7:  http://michellezindorf.stampinup.net   

 Link to my Scentsy website where you can order the best smelling, safest wickless candles from me 24-7:  https://zindorf.scentsy.us/Home


Birdie, Birdie Birdie – Tutorial #407 and Sport Stamps Blog Candy

Hey All  🙂

I’m off on yet another trip tomorrow morning.  This time to New Jersey to have some fun at a Stampin’ Up! team event.  So today I am busy packing and prepping my vehicle for the drive.  But before I start all of that I wanted to post a tutorial for you and to give away some great Stampin’ Up stamps as blog candy.

My blog candy this week is a package of 3 sets of Stampin’ Up Sports Stamps (Goal, Touchdown and Homerun).

All you have to do to put your name in this drawing is leave a comment on this post telling me to enter you.    If you are getting this blog update via e-mail you will need to CLICK HERE and then leave a comment at the end of this blog post.

I will select the winner on Monday, March 21, 2011 using a random number generator.   Remember, you cannot win if you don’t enter.  🙂  GOOD LUCK TO ALL!

Now let’s get started on today’s tutorial. . . . . .  ..

Supplies:

Stamps: Stampin’ Up! Aviary, Cheep Talk & Friendly Words
Paper: Stampin’ Up! Sahara Sand, Not Quite Navy and Basic Black
Ink: Stampin’ Up! Basic Black, Soft Suede, Cherry Cobbler & Crumb Cake
Accessories: Stampin’ Up! Sponges, Gold Brads, Basic Black marker, Cherry Cobbler marker

  My Stampin’ Up customers that order $50 in Stampin’ Up merchandise will receive this handmade card though March 31, 2011.

Don’t forget it is Sale-a-bration time at Stampin’ Up.  Receive a free Sale-a-bration set for each $50 in merchandise purchased.   Click HERE to place an order.   Your order will be shipped directly to your door step from Stampin’ Up!

The Stampin’ Up USA Idea book and Catalog is here.   For your copy, please send a check for $9.95 to Michelle Zindorf, P.O. Box 116, West Alexandria, OH 45381 or send it via paypal to mzindorf@aim.com USA only.     My current customers will receive a new Occasions Mini Catalog automatically from me.   Not a current customer and want a free copy of the new Occasions Mini Catalog ?  E-mail your mailing address to mzindorf@aim.com and I will get one in the mail to you.  )  Are you getting inspiration from this blog?   One way you can help support it is to order your Stampin’ Up products through me.   Click HERE to place an order.    Want to become a Stampin’ Up Demonstrator , receive a 20% discount on product and earn instant income on orders?  Consider being part of my Stampin’ Up Team and start your own business or become a Hobby Demo just for the discount.  Click HERE for more information.

Stamped the Unmounted Friendly Words Wheel on a 3.5″ x 4.5″ piece of Sahara Sand card stock using Soft Suede ink. 

Here is a link to a post I did on Unmounting Wheels http://zindorf.blogs.splitcoaststampers.com/2009/07/28/tool-time-unmounting-wheels/.

Stamped the branch from the Stampin’ Up set Cheep Talk using Crumb Cake a few times.

Stamped 2 of the Stampin’ Up Aviary bird cages using Cherry Cobbler ink.

Added circles for chains using a Cherry Cobbler marker.

Stamped the branch using Crumb Cake ink one more time towards the bottom of the card stock to balance things out a bit.

Stamped the Birds using Basic Black ink.  Colored the birds in using a Basic Black marker to darken them.

Sponged Crumb Cake ink at the top, right side and bottom of the card stock.

Sponged Soft Suede ink at the right side of the card stock.

Added a 4.5″ square piece of Not Quite Navy card stock.   Stamped the branch on the left side of the card stock using Basic Black ink.     Tip:  When stamping on multi levels of card stock have a marker on hand that matches the ink you used in order to fill in the gaps that are left in the images.

Filled in the gaps in the images using a Basic Black marker.

Sponge Basic Black ink around the edges of the card stock.

Added a 4.75″ Basic Black panel, 4 7/8″ Sahara Sand panel and 5.25″ Basic Black panel.   Also added gold brads to the main image panel corners.

Here is the finished card measuring 5.25″ square.

May your weekend be one to remember.

Until my next post. . . . . . . .. . . .

Huge Hugs,

Michelle

   Get ready for Brayer Workshops!  I am coming to the following locations, click the location name for more information.       

Syracuse (Bridgeport), New York      

St. Peters, Missouri       

La Porte, Indiana       

Orlando (Davenport), Florida       

St. Cloud, Minnesota       

Colorado Springs, Colorado       

Ottumwa, Iowa       

Owings Mills, Maryland (Baltimore Area)      

Cleveland (Euclid), Ohio       

Staley , North Carolina (South of Greensboro)       

Monroe, Connecticut       

Dayton, Ohio     

Leesburg, Florida       

Montreal, Wisconsin       

Savannah, Georgia       

Lincoln, Illinois       

Jefferson, Louisiana (New Orleans Area)       

Here is a link to my workshop calendar where you can see all of my travel schedule and to get info on beginner and advanced Brayer workshops:   http://zindorf.blogs.splitcoaststampers.com/workshop-calendar        

Don’t see a workshop in your State?  Interested in hosting the workshops in your area in 2012?   Click HERE to get hostess information.       

Link to my Stampin’ Up website where you can order all of your must have Stampin’ Up products from me 24-7:  http://michellezindorf.stampinup.net   

 Link to my Scentsy website where you can order the best smelling, safest wickless candles from me 24-7:  https://zindorf.scentsy.us/Home   

 Donate cards to the Give Thanks Project and help out Cancer Patients.   CLICK HERE TO HELP


Mountain Creek – Tutorial #404

Good Morning All,

Just for a change of pace I thought I would use a totally different color combo than my normal blues and greens.  I do love using shades of browns to get an old time feel.   Add a bit of peach and pink and it starts looking like an antique photo that has been tinted.

Let’s get started. . . . . .

Supplies:

Stamps: Stampin’ Up! Lovely As a Tree
Paper: Stampin’ Up! Whisper White, Basic Black and Soft Suede
Ink: Stampin’ Up! Early Espresso, Soft Suede, Sahara Sand and Basic Black
Accessories: Stampin’ Up! Sponges, Brayer, White Gel Pen,Markers – Blush Blossom, Pink Pirouette, Soft Suede, Early Espesso, Gold Brads, Clear Embossing Powder, Heat Gun, 1″ Circle and Word Window Punches, Post it Notes, Piercing Tools

  My Stampin’ Up customers that order $50 in Stampin’ Up merchandise will receive this handmade card though March 31, 2011.

Don’t forget it is Sale-a-bration time at Stampin’ Up.  Receive a free Sale-a-bration set for each $50 in merchandise purchased.   Click HERE to place an order.   Your order will be shipped directly to your door step from Stampin’ Up!

The Stampin’ Up USA Idea book and Catalog is here.   For your copy, please send a check for $9.95 to Michelle Zindorf, P.O. Box 116, West Alexandria, OH 45381 or send it via paypal to mzindorf@aim.com USA only.     My current customers will receive a new Occasions Mini Catalog automatically from me.   Not a current customer and want a free copy of the new Occasions Mini Catalog ?  E-mail your mailing address to mzindorf@aim.com and I will get one in the mail to you.  )  Are you getting inspiration from this blog?   One way you can help support it is to order your Stampin’ Up products through me.   Click HERE to place an order.    Want to become a Stampin’ Up Demonstrator , receive a 20% discount on product and earn instant income on orders?  Consider being part of my Stampin’ Up Team and start your own business or become a Hobby Demo just for the discount.  Click HERE for more information.

Started with a 4″ x 5″ piece of Whisper White card stock, stamped the trees, on each side of the card stock, without inking the grassy area of the stamp using Basic Black Craft ink (Pigment).  Heat embossed the images using clear embossing powder.

Colored the tree tops using a Blush Blossom marker.

Tapped in a bit of Pink Pirouette marker in the middle of the trees.

colored over the marker using a Versamark marker and then heat embossed the images using clear embossing powder and a heat gun.  This potects the color in the trees and will resist ink put on for our background.

Punched a 1″ circle from a scrap piece of card stock.

Put the hole in the card stock where I want my moon and colored the Moon in with Blush Blossom marker.  Added some Pink Pirouette marker to the left side of the moon.  Colored the moon in with Versamark marker and heat embossed the image using clear embossing powder and a heat gun.

Now that our trees and moon are protected with embossing we can brayer over them and they will resist the ink.

Brayered Sahara Sand ink at the top and the bottom of the card stock.

Ripped a post it note in a mountain shape and put it on my card stock to mask the sky.

Sponged Soft Suede ink in the mountain shape.

Added Early Espresso ink to the top of the mountain.

Unmasked the sky.  Ripped a creek shaped piece of post it note and masked the creek area.

Ripped another post it note and masked the sky and mountain.

Sponged Soft Suede in the unmasked area.

Added Early Espresso ink in the top 1/2 of the unmasked area.

Sponged a bit of Basic Black ink at the very top of the unmasked area.

Removed the post it notes and gently wiped my embossed images off using a paper towel.

Put a line of Early Espresso marker at the top of creek and extended the tree trunks.

Lightly Sponged Early Espresso ink at the bottom half of the creek.

Brayered Early Espresso ink at the top of the card stock.  Wiped my embossed images off again.

Added White Gel pen dots to the trees to add a bit of sparkle.

Added a few rock shapes and water lines in the creek using a Soft Suede marker.

Punched 2 Basic Black Word Window punches and held them together and one end off of them.

Added 2 Basic Black panels, 1 Soft Suede panel, word window punches and gold brads.

Here is the finished card measuring 5″ x 6.5″.

May your day be filled with all that pleases you.

Until my next post. . . .  . . . . . . .

Hugs,

Michelle

   Get ready for Brayer Workshops!  I am coming to the following locations, click the location name for more information.    

Wichita, Kansas    

Syracuse (Bridgeport), New York    

St. Peters, Missouri    

La Porte, Indiana    

Orlando (Davenport), Florida    

St. Cloud, Minnesota    

Colorado Springs, Colorado    

Ottumwa, Iowa    

Owings Mills, Maryland (Baltimore Area)   

Cleveland (Euclid), Ohio    

Staley , North Carolina (South of Greensboro)    

Monroe, Connecticut    

Dayton, Ohio  

Leesburg, Florida    

Montreal, Wisconsin    

Savannah, Georgia    

Lincoln, Illinois    

Jefferson, Louisiana (New Orleans Area)    

Here is a link to my workshop calendar where you can see all of my travel schedule and to get info on beginner and advanced Brayer workshops:   http://zindorf.blogs.splitcoaststampers.com/workshop-calendar     

Don’t see a workshop in your State?  Interested in hosting the workshops in your area in 2012?   Click HERE to get hostess information.    

Link to my Stampin’ Up website where you can order all of your must have Stampin’ Up products from me 24-7:  http://michellezindorf.stampinup.net

 Link to my Scentsy website where you can order the best smelling, safest wickless candles from me 24-7:  https://zindorf.scentsy.us/Home

 Donate cards to the Give Thanks Project and help out Cancer Patients.   CLICK HERE TO HELP


Patriotic Cowboy – Tutorial #399

A few days ago I requested that my readers let me know what they would like to see on my blog.  Well, there were many requests to see more Western themed cards and more Direct To Paper Tutorials.    I think we have those two requests covered with this tutorial. 

Folks, it is so very easy to put in this flag background.  I hope you give this one a try.  🙂

Let’s get started. . . .  . .

Supplies:

Stamps: Stampin’ Up! Out West & Seeing Stars
Paper: Stampin’ Up! Very Vanilla, Bravo Burgundy and Soft Suede
Ink: Stampin’ Up! Ink Spots – Not Quite Navy, Bravo Burgundy, Soft Suede, Early Espresso, Craft ink pad Whisper White
Accessories: Stampin’ Up! Sponges, Basic Black marker, Gold Brads


  My Stampin’ Up customers that order $50 in Stampin’ Up merchandise will receive this handmade card though March 31, 2011.

Don’t forget it is Sale-a-bration time at Stampin’ Up.  Receive a free Sale-a-bration set for each $50 in merchandise purchased.   Click HERE to place an order.   Your order will be shipped directly to your door step from Stampin’ Up!

The Stampin’ Up USA Idea book and Catalog is here.   For your copy, please send a check for $9.95 to Michelle Zindorf, P.O. Box 116, West Alexandria, OH 45381 or send it via paypal to mzindorf@aim.com USA only.     My current customers will receive a new Occasions Mini Catalog automatically from me.   Not a current customer and want a free copy of the new Occasions Mini Catalog ?  E-mail your mailing address to mzindorf@aim.com and I will get one in the mail to you.  )  Are you getting inspiration from this blog?   One way you can help support it is to order your Stampin’ Up products through me.   Click HERE to place an order.    Want to become a Stampin’ Up Demonstrator , receive a 20% discount on product and earn instant income on orders?  Consider being part of my Stampin’ Up Team and start your own business or become a Hobby Demo just for the discount.  Click HERE for more information.

Using a Stampin’ Up Not Quite Navy ink spot, swiped it on the top left corner of a 4″ x 5.5″ piece of Very Vanilla card stock.

Swiped a Bravo Burgundy ink spot on the card stock creating stripes.

Smeared Soft Suede ink around the sides of the card stock.

Swiped Early Espresso ink at the edges of the card stock, not covering the Soft Suede ink entirely.

Ripped a Post it note mask in the shape of a mountain.  Masked the card stock and sponged Soft Suede ink in the mountain shape.

Stamped the Cowboy using Basic Black ink.

Colored the cowboy in to create a silhouette.

Filled the bottom of the card stock in by swiping Soft Suede ink on.

Swiped Basic Black ink at the bottom of the card stock to create the ground.

Stamped the star in the Not Quite Navy ink area using Whisper White ink.

Sponged Basic Black ink around the edges of the card stock.

Cut a 4.75″ x 6.25″ piece of Soft Suede card stock and sponged Basic Black ink around the edges.

Added two Bravo Burgundy card stock panels and gold brads. 

Here is the finished card measuring 5″ x 6.5″.

May your day be one to remember.

Hugs,

Michelle

   Get ready for Brayer Workshops!  I am coming to the following locations, click the location name for more information.  

Houston, Texas  

Wichita, Kansas  

Syracuse (Bridgeport), New York  

St. Peters, Missouri  

La Porte, Indiana  

Orlando (Davenport), Florida  

St. Cloud, Minnesota  

Colorado Springs, Colorado  

Ottumwa, Iowa  

Owings Mills, Maryland (Baltimore Area) 

Cleveland (Euclid), Ohio  

Staley , North Carolina (South of Greensboro)  

Monroe, Connecticut  

Dayton, Ohio

Leesburg, Florida  

Montreal, Wisconsin  

Savannah, Georgia  

Lincoln, Illinois  

Jefferson, Louisiana (New Orleans Area)  

Here is a link to my workshop calendar where you can see all of my travel schedule and to get info on beginner and advanced Brayer workshops:   http://zindorf.blogs.splitcoaststampers.com/workshop-calendar   

Don’t see a workshop in your State?  Interested in hosting the workshops in your area in 2012?   Click HERE to get hostess information.  

Link to my Stampin’ Up website where you can order all of your must have Stampin’ Up products from me 24-7:  http://michellezindorf.stampinup.net


Flowering Spring – Tutorial #398 and Punch Bunch Blog Candy

28 days to Spring.   I’m counting, how about you?    Are you ready to make those welcome Spring and Easter cards.   As you see I’m getting a head start.   This little girl is the perfect image to use and easy too since you don’t have to color her.   I love, love, love silhouettes.


But before I get started on the tutorial how about some Blog Candy.   I have a Cute, cute Stampin’ Up! Punch Bunch stamp set to give away.  

All you have to do to enter for a chance to win this Punch Bunch set is to leave a comment at the bottom of this post.   If you are getting this blog update via e-mail, PLEASE CLICK HERE and then leave a comment at the bottom of the blog post.

I will choose the winner on Tuesday,  February 22, 2011 using a random number generator.   GOOD LUCK TO ALL!

Now on with the Tutorial!

Supplies:

Stamps: Stampin’ Up Easter Blossoms & Apple Blossoms
Paper: Stampin’ Up Whisper White, Tangerine Tango & Crumb Cake
Ink: Stampin’ Up Basic Black, Old Olive, Peach Parfait, Tanergine Tango & Daffodil Delight
Accessories: Stampin’ Up Daffodil Delight & Peach Parfait markers, Brayer, sponges, Daffodil Delight Grosgrain Ribbon

  My Stampin’ Up customers that order $50 in Stampin’ Up merchandise will receive this handmade card though March 31, 2011.

Don’t forget it is Sale-a-bration time at Stampin’ Up.  Receive a free Sale-a-bration set for each $50 in merchandise purchased.   Click HERE to place an order.   Your order will be shipped directly to your door step from Stampin’ Up!

The Stampin’ Up USA Idea book and Catalog is here.   For your copy, please send a check for $9.95 to Michelle Zindorf, P.O. Box 116, West Alexandria, OH 45381 or send it via paypal to mzindorf@aim.com USA only.     My current customers will receive a new Occasions Mini Catalog automatically from me.   Not a current customer and want a free copy of the new Occasions Mini Catalog ?  E-mail your mailing address to mzindorf@aim.com and I will get one in the mail to you.  )  Are you getting inspiration from this blog?   One way you can help support it is to order your Stampin’ Up products through me.   Click HERE to place an order.    Want to become a Stampin’ Up Demonstrator , receive a 20% discount on product and earn instant income on orders?  Consider being part of my Stampin’ Up Team and start your own business or become a Hobby Demo just for the discount.  Click HERE for more information.

Brayered Daffodil Delight ink at an angle on the bottom right corner of a 4.25″ x 5″ piece of Whisper White Card Stock.

Brayered Peach Parfait at an angle on the top left corner.

Brayered Tangerine Tango ink at the top left corner, not covering the Peach Parfait ink entirely.

Stamped the flower from the Stampin’ Up Apple Blossoms set using Peach Parfait ink.

Stamped the girl silhouette stamp from the Stampin’ Up Easter Blossoms set using Basic Black ink.

Sponged Old Olive ink at the bottom of the card stock.

Sponge Basic Black ink at the bottom of the card stock, not covering the Old Olive ink entirely.

Added a Tangarine Tango panel, a Crumb Cake panel and Daffodil Delight Ribbon.

Stamped the blossom twig from the Stampin’ Up Easter Blossoms set using Basic Black ink.

Colored the flowers using a Daffodil Delight marker.  Added Peach Parfait marker to the darker areas of the flowers.

Here is the finished card measuring 5″ x 6.5″.

May your day be filled with early Spring breezes.

Until my next post. . . . .  . ..

Hugs,

Michelle

   Get ready for Brayer Workshops!  I am coming to the following locations, click the location name for more information.  

Houston, Texas  

Wichita, Kansas  

Syracuse (Bridgeport), New York  

St. Peters, Missouri  

La Porte, Indiana  

Orlando (Davenport), Florida  

St. Cloud, Minnesota  

Colorado Springs, Colorado  

Ottumwa, Iowa  

Owings Mills, Maryland (Baltimore Area) 

Cleveland (Euclid), Ohio  

Staley , North Carolina (South of Greensboro)  

Monroe, Connecticut  

Sturgis, South Dakota  

Leesburg, Florida  

Montreal, Wisconsin  

Savannah, Georgia  

Lincoln, Illinois  

Jefferson, Louisiana (New Orleans Area)  

Here is a link to my workshop calendar where you can see all of my travel schedule and to get info on beginner and advanced Brayer workshops:   http://zindorf.blogs.splitcoaststampers.com/workshop-calendar   

Don’t see a workshop in your State?  Interested in hosting the workshops in your area in 2012?   Click HERE to get hostess information.  

Link to my Stampin’ Up website where you can order all of your must have Stampin’ Up products from me 24-7:  http://michellezindorf.stampinup.net


Happy Little Black Bird – Tutorial #397


Well, well, well, I’m approaching another tutorial milestone here on Freedom to Create.   I hope you are still with me and enjoying the tutorials as I make my way to the 400th tutorial!   Where does the time go.  I could swear I just started this blog yesterday.   How about cheering me on by leaving a comment on this post telling me things you would like to see used or done in one of my tutorials?  Let me hear from you, my cyber friends!  If you are receiving this post via e-mail CLICK HERE TO LEAVE A COMMENT.

Let’s get started. . . . .  .

Supplies:

Stamps: Stampin’ Up! Punch Potpourri and Season of Friendship
Paper: Stampin’ Up! Whisper White, More Mustard, Old Olive, Marina Mist and Basic Black
Ink: Stampin’ Up! Bashful Blue, Marina Mist, More Mustard, So Saffron, Crumb Cake, Certainly Celery, Old Olive, Baja Breeze, Basic Black, Always Artichoke & Early Espresso
Accessories: White Gel Pen, Markers – Basic Black, So Saffron & More Mustard, White Gel Pen, Old Olive Striped Grosgrain Ribbon, Basic Black Brads, Bird Punch
Techniques: Direct to Paper

  My Stampin’ Up customers that order $50 in Stampin’ Up merchandise will receive this handmade card though March 31, 2011.

Don’t forget it is Sale-a-bration time at Stampin’ Up.  Receive a free Sale-a-bration set for each $50 in merchandise purchased.   Click HERE to place an order.   Your order will be shipped directly to your door step from Stampin’ Up!

The Stampin’ Up USA Idea book and Catalog is here.   For your copy, please send a check for $9.95 to Michelle Zindorf, P.O. Box 116, West Alexandria, OH 45381 or send it via paypal to mzindorf@aim.com USA only.     My current customers will receive a new Occasions Mini Catalog automatically from me.   Not a current customer and want a free copy of the new Occasions Mini Catalog ?  E-mail your mailing address to mzindorf@aim.com and I will get one in the mail to you.  )  Are you getting inspiration from this blog?   One way you can help support it is to order your Stampin’ Up products through me.   Click HERE to place an order.    Want to become a Stampin’ Up Demonstrator , receive a 20% discount on product and earn instant income on orders?  Consider being part of my Stampin’ Up Team and start your own business or become a Hobby Demo just for the discount.  Click HERE for more information.

I love creating direct to paper projects using the Stampin’ Spots Ink pads.  They are so very easy to control for this type of work.

On a 4 3/8″ Square piece of Whisper White card stock, smeared the edge of the Bashful Blue ink spot across the card stock.

Smeared Certainly Celery ink across the card stock.

Smeared Old Olive ink across the card stock.

Smeared Baja Breeze ink across the card stock.

Smeared Marina Mist ink across the card stock from the right side only.

Smeared So Saffron ink across the card stock from the left side only.

Smeared More Mustard ink across the top of the card stock from the left side only.

Smeared Crumb Cake ink across the card stock at the bottom of the green area.

Stamped the branch twice using Early Espresso ink.

Stamped the leaves using Always Artichoke ink.

Stamped the bird using Basic Black ink on a separate piece of Whisper White card stock and then punched it out using the bird punch.

Adhered the bird to the card stock and added White Gel Pen highlights to the leaves and branches.

Added Basic Black marker shadows under the leaves and branches.

Added an Old Olive panel, Basic Black panel and a More Mustard panel.  Added Old Olive Striped Grosgrain ribbon and Basic Black brads.

I felt the card was a little out of balance so I added a strip of More Mustard and Marina Mist card stock under the ribbon.  Also added two leave punches from Old Olive card stock.

Added Basic Black and More Mustard marker to the punched leaves.

Added More Mustard marker to some of the leaves and to the bottom of the bird’s belly.  Also added So Saffron Marker to the bird’s belly.

Here is the completed card measuring 5″ x 6.5″.

May your day be filled with all of the people and things that you love.

Until my next post. . . .  . . . .

Hugs,

Michelle

   Get ready for Brayer Workshops!  I am coming to the following locations, click the location name for more information.  

Houston, Texas  

Wichita, Kansas  

Syracuse (Bridgeport), New York  

St. Peters, Missouri  

La Porte, Indiana  

Orlando (Davenport), Florida  

St. Cloud, Minnesota  

Colorado Springs, Colorado  

Ottumwa, Iowa  

Owings Mills, Maryland (Baltimore Area) 

Cleveland (Euclid), Ohio  

Staley , North Carolina (South of Greensboro)  

Monroe, Connecticut  

Sturgis, South Dakota  

Leesburg, Florida  

Montreal, Wisconsin  

Savannah, Georgia  

Lincoln, Illinois  

Jefferson, Louisiana (New Orleans Area)  

Here is a link to my workshop calendar where you can see all of my travel schedule and to get info on beginner and advanced Brayer workshops:   http://zindorf.blogs.splitcoaststampers.com/workshop-calendar   

Don’t see a workshop in your State?  Interested in hosting the workshops in your area in 2012?   Click HERE to get hostess information.  

Link to my Stampin’ Up website where you can order all of your must have Stampin’ Up products from me 24-7:  http://michellezindorf.stampinup.net


Going Vintage – Tutorial #396


Supplies:

Stamps: Stampin’ Up Lovely as a Tree, Medallion
Paper: Stampin’ Up Whisper White, Baja Breeze & Early Espresso
Ink: Stampin’ Up Early Espresso, So Saffron, Old Olive & Baja Breeze
Accessories: Stampin’ Up Sponges, Brayer, Vintage Brads, Baja Breeze Seam Binding, Old Olive & Basic Black markers, Post it Note, 3″ Circle Die Cut, Big Shot Marchine


Cut a 3″ circle die cut circle out of Whisper White Card stock using my Big Shot Machine.

Brayered So Saffron over 1/2 of the card stock.

Brayered Baja Breeze ink over the top of the card stock.

Colored the middle tree top only on the Lovely as a Tree stamp using an Old Olive Marker and then huffed on the stamp and stamped it on the card stock.

Sponged Old Olive ink at the bottom of the card stock.

Masked the bottom of the card stock using a post it note and stamped the top of the tree on the right side of the stamp using Baja Breeze ink to create some bushes in the back ground.

Sponged a bit of Baja Breeze in the bushes.

Extended the tree trunk down to the ground using a Basic Black marker.

Sponged Early Espresso ink at the very bottom of the card stock.

Sponged just a bit of Old Olive ink in the center of the tree.

Cut a 4.75″ x 6.25″ panel of Baja Breeze card stock and stamped the Medallion stamp 3 times on the card stocking using Early Expresso ink.

Sponged Early Espresso ink on the edge of the panel and the main image panel.

Added a 5″ x 6.5″ panel of Early Espresso card stock, Baja Breeze seam binding and 2 vintage brads.

Here is the finished card measuring 5″ x 6.5″.

Have a Fantastic Thursday!

Until my next post. .  . . .

Hugs,

Michelle


Tool Time – Stamp-a-ma-jig

dsc01815.JPG

In this little tool time post, I am going to demonstrate how to use a Stamp-a-ma-jig, Stampin’ Up! item number 101049, $11.95.  This little tool has saved me from trashing many a project.  🙂  I do not stamp a sentiment any more without using this tool.  The Stamp-a-ma-jig helps you to stamp right where you want to on your project.   There is nothing worse than putting together a great scene and then go an stamp a crooked sentiment on it.    This tool will keep you from doing that.  Gotta love it.   The Stamp-a-ma-jig comes with the plastic sheet and the handle.

As you see above in the picture, my Stamp-a-ma-jig has seen lots and lots of use and the clear plastic sheet does get stained over time.  This is one of the tools I keep within reaching distance on my desk.  So I feel it is a tool worthy of a tool time post.

What I am stamping is for demonstration purposes only.  I picked a piece of colored card stock and drew a straight line across just so you could see it well in the demonstration.  You do not need to draw a line on your projects.

Let’s get started. . . . . . . .

dsc01816.JPG

You take the plastic sheet that comes with the Stamp-a-ma-jig handle and put it against the handle as shown below.  Make sure it is against the handle on the left side and the bottom.

dsc01817.JPG

Take your stamp and load it with ink and then place it against the handle on the left and bottom and then lower it down to the plastic.

dsc01818.JPG

Lift the stamp up and you will see you have the image now stamped the the clear plastic.

dsc01819.JPG

Take the clear plastic and put it on your project so the image is where you want it to be.

dsc01820.JPG

Hold the plastic in that position with one hand the put the handle against the plastic with the other hand.  Make sure the plastic is against the handle at the left and bottom.  Do this by moving the handle, not the plastic.

dsc01821.JPG

Hold the handle in place and remove the plastic.   Put the stamp against the handle so it is against the left and bottom then lower down to the card stock and stamp your image.

dsc01822.JPG

You can get really precise with stamping your images with this tool.  See I stamped the tree right on the line I had drawn.  See it’s a miracle!  My tree isn’t leaning to one side or anything, lol.

dsc01823.JPG

Now to stamp a sentiment over the tree. 

Wipe the tree image off of the plastic sheet.

dsc01824.JPG

Line the plastic sheet up against the left and bottom of the handle.  Ink your stamp and lower your stamp down to the plastic sheet while your stamp is against the left and bottom of the handle.

dsc01825.JPG

Now you have your image on the plastic sheet.

dsc01826.JPG

Take the plastic sheet and and put it over you project.  Move it around until you find just where you want your image to be.

dsc01827.JPG

Hold the plastic piece in place and line the handle up against the bottom and left side of the plastic.

dsc01828.JPG

Remove the plastic without moving the handle.   Lower your stamp down on the handle so it is against the left and bottom of the handle, then lower it onto the card stock and make your impression.

dsc01829.JPG

There is my sentiment, right where I wanted it.

dsc01830.JPG

The Stamp-a-ma-jig, just like my hero, Martha would say “It’s a good thing”.

dsc01815.JPG

The sun is shining and it is going to reach 50 degrees here in Ohio today.  With all the traveling I have been doing I have yet to do my Autumn clean up in my gardens, so off I go to work outside.

May you also feel the warmth of the sun on your face today.

Huge Hugs,

Michelle

dsc00599.jpg  Get ready for Brayer Workshops!  I am coming to:

2010

Dayton, Ohio at Marco Paper

Phoenix, Arizona

Monroe, Louisiana

Jacksonville, Florida

 St. Louis, Missouri

Mechanicsville, Virginia

Raleigh, North Carolina 

Colleyville, Texas

Colorado Springs, Colorado

 Boise area of Meridian, Idaho

Riverside, California (Southern California)

Salem, Oregon

Wheaton, Illinois

St. Cloud, Minnesota

Rockville, Maryland

North Chili, New York (near Rochester)

New Johnsonville, Tennessee

Kenova (Huntington), West Virginia

Helena, Montana

Middleburg Heights, Ohio

Venice, Florida

Grinnell, Iowa

Piedmont, Alabama (Near GA border close to Cedartown)

Auburn, Washington (near Seattle)

Elk Grove Village, Illinois

Savannah, Georgia

Atlanta, Georgia

Saledad, California

Here is a link to my workshop calendar where you can see all of my travel schedule and to get info on beginner and advanced Brayer workshops:   http://zindorf.blogs.splitcoaststampers.com/workshop-calendar 

Link to my Stampin’ Up website where you can order all of your must have Stampin’ Up products from me 24-7:  http://michellezindorf.stampinup.net

Frequently asked questions answers:  http://zindorf.blogs.splitcoaststampers.com/frequently-asked-questions/ 


Fall Lake – Tutorial #279

dsc01490.JPG

I noticed last Monday when I was driving to Ohio from Oklahoma that most of the leaves were off of the trees but the grass was still green in a lot of areas.   This tutorial is my interpretation of what I saw. 

Tomorrow morning I will be traveling to Nashville, Indiana to teach my brayer technique there.  Driving from location to location is so very inspiring.  I cannot wait to hit the road once again!

The Stampin’ Up Set, Branch Out is on the dormant list with Stampin’ Up! so it can still be ordered although it is not in the current catalog, item #113200. 

This is one of my longer tutorials so grab a cup of your favorite warm drink and hang out a while.

Supplies:

Stamps: Stampin’ Up Branch Out, En Francais, Falling Leaves Sentiment
Paper: Stampin’ Up! Whisper White & Basic Black
Ink: Stampin’ Up! Basic Black, Old Olive, Apricot Appeal, Bashful Blue, Creamy Caramel, Going Gray & Chocolate Chip
Accessories: Stampin’ Up! Chocolate Chip Ribbon, Bashful Blue Brads, White Gel Pen, Stamp-a-ma-jig, piercing tool & Sponges

Want a free 39 page, Stampin’ Up Mini catalog?  If you are a resident of the United States,  just e-mail your mailing address to me and I will get one in the mail to you.  Are you inspired by this Blog?  One way you can help support this blog is by ordering your Stampin’ Up products through me.   You can order from me 24-7 from this link:  http://michellezindorf.stampinup.net or e-mail me at mzindorf@aim.com.  If you are within the United States.  Want a copy of the brand new 2009-2010 Stampin’ Up Catalog for $9.95 with free shipping, just e-mail me at mzindorf@aim.com and I will get one in the mail to you.  Want to become a Stampin’ Up Demonstrator and earn instant income?  Consider being part of my Stampin’ Up Team.  Also check out the Stampin’ Up specials, click this link to check it out:  http://www.stampinup.net/esuite/home/michellezindorf/promotions

dsc01493.JPG

I wanted to do a large main image panel for this card.  Started out with a 4.75″ x 6.26″ piece of Whisper White card stock.  Masked over 1/2 of the card stock at the bottom with two large post it notes.

dsc01461.JPG

Brayered Apricot Appeal ink at the bottom of the unmasked area.

dsc01462.JPG

Brayered Bashful Blue at the top of the card stock.

dsc01463.JPG

Brayered Going Gray ink at the top of the card stock, not covering the Bashful Blue ink entirely.    I think I have found another great winter sky color combo.  🙂

dsc01464.JPG

Using the edge of the Old Olive ink pad, streaked in some color at the bottom of the unmasked area.

dsc01465.JPG

Sponged some Chocolate Chip ink over the Old Olive, not covering it entirely.

dsc01466.JPG

Moved the post it note mask down 1/2 inch.

dsc01467.JPG

Streaked in some Old Olive ink in the white unmasked area with the edge of the Old Olive ink pad.

dsc01468.JPG

Sponged some Chocolate Chip ink at the bottom of the unmasked area.

dsc01469.JPG

Sponged some Basic Black ink right at the post it note edge.

dsc01470.JPG

Stamped the tree from the Stampin’ Up Branch Out set across the card stock using Basic Black ink.

dsc01472.JPG

Took the inky post it notes off of the card stock.  Turned the card stock upside down and masked the sky area of the card stock with two clean post it notes.

dsc01473.JPG

Brayered Apricot Appeal ink on the card stock.

dsc01474.JPG

Brayered Bashful Blue ink on the card stock.

dsc01475.JPG

Brayered Going Gray ink over the Bashful Blue ink, not covering it entirely.

dsc01476.JPG

Lightly sponged a bit of Old Olive ink over the Apricot Appeal ink.

dsc01477.JPG

Sponged on a little Chocolate Chip ink at the post it note edge.

dsc01478.JPG

Marked on the side of my wood block with a marker to indicate where the trunk of the tree is so when I stamp it I can line up the reflection tree trunk with the Original stamped images trunk.

dsc01479.JPG

Used the clear plastic sheet that came with my Stamp-a-ma-jig to mask the top of the card stock so I can still see the original stamped trees.

dsc01480.JPG

Stamped the reflection trees using Going Gray ink and lining the tree trunks up with the original trees that are stamped with Basic Black.

dsc01481.JPG

Added White Gel pen streaks in the water area.

dsc01482.JPG

Sponged Basic Black ink around the edge of the card stock.

dsc01483.JPG

Stamped the Stampin’ Up Background stamp, En Francais using Creamy Caramel ink on the left third of the card stock.

dsc01484.JPG

Stamped the “Grateful” sentiment from the Stampin’ Up set Falling Leaves using Chocolate Chip ink.

dsc01485.JPG

Added Chocolate Chip Ribbon and Bashful Blue brads.

dsc01486.JPG

Finished assembling card.  Here it is finished measuring 5″ x 6.5″.

dsc01490.JPG

I hope this tutorial has inspired you to look at what surrounds you so you can put it on paper.  🙂

Until my next post. . . . . . . . .

Huge Hugs,

Michelle

dsc01434.jpg  Get ready for Brayer Workshops!  I am coming to:

Nashville, Indiana

Portland, Michigan

2010

Dayton, Ohio at Marco Paper

Phoenix, Arizona

Monroe, Louisiana

Jacksonville, Florida

 St. Louis, Missouri

Mechanicsville, Virginia

Raleigh, North Carolina 

Colleyville, Texas

Colorado Springs, Colorado

 Boise area of Meridian, Idaho

Riverside, California (Southern California)

Salem, Oregon

Wheaton, Illinois

St. Cloud, Minnesota

Rockville, Maryland

North Chili, New York (near Rochester)

New Johnsonville, Tennessee

Kenova, West Virginia

Helena, Montana

Middleburg Heights, Ohio

Venice, Florida

Grinnell, Iowa

Piedmont, Alabama

Auburn, Washington (near Seattle)

Elk Grove Village, Illinois

Atlanta, Georgia

Soledad, California

Here is a link to my workshop calendar where you can see all of my travel schedule and to get info on beginner and advanced Brayer workshops:   http://zindorf.blogs.splitcoaststampers.com/workshop-calendar 

Link to my Stampin’ Up website where you can order all of your must have Stampin’ Up products from me 24-7:  http://michellezindorf.stampinup.net

Frequently asked questions answers:  http://zindorf.blogs.splitcoaststampers.com/frequently-asked-questions/ 


Christmas Card Time – Tutorial #275

dsc01277.jpg

It’s that time of year when my friend Claire shows up wanting to make Christmas cards.  Claire is my Dear, Evil, Friend that got me into stamping, but does not stamp, lol.  But that is a whole different story.  

A couple of weekends ago we got together and mass produced 40 of these cards in a day, less the time it took us to go out to lunch, gab, harass each other, tease my husband etc, etc.  🙂  I always tailor the card we make each year to what Claire likes and so it varies a bit from my usual style.  Claire likes layers and do-dads.  Things she can feel on a card.  Me, I tend to not care about the do-dads, lol. 

Anyway, here is a tutorial on this years card.  The tutorial may be missing a couple of pictures.  Hard to remember to pick up the camera when you are having a tremendous amount of fun with a friend.

dsc01380.jpg

Supplies:

Stamps: Stampin’ Up Patterned Pines, Snow Swirled & Serene Snowflakes
Paper: Stampin’ Up Whisper White, Bashful Blue, Not Quite Navy and Old Olive
Ink: Stampin’ Up Old Olive, Whisper White and Not Quite Navy
Accessories: Stampin’ Up Real Red Gingham Ribbon, Real Red & Gold Brads, Dazzling Diamonds Glitter, Brayer, Big Shot Die Cut Machine, Top Note Die, Flourish Texture Plate and the Photo Corner Punch

Want a free 39 page, Stampin’ Up Mini catalog?  If you are a resident of the United States,  just e-mail your mailing address to me and I will get one in the mail to you.  Are you inspired by this Blog?  One way you can help support this blog is by ordering your Stampin’ Up products through me.   You can order from me 24-7 from this link:  http://michellezindorf.stampinup.net or e-mail me at mzindorf@aim.com  If you are within the United States.  Want a copy of the brand new 2009-2010 Stampin’ Up Catalog for $9.95 with free shipping, just e-mail me at mzindorf@aim.com and I will get one in the mail to you.  Want to become a Stampin’ Up Demonstrator and earn instant income?  Consider being part of my Stampin’ Up Team.  Also check out the Stampin’ Up specials, click this link to check it out:  http://www.stampinup.net/esuite/home/michellezindorf/promotions

Started out using my Big Shot Die Cut Machine and Top Note Die.  Cut one Whisper White Top Note and one Bashful Blue Top Note.

dsc01281.JPG

Stamped the Greeting from the Stampin’ Up Set Snow Swirled with Real Red ink on the White Top Note.

dsc01282.JPG

Brayered Not Quite Navy ink at the top of the Bashful Blue Top Note.

dsc01283.JPG

Ran the Bashful Blue Top Note through the Big Shot Machine using the Flourish Texture Plate.

dsc01284.JPG

Tore the top and the bottom off of the Whisper White Top Note, discarding the middle portion.  Stacked the two tore pieces at the bottom of the Bashful Blue Top Note to create the snow.

dsc01285.JPG

Used a Heat Gun to dry the brayered on ink and stamped the snowflake stamp from the Stampin’ Up set Serene Snowflakes in the sky area of the Bashful Blue Top Note.

Note:  If you stamp the snowflakes before the Brayered on ink is dry your snowflakes will disappear.  Learned this the hard way, lol.

dsc01286.JPG

Stamped the Tree stamp from the Stampin’ Up set Patterned Pines with Old Olive ink on Whisper White Card stock.

dsc01287.JPG

Cut two of the trees out and adhered them to the front of the card.

dsc01288.JPG

dsc01289.JPG

Assembled Bashful Blue, Old Olive and Not Quite Navy layers, added Real Red Gingham ribbon, Not Quite Navy Photo Corner Punches and Gold Brads.  Also added three Real Red brads to each tree.   It is hard to see, but there is Dazzling Diamonds Glitter on the top of each layer of the snow.

Here is the finished card measuring 5″ x 6.5″.

dsc01380.jpg

Now for a giggle, I was going through a card stash I have.  You know the card stash, we all have one.  Don’t deny it, lol.

Anyhow, found this old card I created back in 2006.  I had to look way back in my Split Coast Stampers gallery to see when it was created.  Poor Santa!  The Stampin’ Up stamp set used for this is a retired set, Star Santa.  Don’t you just love looking at your old stuff.  It always makes me laugh.

dsc01378.jpg

May your day be filled with fond memories.

Huge Hugs,

Michelle

tiny-bird.jpg  Get ready for Brayer Workshops!  I am coming to:

Moore, Oklahoma

Nashville, Indiana

Portland, Michigan

2010

Dayton, Ohio at Marco Paper

Phoenix, Arizona

Monroe, Louisiana

Jacksonville, Florida

 St. Louis, Missouri

Mechanicsville, Virginia

Raleigh, North Carolina 

Colleyville, Texas

Colorado Springs, Colorado

 Boise area of Meridian, Idaho

Riverside, California (Southern California)

Salem, Oregon

Wheaton, Illinois

St. Cloud, Minnesota

Rockville, Maryland

North Chili, New York (near Rochester)

New Johnsonville, Tennessee

Kenova, West Virginia

Helena, Montana

Middleburg Heights, Ohio

Venice, Florida

Grinnell, Iowa

Piedmont, Alabama

Auburn, Washington (near Seattle)

Elk Grove Village, IllinoisHere is a link to my workshop calendar where you can see all of my travel schedule and to get info on beginner and advanced Brayer workshops:   http://zindorf.blogs.splitcoaststampers.com/workshop-calendar 

Link to my Stampin’ Up website where you can order all of your must have Stampin’ Up products from me 24-7:  http://michellezindorf.stampinup.net

Frequently asked questions answers:  http://zindorf.blogs.splitcoaststampers.com/frequently-asked-questions/